Salt Printing tutorial part III
Salt Printing tutorial part III
Ok the day has come… You have your salted paper on hand, the silver nitrate is waiting and… it’s a sunny day 😊 Well, let’s go then…
Making the paper light sensitive
To make the paper light sensitive we will have to coat it with the silver-nitrate solution we prepared before. We will use the same technique as when salting the paper : brushing across the sheet, first horizontally and then vertically.
But, there are a couple of important things to keep in mind :
- Your paper must be completely dry. If you salted it the same day I would wait until the next day!
- The sensitizing must be done in safelight-conditions. This means : No UV at all… Personally I do this in my garage where there are no windows at all. A classic lightbulb at a distance of at least 3 meter is allowed. You don’t need a complete dark room…but the lesser light, the best…
- Considering the price of your silver-nitrate solution you don’t want to spoil any. I work with a drop pipette and when starting to brush, I first apply some drops on the paper from top to bottom and start to brush from left to right. I do repeat this operation a couple of times over the complete width of the sheet.
When finished, I turn the whole sheet 90° (from landscape to portrait 😉) and start the above procedure again. And again I turn the sheet 90° and continue to do this until I end up in the start position… That way I’m sure I didn’t forgot to brush even the most tiny spot on the sheet!
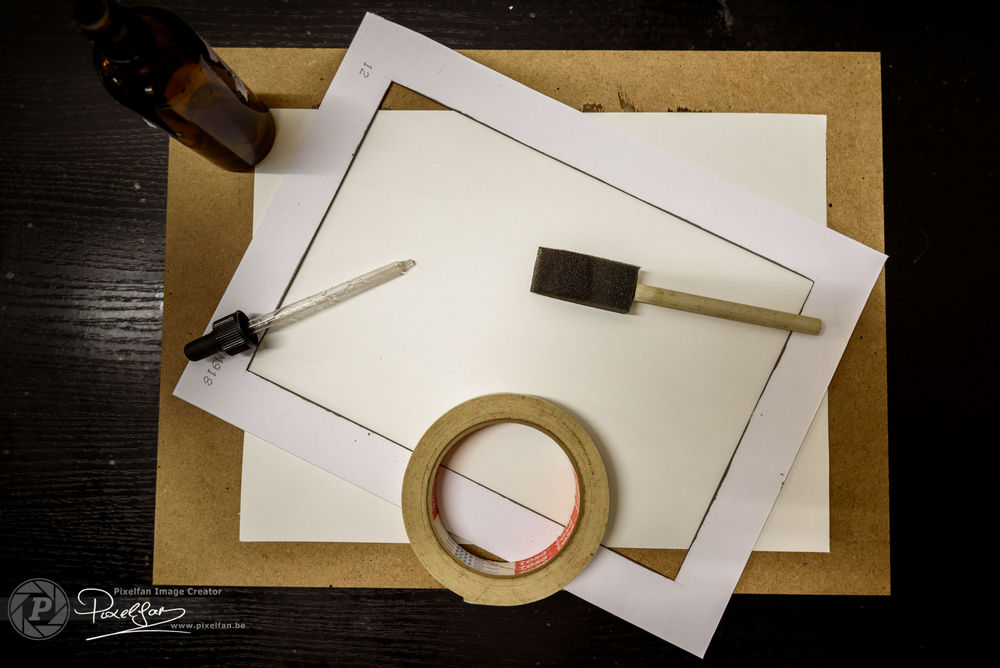
On the picture above you see how I proceed to apply the silver nitrate solution. I first put the sheet on a wooden (or MDF) plate. On top of the sheet I use a sort of cardboard template… the hole in the template has the same dimensions as the final picture + the border you want. This helps me to brush only on the needed space…
After taping sheet and template on the wood it’s easy to brush and turn the whole thing in all directions you need while keeping the sheet flat and not spoiling the solution…
I came up with the idea of the template after some experiments where I didn’t brush the whole needed surface of the paper. You can then end up with something like this :Although it has a particular charm… it’s not really what you want 😊 Since I use a cardboard template, I don’t have that problem anymore…
After finishing the brushing you are almost ready to mount your paper and film in the contact frame. But first your paper has to dry and… here comes maybe the most important thing in the whole process : YOUR PAPER HAS TO BE COMPLETELY DRY!!!!! (I think that’s clear, isn’t it? 😉)
I know that after all the preparations you had to make, you’re now in a hurry to finally expose your picture to the sun… But this last step is really crucial. Most of my failures were due to a sensitized paper that was not completely dry…
As a rule, and when you check the literature, you have a maximum of 2 hours of drying after coating your paper with the silver nitrate solution. After that, your paper start to turn yellow… even if it’s kept in a dark place. If you then expose to the sun you will never be able to obtain a nice Black&White but will end with a yellow/black picture…
The problem is… I discovered that with my way of brushing/coating, I’m never sure the paper is completely dry after 2 hours…
So, to make sure it is… right after coating I use a hairdryer and dry the sheet for approximatively 5 to 10minutes. I then leave the sheet in a dark place for max 30minutes and tadaaaa… your paper will be dry enough to start the next step!Exposing to the sun
Finally… the step where the magic happens… As you can see on the picture all you have to do now is mount your paper in the contact frame… and don’t forget the negative on top of it 😊
Take the whole thing outside and put it somewhere where it’s exposed to the sun… and wait…
How long? Well… I don’t know 😊 The time is depending on a lot of factors… the coatings, the paper, the exposition place… but of course most of all…the amount of UV. I think it’s easy to understand that you will need a lot more time when you are in Belgium (like me) at 18h00 in the winter, or when you are in the Caribbean at 14h00 in the summer… 😊 I had prints where I had to wait up to 10 minutes (I exposed the print inside behind a window) and some that were ready after 1 minute (outside on a very sunny day) It really is a matter of experimentation and try-outs… But as the process of contact-printing is completely visible (you can see your paper darken in the sun), it’s up to you to stop the exposing when the dark areas have a nice dark brown colour… just take into account that the picture will slightly lighten in the different baths after the exposing.Post processing
Once you stop the exposition the first thing you have to do is to stop the chemical reaction by washing your print in clear water. Put your print, face down, in a tray with water and you will see the excess silver chloride sinking/floating in the water by forming some white “clouds”. Refresh the water after 2 to 3 minutes and repeat this until you don’t get those white “clouds” anymore…
After the washing of the print it is time to “fix” it in the fixing-solution of Sodium thiosulfate we prepared before. Again, put your print face-down in a tray filled with the fixing solution and start to gently rock the tray… do this for about 2 to 3 minutes and then turn the print face-up. Don’t panic if the image seems to be too “pale”, it will darken again after the fixing and the last washing round…
Important here is to keep the tray in movement so that the fixing solution is evenly spread over the print. After again 2 minutes turn your picture back face-down for 1 minute… use this time to refill your washing tray with clear water…After the fixing we will wash our print again… purpose here is to get rid of all remaining chemicals in the paper so, it’s a very important step and you better wash your print too much than too less. I personally do wash my prints for +/- 1.5 hours and change the water 5 to 6 times during the whole process. Time enough to prepare your next negative on the computer 😊
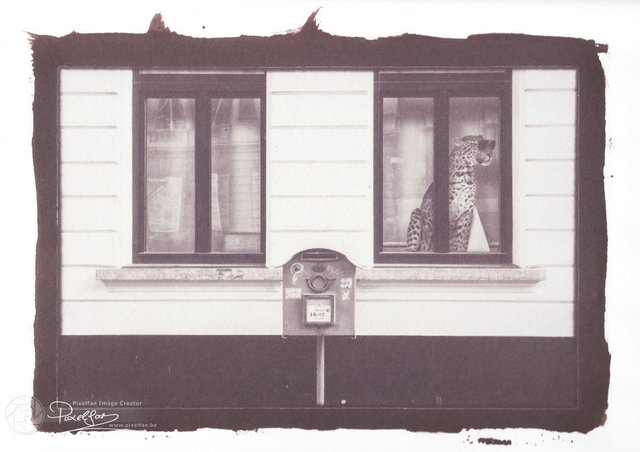
If everything went well, you will end up with this result :Remember him? 😉
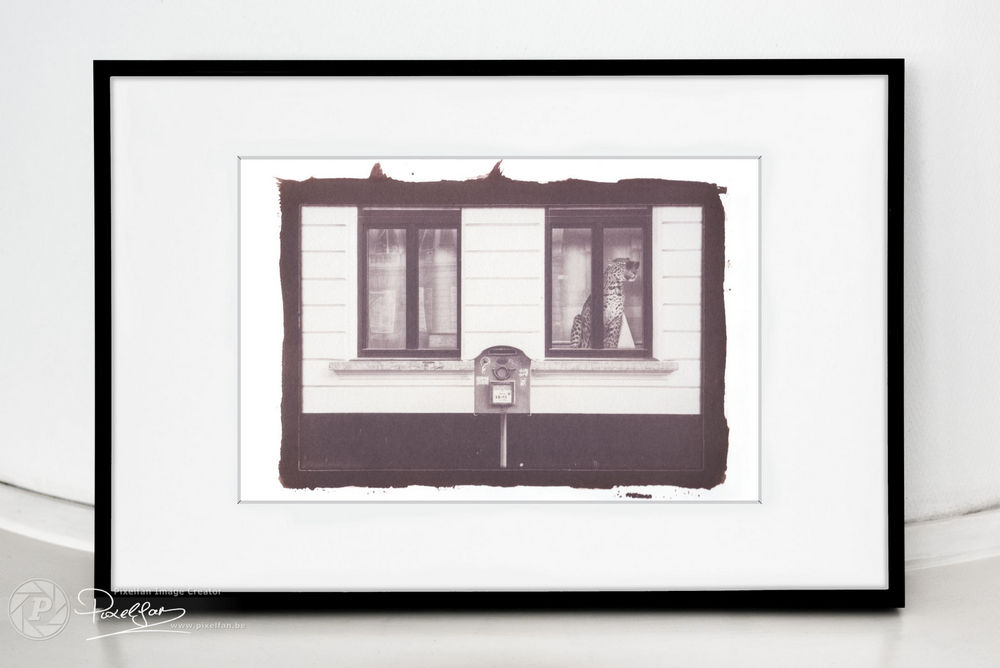
The very last step is to hang your print to dry… Or no, the very last step is to frame your print after a night of drying and start congratulate yourself with the fantastic art-piece you just made 😊So, this is the end of this salt printing tutorial. I really hope you enjoyed it and I’m looking forward to see your own salt-prints appearing here on steemit! Really, just try it. It’s fun and the results are always unique, you can’t make 2 identical salt prints…
Have fun!Feel free to ask if you have any questions… I’ll answer them as far as my knowledge permits 😉
If you missed the first parts of this tutorial, just click on the following thumbnails…Curious to see my other work?
Happy to hear that 😉
The best thing you can do is checking out my profile here on steemit ( @pixelfan ) and follow me. I’m always happy to connect with other photographers! (And of course I’m always very happy with a little upvote… although a large one is allowed too 😊)
But of course you can find me on other social media too... just check out:- 500px - pixelfanfoto
- ello - bisje
- facebook - pixelfanfoto
- google+ - Eric Verbiest
- instagram - pixelfanfoto


Great delivery!
This is truly remarkable.
I'm blown away.