Tips for Improving your Long Exposure Photography
Long exposure photography is a fun and creative way to take a shot. It can dramatically change a scene and opens up new possibilities for what you can do with an image. It is however very easy to screw up a long exposure, and I have screwed up plenty in the past so I will share with you my tips for improving your long exposures so you can skip the screw ups I made!
Essential Equipment
There is certain equipment for this that is essential. If you don’t have this in your kit bag the I wouldn’t recommend a long exposure attempt:
Tripod
You need to keep your camera as still as possible and a sturdy tripod will do that best. If you have a more lightweight tripod try and weigh it down, especially when it gets windy. Many tripods have hook on the underside that you can hang things on. Both my tripods have this and when it gets windy I will hang my camera bag from it to add a couple kilos to the tripod.Camera with ‘bulb’ mode
You will need to set the camera to bulb mode in order to control the exposure time from a shutter remote. It also sets your camera to full manual so you need to dial in all your other settings manually. This is best as it affords you the most control over your shot.Shutter Remote
Even pressing the shuttler on your camera can cause it to shake and will blur your image. The shutter remote avoids this. However, if you don’t have a shutter remote you can always set your camera to the 2 or 10 second timer thats built into most cameras. This delay helps avoid the shake of pressing the shutter as it gives the camera time to stop shaking before it takes the shot.Something to cover the viewfinder (electrical tape works well)
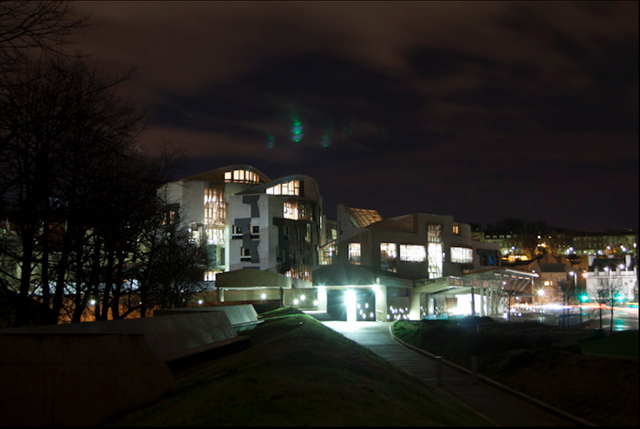
This is something that took me a while to figure out and is critical if you are doing long exposures at night in an urban area. Light from behind you will leak into the exposure from your viewfinder (say a passing car’s headlights or a street light).
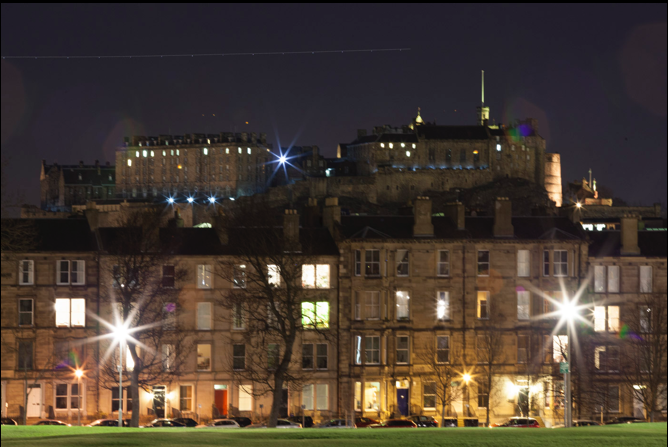
This is one of my first long exposures, and there is a lot wrong with it, but you can see the most glaringly obvious problem, those phantom lights above the building. They came from a light source behind me that leaked into the viewfinder:

Nice-to-have Equipment
Some equipment is just nice to have as it extends the range of your capabilities:
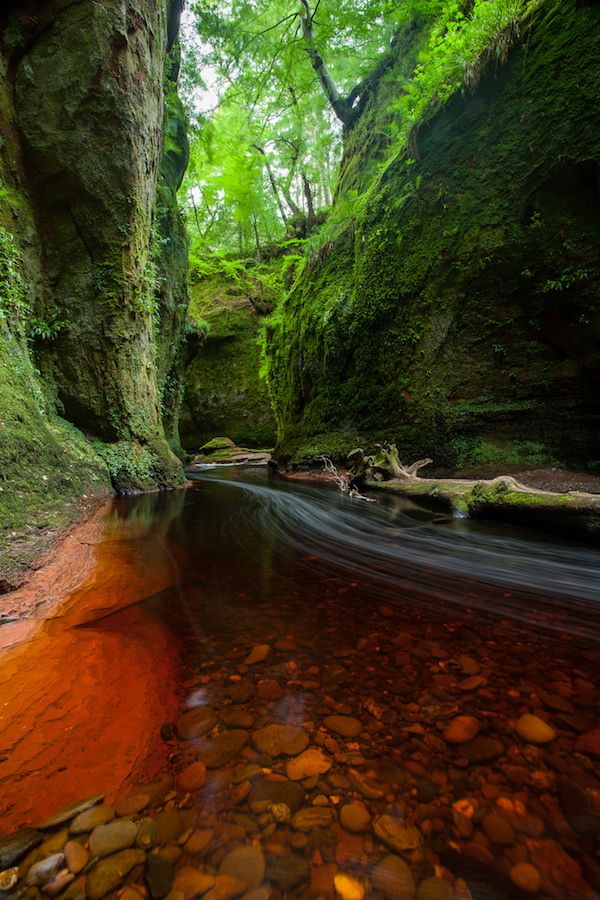
- ND filter - 10 Stop
This is a great piece of kit for doing day time long exposures. It’s excellent for those times you have water in a shot you want to smooth out or you want to create a sense of motion in a day time image. It doesn’t need to be a 10 stop filter, it can be anywhere from 2 to 10 depending on how long an exposure you want to make or what effect you are going for. Here are some examples:
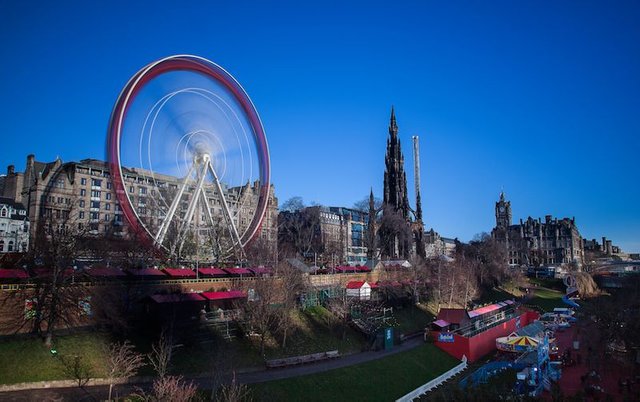


Lens Hood
Lens flares are not just a daytime problem when shooting at certain angles from the sun. When the sun is down its replaced with street lights and lights from buildings. These can create horrible lens flares that can really screw up your shot. A lens hood can go a long way to alleviating this issue. If you are still getting lens flares then you need to re-think your composition and place your camera at a different angle from the light sources near you.
look at how badly i screwed this one up:
and this one
Forget the fact that its out of focus for the moment. We’ll cover that later.Extra Batteries
Long exposures take a toll on your battery life so if you are doing quite a few in one evening it is worth taking a second battery along so your session isn’t cut short.

Your camera settings
ISO - keep you iso as low as possible to avoid noise. Noise is much more obvious in long exposure night shots than any other. I tend to keep mine around 100.
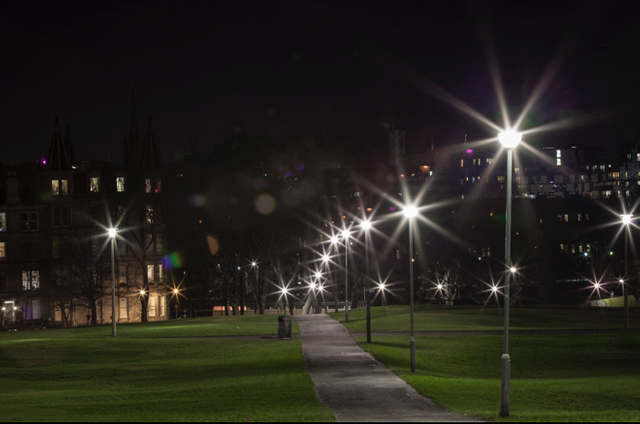
Aperture - I keep this as low as possible too, but it depends on what your want to achieve. If you want a low depth of field that keeps everything in the image in focus then f/18 - f/22 or more is good. It also creates that starburst effect on lights you often see. A higher/wider aperture i.e. f/2.0 - f/8 will give you a stronger depth of field and between f/2.0 - f/4 you run a good chance of getting some nice bokeh effects.
Shutter Speed - this one will entirely depend on the conditions at your location and you will need to wing it. I often start with a 30 sec exposure time and then adjust after I have reviewed the image.
Bring it into Focus
Focus is important, it can make or break you image. Nothing looks quite as shit as a long exposure thats not quite in focus. I may be exaggerating but it looks pretty bad, but there’s a simple technique to avoid this. Set your camera to Manual Focus!
Once in manual, use the live view mode on your camera. once in live view mode you can zoom into the area of the shot on your screen that you want to have as the sharpest. Then, while zoomed in you can manually adjust the focus of your lens until its as sharp as you can make it. Then you can zoom out and since you are in manual focus mode, you don’t have to worry about the camera trying to refocus when you hit the shutter.
Mind your highlights and your shadows
The histogram is your friend.. learn to read it. One of the main things people often get wrong in their long exposures is to either to blow out the highlights and overexpose, or to underexpose and loose the shadows to total black. Sometimes you will do this for intentional effect, but generally you want to avoid it. Remember the shot above with the light leaking from the viewfinder? The windows in that shot have no detail because I overexposed and blew out the highlights!
If you have live view on your camera you can usually also super impose the histogram over the live view and you can see what your settings will produce. you can use this as a guide for your camera settings. Here is a nifty cheat sheet I made:

Color Temp/White Balance
Its often over looked but pay attention to your color temperature/white balance. You want this to be on the colder side 4500 - 5000k if you are in an urban area as many street lights give that horrible orange glow. This is also something you can adjust later in lightroom or your prefered photo editor (provided you are shooting RAW which you should always be doing!).
Here’s a rather extreme example:


See the difference between the two?
Post Processing
Post Processing is a rather personal process that greatly relies on the individuals tastes and vision for their image, but there are some general tips I would give that I start with in all my long exposures:
Adjust the white balance/color temp to a more realistic setting - especially if your image is mostly orange from the street lights
Tune the highlights up or down to bring back detail
Tune the shadows to bring back detail
Adjust the blacks if adjusting the shadows has taken away from of the contrast in the image.
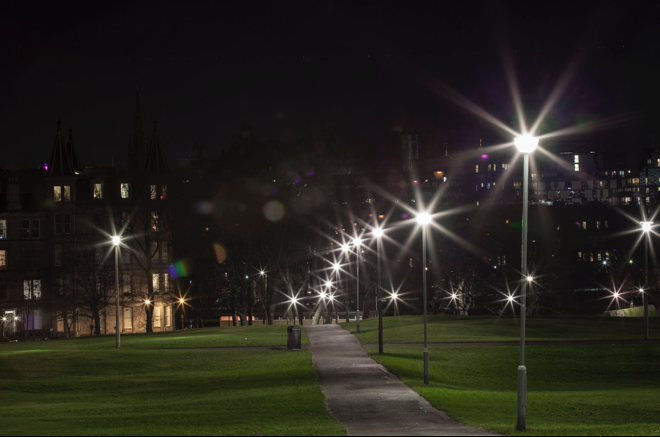
That’s it, beyond that is your own preference I feel. These are the key aspects that I work on and have helped me produce shots like these:


Thanks for Looking.
Follow me and read more of my posts here: @fiftysixnorth
Don't forget to Upvote and Resteem

Excellent post!!!
The weekend is almost here, have a great weekend!
Steem on,
Mike
You got a 73.90% upvote from @emperorofnaps courtesy of @etcmike!
Want to promote your posts too? Send 0.05+ SBD or STEEM to @emperorofnaps to receive a share of a full upvote every 2.4 hours...Then go relax and take a nap!
Thank you so much for using our service! You were protected from massive loss up to 20%
You just received 33.33% upvote from @onlyprofitbot courtesy of @etcmike!
More portion of profit will be given to delegators, as the SP pool grows!
Comment below or any post with "@opb !delegate [DelegationAmount]" to find out about current APR, estimated daily earnings in SBD/STEEM
You can now also make bids by commenting "@opb !vote post [BidAmount] [SBD|STEEM]" on any post without the hassle of pasting url to memo!
* Please note you do not have to key in [] for the command to work, APR can be affected by STEEM pricesThis post was nominated by a @curie curator to be featured in an upcoming Author Showcase that will be posted in about 12 hours on the @curie blog.
NOTE: If you would like us to NOT feature your post in the Author Showcase please reply, or DM me on Discord as soon as possible. Any photos or quoted text from your post that we feature will be properly attributed to you as the author.
You can check out a previous Author Showcase I wrote to get an idea of what we are doing with these posts.
Thanks for your time and for creating great content.
Zoe (@curie curator)
Thanks @pixresteemer :)
Lots of great tips for many photographers out there!
Just had some tips about the use of filters posted not so long ago. The articles would combine nice together I think :)
Thanks! That's a brilliant write up of filters! I wish I had seen it before it paid out! I think you are correct, they'd definitely combine nicely :)
Don't worry about the payout, happy to hear you liked it. That is the most important thing 😎 Even better my link is in your comments now, people reading here hopefully want to know more and start reading my old post. Imagine all those Long Exposure experienced photographers on this platform 😍
You're living in such a beautiful country btw for long exposures. Moving waters, plenty of beautiful scenery's, people proud at the history of their country, so the buildings are nicely exposed during the night by artificial lights. Yep a bit jealous I think 😉
Wow man, you must have devoted a lot of time for such a thorough post. Even though I new a lot of that it was great to read it in such an organized and detailed way! I had completely forgot that the viewfinder should be covered but now that you told it I remembered that my old canon AE1 had a plastic cover on the hot shoe that could be attached on the viewfinder! And the lens flares really pain in the butt, I have given up a lot of shots because I couldn't control them. Anyway thanks a lot for sharing, I am sure that a lot of people will benefit from it and the well deserved curie upvote will certainly help with the visibility part :)
Thanks a lot @fotostef! My camera came with that plastic cover too, but I lost it a long time ago.. i usually use a hat :) It took me a while to realise that little plastic square was for covering the viewfinder lol!
It took me the better part of a day to get the whole post together so I am glad that people are enjoying it and finding it helpful :)
a small piece of duct tape will do when you lost the cover or your camera has no shutter for the viewfinder @fotostef and @fiftysixnorth :)
Enjoyable post! I've only ever tried with water and haven't had much success. More than a few useful pointers here.
Thanks! Water can be really tricky, I hope these pointers help :)
This technique is certainly not easy to do. Really professional. I have to study slowly and I think it takes a long time to produce good long exposure and detail, and make the image really look as alive as in your post.
Thank you for sharing tips.
Yeah man, this is great, thanks for sharing! Love the Edinburgh shots, which is where I currently am :)
Thanks man! That's great that you are in Edinburgh, its a beautiful city with many brilliant places for photography!
That and the soft, low-angled sunlight, magical combo :D
This post was shared in the Curation Collective Discord community for curators, and upvoted and resteemed by the @c-squared community account after manual review.
@c-squared runs a community witness. Please consider using one of your witness votes on us here
Thanks @c-squared :)
Surely you could pitch the image with viewfinder light artifacts as a "genuine UFO" and sell it for cash to gullible people?
lol! There's an idea! Though I have done that before, though not sold them. I once managed to get some long exposures of a helicopter at night in a park with search lights on (i think they were looking for an escaped prisoner) and it looked like a UFO. Check it out: