Photoshop. Mask for the girl in the mask.
Previous issues
the Beginning. Part 1.
Photoshop. Curves
The curve again
Just like an orange. Selection and Cutting
The Mask.
Back in those distant days, when I was just learning the technological process of photo printing in a dark room, one more new meaning of the word "mask" was found out. At that moment, the mask is a cardboard or a piece of paper, perhaps on a thin wire, or even just a hand. Most often - a hand.
During the exposure of the photo, some parts of the photo paper should have received more light, some less. Increasing the exposure time to ensure that more light has come to places where it is not enough, with the help of this cardboard mask, I closed the part of the image that the light lacked. From the outside it looked funny. The photographer made passes with his hands over a white sheet of photo paper, and then, in the bath with the developer, in the rays of a red lamp, an image appeared. And it was a miracle!
The figure came and killed all the old miracles, though, we must give credit, brought new ones. And the concept of "mask" was transferred from the dark room to the digital age with approximately the same meaning.
If we consider photoshop as a kind of magnifier, then the film that we print is the layers. The palette of the photoshop is Layers. In the old days, I too could put several films in the frame at once, and, having printed, could get a kind of editing.
Layers in the Layers palette are the same films, although they have several other properties.
Consider a photo opened in Photoshop.
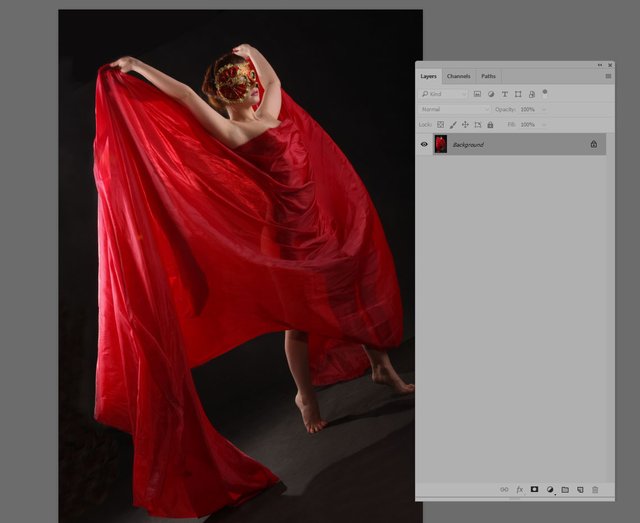
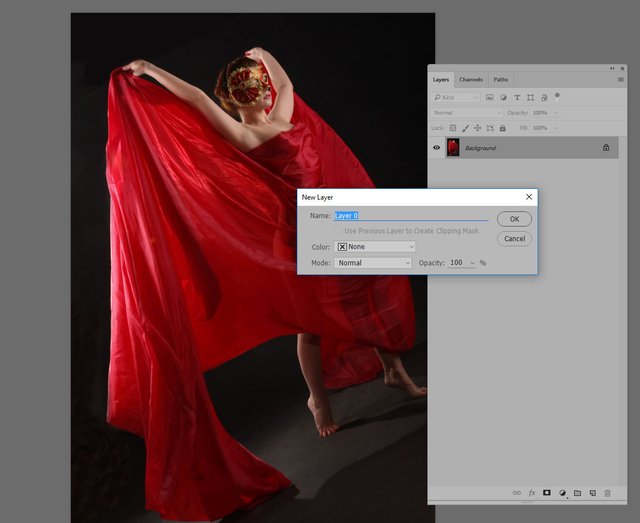
In the layers palette there is only one layer and it is called "Background". In this mode, a lot of the possibilities of Photoshop are hidden from us. Let's move the "Background" layer to the normal layer. To do this, double-click on the "Background" layer. In it, you can add a layer name, set a color in the Layers palette, blend mode, and transparency. The "New Layer" dialog opens. Let's leave it as it is. Click OK.
Again, look at the Layers palette.
The first thing that catches your eye is the transparency and filling (filling) ... in English Opacity and Fill. Both these controls affect the transparency of the layer. If the layer has a certain style (Layer style), then Fill will not affect the transparency of this style. Opacity affects the entire layer with the style.
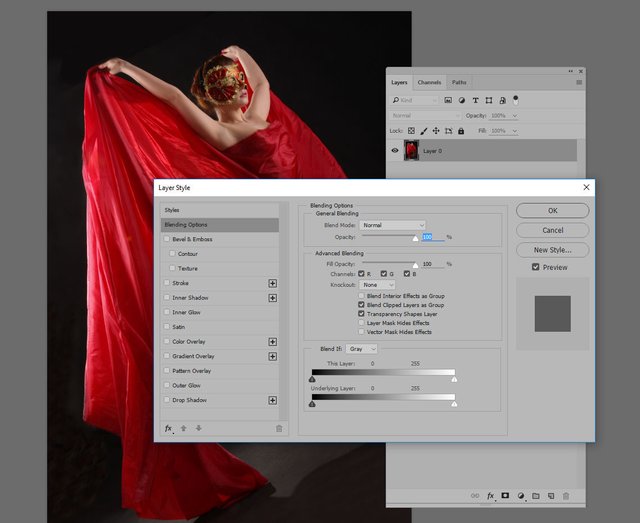
The layer style is opened by double clicking the left mouse button on the layer. The menu opens with the layer style settings. There are many interesting things ... And the opportunity to drop the shadow, and the glow, both external and internal, stroke, pouring and much more ... Until we stop on this menu.
After all, today we have a story about a mask.
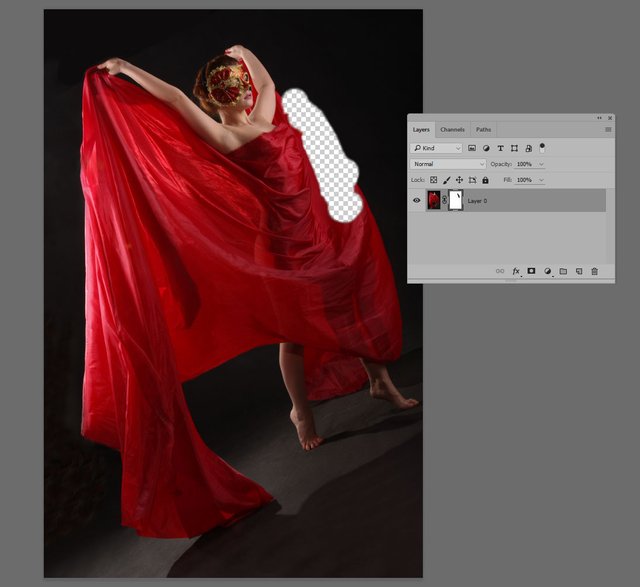
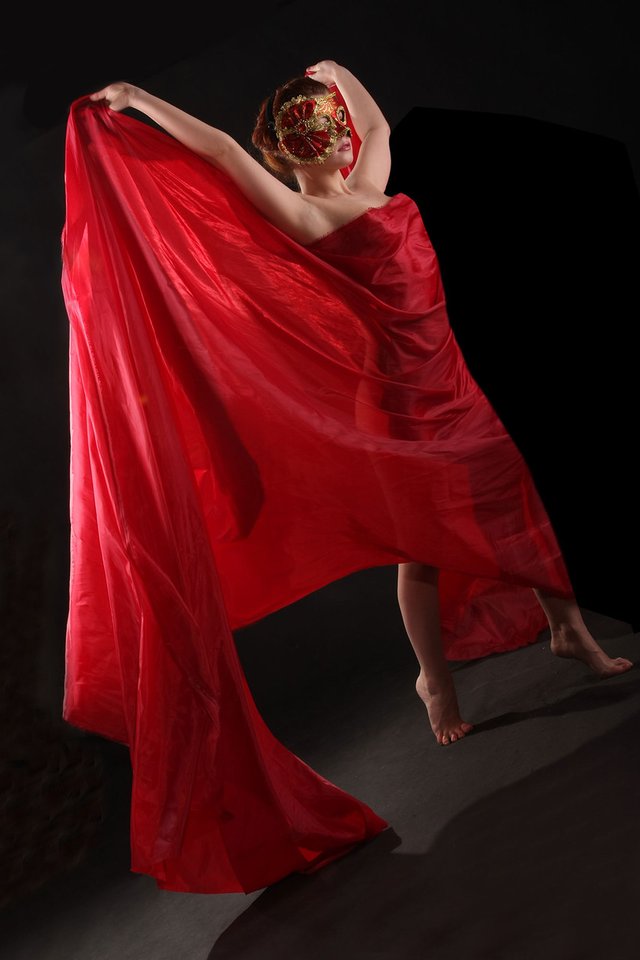
Mask allows you to hide part of the image. Cover, as if cardboard, in the very dark room. Here in this picture, for a start, I want to hide some of the red fabric that is in front of the model. I want to make it so that the contour of the body under the cloth was on the verge of a contrast between the black background and the red one.
Let's try to make this one of the simplest ways to go from simple to complex. Add to our layer (which for now is called Layer 0, or Layer 0, or maybe somehow, depends on the localization.) By the way, to the question of localizations.In different translations of the interface, the names of the layers also change.If we do not take this into account, in action, you can get into an unpleasant situation) mask.
To add a mask, you can click on the button in the form of a rectangle with a circle inside. This button is at the bottom of the layers palette. This is one of the ways. There is another. You need to go to the Layers menu, then Layer Mask and there to choose one of two options.
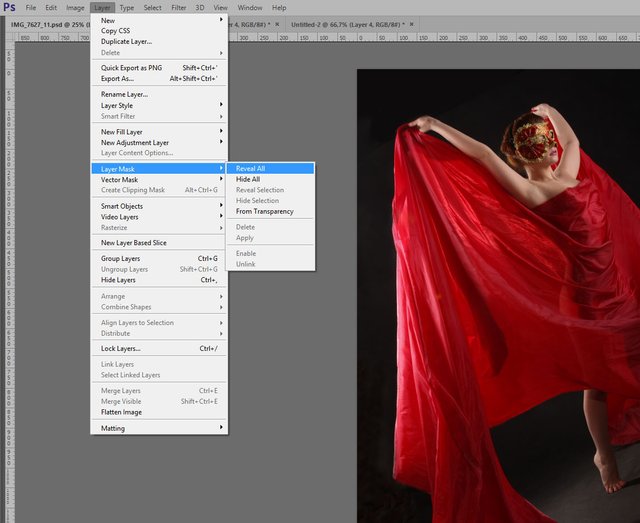
The first one is Reveal All, the second is Hide all. Depending on which option we have chosen, we get a mask or black and then the layer, as it were, will disappear, or white and nothing will change for us.
Let's choose Reveal All and look at the layers palette. We see that a white rectangle was added to the Layer 0 layer. This is the very same, notorious mask.
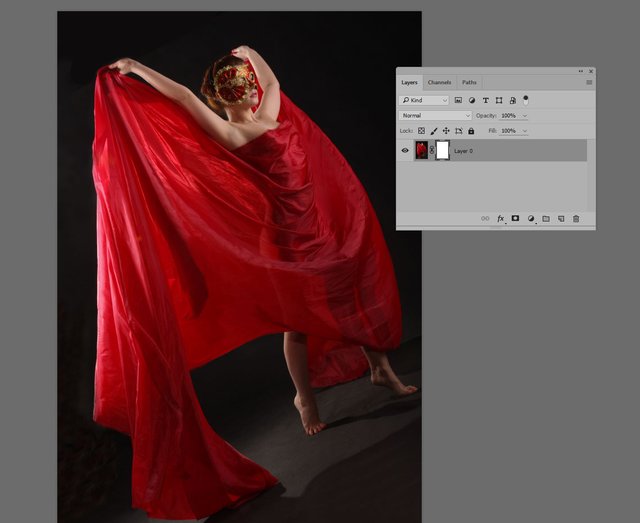
In fact, the mask is a black and white layer. If the color is white - it does not affect the image, if the color is black - then it makes the image of this layer transparent. If the color is gray, then translucent, and the lighter, the more transparent.
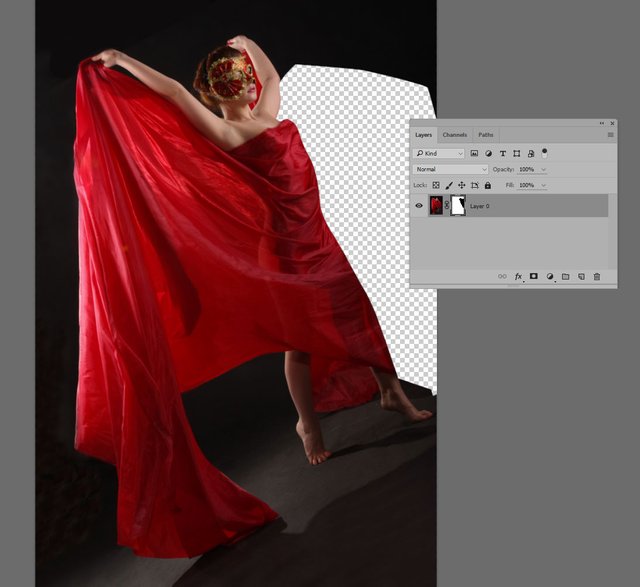
We will carry out the experiment. Press the hotkey "Ctrl + I". This is inverting. The mask of white became black. The image is gone. Hey! Where! Where is my picture!
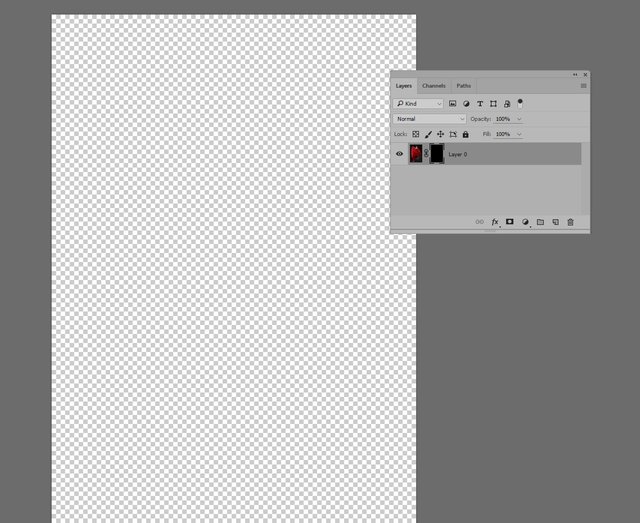
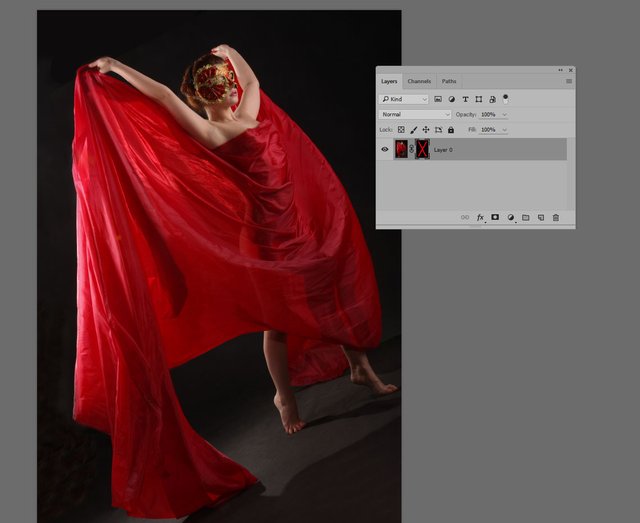
Let's not get excited. While we mask completely hides our layer, we'll look at another point, which later may come in handy. If you click the left mouse button on the mask layer (this now black rectangle attached to the layer icon) with the shifter, then we will see that the image appeared again, and a red cross appeared on the mask icon. This is the mask mute mode. Once again, repeat such a click - the mask will return.
Among other things, the mask has a context menu, called by the right mouse button and its own kind of the Propeties palette.
Invert the mask back and proceed to remove the part of the red rag that I do not like.
Take the brush tool for this. Hot button "B". From English Brush. The cursor has changed, turning into mugs of a brush. And sometimes, mugs do not appear! I, at first, can not understand in any way what is the matter. But, everything turned out to be simple. If Caps Lock is pressed, the interface reflects the tools differently. In this case, the logo turns into a cross. Click Caps Lock again and you will see the mugs of the brush. If you press the right mouse button, a menu appears in which you can select the brush size and hardness.
The size of the brush is also convenient to choose with the help of hot buttons "[" and "]".
We are already ready to wave the brush on the mask, black paint on a white mask.
It's not unimportant, to know where we have the color of the instrument and where the background color is. These are the dyes on the toolbar, one above the other. If you press the hotkey "X", the colors will be reversed. In our case, this is very convenient, because while we draw with black, the image is masked, but if we press "X" and continue drawing, then again we will show from the mask what was just hidden. This is convenient, because it quickly allows you to correct mistakes, unsuccessful brush strokes.
Here I holeed the image on the mask. Skroz this hole through the squares of the background, which indicate that there is no background. Let's put another layer under our layer, and fill it with black.
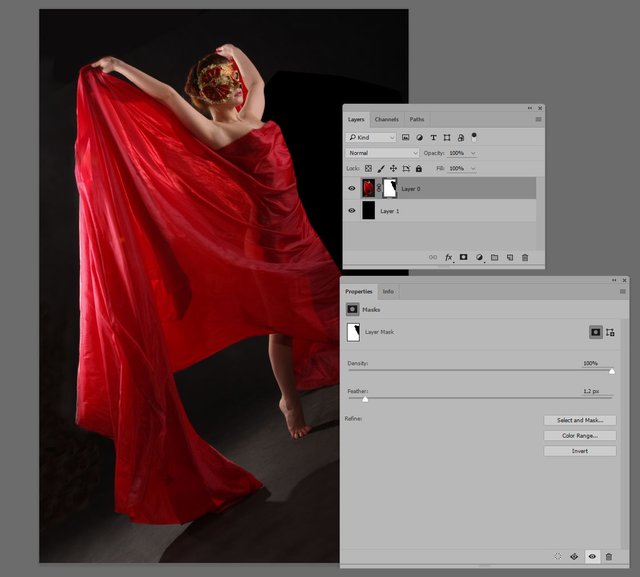
Also, click on the mask and look at the Properties palette. There are two regulators. We are now interested in one of them - this is Feather (Edge Blur). The larger the value, the more blurred the edge of our mask. If you make a mask with a rigid brush, then this regulator may be required to smooth the edge.
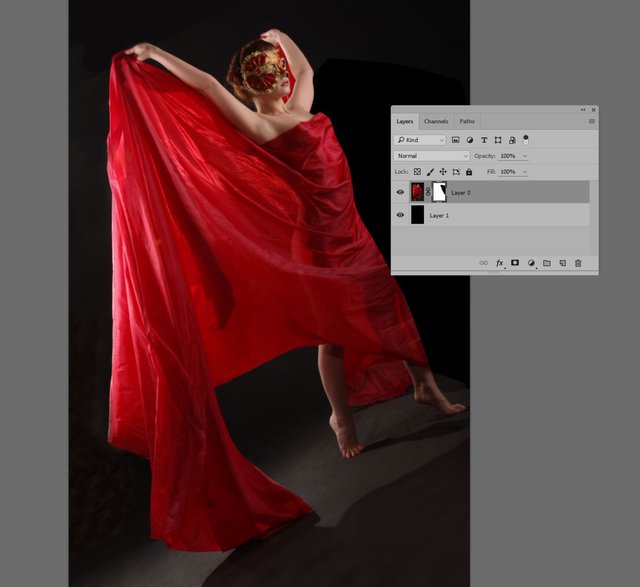
The picture turned out, as it was intended, without a piece of red cloth, but what's nice, the fabric has not gone anywhere, it's just covered up with our magic mask ... It fits perfectly into the concept of nondestructive processing. So to speak, a non-destructive method.
To be continued…
Previous issues
the Beginning. Part 1.
Photoshop. Curves
The curve again
Just like an orange. Selection and Cutting
Congratulations! Your post has been selected as a daily Steemit truffle! It is listed on rank 19 of all contributions awarded today. You can find the TOP DAILY TRUFFLE PICKS HERE.
I upvoted your contribution because to my mind your post is at least 14 SBD worth and should receive 91 votes. It's now up to the lovely Steemit community to make this come true.
I am
TrufflePig, an Artificial Intelligence Bot that helps minnows and content curators using Machine Learning. If you are curious how I select content, you can find an explanation here!Have a nice day and sincerely yours,

TrufflePig