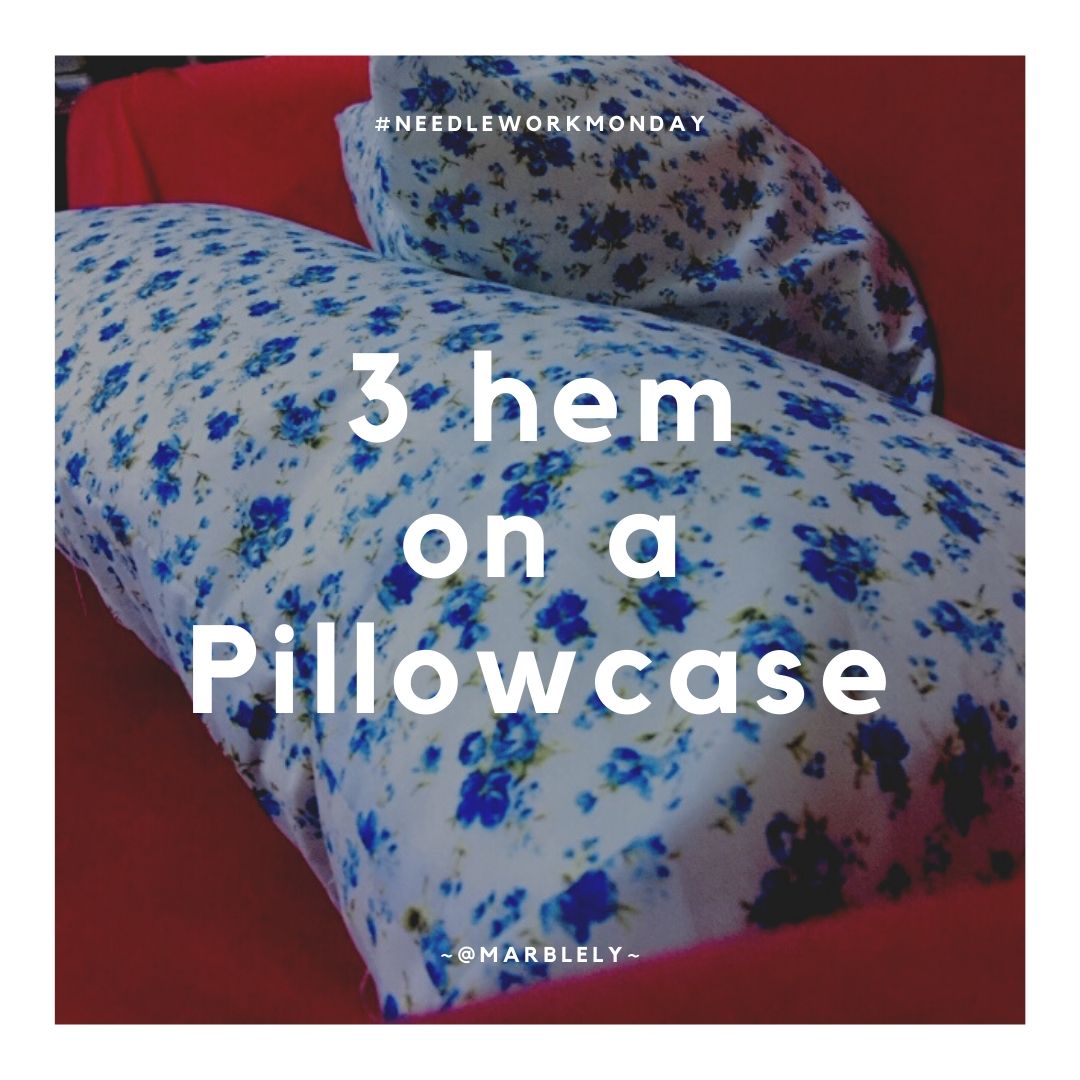
#needleworkmonday :: 3 hem on a Pillowcase
I think hemming is one of a must-do in sewing but it is often one of the most neglected because of the extra effort and materials that are required. But, I always remind myself that if we do not hem properly, we will end up with frayed edges like this:
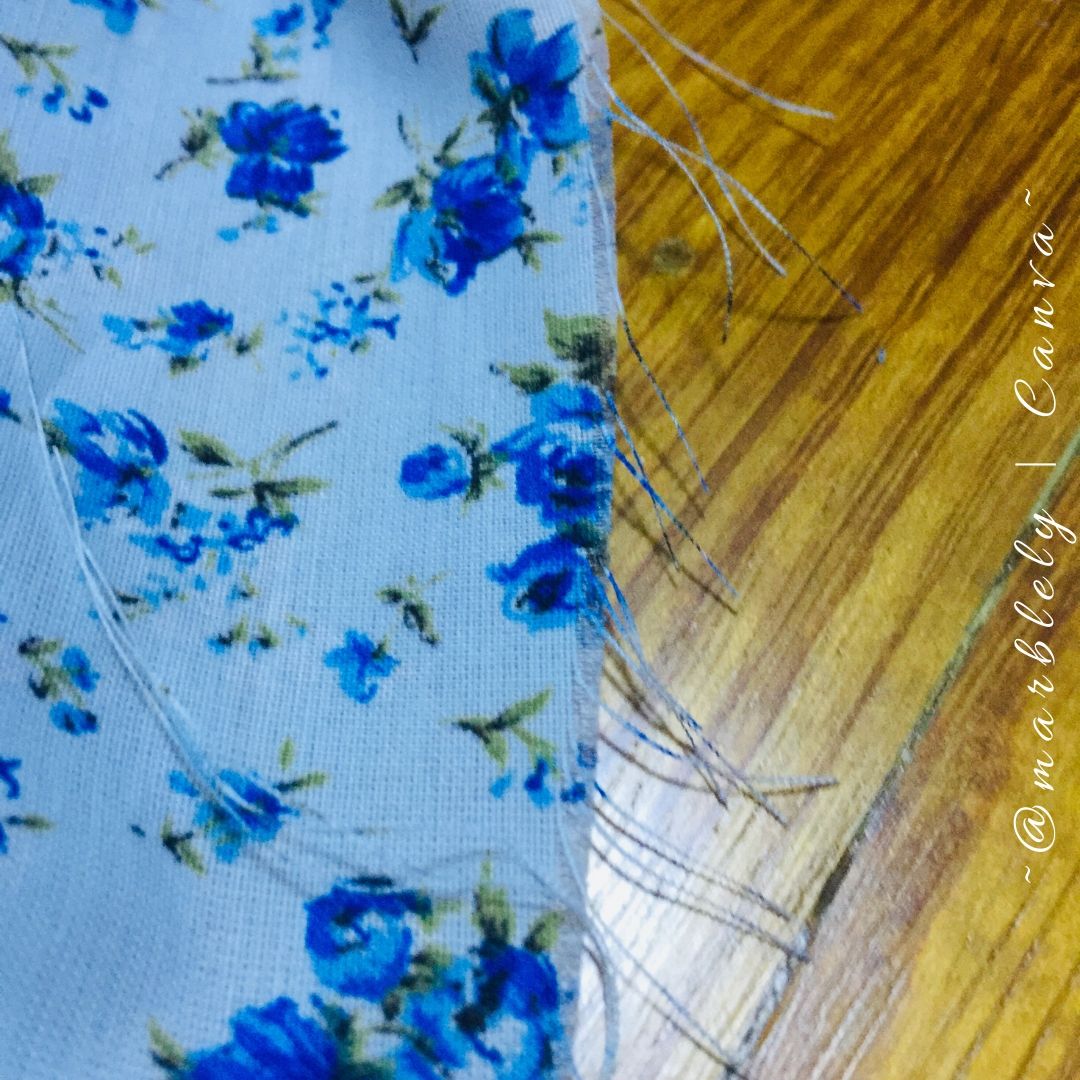
and all our hard work of sewing whatever item or garment will fall apart within a few days or weeks of using.
In case you are wondering:
A hem in sewing is a garment finishing method, where the edge of a piece of cloth is folded narrowly and sewn to prevent unravelling of the fabric.
Source: https://en.wikipedia.org/wiki/Hem
There are many ways to hem and hemming can be done traditionally by hand stitches or by machine stitches.
But it is important to choose the right hem for the type of fabric and edge requirements for the project.
To sew a hem, we would include extra fabric on the edges that we need to hem, something known as a hem allowance.
Hem allowance provides the excess fabric needed to achieve a clean-finished hemline. In other words, hem allowance is the distance from the raw edge of the fabric to the hemline.
Source: https://www.doinaalexei.com/beginnersewingtutorialblog/understanding-seam-allowance-in-sewing-beginners-guide-to-fabric-allowance
And one of my favourite items to sew is... take a guess.... a pillowcase! :)
I have sewn quite a few and I can never get enough of pillowcases.
I have pillowcases for my pillowcases :D, sort of a double layer protection for the pillows.
The reasoning for this is that the inner pillowcase protects the stuffing or the pillow itself. And it is always fun to have different designs and to be able to change up the "ambience" every few days or weeks or months.
The easiest pillowcase to sew, in my opinion is the envelope pillowcases. I have posted a few on this platform too and on this post, I will focus more on hemming.
~ ~ ~ 🧵🧶💗🧶🧵 ~ ~ ~
For this particular pillowcase, I used 3 types of hem, hence the title of this post :D
My pillow is a long rectangular shaped pillow, about 29inches by 13inches:

To create an envelope pillowcase, I will need fabric twice the length of the pillow plus additional fabric for the envelope itself plus extra fabric for hem allowance.
This is my sewing plan:
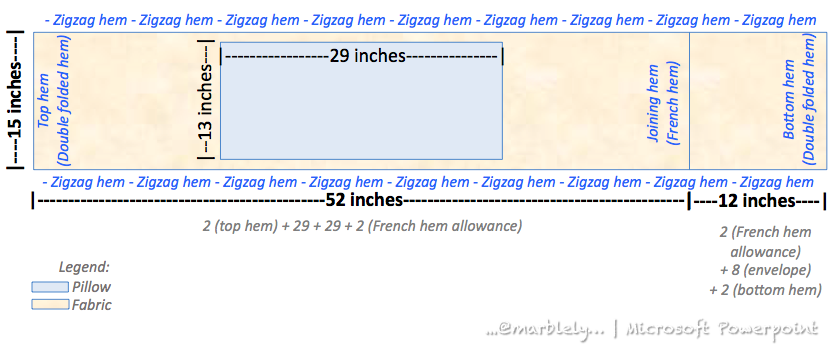
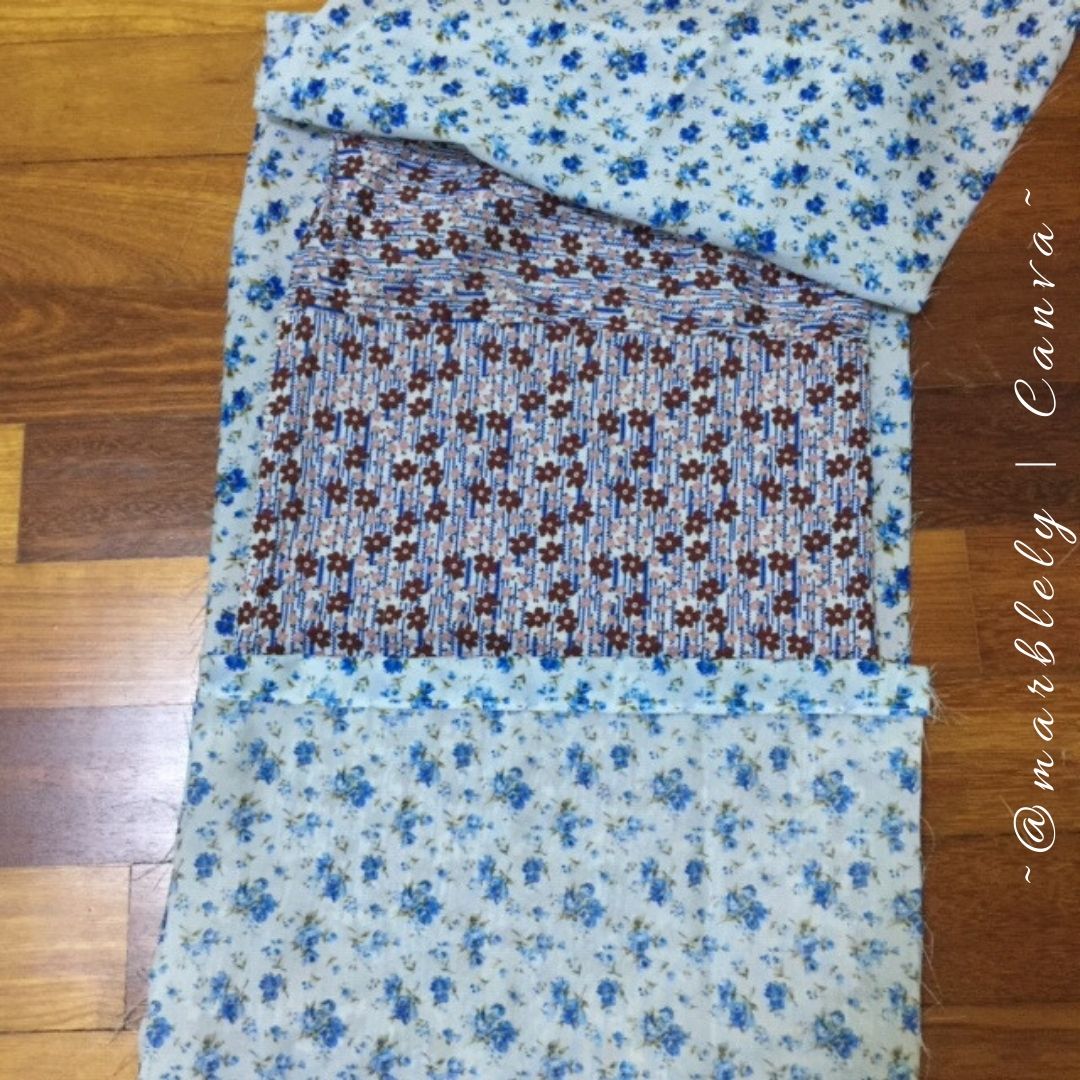
My fabric is not long enough to cover the long pillowcase, therefore I will be joining the fabric (52 inches) with a shorter piece (12 inches) to create a long fabric, which I will then fold to create an "envelope" in the middle.
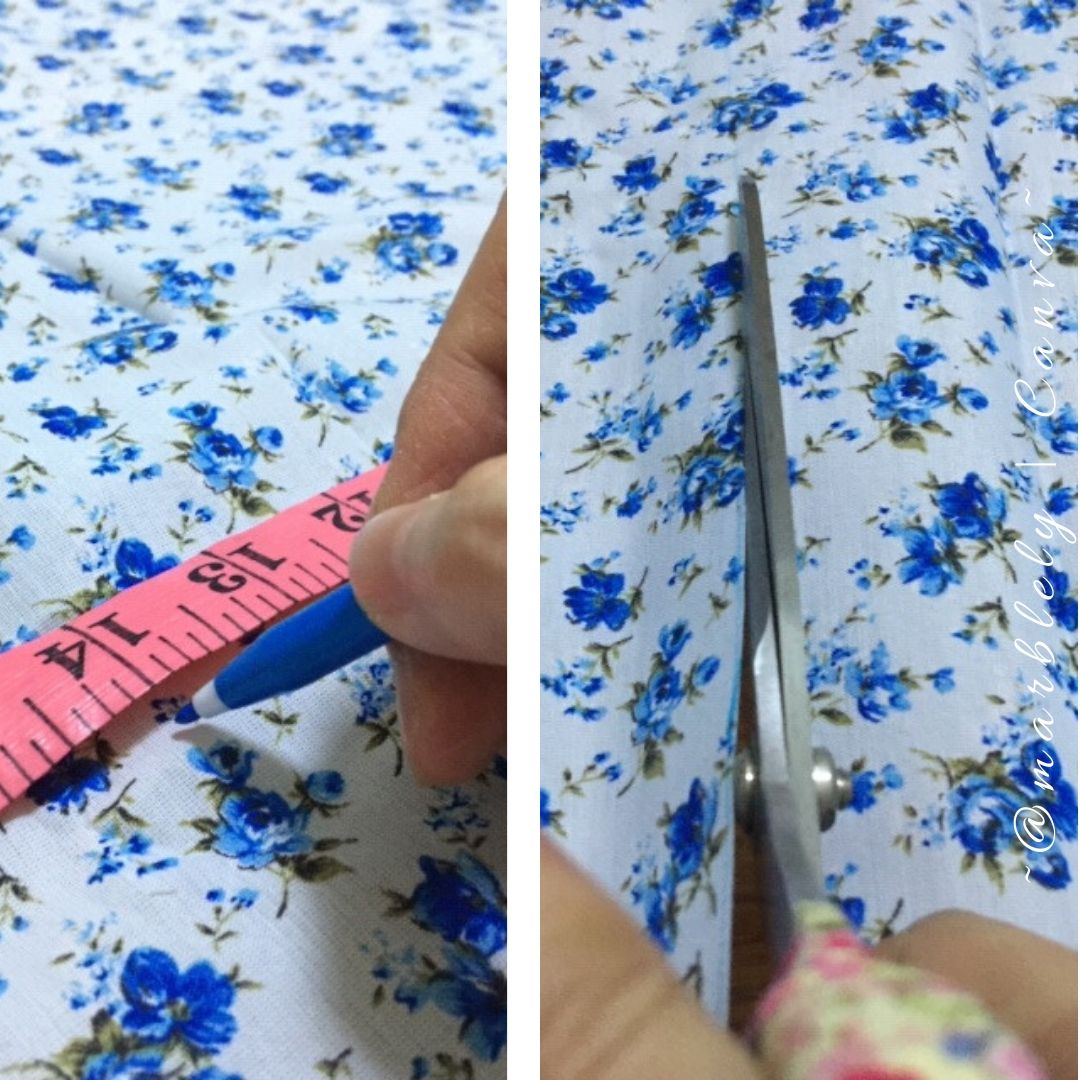
After measuring and cutting the amount of fabric that is required, I am ready to hem:
~ ~ ~ 🧵🧶💗🧶🧵 ~ ~ ~
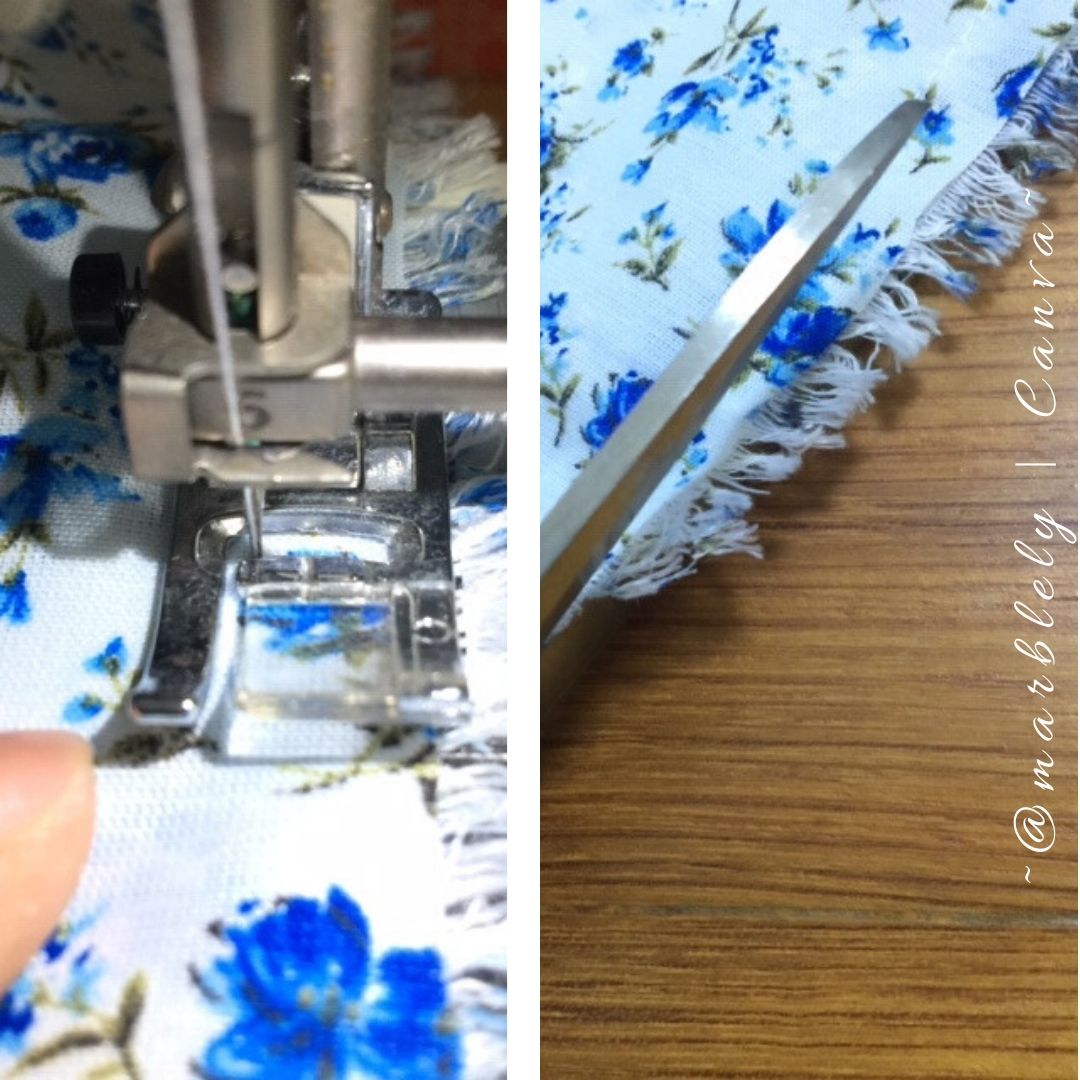
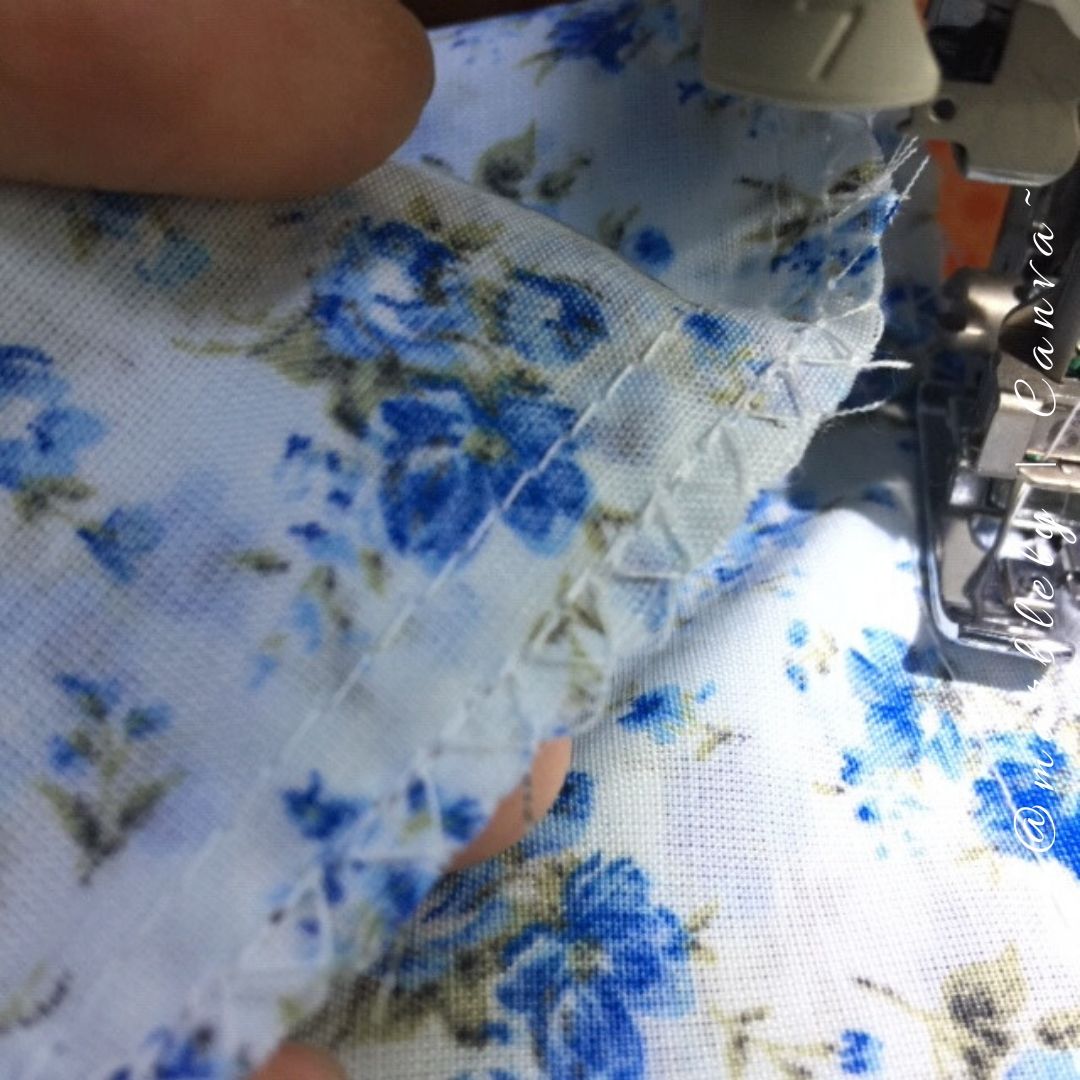
French hem / seam
The first hem I used is the French hem / seam to join my two pieces of fabrics together, the 52 inches with the 12 inches to create a 64 inches fabric. The reason for this hem is to create a strong joining seam between the 2 pieces of fabric.
A French seam is a double seam that encases the raw edge of the fabric. While this method takes a few extra steps, the result is a crisp, folded edge within your garments. Not only do French seams look great, your garment will likely fare better after repeated washings. No raw edges means no fraying fabric!
*Source: https://indiesew.com/blog/how-to-sew-french-seams
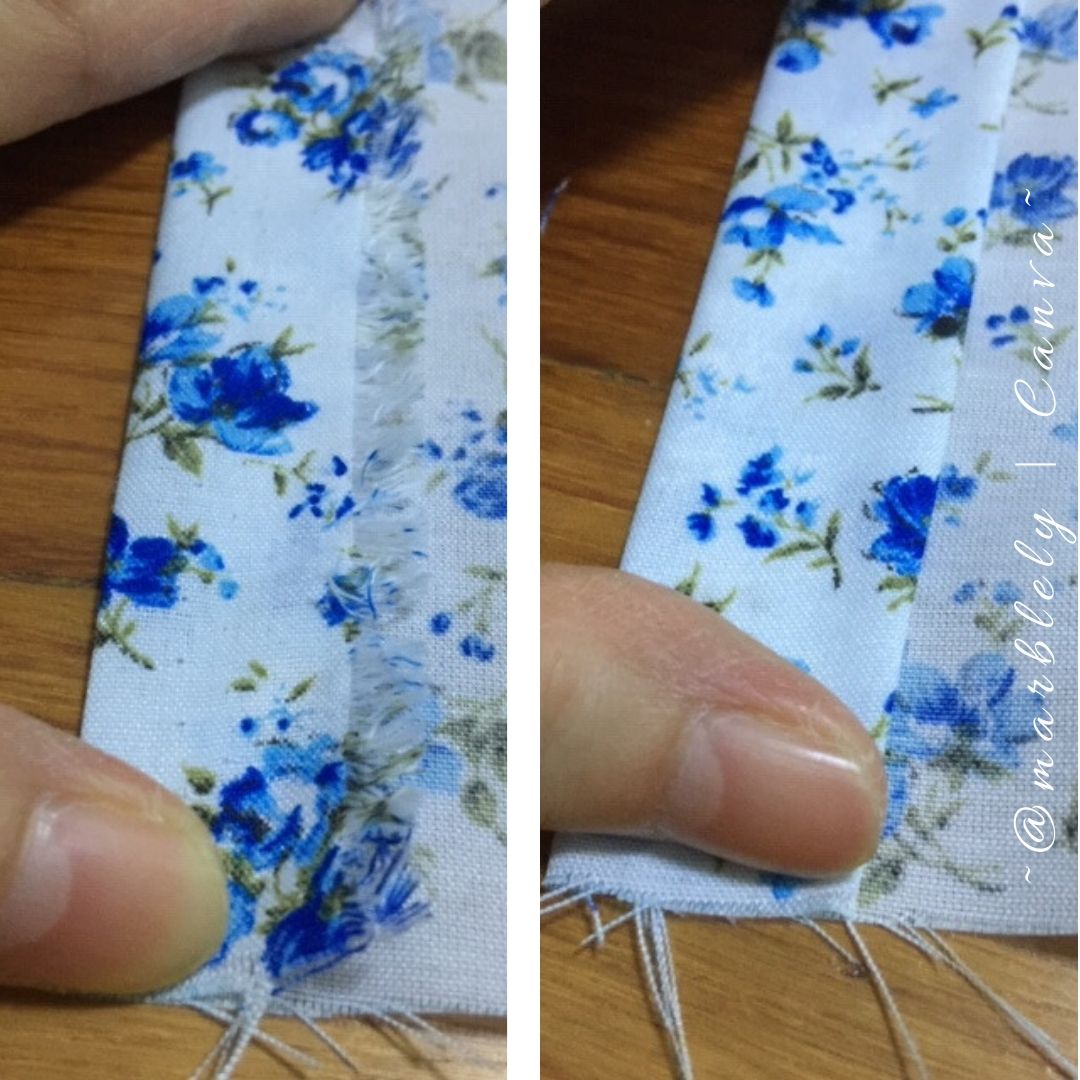
I start by sewing the right sides together, and cutting off any excess raw edges:
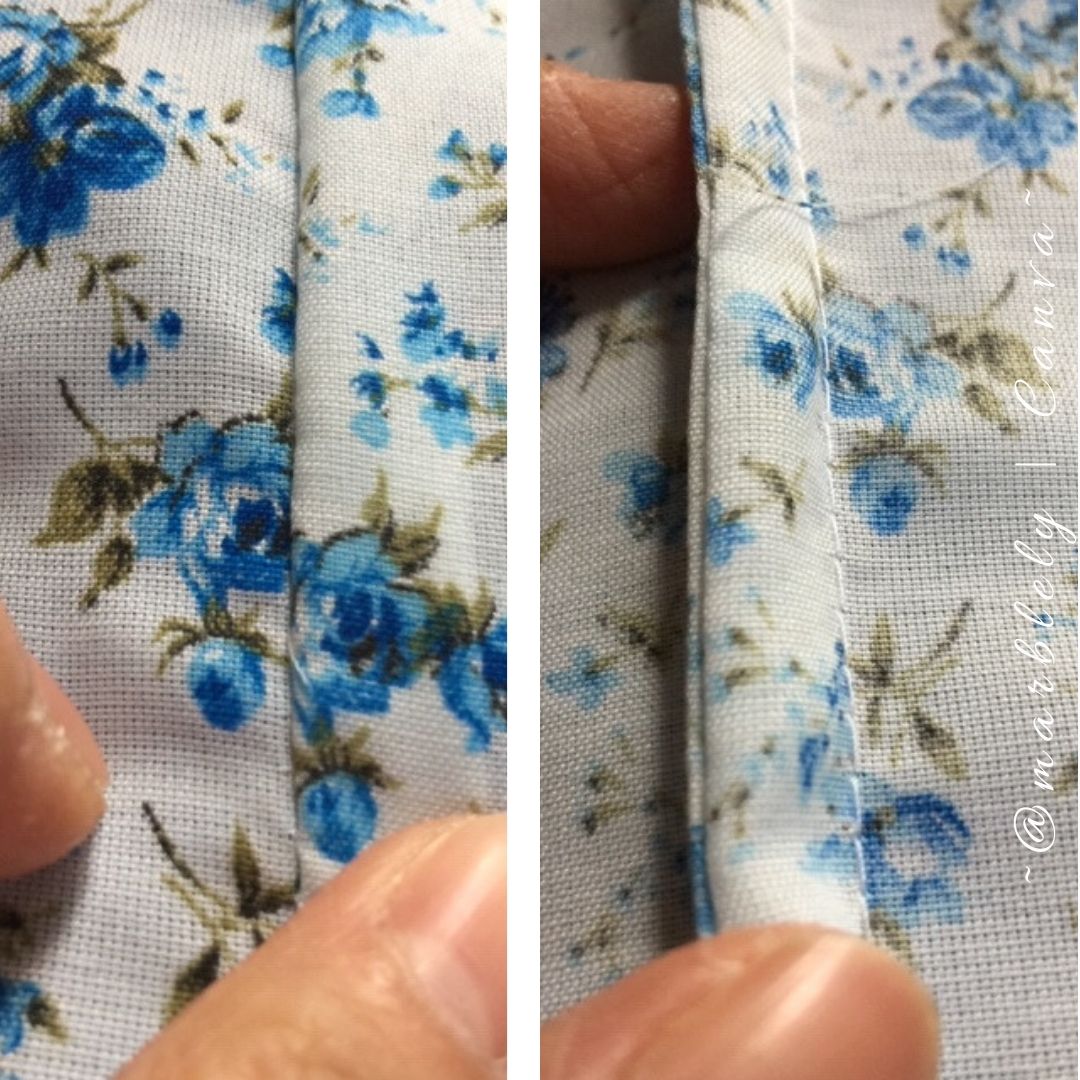
This is followed by pressing the fabric to create a clear crease:
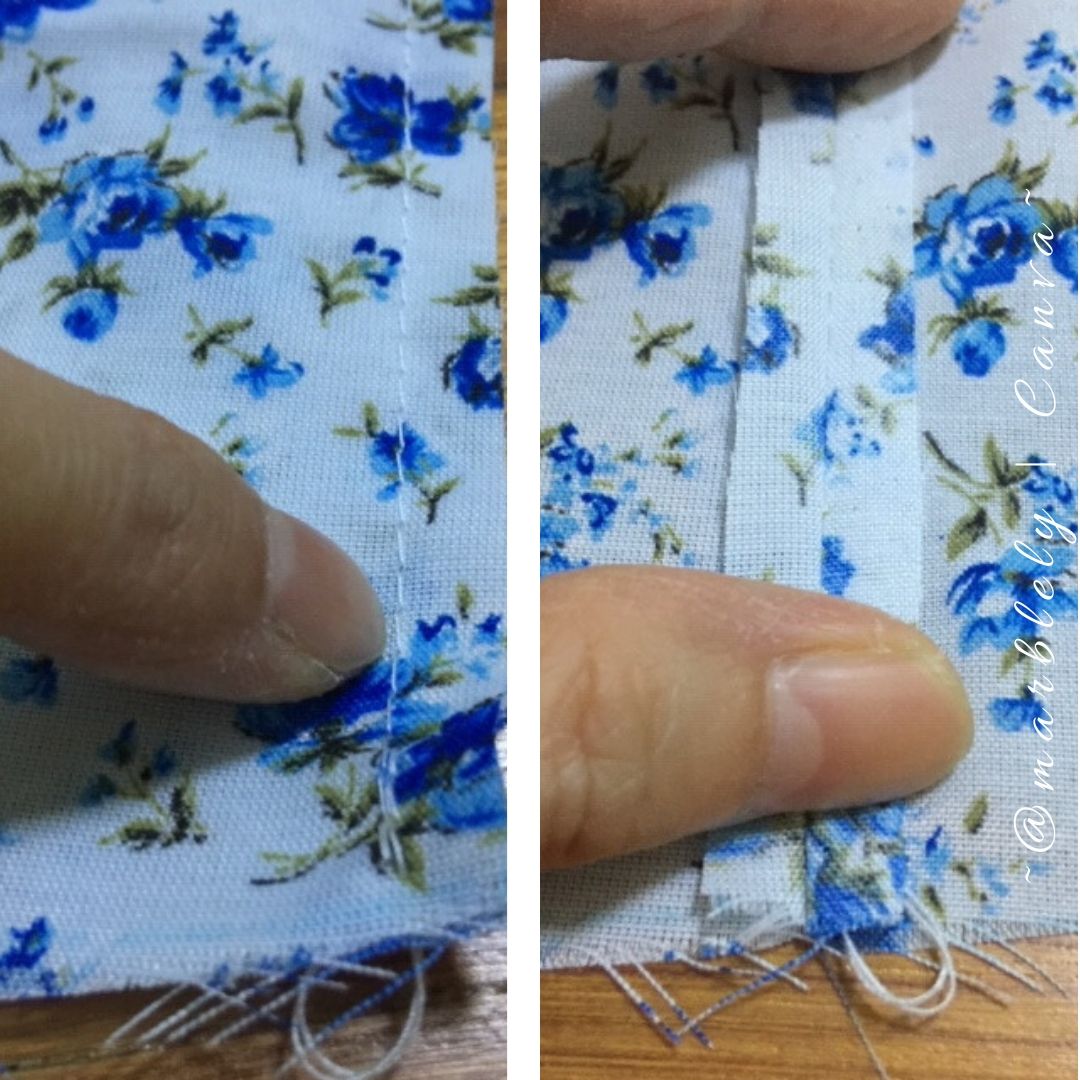
And folding the fabric, wrong sides together before sewing them down to encase the hem:
Here is how the French hem / seam looks, front and back:
~ ~ ~ 🧵🧶💗🧶🧵 ~ ~ ~
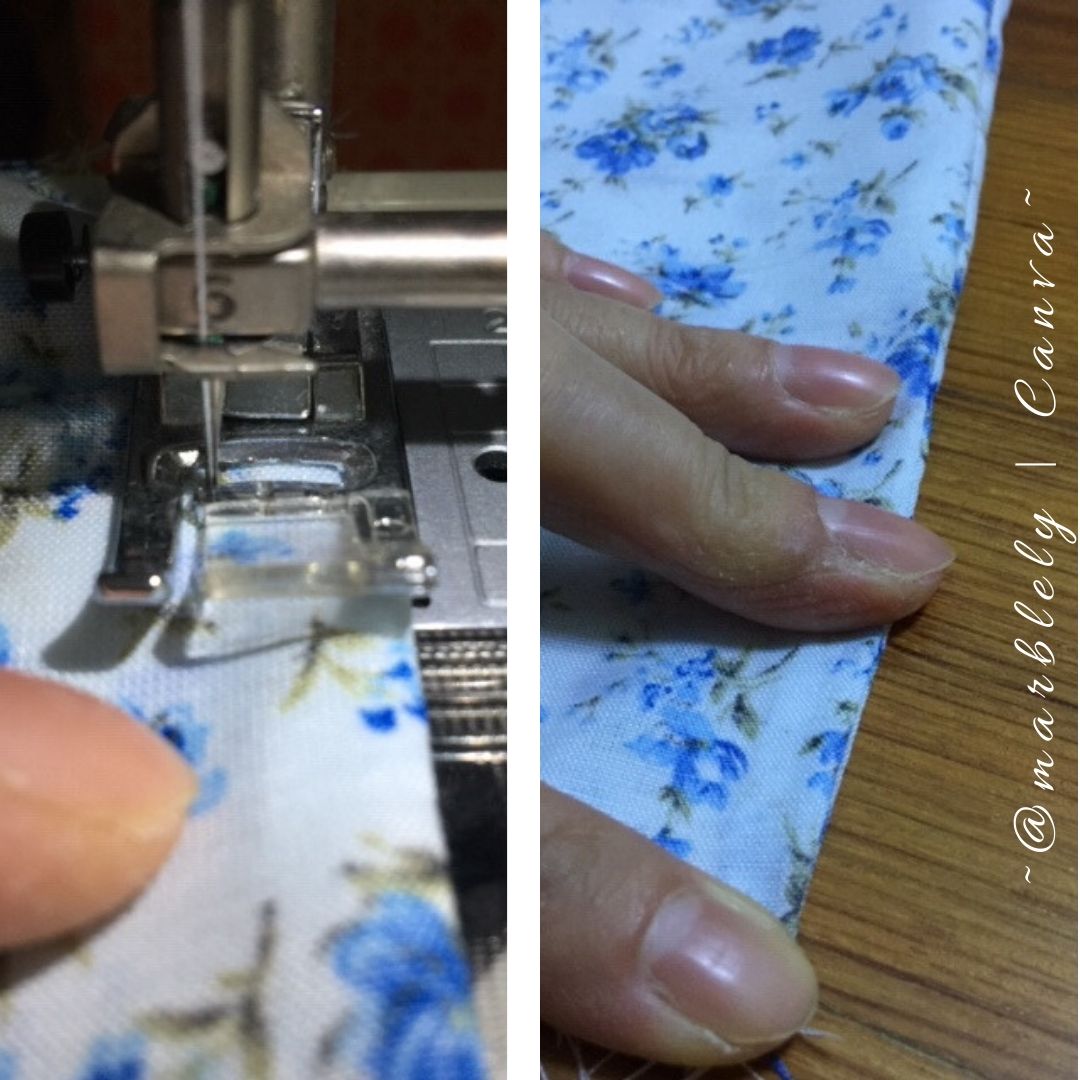
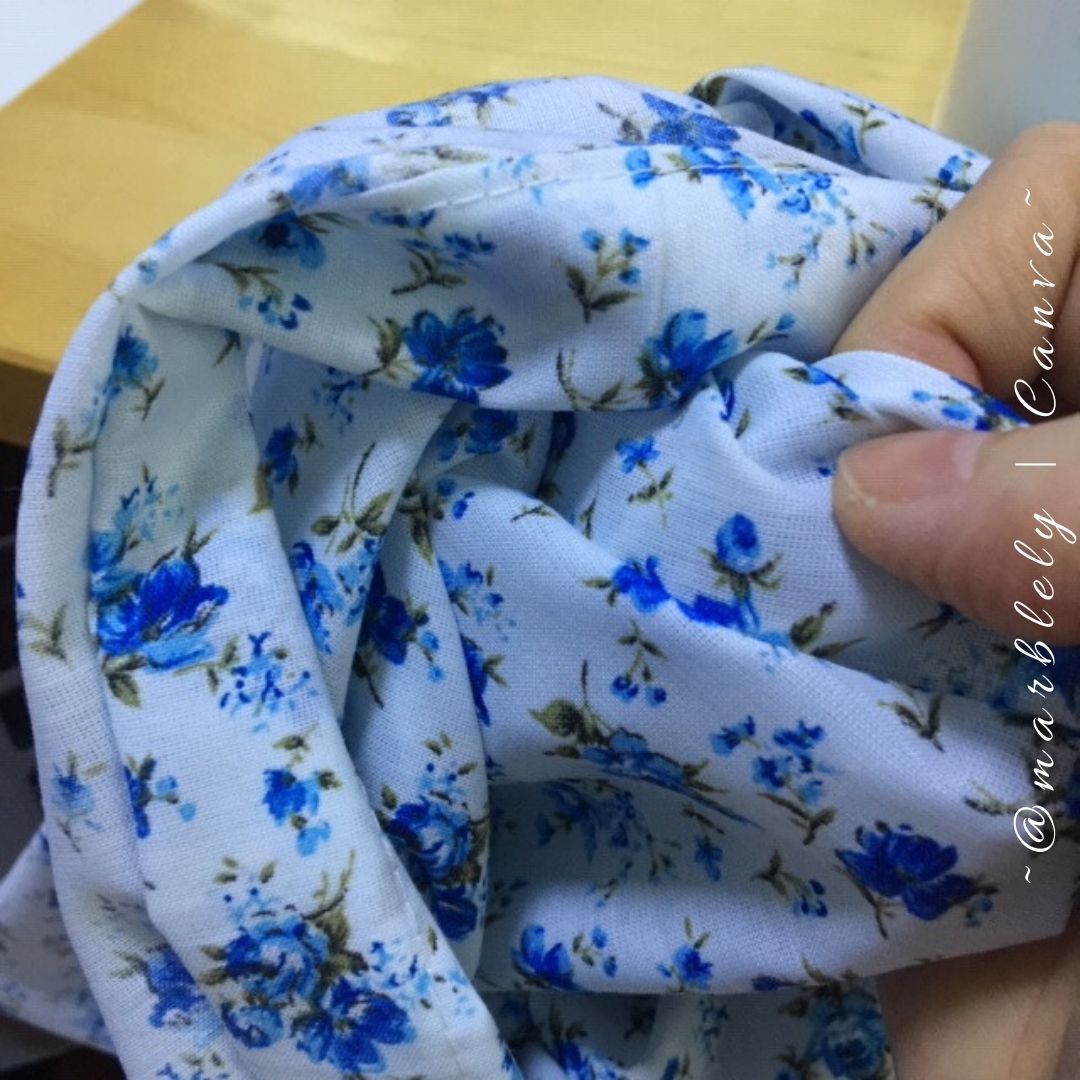
Double folded hem
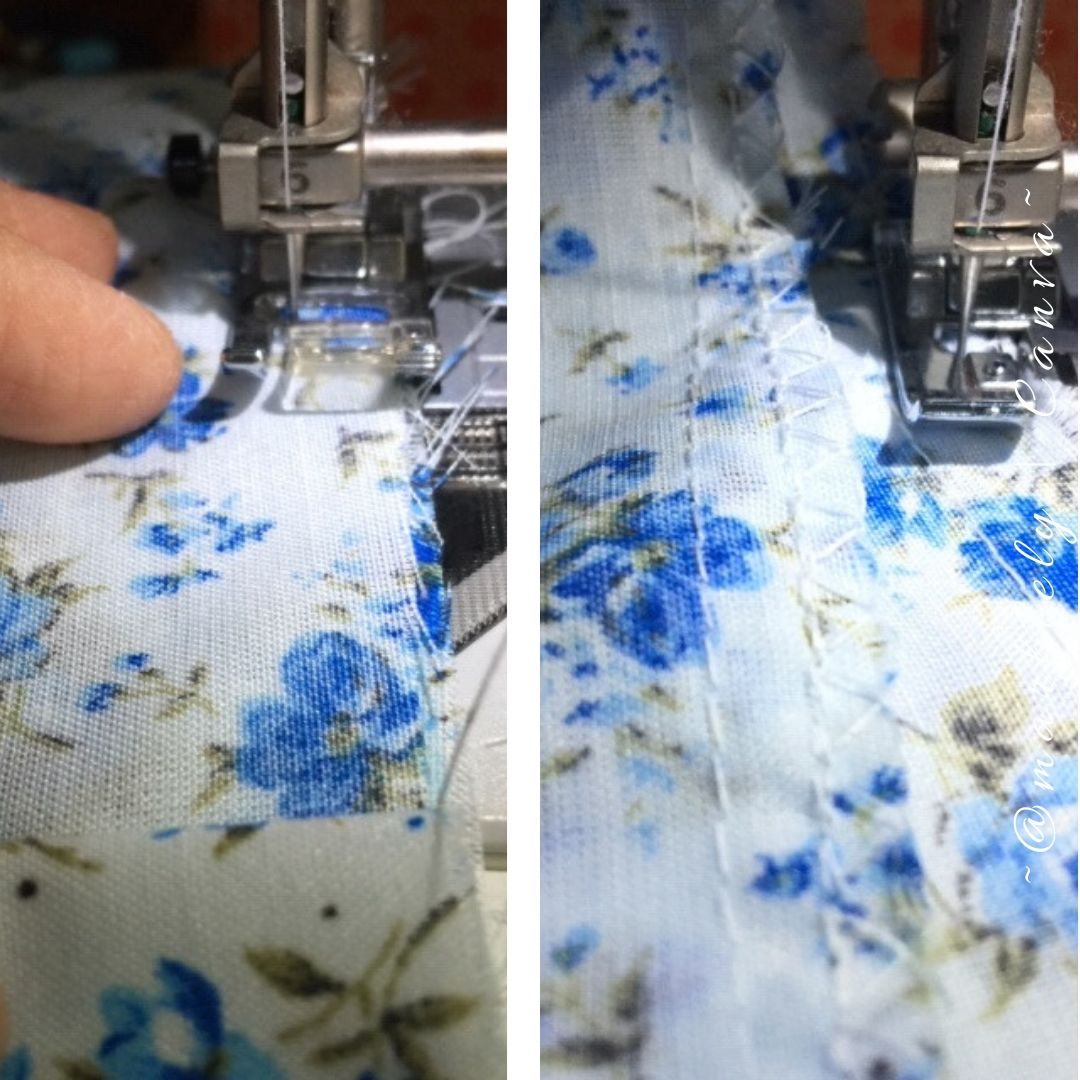
The double folded hem or double hemming is one of the most common hem used in sewing projects. On this pillowcase, I used the double folded hem on both the short top and bottom edges (the 15 inches sides).
The edge of the fabric is folded twice:
And sewed on to hide the frayed edges.
~ ~ ~ 🧵🧶💗🧶🧵 ~ ~ ~
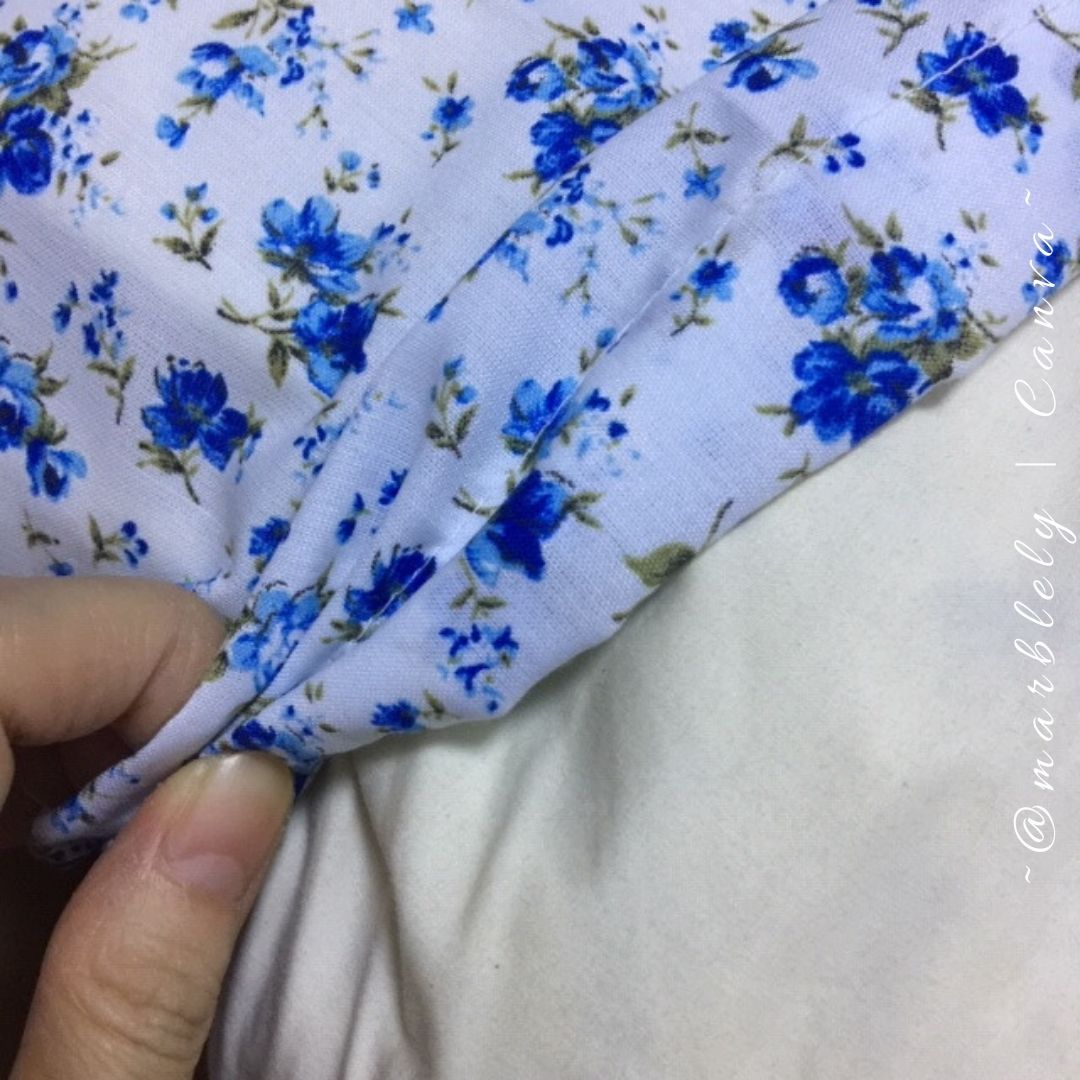
Zigzag hem
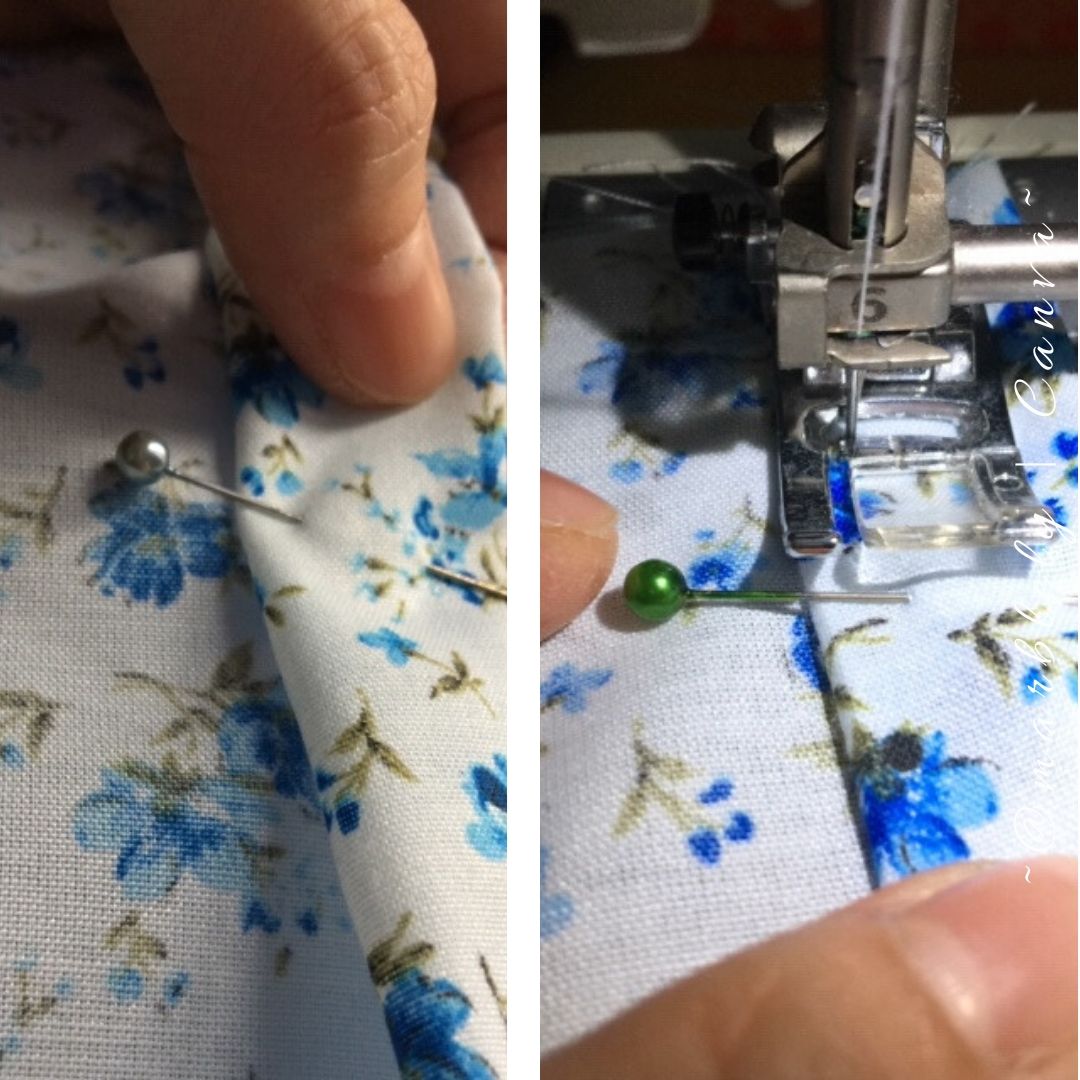
Once the top and bottom edges are hemmed, it is time to sew the sides.
Using an older pillowcase as a template, the sides are pinned before sewing:
After sewing the sides, the edges are finished with zigzag hem or on my sewing machine, I changed to an overcast foot and used one of the hem stitches that looked like zigzag:
~ ~ ~ 🧵🧶💗🧶🧵 ~ ~ ~
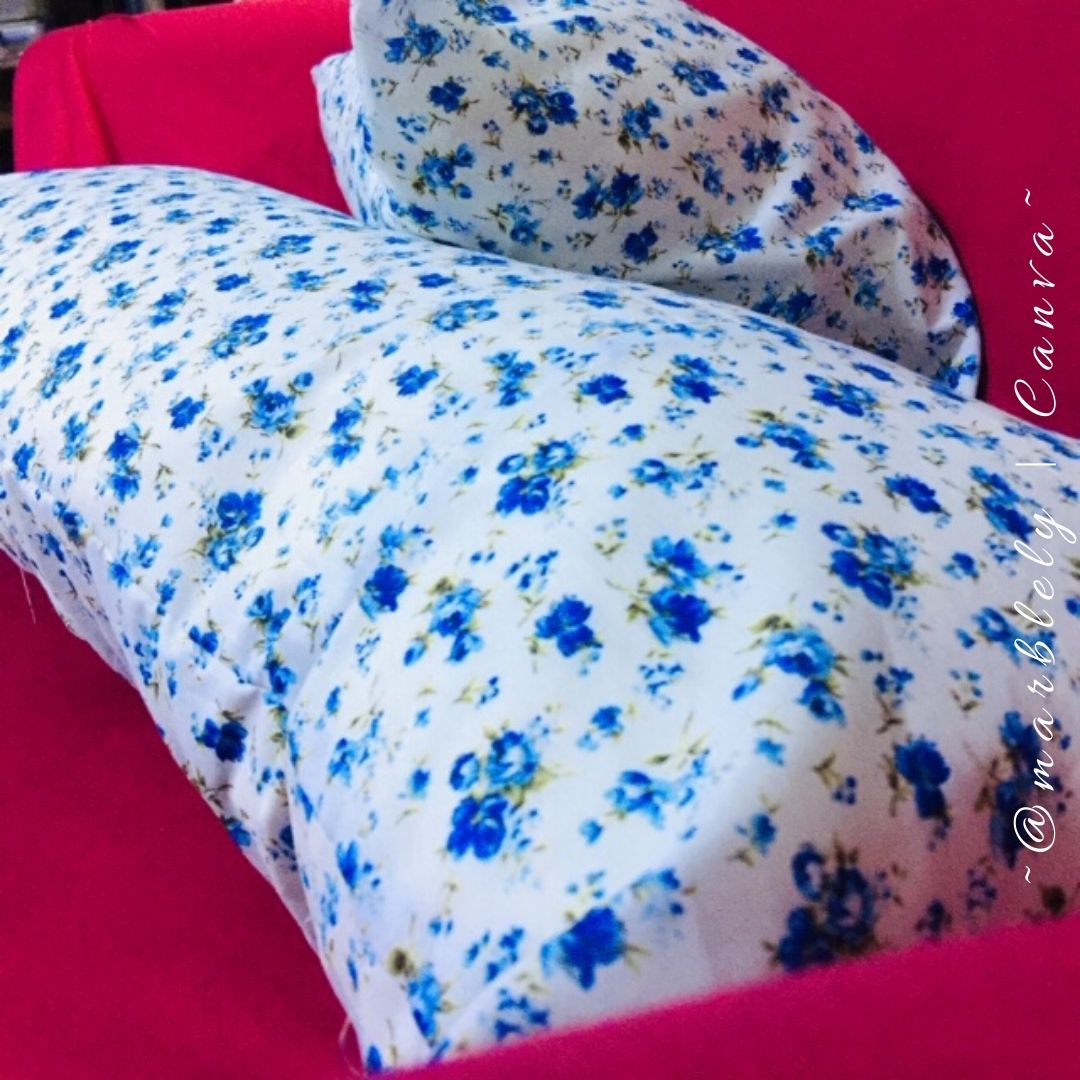
Once done, the pillowcase is turned inside out:
The pillow is stuffed in with anticipation and excitement:
Ah... jolly heart 💖:
~ ~ ~ 🧵🧶💗🧶🧵 ~ ~ ~
I find these 2 videos quite a good watch to learn more about the different hemming types:
How to Finish a Seam: 9 Ways to Finish a Seam
Learn to Sew: Finishing Seams by Hobby Lobby
And these links also show some other different kinds of hem:
https://blog.colettehq.com/tutorials/6-ways-to-finish-the-edge-of-your-hem
https://mellysews.com/how-to-hem-anything/
All in all, it is definitely worth the time and effort to hem properly, for our projects to have a longer life :)
Take a look at the FAQ to learn more!
Helping to host are @muscara, @shanibeer and me.
If you love any craft that uses needles, come and join the fun with us here every Monday! You can also join us every other day at #NeedleWork.


This is an Invitation to join #ccc for Guaranteed 👍 Daily Income 💵 and Payout 💸 for Newbies (2.0) 🐟 🐜 🐛 in #ccc 👣 and Follow 👣 the Honor Code 🏅 - the Creed (Conditions and Limits Inside)
AND
the latest update <<< please click to read.
Pillowcases for pillowcases? :D Send some of them my way as I don't have enough!!! :) Just kidding... I don't sew myself but I admire people who can do it. And you seem to be great! That pillowcase looks professional.
Thank you for sharing and have a lovely day!
While reading your post I got sweaty hands: I am currently sewing a dress with woven fabric and I am always afraid that my hemming is not enough and that the seams will fray over time. The French seem you explained looks so neat! But I am not sure how to use this on clothes. I guess I must do a bit of research.
As always, wonderful post and wonderful pillow cases <3
Thank you!! <3
I have that challenge too!! Always wonder if I should do another round of hemming or choose a different hem. And then we have the curved ones, where the ‘extra’ fabric needs to be tucked in nicely to maintain the curve without excess hem sticking out like a sore thumb.
Yah, I think the french seam seems to be good for joining fabric when the sides are not sewn yet. Once the sides are sewn, I too am not sure how to use it hehe.
Posted using Partiko iOS
Good your post and design
Thank you!
Posted using Partiko iOS
You're welcome
An excellent sewing tutorial. The videos are fabulous. Thanks for sharing @marblely
Thank you!
Posted using Partiko iOS
You did such an excellent job on this hemming tutorial and explaining the steps! I really really love that French hem and want to try it on something now! 😃
I love how you laid out your sewing plan! Wonderful post! Thank you for this!
Thank you!!! <3 I love that French hem too but I think it is good for joining fabric. As I have said to @neumannsalva, I too am not sure how else to use it :D.
Oh hehe. I thought the post was getting a bit complicated, thats why the sewing plan but I think the sewing plan looked complicated too :D
Posted using Partiko iOS
You have used the Hashtag #[CC] and can now reward 19.0 comments under your post with one CC.
More information about the Commentcoin-Project can be found on this account.
Thanks for using it.
Happy comments.
Your CC-Team:
@kristall97 ([Code-Designer])
@alucian ([Project-Designer])
Thank you!
Posted using Partiko iOS
Very good, @puncakbukit resteemed to thousand followers.. Thank you so much to choose @puncakbukit as your witness.
Thank you!
Posted using Partiko iOS
As a member of the @Council - Community Curator Service, this post has received a 100.00% upvote.
Members of the community can all chip in to Power UP. Become a member, delegate 10 or more Steem Power (SP) to @Council to receive upvote and resteem. Here's the link to delegate https://on.king.net/council10sp it will redirect to Steem Connect for a secure connection. We share the Steem Power of all members that delegate to Community Curator Service, sharing our SP for a stronger upvote.
Thank you.
Project Powered by Steemians
Thank you!
Posted using Partiko iOS
Thank you marblely! You've just received an upvote of 51% by artturtle!
Learn how I will upvote each and every one of your posts
Check out today's daily report detailing my current upvote power and how much I'm currently upvoting.
This bot is open source.
Clone it from github
Get help installing and running this bot
Thank you!
Posted using Partiko iOS
Congratulations @marblely! You have completed the following achievement on the Steem blockchain and have been rewarded with new badge(s) :
You can view your badges on your Steem Board and compare to others on the Steem Ranking
If you no longer want to receive notifications, reply to this comment with the word
STOPDo not miss the last post from @steemitboard:
Thank you!!
Posted using Partiko iOS