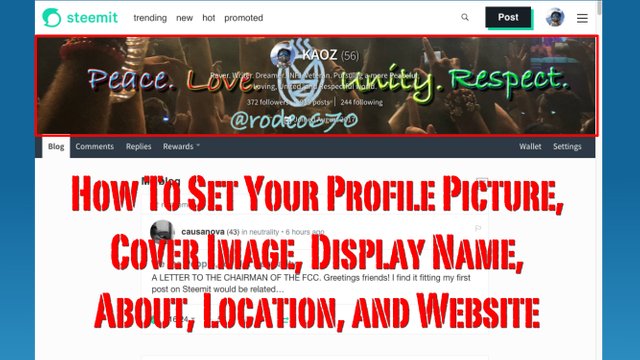
Steemit Tutorials - How To Set Your Profile Picture, Cover Image, Display Name, About, Location, and Website
"How do I set my profile picture? What about my cover photo? How do I edit my profile information?" These are the kinds of questions that I've been asked more and more often lately, since I started to bring more of my friends onto Steemit. As much as I love helping my friends out individually, on a one-on-one basis, this kind of information is clearly beneficial to all new users on Steemit, so I decided to make a tutorial for everyone.
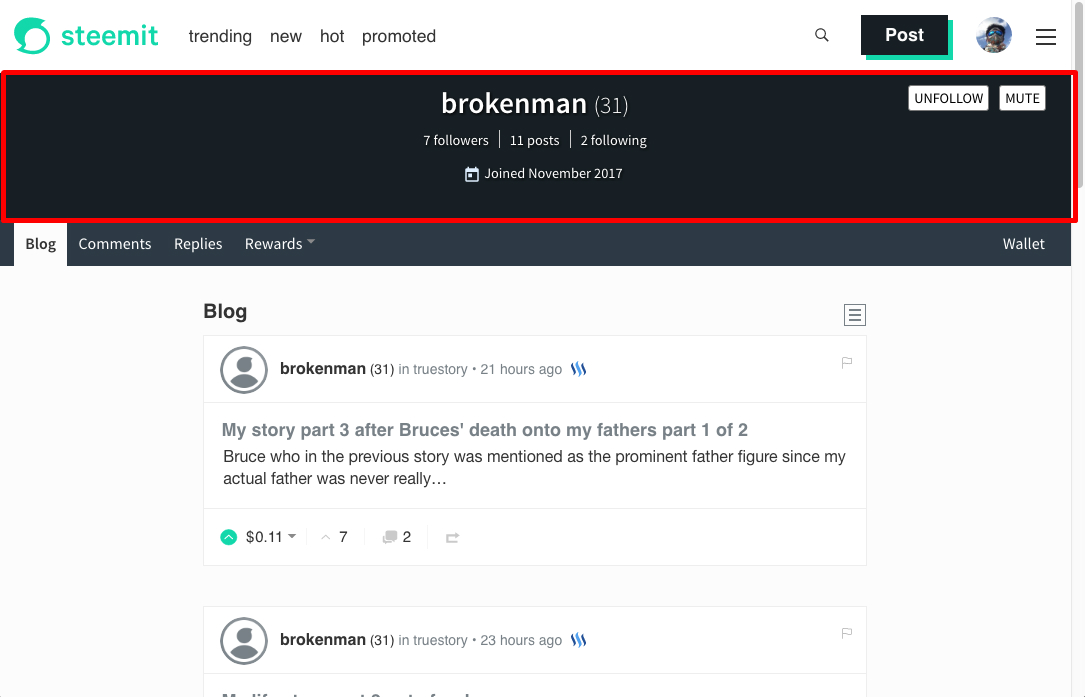
Once your account gets approved, your "header bar" will look empty, like the one seen in this image below. By default, it will only display your user name, the number of your followers, posts, and following, as well as the date you joined Steemit.
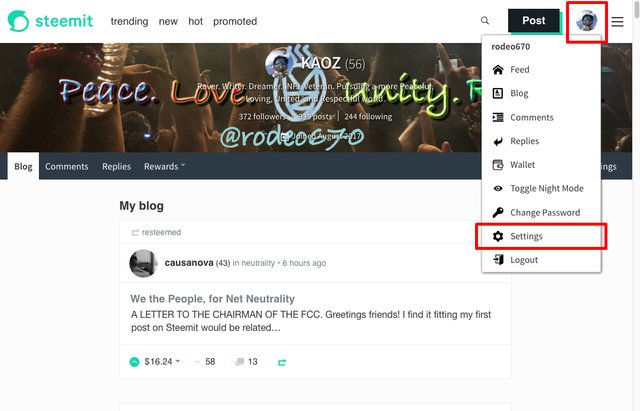
In order to change how your header bar appears, as well as what information is displayed, you'll have to click on the circle in the upper right-hand corner of your Steemit window, in between the three horizontal lines and the Post button. This will bring up the drop-down menu that you see below. Click on Settings to get started.
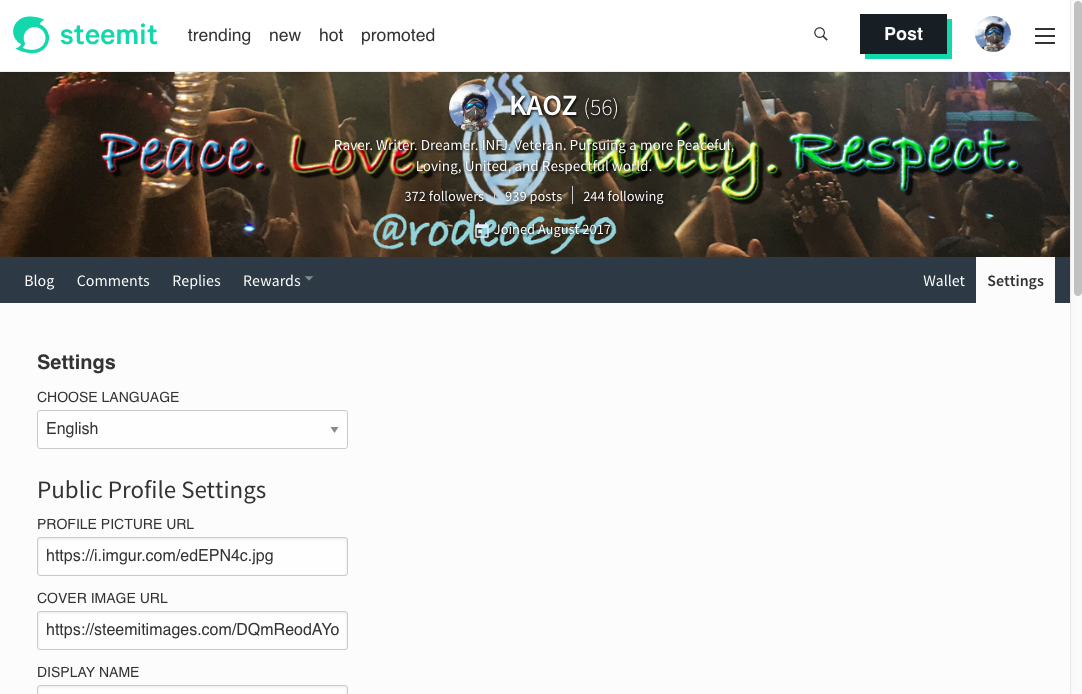
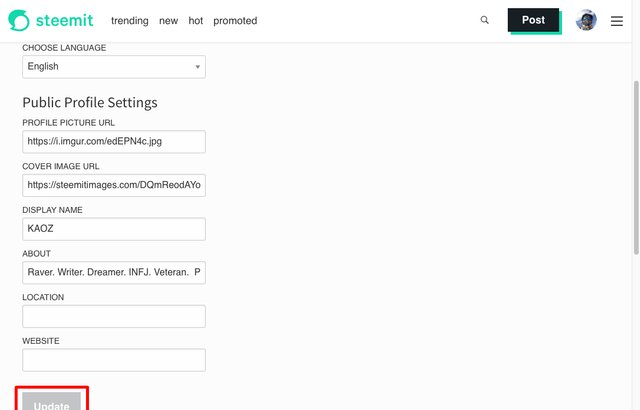
This will take you to the Settings page, which you see below. From here, you will have to paste the URLs to the images you would like to use for your Profile Picture and Cover Image in their respective boxes.
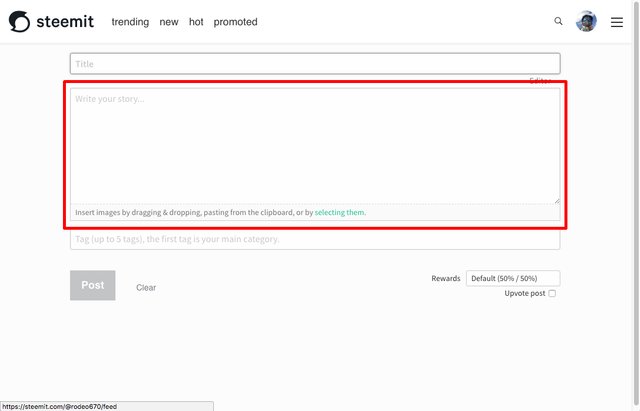
For quick image hosting, you can open a new Steemit window and click on the Post button to open up the Posting screen. From the posting screen, you will have to drag the images you would like to use for your profile picture and cover image into the main body text box seen below, highlighted with a red rectangle.
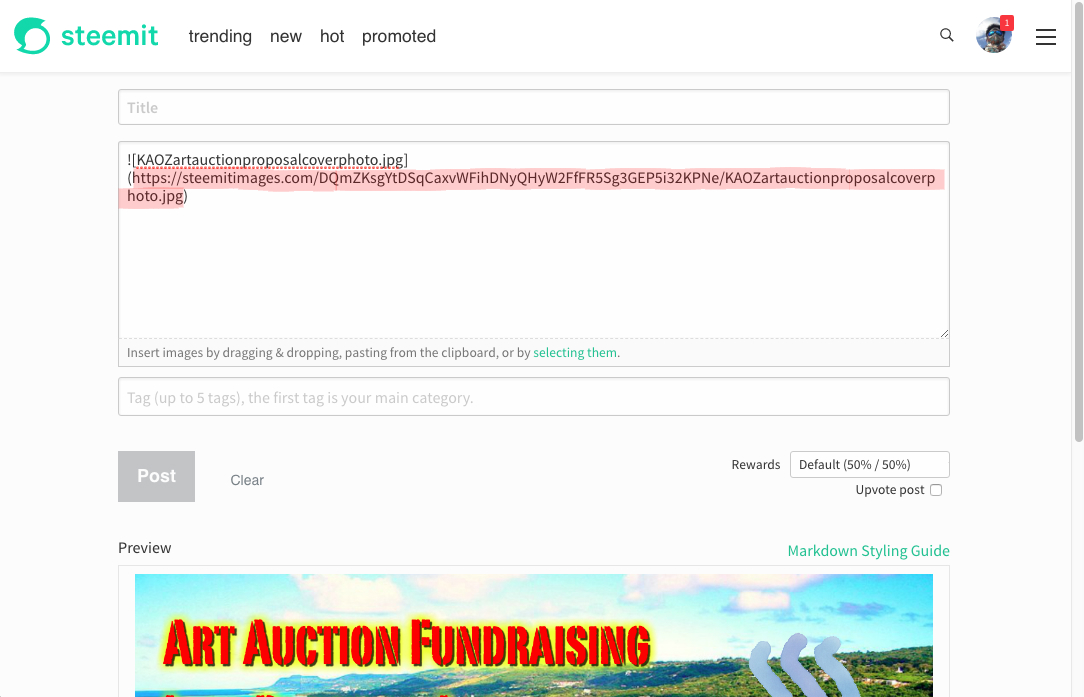
Links will pop up for those images, along with a preview of the images in the Preview section. In the image below, the part in brackets is simply the filename of the image you dropped into the window, and you can completely ignore that part. The part you'll want to highlight and copy is in the parentheses, as seen highlighted in red below.
Go back to the window with your Settings screen, and paste the link to the picture you want to use for your profile picture in the appropriate field, and then do the same with the link for the picture you want to use for your cover image. Once the URLs have been pasted, you can go back to the window with the new post, click on Clear, and exit out of that window.
Now you can proceed to updating the rest of your profile. You can change your display name, it doesn't have to be the same as your Steemit username. For example, my Steemit username is @rodeo670, but I have set my display name to KAOZ. Add some quick information about yourself in the About section, add your location if you would like people to know where you're from, and a link to your website or other main social media profile, if you have one.
When you finish, click on the Update button at the bottom to save the changes you've made to your profile.
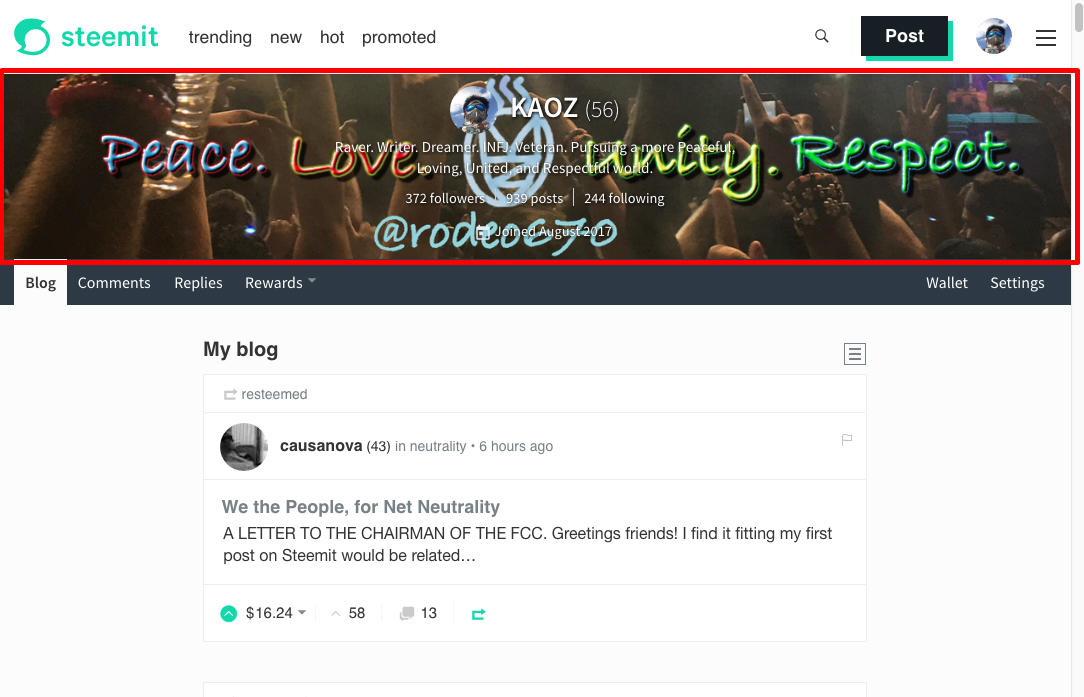
If you've followed these instructions, your profile header bar should now look something like the one you see below, populated with more information than just the number of followers, posts, and following, and you should see your profile picture and cover image.
I hope this has been a helpful tutorial for you all! Setting these things is really important, in my opinion, because it allows visitors to your profile a really quick glance at who you are and what you're all about. It's prime real estate on Steemit where you can let your creativity show and give other Steemians a taste of what to expect from your future posts.
Welcome to Steemit! I hope you have fun and enjoy being a part of this amazing community. To increase your chances of success on Steemit, come check out the @MinnowSupport Project on Discord! Click here to join us. Let's STEEM together!

Check out some of my other posts!
What You Need to Know About Telling Veterans "Thank You" on Veterans Day
The Tossed and Forgotten - An Ode to Our Veterans
How I Achieved 200 Followers in My First Month on Steemit
Why I Chose to Invest $100 in Steem
My First Week on Steemit
The Dawn of The Dancing Dreamers
The Dawn of Friendship In a New Age
I'm Just an Island Boy Living in Utah who Loves EDM

!steemitworldmap 40.754539 lat -111.902618 long Salt Lake City, Utah local Steemian! d3scr

Thank you for sharing good information on setting ones page...cheers!
Thank you for your upvote, I really appreciate it! :)
Beep! Beep! This humvee will be patrolling by and assisting new veterans, retirees, and military members here on Steem. @shadow3scalpel will help by upvoting posts from a list of members maintained by @chairborne and responding to any questions replied to this comment.
Congratulations, Your Post Has Been Added To The Steemit Worldmap!
Author link: http://steemitworldmap.com?author=rodeo670
Post link: http://steemitworldmap.com?post=steemit-tutorials-how-to-set-your-profile-picture-cover-image-display-name-about-location-and-website
Want to have your post on the map too?
Add the following inside your post:
!steemitworldmap xxx lat yyy long description d3scr
(replace xxx and yyy with latitude and longitude)
That's a great tutorial for new users! Thank you :D
I would add the recommended pixel size for the photos to get the best quality. Thank you for contributing to the new minnows out there!
Thank you, @paps! I plan on making a separate post soon to cover the proper dimensions for the photos. :)
This is a great post for newbies. Thanks for posting this.
Thank you, I'm so glad you liked it! Hopefully it helps a lot of new users. :)
I've always been confused about what the ideal size of a banner would be.
Hi @seablue! Sorry it took me a few days to respond to your comment. The size of the full banner image that I used for my cover image is 2480x275, however, from what I can tell, the only visible part of it, which you see on my profile now, is the center portion that measures out to 1451x275. I haven't tested a banner of that exact size yet, so I'm uncertain if such a banner of that size would still fit/display perfectly the way that you'd want it to. I'll probably test it out soon, but if you try it out before I get around to it and it works, please let me know! :)
Found more about dimensions here. I hope this is helpful and the right thing to do!
https://steemit.com/steemit/@foovler/best-size-for-steemit-cover-image
That's actually the post I found when I was setting up my profile as well, but the dimensions provided didn't quite work out for me, hence the tinkering I had to do for my cover image :P
Thanks for attending Pimp Your Post Thursday @rodeo670. I have written a post to share your featured post. Just stopping back to let you know that you can see your name in lights right here. (Just kidding about the lights :)
Woohoo!! Always a pleasure to be a part of the weekly PYPT experience. Like I said, "Come to pimp your post, stay for the conversations" :P
That's pretty clever, to get Steemit to host the profile and cover images! I linked images from my personal website, but your solution was more elegant.
Thank you! As you can see in the screenshot, my profile pic was hosted on imgur :P I used it before I figured out this nice little workaround, lol.
I just read your article. It's very informative. I've been a member of Steemit for two and a half years, and I haven't selected a display name until today. I was thinking about using the display name "Starship Captain," but it sounded too weird and I'm not really a fan of Gene Roddenberry; so I decided on "Spaceship Captain." Anyhow, I gave your article an upvote. :-)
This post has received a 18.81 % upvote from @aksdwi thanks to: @rodeo670.