Puppet Making, Part 2: Forming Bean's Mouth (Mommy Monday)

This was previously posted on a blog of mine back in 2012. I created this puppet due to a silly "cartoon monkey voice" that I had finally revealed to my kids. My girls and I wanted to create a puppet show with this new monkey... so that's what we did. This was step two. The mouth taking a little more work because, well, the mouth is pretty freaking important in the grand scheme of being a puppet :)

You can find the previous post about Step One: Making the head/skull & body/belly HERE
Wow, was this hit and miss! Looking at it, it looked super simple, easy to understand. I hadn't bought foam core board, because we ALWAYS have foam core board sitting around.
Which, of course, meant that THIS time we didn't have any.
Oh well, I am a genius at making something out of nothing, breaking the rules, working around an issue. I knew that I had this down.

I was wrong.

Huh. Definite Fail.

I decide to just give up and use regular cardboard glued together to the correct width, because yes, I am that bad about NOT wanting to drive to town for yet ANOTHER thing.

Then, after these long hours (or minutes, I guess) my daughter Paris @loliboofae finally finds the foam core board that I KNEW we had.
At least I was right about something???
Those puppet making pros know what they're talking about. There was a definite reason that they say to use foam core board. Yes, I could have made the toehr stuff work, but first off, this was SO easy. And secondly, the foam core board would hold up SO much better with a puppet that will get a lot of use!
Cut out two half circles, stack them and use duct tape to tape along the straight edge.

Unfold, making sure the tape sticks to the sides and goes down into the groove, like so:

Then you add the reticulated foam around the outside. This gives you foam that is useful for pinning things to later, once its covered with fur/fabric.

Now we're ready for more hot glue (again, hot glue is hot, and sticks to acrylic nails like you wouldn't believe! Don't get it on your fingers OR your nails:) Squeeze hot glue in between the foam core and the reticulated foam.

Do this from both sides, and use plenty of glue. You have to get it covered thoroughly because the last thing you want is your puppet core falling apart after its all covered with fur/fabric.
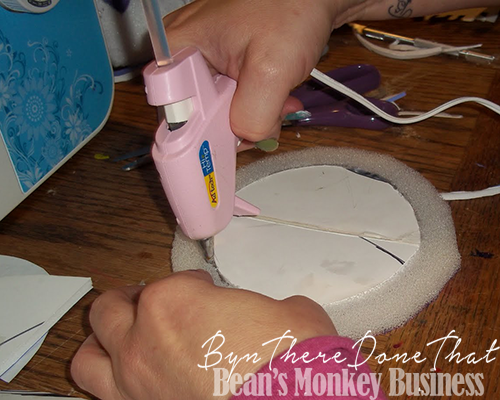
Now bend your mouth at the hinge and put hot glue on the TOP reticulated foam ONLY:

Then, if you're like me, you let that sit to dry while you go chill in a bubble bath for a while, bribing the kids to be quiet/content by letting them have popcorn if they promise to go watch a movie and be quiet :)

The skull (with the seam in the middle lined up with the middle of the top 'lip') is hot glued to the mouth plate.

Next Week: Part 3, Creating the Puppet "Skin"


Join us @steemitbloggers
Animation By @zord189

art and flair courtesy of @PegasusPhysics

Click the icons to read some of my other posts!
Storytime Saturday: Psychological Thriller

Sunday Funnies: Letters from a Boat Cat
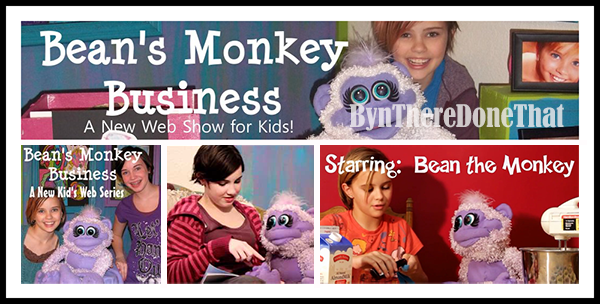
Mommy Monday: Puppet Making Series, Part One

Try Something NEW Tuesday: Learning the Ukulele

Weightloss Wednesday: ONE YEAR!!! Progress and Meal Plans

Therapy Thursday: My Bucket List (Dreams and Life)

Friday Favorites: Posts That Caught My Eye this Week


Ah the joys of using what you have on hand! Sometimes it works well....other times it's "lesson learned" I love watching your little Bean come together. Looking forward to your next steps! Thanks for sharing.
So true! It was worth a try, but in hindsight I am REALLY glad I didn't stick with the cardboard. In all of Bean's interaction with kids, he always had little hands in his mouth. I think cardboard would have just wilted almost immediately!
Thanks for the support!
wow! you are very creative miss byn , we love your work ❤️❤️❤️
Thank you so much! I hope to keep posting about this whole process every Monday until I get to post the actual videos of "Bean" in action!
Wow, funny AND super artistic. You go girl. :-)
Thank you! My real... um, scattered self tends to bleed through in my "how to" posts :) I'm glad it's entertaining. Thanks for the comment.
You're welcome. Seeing the puppet in the making is pretty cool.
Sometimes during the process, trial and error part is the most fun part!
Can't wait to see the next one.
That is so SO true, especially for me, since I'm almost always missing something or forgetting something! I'm glad I can still have fun with it, though.
If you're not feeling frustrated, means you are on the right path.
Keep enjoying yourself!
this is really cool, looking forward to seeing it all come together.
Thank you! It is an awesome process to go through from start to finish. Bringing that character to life after him being 'just' a voice in my head for decades was quite magical!
OOh this looks so fun and creative!! Can't wait to see the next parts :)
It was SO much fun to bring this character to "life"! I hope to keep posting about this whole process every Monday until I get to post the actual videos of "Bean" in action!
Looking forward to it!!! :)
Very good, you are really creative 👍
I HATE having to drive to the store for things! I'm totally with you there! My aunt is building a giant doll house right now. I told her she should make a puppet like yours next!
Right? I can be such a hermit. Once my last child learns to drive, I may only leave the house once a month... if that! :) Thanks for stopping by and YES, she totally should make a puppet. It makes for an amazing adventure!
Hello @byn, thank you for sharing this creative work! If you're interested, take a look at our magazine @creativecrypto. We are all about art on the blockchain, and learning from creatives like you. Swing by and say hello!
Thank you! I will come check it out :)
Pretty cool! I have never been creative when it comes to anything sewing, knitting, etc and this is just such a great post.
I feel like I'm ONLY creative. When it comes to anything else, I'm just incompetent. Unfortunately being creative doesn't always help with the whole adulting and responsibilities! :) I appreciate your support!