

So Fresh and So Clean
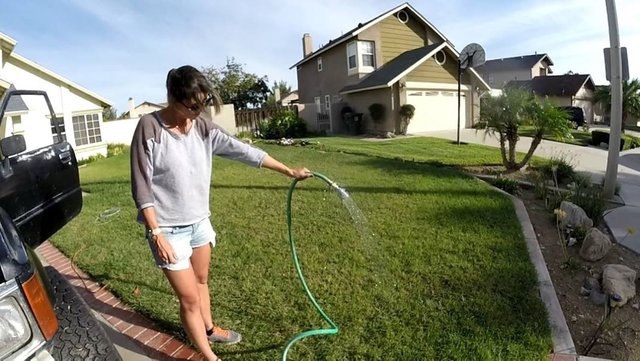
How are all of you Steemians out there? Have you ever been camping near your car out somewhere and not been near a shower? Ever take "wetnap showers" and find them not satisfying? I can attest to the fact that a shower while camping is one of the best feelings in the world. That fresh feeling in the wild is unmatched. I set out to build a proof of concept on the idea. There were several builds on the internet, pretty much all of which were professional and used a heating coil or exchanger. All designs rely on flowing radiator coolant to heat the water for the shower. I was not about to spend money on these devices as they were costly and my engine bay was a mess of a rats nest at that point anyway.
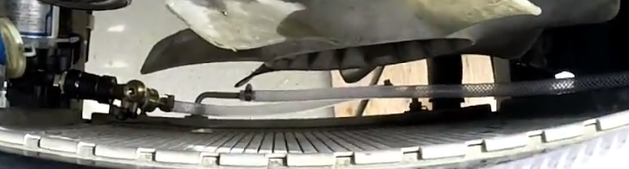
What I did notice were two unused lines on my radiator. This radiator was a universal radiator for a Toyota 4runner and what I soon learned was the unused lines were for models with an automatic transmission. I never knew before this point that the vehicle radiator actually cooled the transmission fluid and these ports were for the transmission lines. My 4Runner was a manual transmission so I figured these lines would work perfect for heating water.
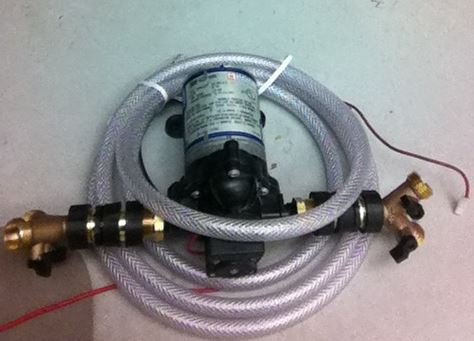
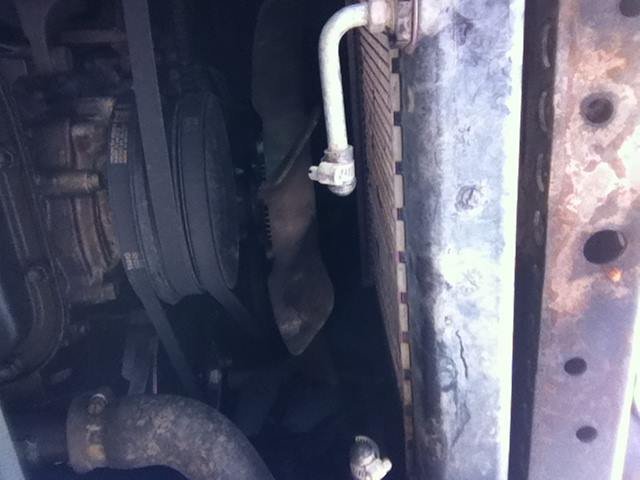 Some systems researched included a hose pulling from a water source, others had tanks to store the water. A pump is needed to circulate the water and shower. I set out to design a system that would work for my vehicle. The design below is what I came up with. My design was set to be as cheap as possible and still allow for a functioning shower. The pump on my windshield washer went out and the tank was a suitable holding tank for the circulating hot water. A radiator is considered "cool" at 180 Fahrenheit and starting to overheat at 220 Fahrenheit. That is very hot water so the holding tank doesnt need to be that large as long as the water is diluted with cold water from the source.
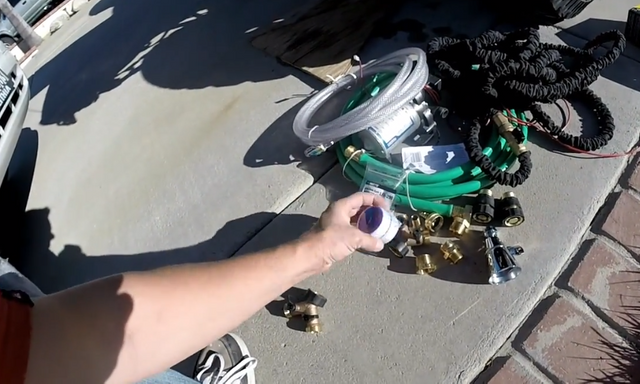
I sourced pumps for the job and a company by the name of SHURFLO designs 12 volt pumps for use in RV's. These pumps are pretty durable and can dry prime without damage to the pump. I looked up flow rate and it seems a low flow shower pumps at about 3 gallons per minute, so that was my benchmark. I also sourced the other parts needed and most can be found at your local hardware shop. The list is as follows:
Parts:
- Shurflo 2.8gpm pump
- (2) Garden hoses 15ft
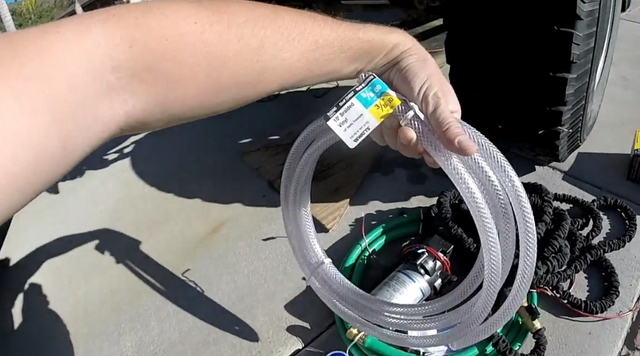
- 10ft Vynle tubing 3/8 ID
- (2) 3/4 in x 1/2 in Brass MIP x FIP Hex bushing
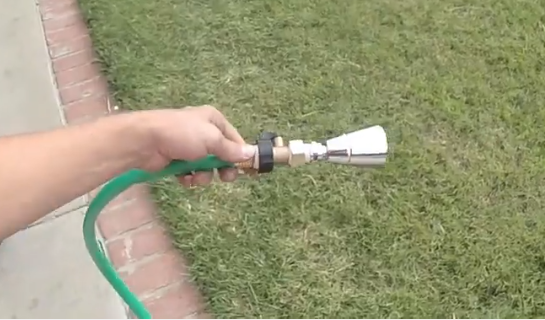
- (2) Garden Hose Y splitters, Brass
- A switch to turn on the pump
- Shower Head, Brass
- (2) 3/4 in x 3/4 in Brass Barb x MGH adapter
- Brass garden hose valve
- (2) Garden hose quick dissconnects, Brass
- (2) 3/8 ID brass Hose Barb splicer
- 3/4 in x 1/2 in MIP x FGH adapter, brass
PARTS LATER ADDED (not pictured)
- (2) 3/4 in brass garden hose caps
- Small Coverage Bubbler (soaker ball)
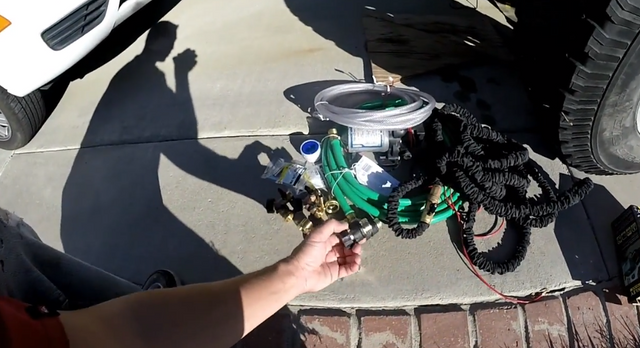
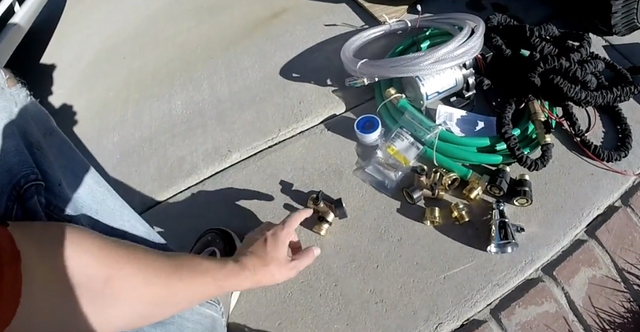
I purchased the parts and began to build. The pictures below show an accordion style hose, but that hose was acquired second hand and was inoperable. I later used the same style garden hose as the one that pulls from the source.
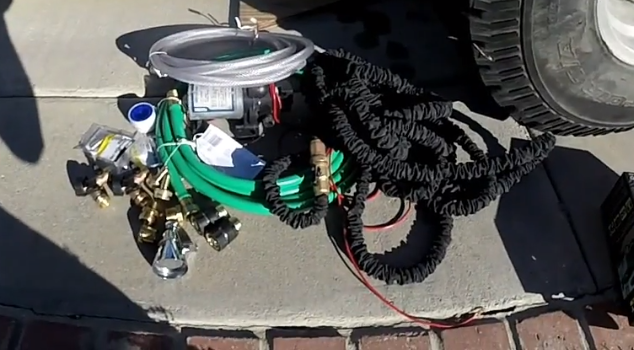
Mostly all the parts are designed for garden hoses but I purchased brass for the high temperature. I purchased quick disconnects so that the system could be disengaged and drained while driving.
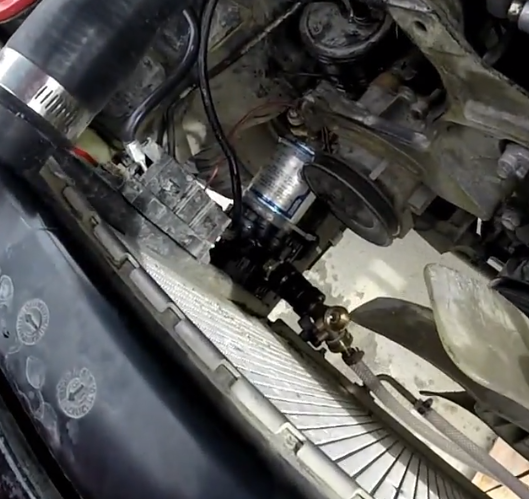
The garden hose Y splitters would regulate the flow from the source, circulate to the maximum temp, then out the other end. These were ideal for having both a splitter and ball valves in one item. Inflow and outflow could be closed to circulate and mixing of hot and cold could be achieved with these valves.
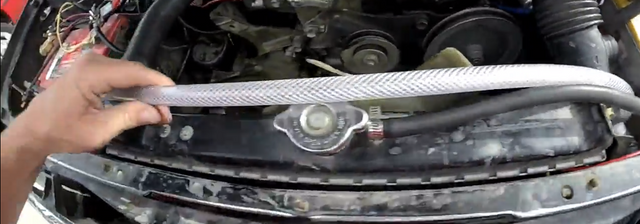
Braided vynle tubing was used to circulate the water from the tank to the radiator. This type of tubing is more robust than regular vynle tubing so I felt it ideal. 3/8th inch was the standard Inner Diameter chosen for this job and was a perfect fit for the radiator lines. The other ends were attached to the 3/4 in x 3/4 in Brass Barb x MGH adapters on the Y fittings with hose clamps to keep them from leaking.
And as for any water job, thread sealer is used to make sure no leaks are present. Make sure to get very good thread sealer as cheap stuff is stringy and falls apart easily.
The shurflo pump had smaller fittings than a standard hose so adapters were used. The 3/4 in x 1/2 in Brass MIP x FIP Hex bushings were used to adapt the pump to hoses. Thread sealer was used on all threads making sure to wind the sealer in the same direction as one would tighten the fitting. That way the sealer does not clump or bind up.
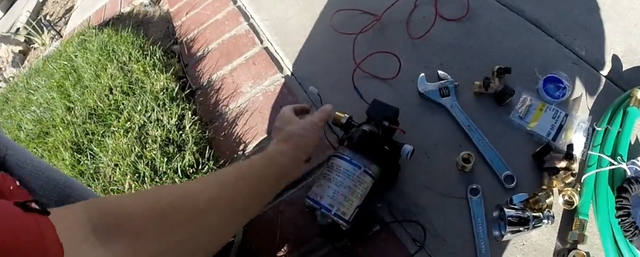
The quick disconnects were then added
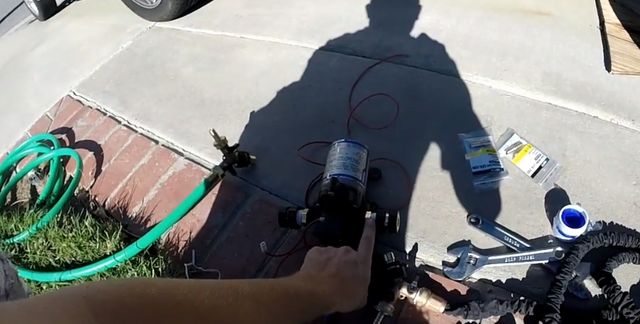
I had assembled the unit earlier without tightening everything down for visual concept.
The cheapest brass shower head I could purchase was one with two flow types. The lever on top is not a valve but a flow type adjuster. Like the pump, the shower head needed an adapter to the hose. This is where the 3/4 in x 1/2 in MIP x FGH adapter came in.
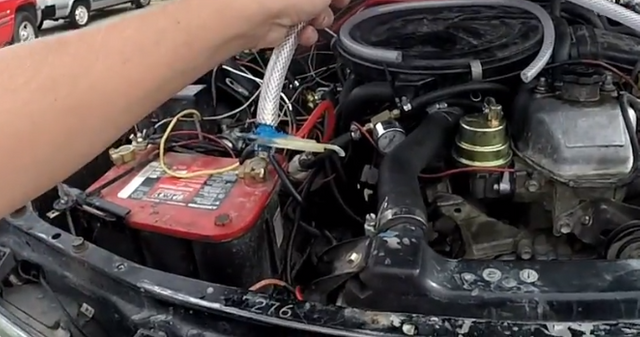
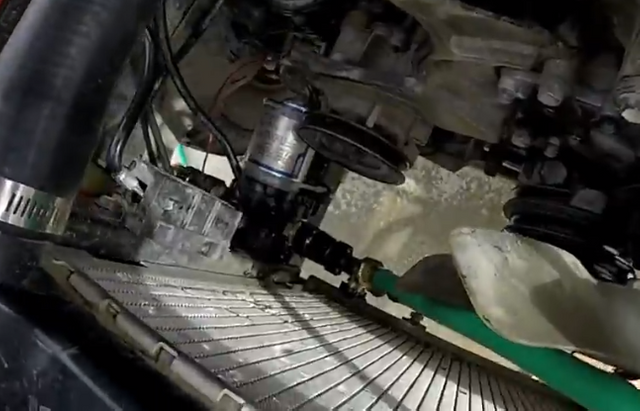
The pump would be situated on the frame rail but before I could put it where it was needed, the carbon filter for the EVAP system needed to be slightly relocated. Everything worked out in the end.
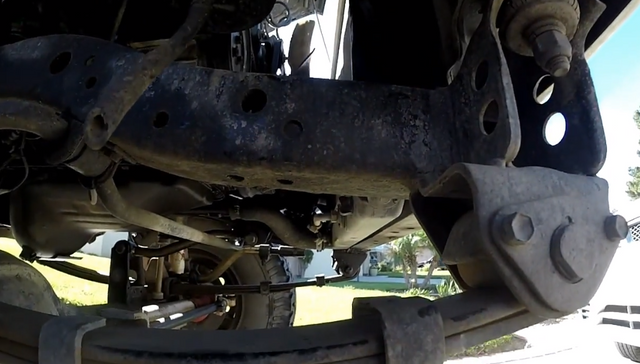
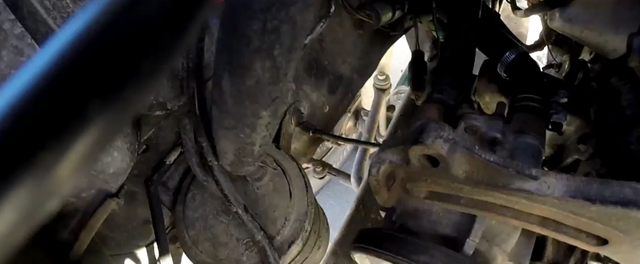
The vynle tubing was routed to where it would not contact the engine fan. Hose clamps attached the tubing to the outlets.

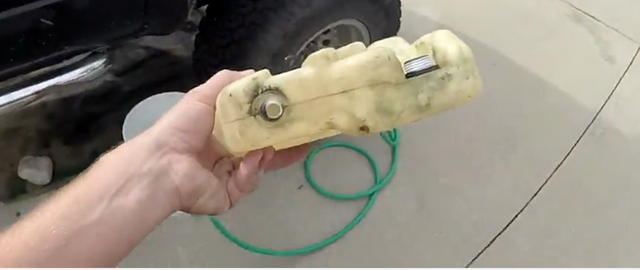
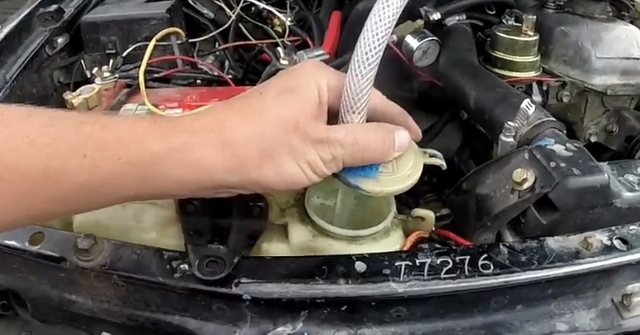
I went on to modify the small washer fluid container. The pump was bad so I plugged it with a hose plug I had (not a part of parts list). It was a plug I had laying around that had the same thread pitch.
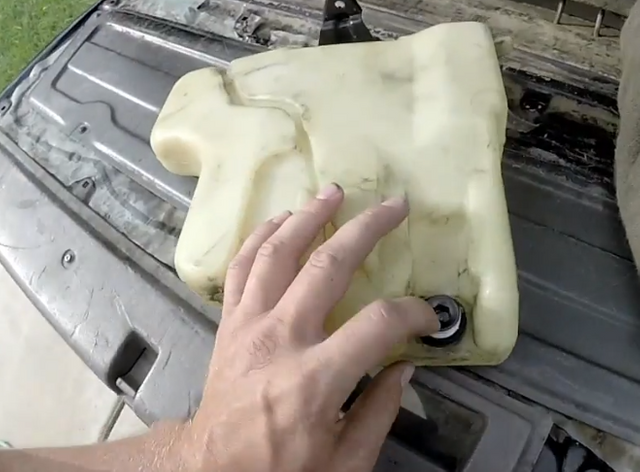
I chose to have the water flow through the top so that the internal filter on the washer fluid container could be utilized. This would keep small particulates out of the wash water.

I drilled a hole through the top of the lid and stuck a 3/4 in x 3/4 in Brass Barb x MGH adapter through it. I sealed it with blue high temp RTV sealant.
The bottom of the washer fluid tank had a type of "nipple" that I felt would be perfect to feed the water down through. I drilled the bottom out and inserted the other 3/4 in x 3/4 in Brass Barb x MGH adapter in it. The nipple had a very odd resting place that made it ideal to run a hose to through the frame.
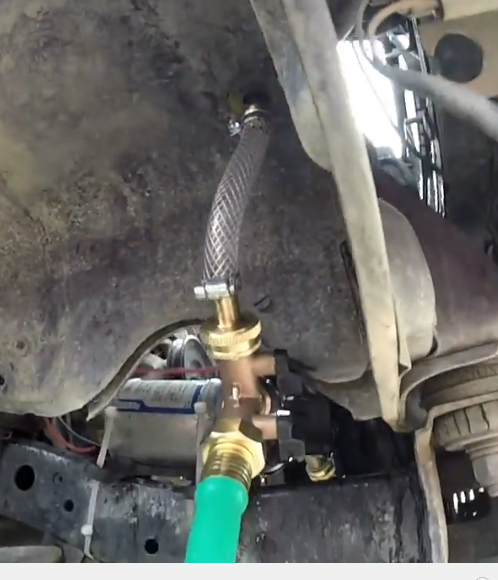
The pump was secured to the frame rail by heavy duty tie downs through the rubber mounts that were on the pump.
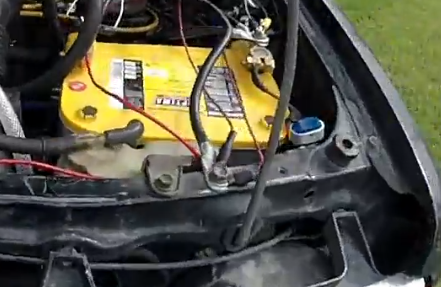
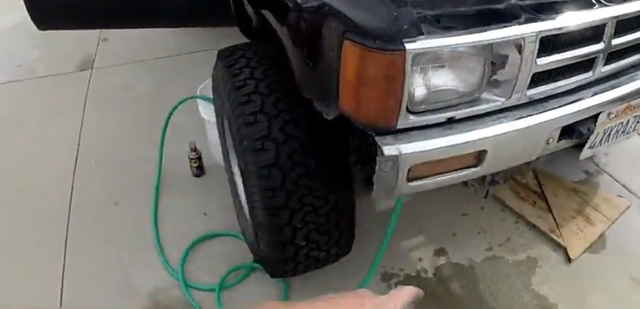
A switch was installed in line to the pump.
The tank and circulation system needed to be filled before the hot water was produced. I recommend that the vehicle runs through this so that the water is piping hot
A valve was added just before the shower head so that water doesn't simply flow out. The shower head needed to be adapted to fit the garden hose using the 3/4 in x 1/2 in MIP x FGH adapter.
The other end of the hose goes to the Y brass fitting on the output side of the pump. The valves on the brass fittings are used to direct the flow of water from the source, circulate and then direct it out to the shower head.
Both hoses purchased were the cheapest at the local hardware store so they both are only 15 foot. The pump will most likely pull through a 50 foot hose if the water source is not to much lower than the vehicle.
@beckymeep was happy to see this proof of concept actually working and was excited at the idea of feeling warm water on a camping trip.
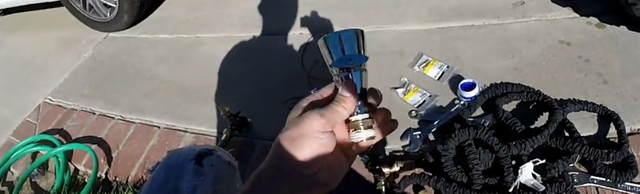
I later added a few products that improved the system. What is known as a "soaker ball" was added to the input end of the hose. I read about this product on forums about the subject and it prevents debris from getting sucked up the hose. Other people used socks or such material but this item had high reviews. I dont have a picture of it but the item below is exactly what I ordered.
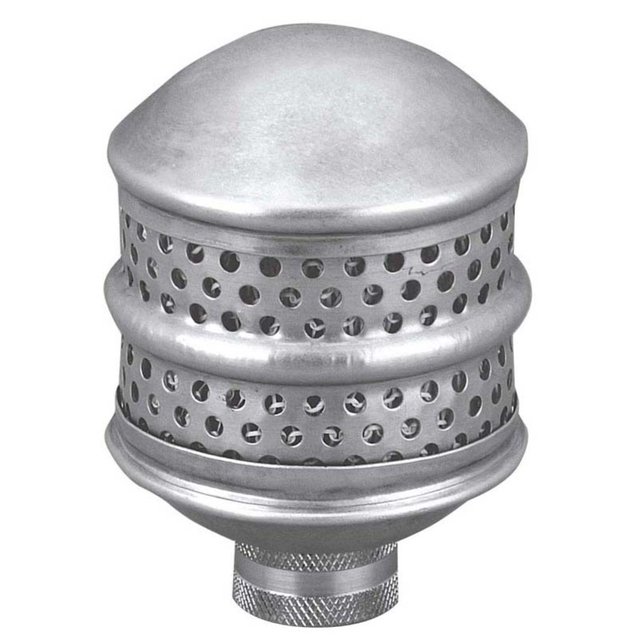
Gilmour 315MTL Small Coverage Bubbler, Walmart
Flaws
The quick disconnects do leak, I opted to remove them and have since added (2) 3/4 in brass garden hose caps to the pump to keep dirt and debris from blowing into it when not in use. The system works flawless aside from the tank capacity. Having a larger tank located somewhere on the vehicle would remedy this situation and I might add this later. Its recommended that you have a 5 gallon tank to hold JUST the hot water. Depending on the ratio you mix, this can be spread out to a nice shower. I took the temperature of the water in the tank after circulating for 5 minutes and it was a piping hot 175 degrees Fahrenheit. Your average shower at a very hot temperature is around 105- 109 degrees Fahrenheit so the water is scalding if not mixed. If you decide to design your own system I would add a digital temperature gauge somewhere not in the way to give reference and let you know when the water is fully heated. Also the cap on the tank in my design needs to be removed to close the hood, but doesn't cause issues when disconnected, it just gets tucked away until I'm ready to use it.
Id like to share the video that really got myself motivated on building a shower on my vehicle. The one in this video is tricked out and professional and it will give you an idea of how nice they can get.


That is amazing. Thanks for sharing that!
Thanks @Kunschj!
Hi csusbgeochem1,
Visit curiesteem.com or join the Curie Discord community to learn more.
Thank you @curie!! Much appreciated!
Hai friend @csusbgeochem1, i say that excellence experiment, maybe not yet everyone know about this, thank you for sharing.
Your very welcome! I'm glad it worked in the end. Thank you for the comment.
My pleasure friend..
Posted using Partiko Android
Congratulations @csusbgeochem1! You have completed the following achievement on the Steem blockchain and have been rewarded with new badge(s) :
Click here to view your Board of Honor
If you no longer want to receive notifications, reply to this comment with the word
STOPDo not miss the last post from @steemitboard:
Thank you so much for being part of the #socalsteemit community.
Awesome, thank you!
Wow that is cool. For sure that would turn some heads.
Its also useful for washing mud off as well. Thanks for the comment!
A car with a shower hahaha, I loved the idea, so it's more comfortable to camp. Thank you for sharing your way of installing a shower, it is innovative and less expensive than those shown on the internet.
Your very welcome! A lot of people get confused and ask if the water will be contaminated by antifreeze. The radiator compartmentalizes both the coolant and trans fluid so the water never touches the coolant.
Great, my dad works with refrigeration and I know a little about the subject.
I really like how extensive you detailed the whole process. That would certainly make a good guide for anyone attempting to recreate this shower system.
Congratulations for your curie vote =).
Thank you! While building it I honestly didn't expect it to work. Other systems use a heat exchanger but I had no room on my truck for one so I improvised. Im very grateful the Curie community finds my content interesting.
This post has been voted on by the SteemSTEM curation team and voting trail.
If you appreciate the work we are doing then consider voting us for witness by selecting stem.witness!
For additional information please join us on the SteemSTEM discord and to get to know the rest of the community!
Thank you @steemstem! I do my best to make sure my engineering content falls within your boundaries.
Howdy there csusbgeochem1! This is a remarkable engineering job! So innovative, did you think of this yourself and had to design the system? You must be a mechanic or an engineer in the real world I assume? Because I think this is amazing. This is a great post with super well done photos and descriptions!
Thank you very much for your kind words! I have a degree in Biochemistry but have been out of a lab for a few years. Mechanical and electrical engineering were more of a hobby of mine as Im an avid offroader and overlander. The concept of the system came from online, but my vehicle could not fit a large home built heat exchanger nor could I afford plated heat exchangers sold on the market. While figuring out the spacing for the pump I realized those lines on the radiator were unused, and researched what they went to. Everything after that was my own design. So anyone with a manual transmission can purchase one of these aftermarket radiators with these ports simply plugged and do the same thing I did without purchasing an expensive heat exchanger.
howdy again sir cusubgeochem1! I see, well it's a remarkable ability to be able to design and adapt that system, or to someone who isn't mechanically inclined it would appear impossible! lol. Keep up the good work and thanks so much for getting back to me!
Your very welcome sir!