SIZ Tutorials #3 || Functions of Tools on Source Monitor - Mark,Cut,Drag,Insert,Overwrite [Adobe Premiere Pro CC 2019]
& 10% to @siz-official
Tutorial: Functions of Tools on Source Monitor
Software: Adobe Premiere Pro CC 2019
Website: https://www.adobe.com/products/premiere.html
Premiere Pro is a popular video editing software by Adobe that works on Windows and Apple computers. Premiere Pro is a non-destructive editing software, nothing you do in this program can change or overwrite your media files.
This software is also a good choice for those of you who want to learn to edit videos professionally, because many video editors use Adobe Premiere Pro.

Let's Start Tutorial
Functions of Tools on Source Monitor
Okay guys, our discussion will understand the function of the tools in the Adobe Premiere Pro Panel. In my opinion, Source Monitor is very useful, basically everything is useful, as long as we want to explore it ourselves.
Well, my previous post was about the importance of recognizing the interface in Adobe Premiere Pro. In that discussion I mentioned about Source Monitor, please read it there.
In short, the use of Source Monitor is where a process of selecting a clip or a video, which we will enter into the Editing Timeline, in order to facilitate our performance when editing a video. Let's go straight to our core discussion is about:
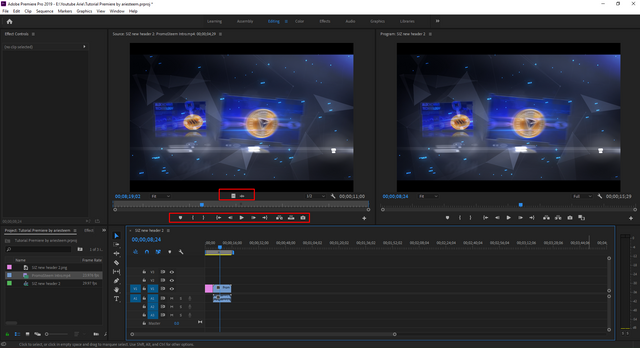
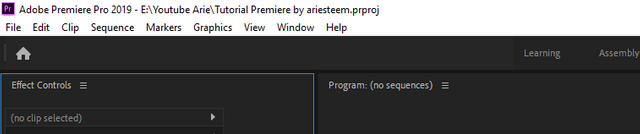
Okay, first change the Workspace in Adobe Premiere to Editing. We can see here, at the bottom, a lot of tools available on Sorce Monitor. We will discuss slowly & each of its uses.

1. Marker Tools
From the name, we already know, Marker Tools or giving a mark on the video section. I rarely use this tool, because the editing timeline already provides Marker Tools. The photo below is an example of giving markers and when importing to the editing timeline.
2. Mark In & Out
Mark In and Out is very helpful, usually we directly import video into our timeline editing sequence, right? without having to select which part we want to import into the editing timeline and cut or cut in the editing timeline.
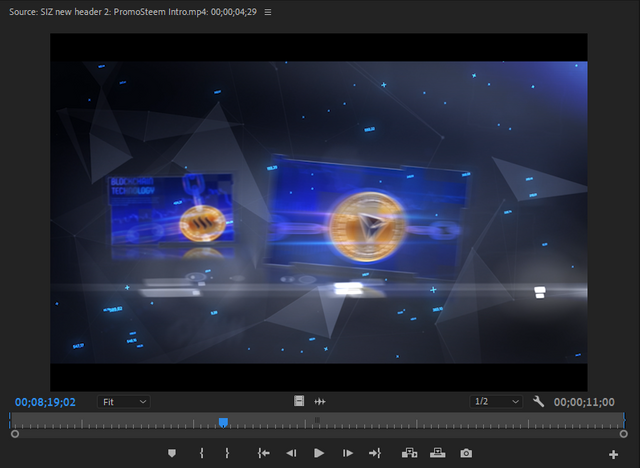
By using Mark I / O we can cut directly which part we want to enter into the editing timeline. Example images are below.
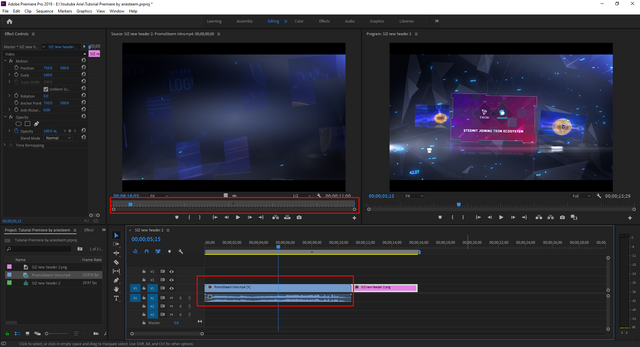
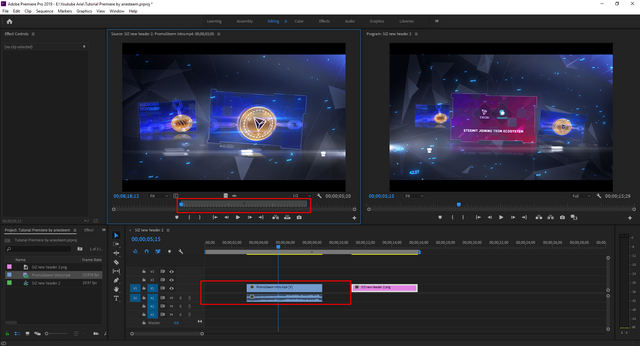
Okay, the first photo, I don't use Mark in and out, just import it to the editing timeline without having to sort the video. And the second picture, I did the marking in and out which I will import into the editing timeline, here we can see, the length of the duration is very different. This means that we minimize or shorten the video that we want to import into the editing timeline.
3. Drag Only Video/Audio
Drag Only Video and Audio I use when I want to import one into my sequence editing timeline. And here we can import according to each other's wishes, for example I want only Video, so I just Drag and Drop Video images to the Editing Timeline. Examples are below.
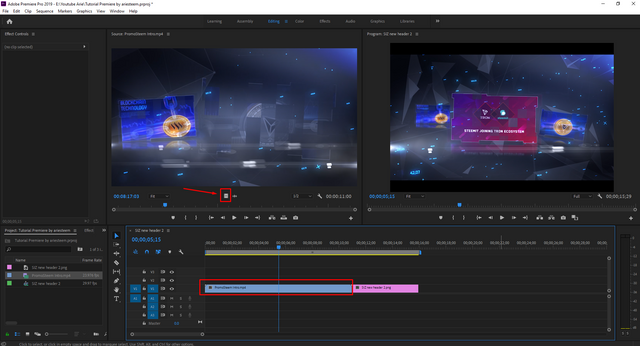
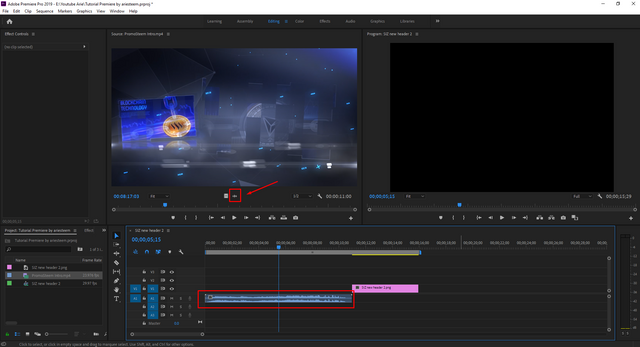
From the picture above, we can import it into our editing timeline as we like, if we only need video, just import the video, if we want to import audio, just take the audio. I usually use this trick when I want to take a scene where there is a conversation.
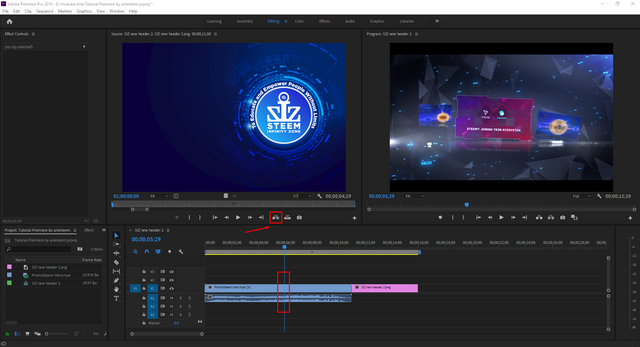
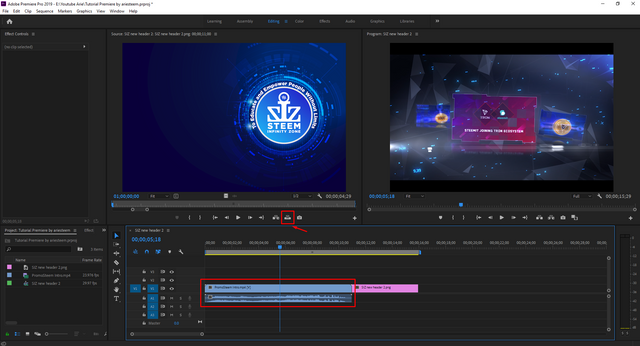
4.Insert & Overwrite
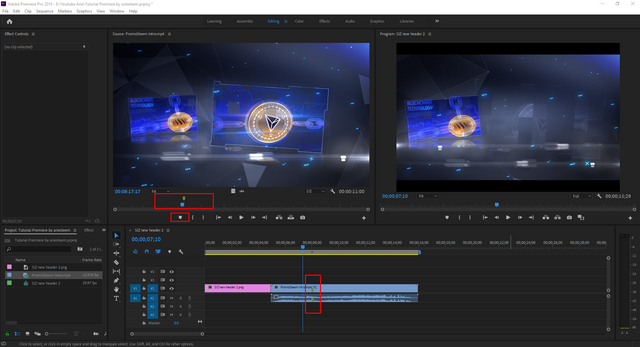
Insert and Overwrite is the same as importing video or audio, but it has a different point and placement when importing a file. For example, we have to place a rule or blue ruler in our Video Editing Timeline, just check the photo below.
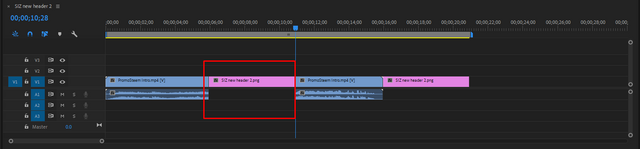
When we use an insert, and I set the blue rule right in the middle of the file and I click the Insert tool, there will be a cut in a video. However, the video that was cut at the back is still intact, it's just like a jump cut.
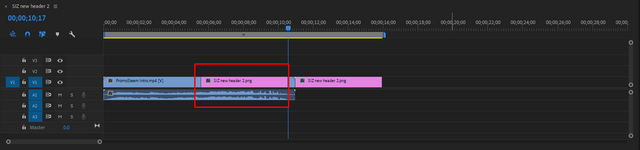
And when I overwrite the previous clip, the existing clip is lost, or overwritten with a new click. Each tool has a difference when importing files.
Tutorial Complete
Tutorial Material
| Tutorial | Status |
|---|---|
| How To Start Project & Create Sequence | Post Link |
| What Is Interface Workspace & And Functions | Post Link |
| Functions of Tools on Source Monitor | ✔️ |
| ? | Next Post |
| ? | Next Post |
| ? | Next Post |
| ? | Next Post |
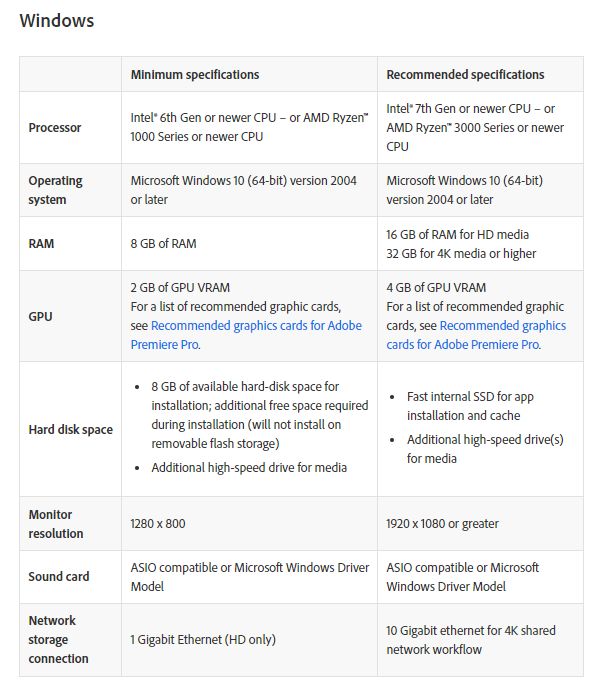
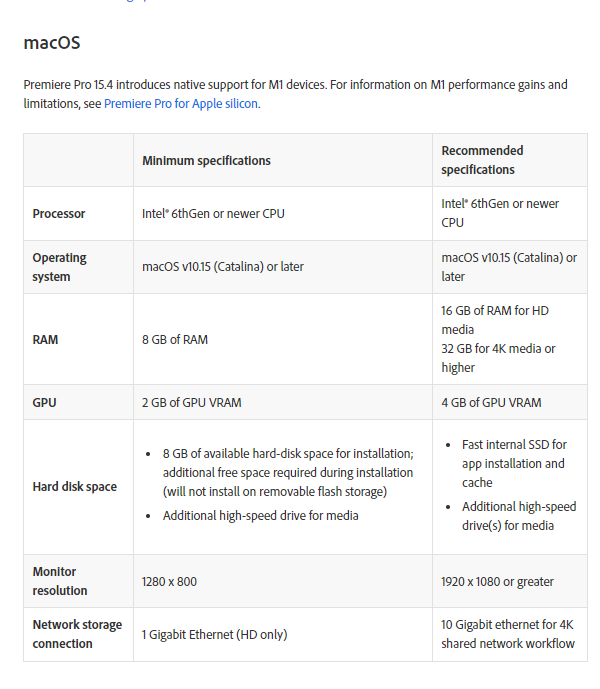
System requirements for Premiere Pro
tutorial premiere by ariesteem.prprojAuthor Post & Image
@arie.steem
& 10% to @siz-official
@steemcurator01, @stephenkendal, @steemchiller, @cryptokraze
Author : @arie.steem
Contact Discord : arie.steem#4626
Twitter : https://twitter.com/ariesteem

Please approve my application
https://steemit.com/hive-181430/@steemitlaptop/application-for-siz-demand-driven-course-by-or-or-steemitlaptop-or-or
Good one tutorial dear sir you are doing a great work on this wonderful platform. I really appreciate your work because your tutorials is very good and wonderful.
My best wishes for you.
Regards, Faran
thank you faran
Thanks u so [email protected] for sharing such a valuable lecture with us.it will help us to learn graphics.