👨💻 10011 Coding In The Community - Let's Go Again
Ever since the birth of my 2nd child, my memory has started to fail me. Whether it's overtiredness or simply the fact that I'm getting older, I've started to forget a lot of things - some of them quite important.
Sometimes, this is great... I'd watch a film and well over half way through, I'd get the sense that I'd seen it before. Look it up on IMDB and yep... I'd given it 7/10. Other times, not so great... I asked a good friend... "won't that interfere with your dialysis?"... his reply... "I had a transplant last year!" Of course, I remember. And I suspect that his new nickname for me - gorillaGPT is probably apt (for those that don't get it... I haven't been updated since September 2021).
Anyway, until I opened the editor to write this post, I'd forgotten that I'd written this just over 2 years ago...
I won't be installing condenser ever again. Ever. No matter what the project. So I won't be working with the Steemit codebase in its current form. There are without doubt people who will be able to work with this but I'm certainly not one of them.
Good old memory. I remember finding things difficult... but having reinstalled GitHub and Docker today and got them both working perfectly on my localhost without any hassle, those sentiments seem somewhat overdramatic to me. It probably helped that I learnt a little bit about Docker before starting out and saying that I'd "installed condenser" seems inaccurate too.
This post then, is a brief summary of how I got it set up so quickly and my thought process behind wanting to go again... good luck sticking with me... it might be interesting, it might not be. I'll try to keep the tech talk to a minimum.
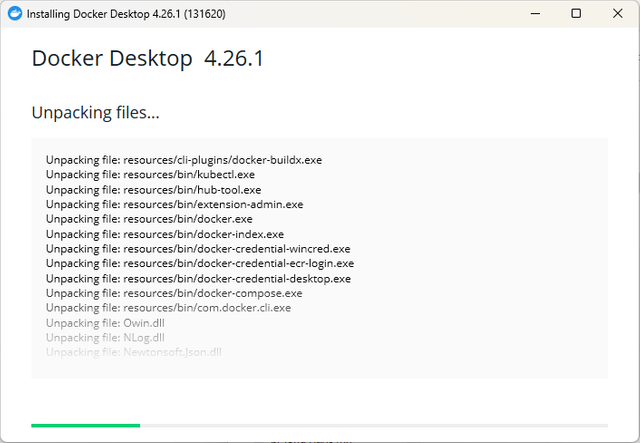
Step 1: Installing Docker
This was the first stage to running Steemit on my localhost ("Hey! You said no tech talk!"). Localhost is just a techy way of saying that I'm running it on my computer under the URL: "localhost".
Installation was a piece of piss - I downloaded the Windows version from here (https://docs.docker.com/desktop/install/windows-install/) and that was stage 1 complete.

Step 2: Downloading Steem/condenser
This also proved to be incredibly easy. No need for any command line instructions - type "steem" in the search bar at the top and BAM! A list of GitHub repositories for Steem.
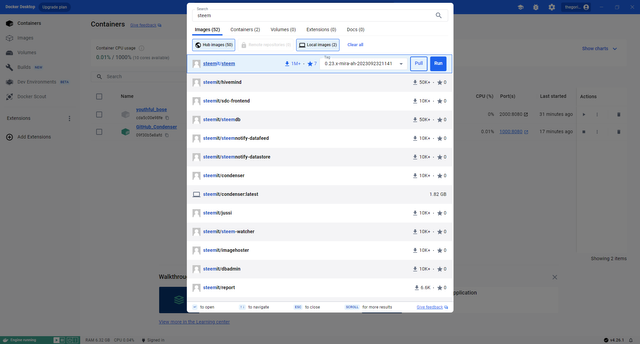
I knew that I wanted "condenser" so I clicked "Run" (which automatically did a "Pull" (i.e. download)) and away we go.
By default, this would run on the URL "localhost:8080" which didn't work. So I changed the port to 2000 and tried again... which worked a treat.
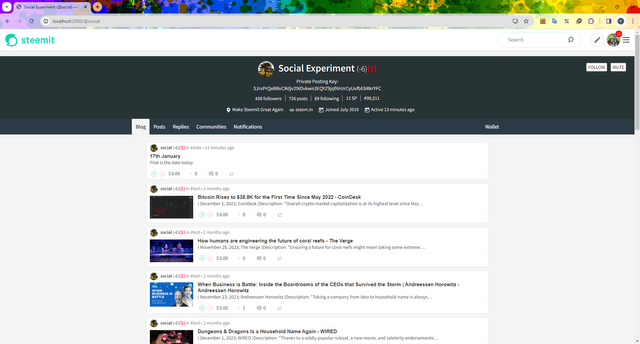
I logged in as @social, wrote a shit-crap-spam-post to see if it worked and hey presto! Steemit.com working on my computer.
I don't think that this took any technical skill whatsoever so if you're the curious type, give it a go!
Step 3: GitHub and Coding
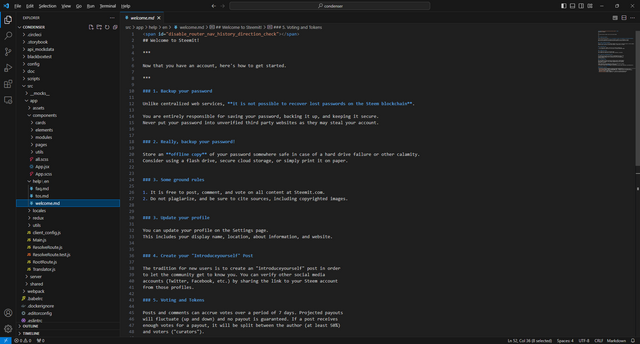
This felt good and I thought I'd try to edit some files to see if I could change anything. I scoured for where Docker had downloaded the source code and went back to a conversation I had with @starlord28 during my previous attempt.
the-gorilla — 10/12/2021 10:33
But that's not the GitHub version I'm running locally is it?
starlord— 10/12/2021 10:33
Nope. This is the remote version that running steemit.com now
So I needed to run condenser from my code... not the remote version.
Ok. No biggie. Let's get GitHub installed and download the condenser code locally... starting with installing GitHub from here - https://desktop.github.com/
Once again, quick and easy. Log in to my GitHub account and Fetch the steem/condenser repository.
Once installed and downloaded, GitHub helpfully asked me if I wanted to open the code in my "code editor" (Visual Studio Code) which I agreed to and here we are... Steemit.com's codebase.
Step 4: Running the GitHub code in Docker
This is great, I can edit the code but I need to be able to run it... and this is the bit that I fortunately had saved in my chat with starlord. A single line of code, run in the command line (in the folder where I'd downloaded the code) to get my GitHub instance running in Docker:
docker build -t thegorillasteem/condenser .
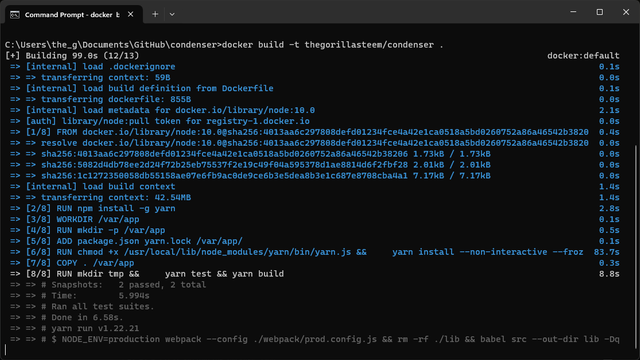
It took a couple of minutes to run which for a simple text / CSS test during development, could be very time consuming - if you've got any tips to speed this up beyond "Chrome Dev Tools", I'd love to hear them.
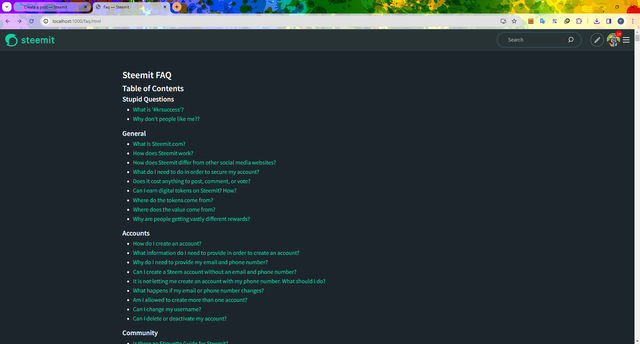
To check if I could make changes, I edited the FAQs with a couple of important questions that aren't currently covered.
Good times 🎉
😕 WHY????
2 years ago, I approached the Steemit codebase with a mindset of "I can just play with the CSS, it'll be easy" and when it wasn't, my expectations weren't met. I became disillusioned and gave up.
In response to a number of recent posts, accompanied by another YouTube video hosted by "The Diary of a CEO", I accepted that I needed to be doing something for myself... which could potentially be monetised (or classed as work)... which didn't have any pressure to achieve any kind of goal. And if there were a goal, then the more important goal would be enjoying how I reach that goal. In other words, I want to enjoy learning how the Steemit interface hangs together, learn how to make changes to it and then hopefully, make it beautiful. Maybe I'll even get a DIP proposal in (if they still exist).
I considered following @rexthetech's guide to setting up a Witness Node, but the approximate cost of £50 per month was somewhat off-putting with our current financial situation (Home insurance now due - double last year's!)
I don't expect it to be easy and hopefully that'll make some of the learning more enjoyable. If it was easy, then it wouldn't be valuable. It also doesn't help that one of Steemit's developers wrote...
Sometimes, these features are so complex that the team wants to only enable them for a small subset of users
...so it could be a slow learning curve but there's no rush. It's fun, remember that.
And to show how much fun, I'm posting this from my localhost!
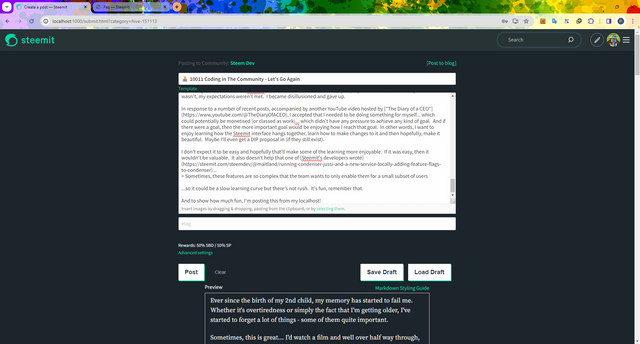
Time to press "Post" 🤞
the-gorilla's Alternative Steemit Interface
In case you didn't know, I've created an interface to help you find content that you're interested in more easily.
Posts by voting bot users, abusers and spam tags are hidden and you can search by multiple tags - allowing you to find the content that you're interested in more easily.
👉 Launch Alternative Steemit Interface 👈

the-gorilla's Club Status Tool

I've also created a tool to help users review their club status - showing them where their power's coming from, how much they're powering up, transferring out and who they share a wallet with amongst other things.
Please use it wisely.
👉 Launch Club Status Tool 👈

I remember that! Hard to believe it was >2 years ago.
I have run condenser through docker on my own PC in the past, and probably even posted with it using Steem Keychain, but I wouldn't know where to begin with the environment if it came to making even the simplest of changes. My old tired computer is near its performance limits right now, but I think I'll be replacing it in coming months. If you write some good how-to documents, maybe I'll follow your lead after I get it replaced. 😉
Either way, I look forward to seeing your progress.
Docker does seem to take over when it’s running (which it probably shouldn’t since one of its benefits is its efficiency).
I’m trying to make it a better dev experience to avoid “building” after every change which I’m sure should be more straightforward than I’m making it. Hopefully moecki can give me the answer 😊
I think I’ll be awesome at the “how not to” guides 😉
Hey, what a surprise to see you back on the Condenser train :-))
For me, the difficulty was also to enable debugging on the condenser code and not to have to make a new build for every change.
Unfortunately I don't have time to describe this in detail now. As far as I remember, the best solution was not to copy the code space into the container, but to mount your local code directory into the container. To do this, I also specified the volume in the
buildcommand and commented out thecopycommand in the Dockerfile.I hope this helps you... :-))
I’ve spent all day trying to figure this out… I tried a docker-compose.yaml file which doesn’t seem to overwrite the /var/lib/files. I also tried nodemod which didn’t work either.
For the docker- compose, I tried to create a volume which is mounting but won’t mount on the files that are actually being used. I wonder if it’s because I’m running “production” instead of a “development” build.
Quite frustrating although I’ve learnt a lot about docker and yaml which I hadn’t planned to learn!
I am glad that you took on such a serious task. You have many good ideas and I am sure you will be able to implement some of them.
YouTube does miracles!
I’m planning to share one of my ideas tonight for the Trending page… although I haven’t seen anybody complain about it for a while!
I tried it many times to build it locally, bot got no luck.
Firstly end up with an issue with the foudation-sites package. I added it manually and updated the path in app.scss.
Now it's running perfectly in the docker but with yarn start css files are not loaded