How to enter the game industry (Part 9: Images) [tutorial]
part 1: your skills
part 2: Choosing an Engine
part 3: Ren'py Game Engine
part 4: Ren'py Scripting
part 5: Ren'py More Scripting
part 6: Ren'py Scripting, Visuals
part 7: Ren'py Scripting, Dialogue
<< Part 8: Ren'py Scripting, Conclusion
As I mentioned before I can't teach you how to draw your characters and backgrounds, but there are some image manipulation skills you need to fit your images to your game. I will help you with that.

This part needs an image editing software, keep in mind that you only need their basic functions and any image editing software with layers should do the trick, to name few:
Photoshop $19.99/mo
GIMP Free
Krita Free
Paint.NET Free
For the skill, once you learned one, you learned all. therefore, I'll be using the most popular (and expensive) one: Photoshop, it's up to you to figure out how does it translate to the software you're using.
You can learn the basics in one of my earlier posts: Learn Photoshop in 10 minutes or less [beginner tutorial]
To start we need some character art and background, I'll be using some renders I've found on internet, renders are usually manga or anime characters that are cut from the background, keep in mind that the copyright for these images belongs to the manga artist and the copyright for the characters possibly belongs to somebody else, therefor, you need to find them and ask for their permission if you're planing to use them in a commercial game.
here are the images I'm going to use in this tutorial: bg.jpg || Wiki-background.jpg || render 1.png || render 2.png
You only need size
When it comes to images, their size is the most important aspect, even more important than how you use them.
Even if you hired an artist to draw for you, they will often hand you images at a higher resolution than your game needs. you are the one whom have to resize them. To figure out the correct size for your images you'll need to choose your games screen size first, to do that you need to know a little bit more about the usual screen sizes and some jargon.
- Almost all devices have a rectangle screen and a majority of the ones that games are played on are horizontal, a horizontal screen is also called "landscape"
- The screen size is usually measured by counting the number of pixels first from left to right (width ) then from top to bottom (height), this gives us two numbers like 1920x1080, that's usually called "resolution"
- The proportional relationship between the width and height of an image or screen is called "aspect ratio"
Most of displays use the "16:9 standard" for aspect ratio, as in HD (1280x720)(AKA 720p / 720i / 720) or Full HD (1920x1080)(AKA 1080p / 1080i / 1080), the newer screens use the same aspect ratio with a multitude of Full HD size, for example 4k (3840x2160) is twice the size of Full HD.
Using this standard will ensure the most possible compatibility for your games resolution when they are scaled up or down to fit the screen.
As I've mentioned in part 3 choosing a good resolution for your game is easy: 1080 for good looking art, 720 for story focused games. feel free to choose either, I'll use 720 for this tutorial because the screenshots will fit better in the steemit posts.
let's resize the background first, open Photoshop and drag the bg.jpg into it, then go to image>image size menu at the top:
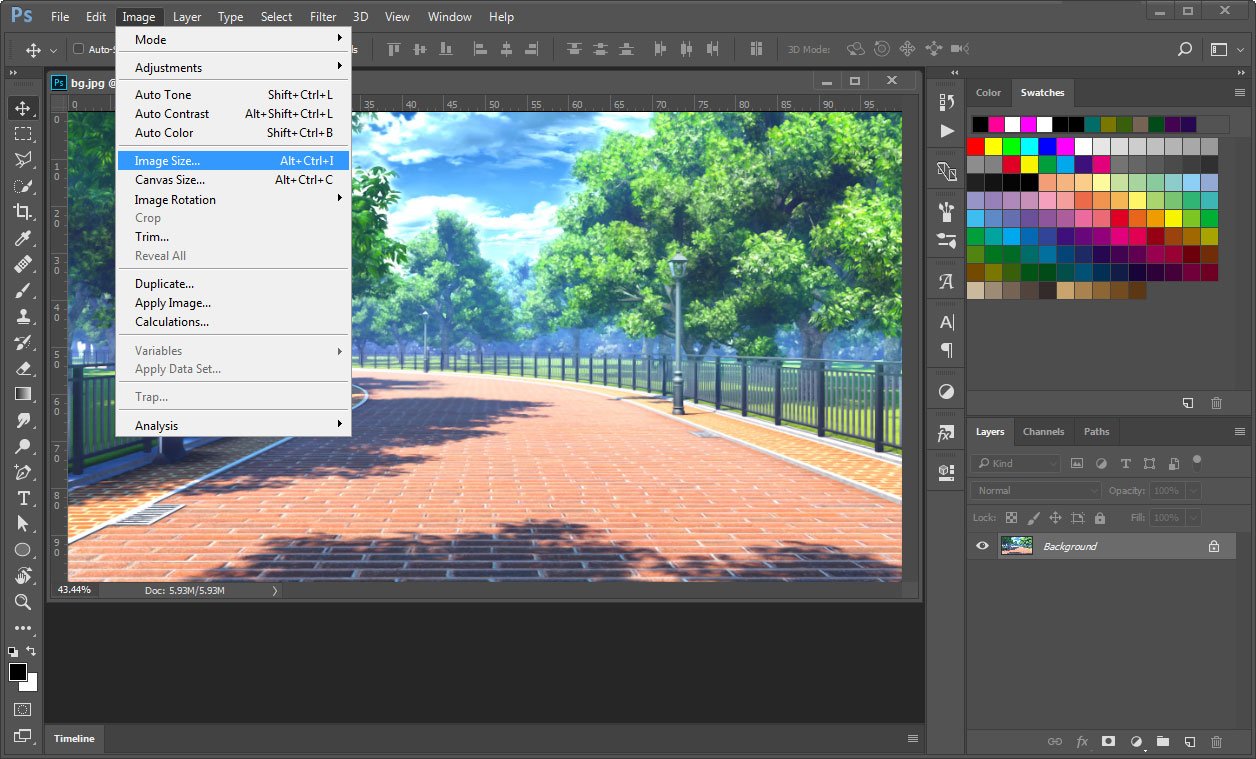
Make sure the chain link is active, this will ensure that the image will resize uniformly and wouldn't look compressed in width or height. Then change either the width to 1280 or the height to 720, in this case because the image is already 16:9 aspect ratio the other dimension will scale correctly. then hit ok and your image is ready to save.
Before moving to save, let's see how to properly scale an image that is not the correct aspect ratio:
- drag your image to Photoshop
- hit
image > resize imagemenu - make sure the chain is active
- type your target
widthin thewidthfield (in this case 1280) - check if your
heightis bigger than your targetheight(in this case 720) skip the next step - if it's smaller than your target
height, enter your targetheightin theheightfield(yourwidthwould be bigger than your targetheight) - hit ok
- now go to
image > canvas size - change both
percentin front ofheightandwidthtopixels - either your
widthorheightis the correct size, change the other one to the correct size and hit ok
this will first resize your smaller dimension to your desired size then you'll remove the extra parts of image. too confusing? let's see some images.
drag Wiki-background.jpg to Photoshop
hit image > resize image menu

- make sure the chain is active
- make sure your measurements are in
pixels - change the
widthto1280 - the
heightis bigger than720we can proceed
hit ok and go to image > canvas size menu, (it's under image size)

- make sure your measurements are
pixels - change the
heightto720 - the top of image is more interesting in this case so I've chosen the top to keep and all of extra size removed from the bottom
hit ok and you'll have a correct size image without any distortion.
save
Now you need to save your image in smallest file size possible without losing much of quality. a smaller file size will help keeping your distribution file size small for easier download plus saves memory used by the game.
There is a save for web option in all versions of Photoshop that let's you change your settings while previewing your quality, it's going to get replaces soon but for now we can use it,
go to file > export > save for web or if you're using an older version of Photoshop file > save for web

- make sure you've chosen
optimizedfor the preview to see the final quality, or2-Upfor the side by side comparison. - choosing the file format is easy, for images that have transparency (like characters)
pngand for images that have lots of colors without transparent parts (like backgrounds) usuallyjpeg - in
jpegthe main setting is quality, click the number and you'll get a quality slider to play with - here you can monitor your file size while changing the quality, it's easy to find a good balance between quality and file size, just lower the quality to the point that you notice a change in the quality then go a bit higher.
Characters
let's add our characters and correct their size, drag the render 1 (the girl with yellow skirt) to the Photoshop
first we need to remove the text on the corner, it wouldn't look good in the game. grab an eraser and delete it.

then we need to get rid of any extra transparent space around the character, go to image > trim...

choose transparent pixelsand make sure all four sides are selected, then hit ok, if you've deleted the text completely your image should look like this

now it's ready to resize let's bring in one of the backgrounds you've resized and saved earlier. open your background by dragging it into Photoshop or file > open
choose the move tool and drag your character into your background, it will be added as a layer

as you can see she is too big for the games screen, let's scale her down. go to edit > free transform menu or as you can see ctrl+t
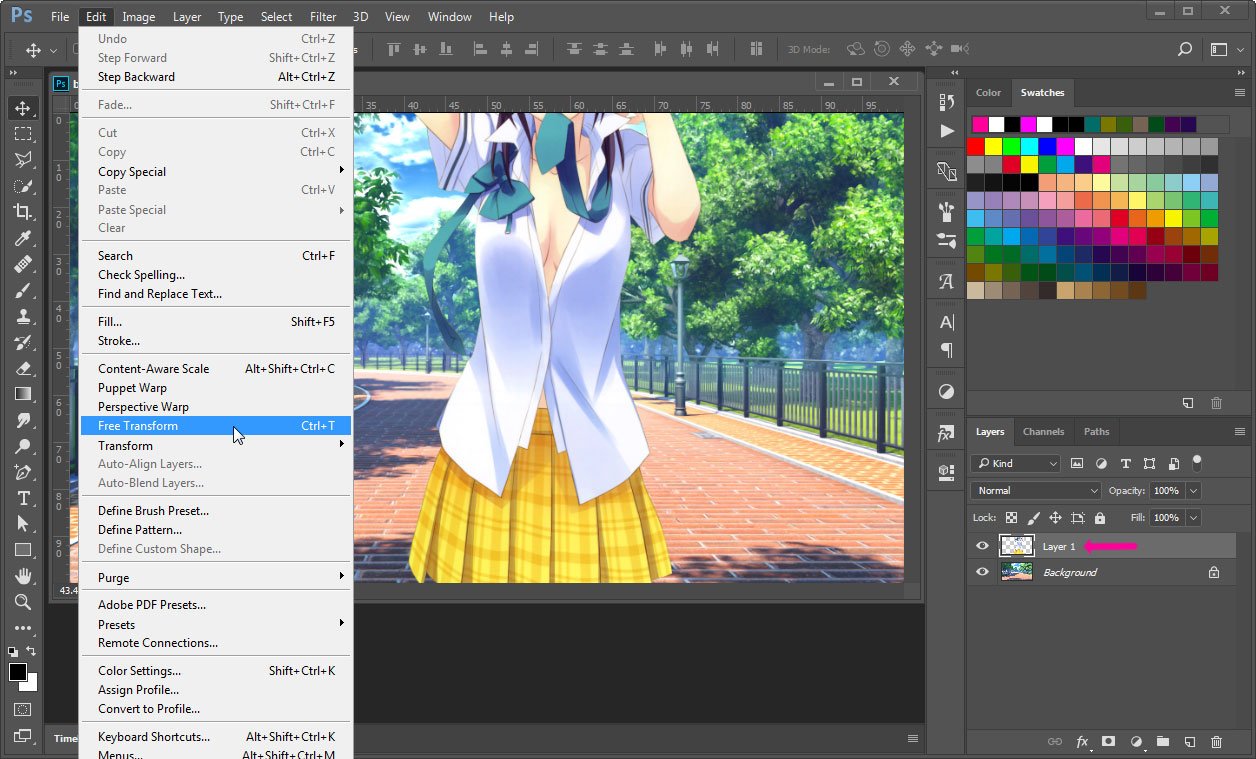
a box appears around the character and a bunch of settings on the top bar.

- always make sure the
widthandheightare linked to avoid distorting your image - grab and drag the
worhto the left to make your image smaller or to the right to make your image bigger - you can grab and move your character around by dragging it's visible parts.
- when your character is in the right size and position you want it to appear in the game click this to confirm the changes.
before saving let's add the other character too, repeat the same steps you've already did on the first character. while resizing her pay attention the their head size, usually the heads are roughly the same size.

Now we have our two characters in separate layers at the correct size we can save them but there's a problem, our second character still has her legs attached to her, we need to cut them out first. Remember trimming the transparent space around the images? repeat it on the current image and any part out of the screen will be cut.
The fastest way to save your characters is to right click on their layer and choose quick export as png from the long list.

this option is perfect for your character and you don't need to bother with the other ways of saving unless you're a pro and you want control over how to compress your png file, don't worry you're not missing much, just the option to use more cpu for smaller file size and how the image loads in browsers.
Flipping a character
Often you need your characters to face towards the middle of screen, depending on which side your character stands you might want to flip your character, it is possible to flip your characters in the game while defining your images but the easier way is flipping it in Photoshop and perhaps having two images for each side of screen.
To flip your character drag your resized image into Photoshop, go to image > image rotation > flip horizontally, now you can use quick export as PNG and save your image to use it in the game.
This part of the tutorial has became too long to include animation, plus it took longer than I expected, let's postponed the animation topic till the next part , then we can spend even more time on the topic and open it more thoroughly.
Like always: experiment and get into trouble, there's no better way to learn than getting into the trouble then searching for a solution. I'll be here to help if you had any questions.
!originalworks
The @OriginalWorks bot has determined this post by @kiaazad to be original material and upvoted it!
To call @OriginalWorks, simply reply to any post with @originalworks or !originalworks in your message!
To enter this post into the daily RESTEEM contest, upvote this comment! The user with the most upvotes on their @OriginalWorks comment will win!
For more information, Click Here!
Special thanks to @reggaemuffin for being a supporter! Vote him as a witness to help make Steemit a better place!
Congratulations @kiaazad! You have completed some achievement on Steemit and have been rewarded with new badge(s) :
Click on any badge to view your own Board of Honor on SteemitBoard.
For more information about SteemitBoard, click here
If you no longer want to receive notifications, reply to this comment with the word
STOP