The repair of Pentax K-shift 28mm
Disclaimer: if you want to do the same, you are all on your own! This is not for the faint of heart, nor for the ones not called mister handy in their family. If any goes south don't go blaming me, this is for entertainment purposes only!
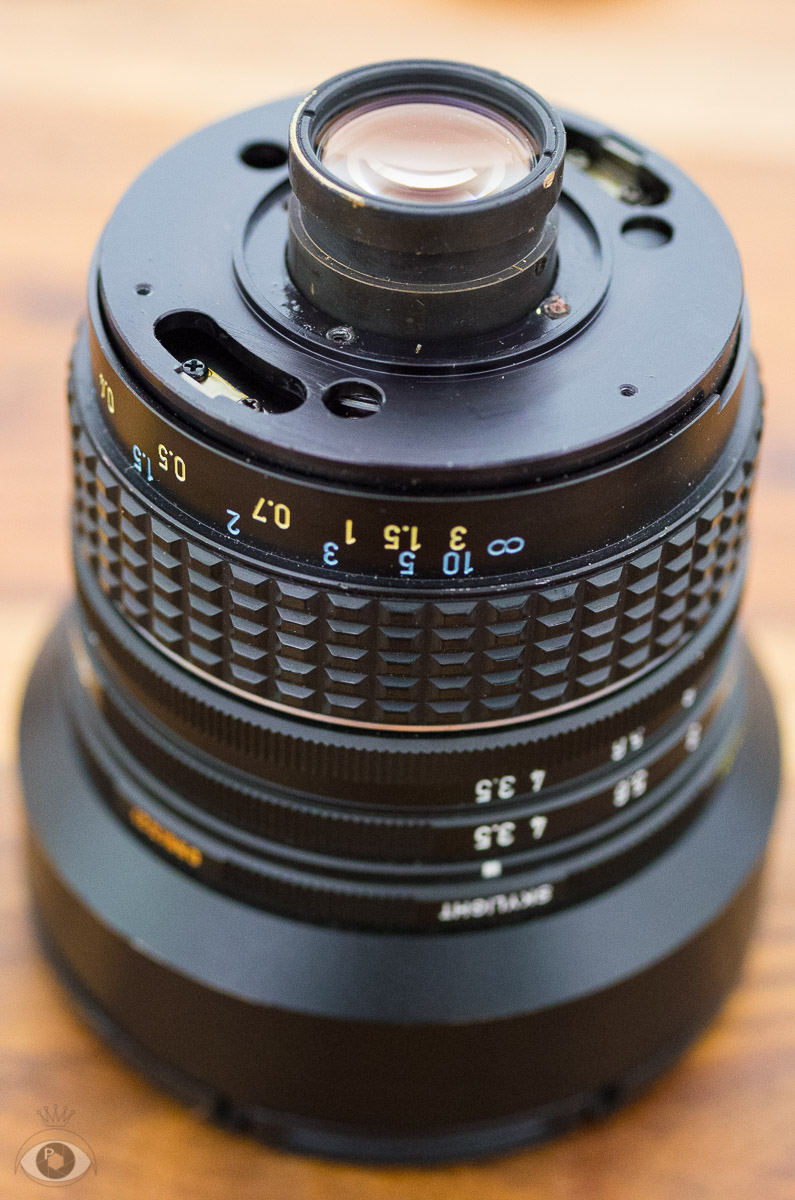
Probably one of the best vintage shift lenses around, this lens stems from 1975 (actually there are 2 versions but they only differ in cosmetical changes.) The special thing is that the lens can shift laterally over 11mm in any direction which makes it perfect for architectural (ie. perspective corrections) and special purposes. I've had several shift lenses from Nikon and Olympus, but believe me if I say that this one bests them all: tack sharp, no color shift whatsoever (a real performance which only modern days shift lenses can equal) and zero distortion. The only downsides are incredible bulk and mass and massive vignetting (but let's face it, no shift lens is free from the latter.)
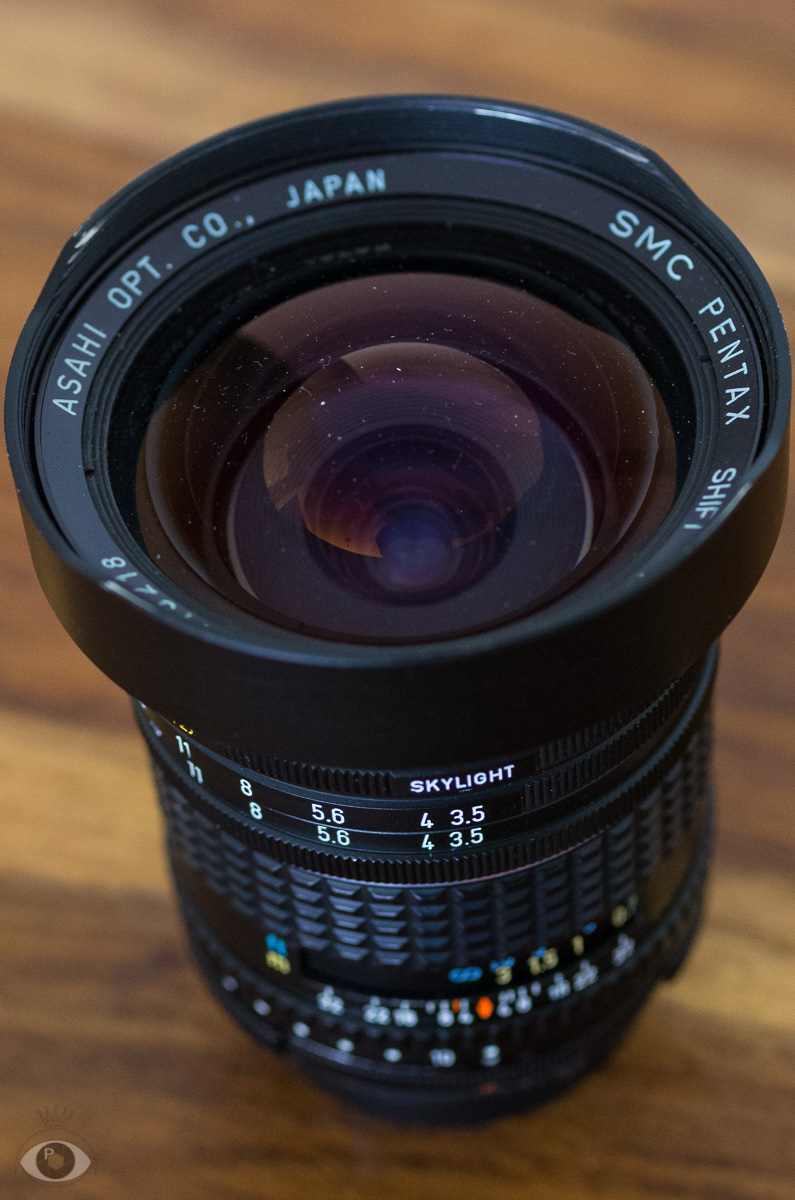
This is not my lens, but from a friend of mine. Having used it in the past with very good results I asked him if I could borrow his and take it to Japan. Was a little let down when I came home to find the images taken with it were not as good as I remembered. It was only then that I saw that the lens didn't focus till infinity (for shorter distances it was fine.) My friend told me he had it repaired for a blocking shift mechanism and we both came to the conclusion that the man had done a rather poor job. I offered my friend to have a look at it to see if I could fix it and he agreed. After taking it apart I am convinced that this lens had a 'gravitational accident' and that all problems were caused by that.
Taking apart then rebuild
Mind you, it was not my first taking-apart-then-rebuild that I performed on a lens, but since there are lots of moving parts I was not sure if I could do it (somehow my friend didn't have high hopes either but looked at it as a last resort.)
Here goes:
What you need: a philips PH0 screwdriver and something to gather the screws and the bits and pieces (I use film canisters marked with numbers for the screws so i always know which screws go where), paper and pencil (to make mental notes), a clean desk and lots and lots of patience.
note: I took a long time to examine the lens before doing anything. I always do that and more than once. That way you can make a stepping plan in your head.
Step one: unscrewing the lens mount. Five screws. The man who worked on the lens before did quite an ugly job: the screws had marks and were also glued on the lens, making them near impossible to unscrew. I had to use a lot of force to loosen them and left still a few more marks (sorry Wim!)
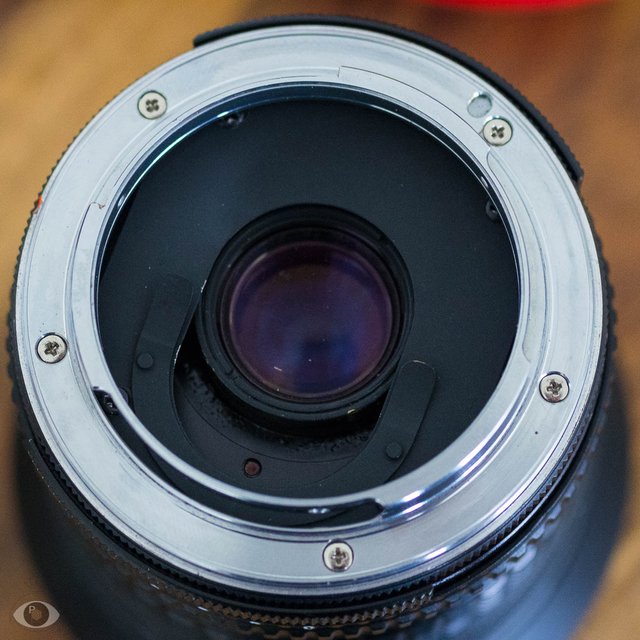
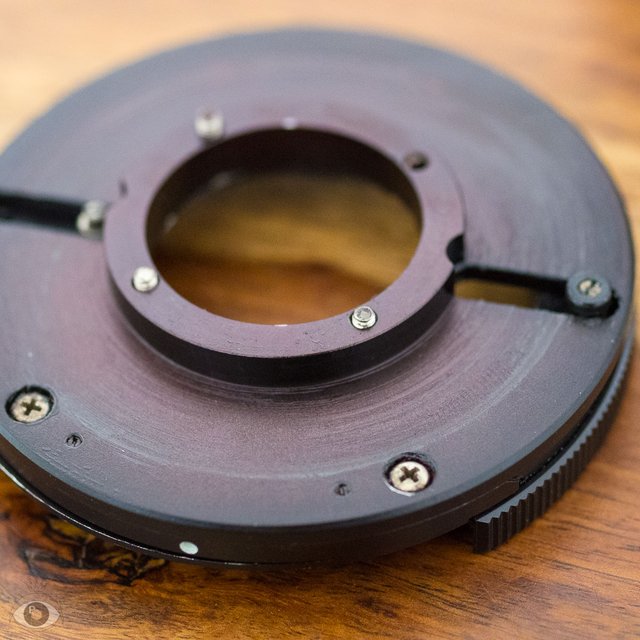
- Step two: More sloppy job found underneath: note the marked screws and the mark on the screw wholes. He also resorted in marking the place of where to remount the plate in the metal (I always use board markers for that.) Now for unscrewing the antivignetting plate/gelatine filter holder. This was one step I hope I didn't have to do, because I knew that then I would unscrew the shifting mechanism which would be a terrible task to assemble again.
- Step three: with the rotating plate unmounted, you find yet another 4 screws. You need to shift the lens a little to get hold of all 4 (2 of them are already unscrewed - I forgot to take a picture! :-) ) Here is where the shift mechanism (which consists of 2 parts) is released from the lens.
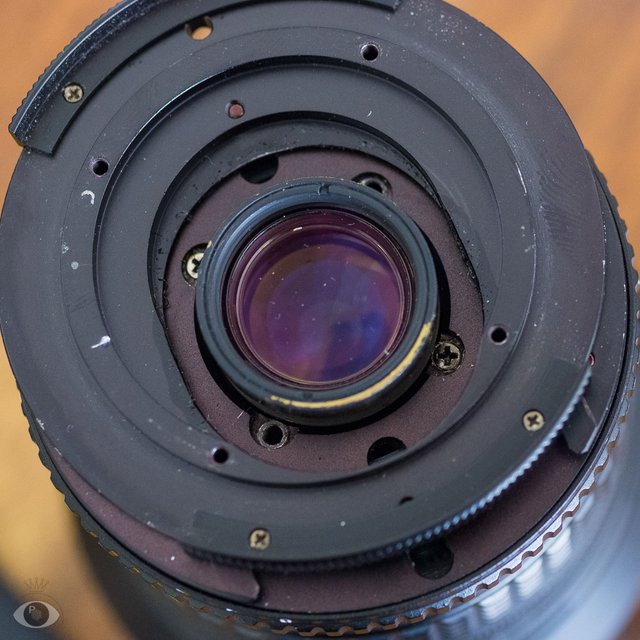
This is the base plate of the shift mechanism (the one that faces the lens)...

... which holds the plate facing the camera (and lens mount.)
- step 4: there is no step 4... Here I lost my believe a little as there was still no sign of anything adjusting the focus mechanism. All steps until now where pretty straight forward but i still want to stress that between each step I paused (as should you if you were ever to do this.) Now however, I took a long break trying to decide how to proceed.
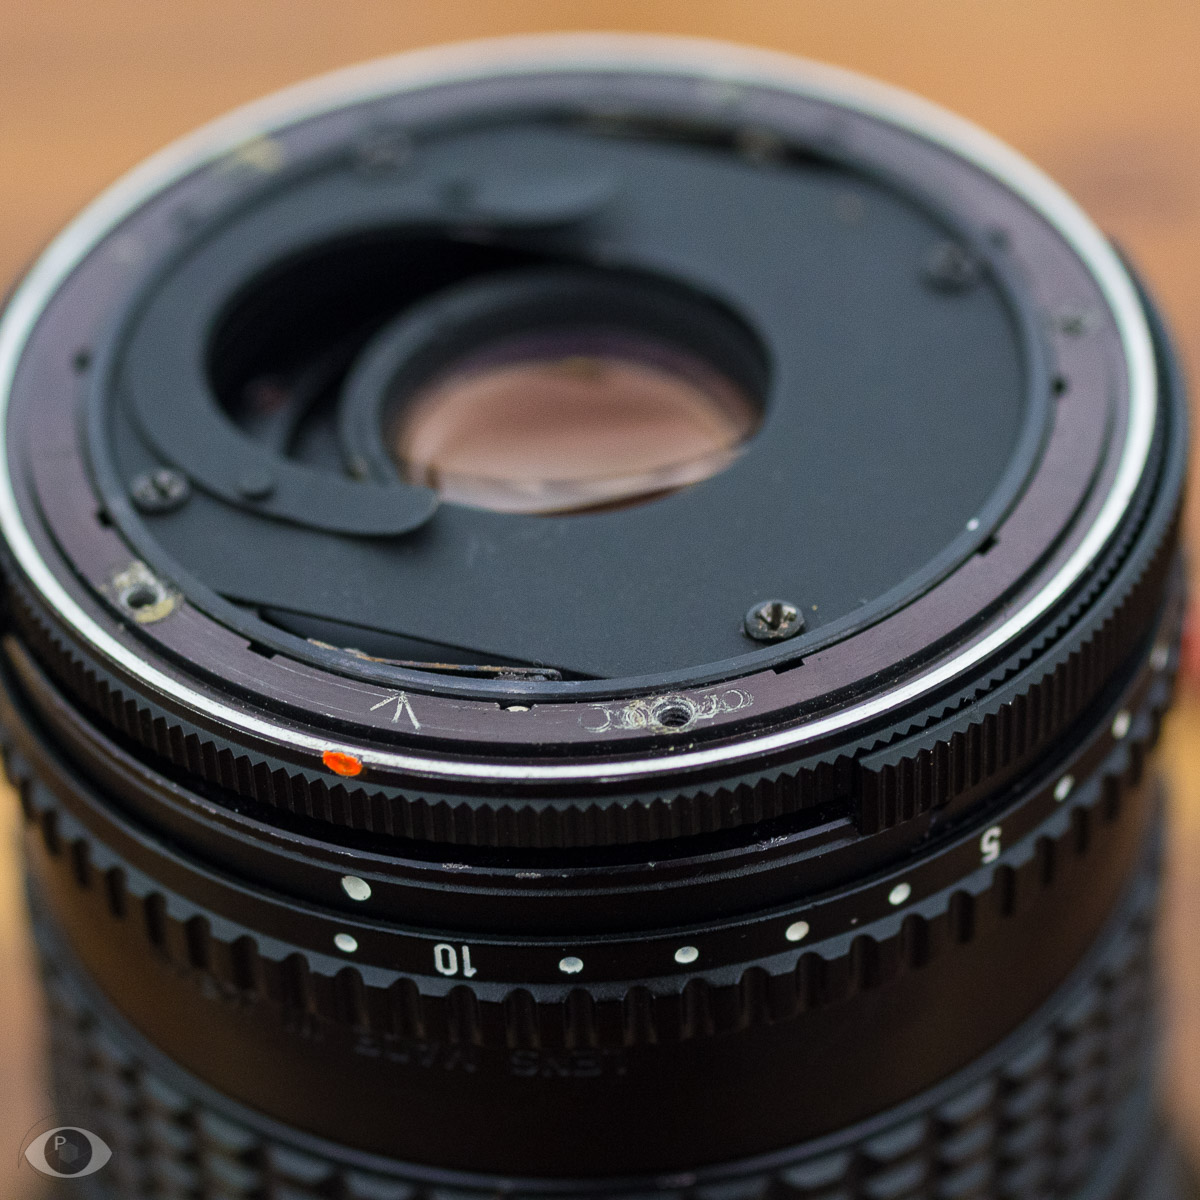
- step 5: ...only by chance I found this little bugger. A screw (here removed) provides for hard stops at infinity and close focus. Could it be this simple?
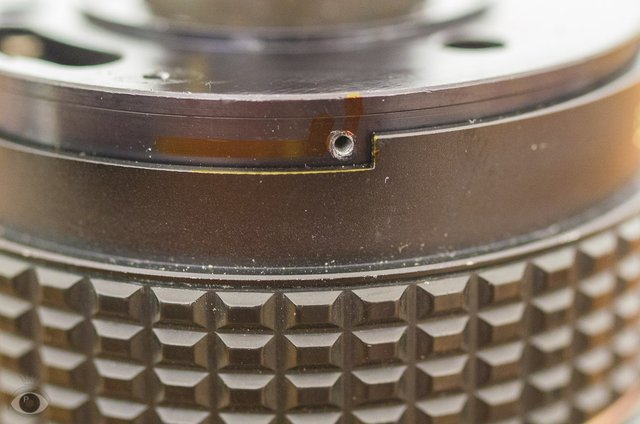
- Step 6: it is this simple! Once this screw removed focus goes way beyond infinity focus (on one side) and close focus (on the other.) The whole time I was looking at shims for adjusting for infinity focus (adding or removing shims brings the lens group farther/closer to the camera which makes it possible to adjust for infinity focus) which is how most lenses are adjusted. Turns out that Pentax had provided for that with a more refined and ingenious way to do it. They really knew how to build a lens!
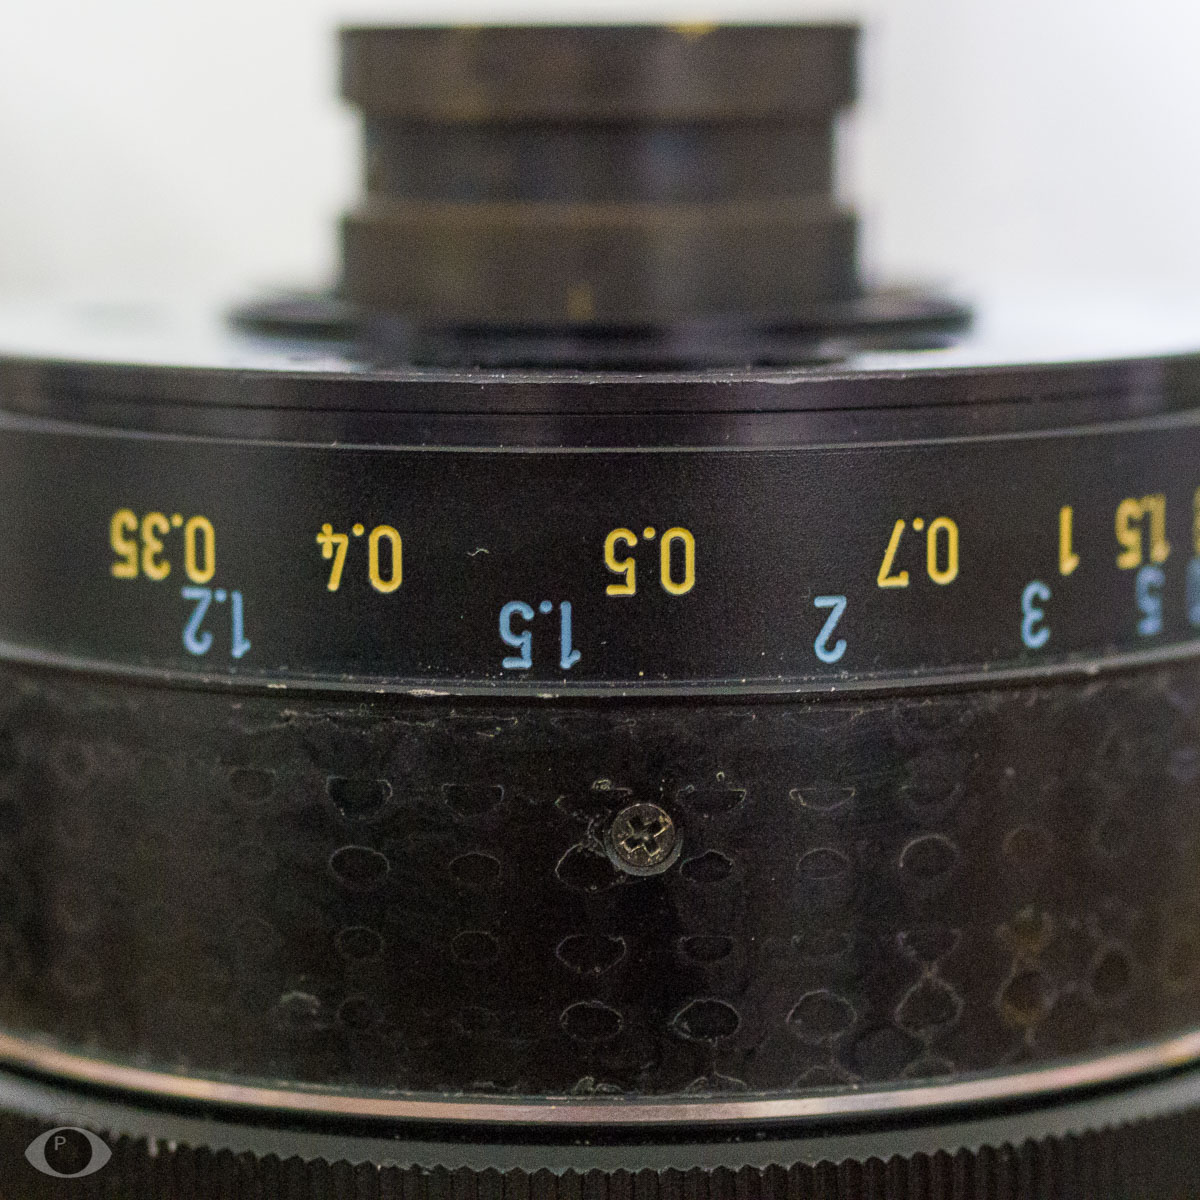
Now of course I had to adjust the ring to have it the good reading (ie infinity saying infinity and not some unknown distance.) It did not take long before I found where you do that. If you remove the rubber ring you will find three screws. Loosening these screws lets you adjust the focussing ring without shifting focus.
I am not going to bother you with how I had to assemble and disassemble 3 times because focus was not set right or (this lens had clearly got a serious hit) because adjusting for infinity made shifting impossible because the rear lens group was blocked by the rear plate (I had to resort to bring this plate further back so it didn't block the lens group - that was a whole lot of extra trouble.)
One last note, you cannot tighten the rear plate too tightly, otherwise rotating and shifting the lens will become difficult (near impossible.) While assembling this plate check that the lens rotates/shifts freely. Reassemble, done! This 30 something year old lens has again some mileage left...!
Unless otherwise noted, all photo's are made by myself!
If you liked this post and the photo's, then you might also probably like other posts I made like this one here and anothere one here.
Thank you for watching and if you liked it vote/resteem/reply!
Well done, nice read!
Txs Walter!
Pix brought me to you! Well done!
Thank you!
You're welcome!
@reported has voted on behalf of @minnowpond. If you would like to recieve upvotes from minnowpond on all your posts, simply FOLLOW @minnowpond. To be Resteemed to 4k+ followers and upvoted heavier send 0.25SBD to @minnowpond with your posts url as the memo
@originalworks
The @OriginalWorks bot has determined this post by @pentaxke to be original material and upvoted it!
To call @OriginalWorks, simply reply to any post with @originalworks or !originalworks in your message!
To enter this post into the daily RESTEEM contest, upvote this comment! The user with the most upvotes on their @OriginalWorks comment will win!
For more information, Click Here! || Click here to participate in the @OriginalWorks writing contest!
Special thanks to @reggaemuffin for being a supporter! Vote him as a witness to help make Steemit a better place!
This wonderful post has received a bellyrub 1.03 % upvote from @bellyrub thanks to this cool cat: @pentaxke. My pops @zeartul is one of your top steemit witness, if you like my bellyrubs please go vote for him, if you love what he is doing vote for this comment as well.
This post received a 1.6% upvote from @randowhale thanks to @pentaxke! To learn more, check out @randowhale 101 - Everything You Need to Know!