Bushcrafting: Bed Roll Crafting with the Sewing Kit - Keeping Cozy and Mended
Having a good night sleep is important for morale, energy level, healing, and general well being. The Bed Roll is my sleep and temporary shelter system when backpacking - the bedding is very comfortable indoor on a mattress as well. This bed roll can be carried over the shoulder with the shoulder strap, or attached to a backpack. For mends on the go, I keep sewing supplies in a small metal box. I find myself reaching for the sewing kit most often at home - to mend my favorite clothes. I also use the sewing kit for other gear modifications.
Unrolling the Bed Roll
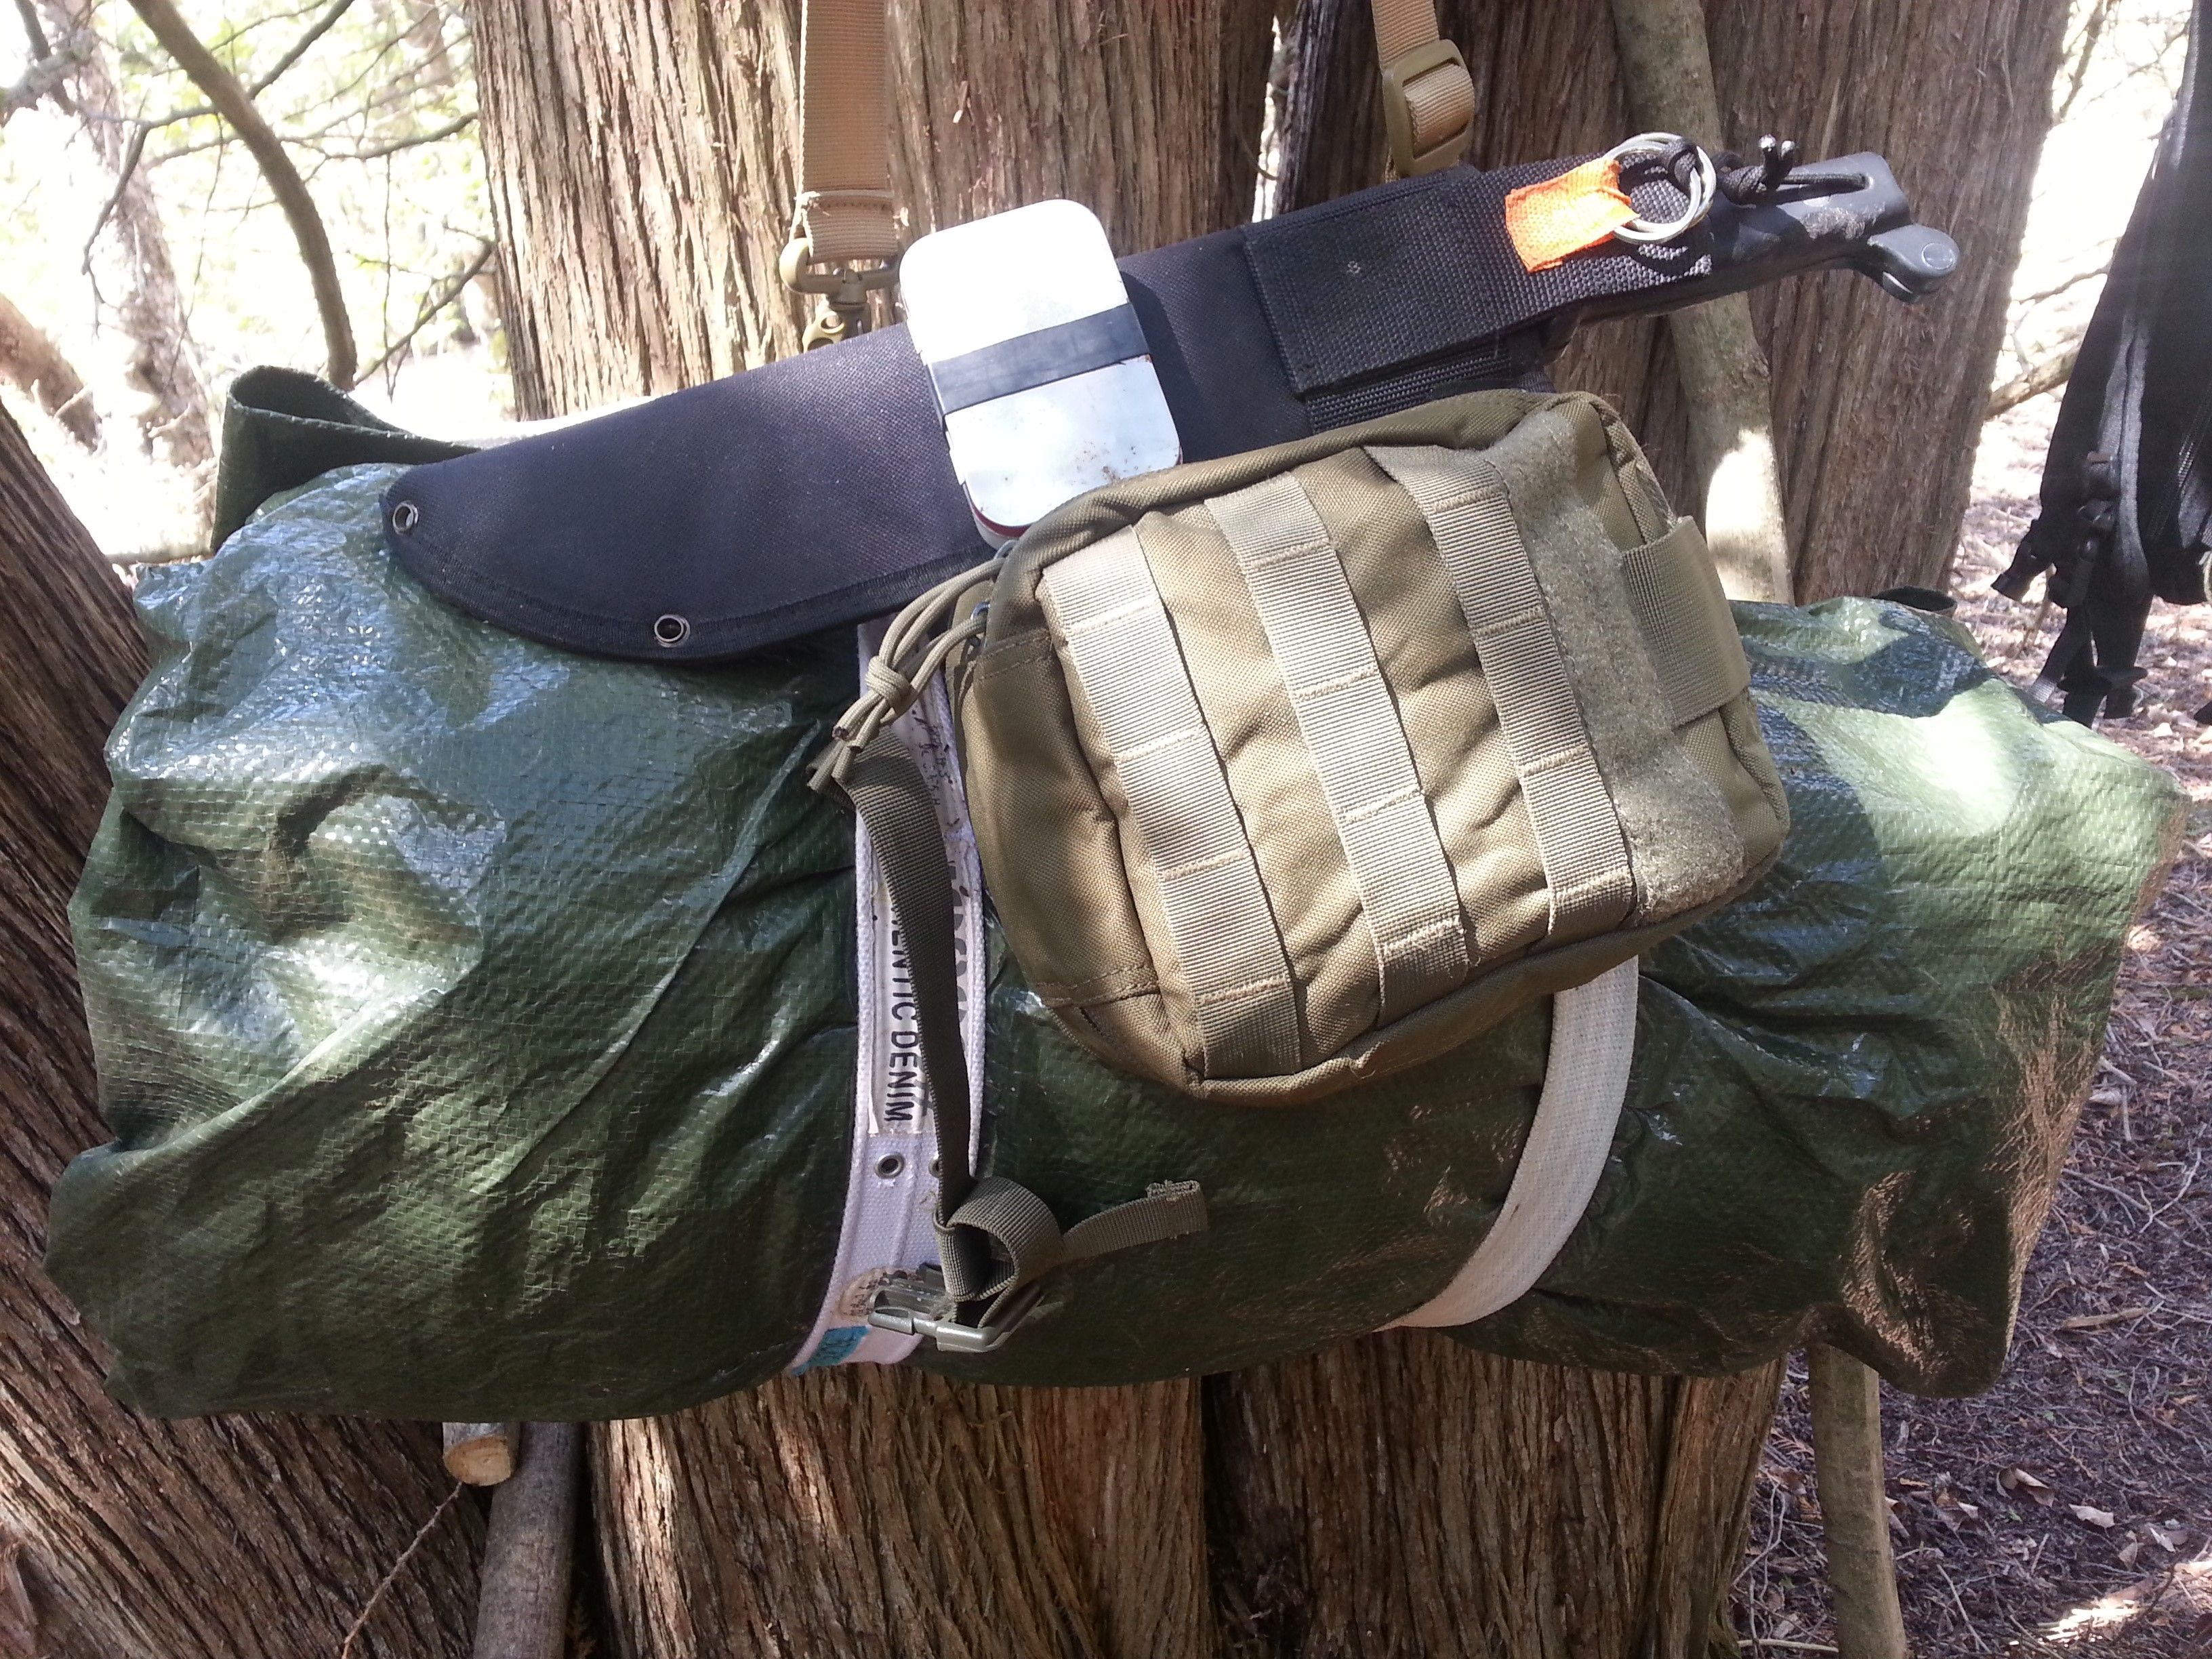
After removing the belt strap, shoulder strap, and green pouch from the bedroll, I start to unroll it. You can see in the picture below how the sides of the green tarp were folded in before rolling it up - to keep the rain and other water out - to keep the bedding dry.
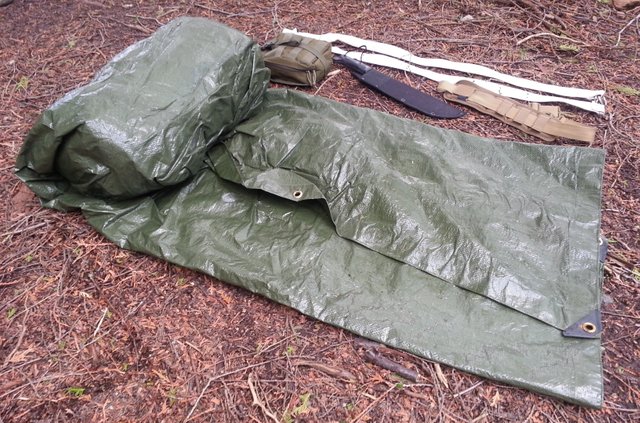
The tarp can be used as a ground cover, overhead cover from sun or rain, or for many other purposes.
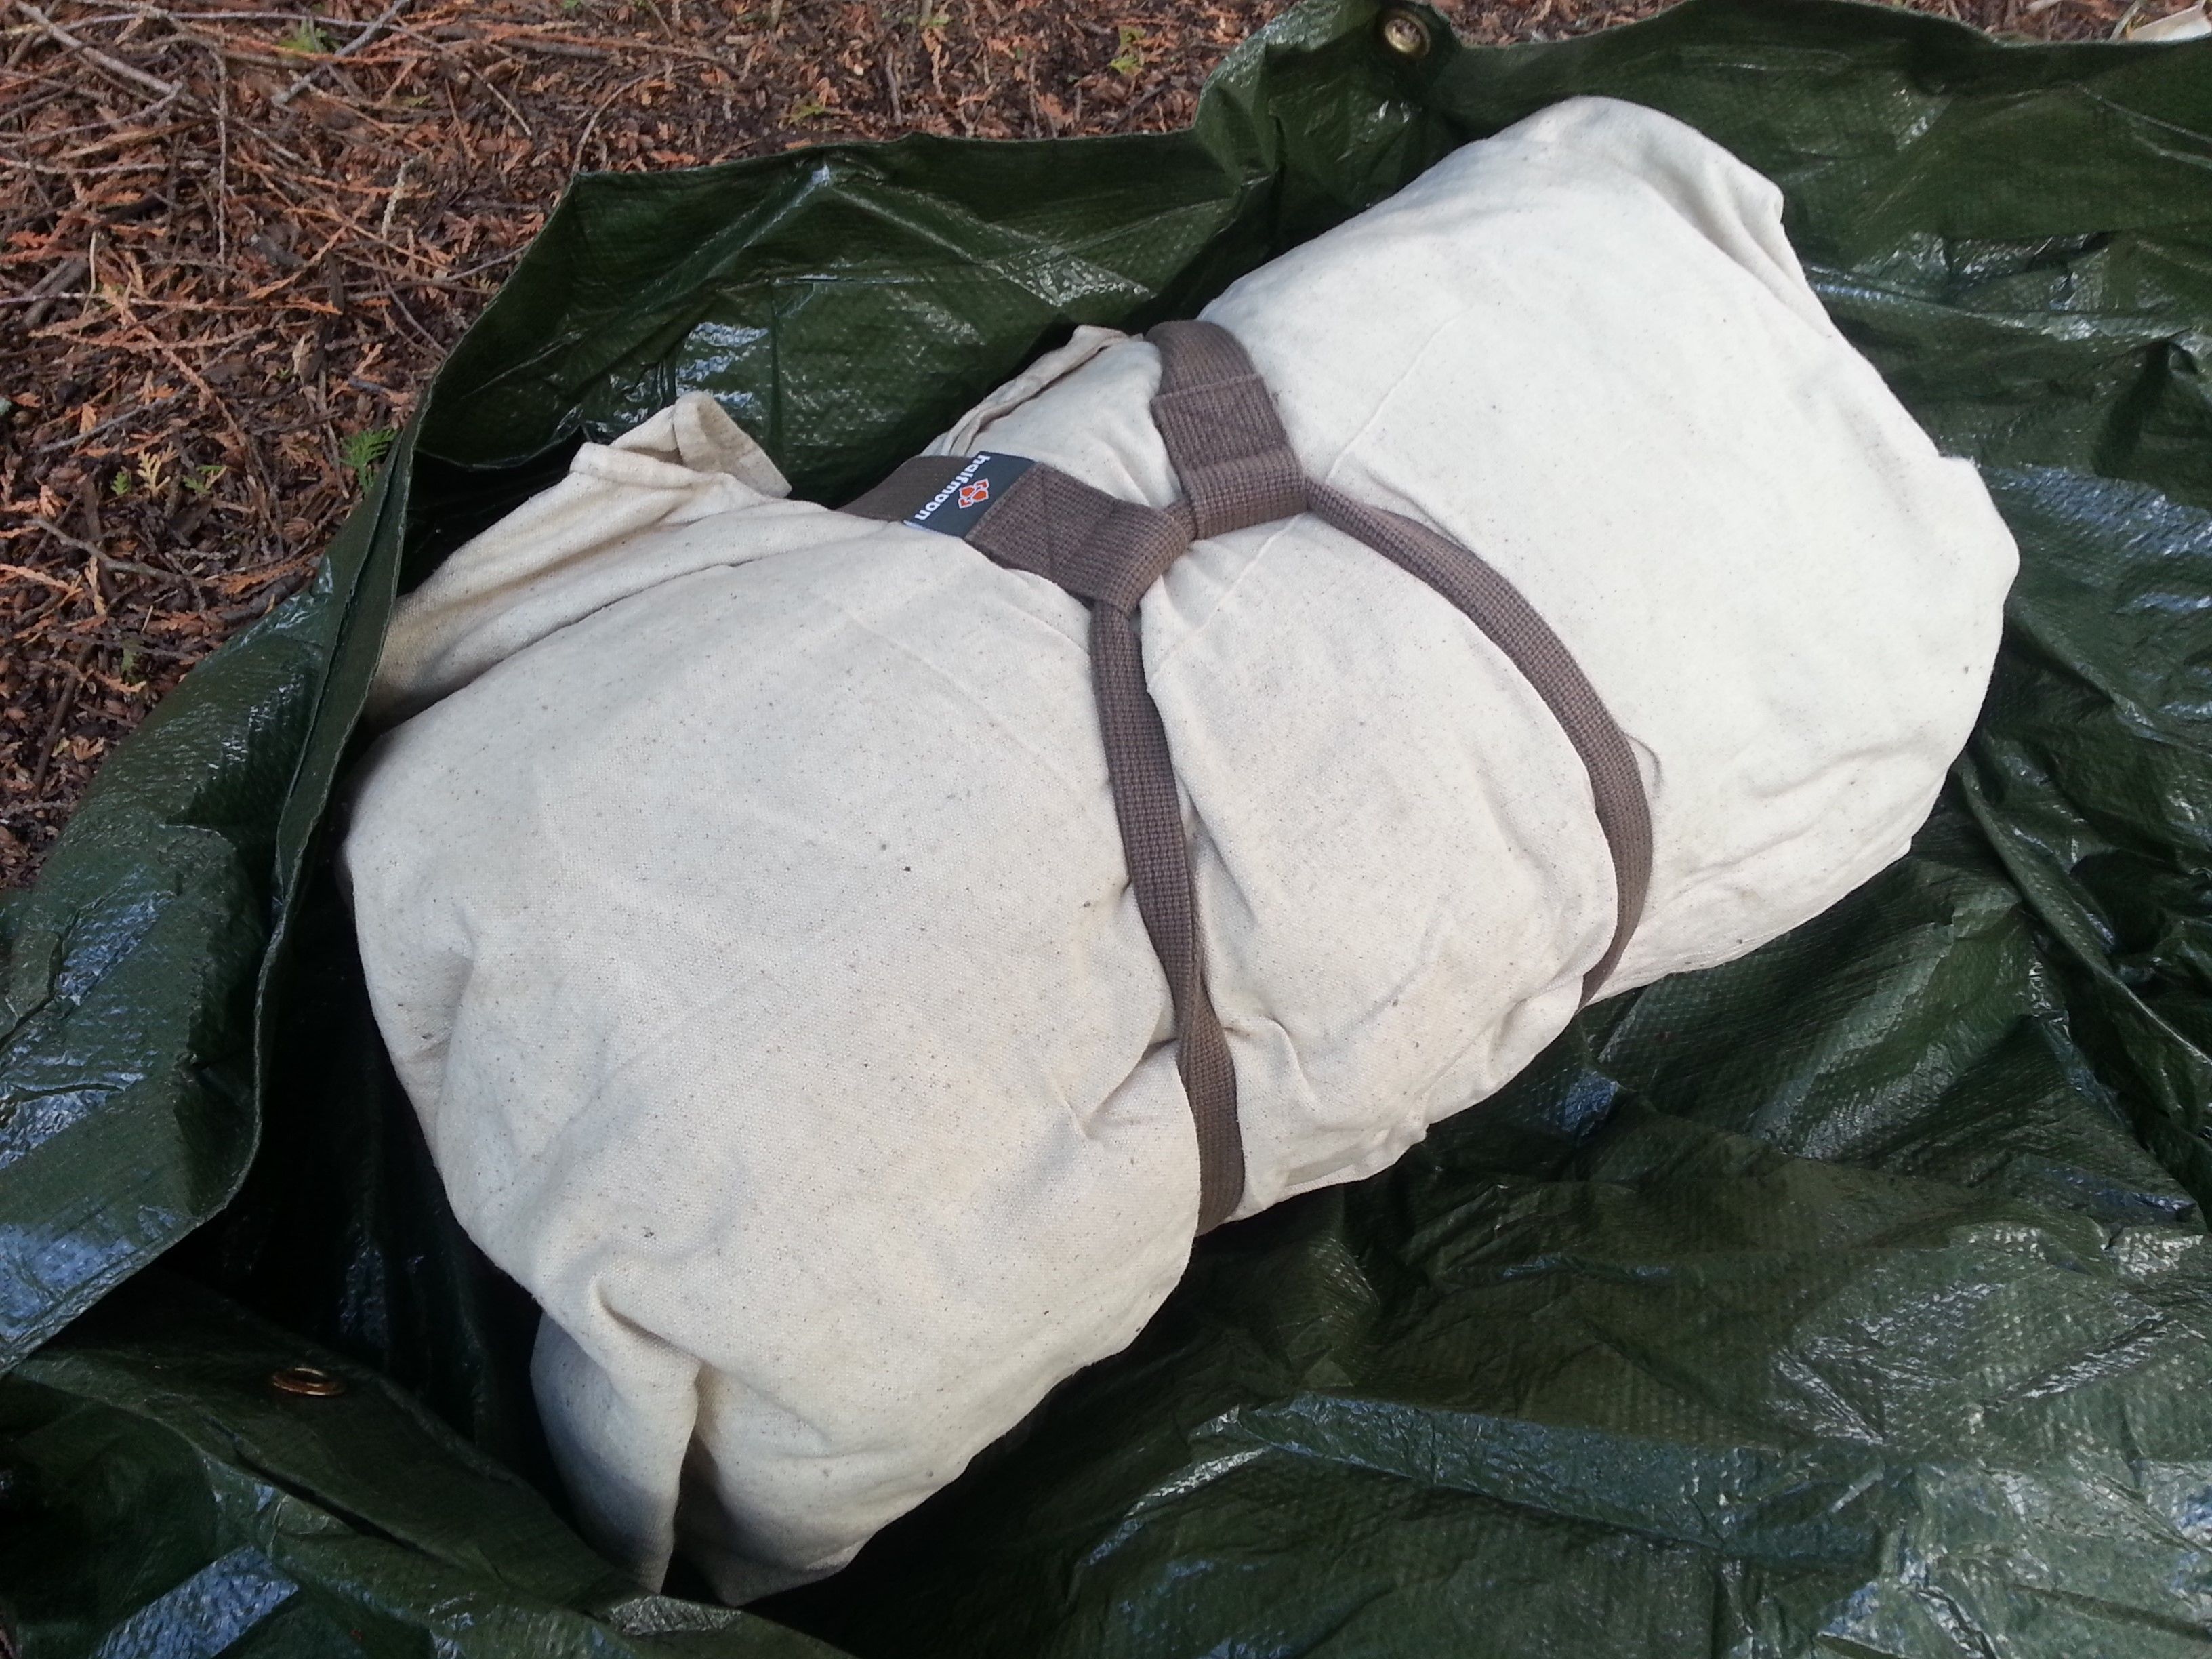
After the tarp has been unrolled you can see the cotton drop cloth sleeping bag rolled up with the wool sleeping bag and extra wool blanket inside.
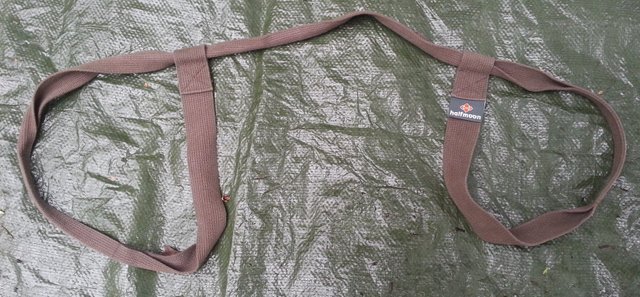
The handy piece of strapping above slides over each end of the bed roll, then pulls tight with a handle.
I also have bivvy and bug screened hammock with tarp covering options for isolating the bedding from damp and wet conditions. A bivvy is a small tent that is just large enough to hold a sleeping bag - along with a little head room so you don't feel closed in.
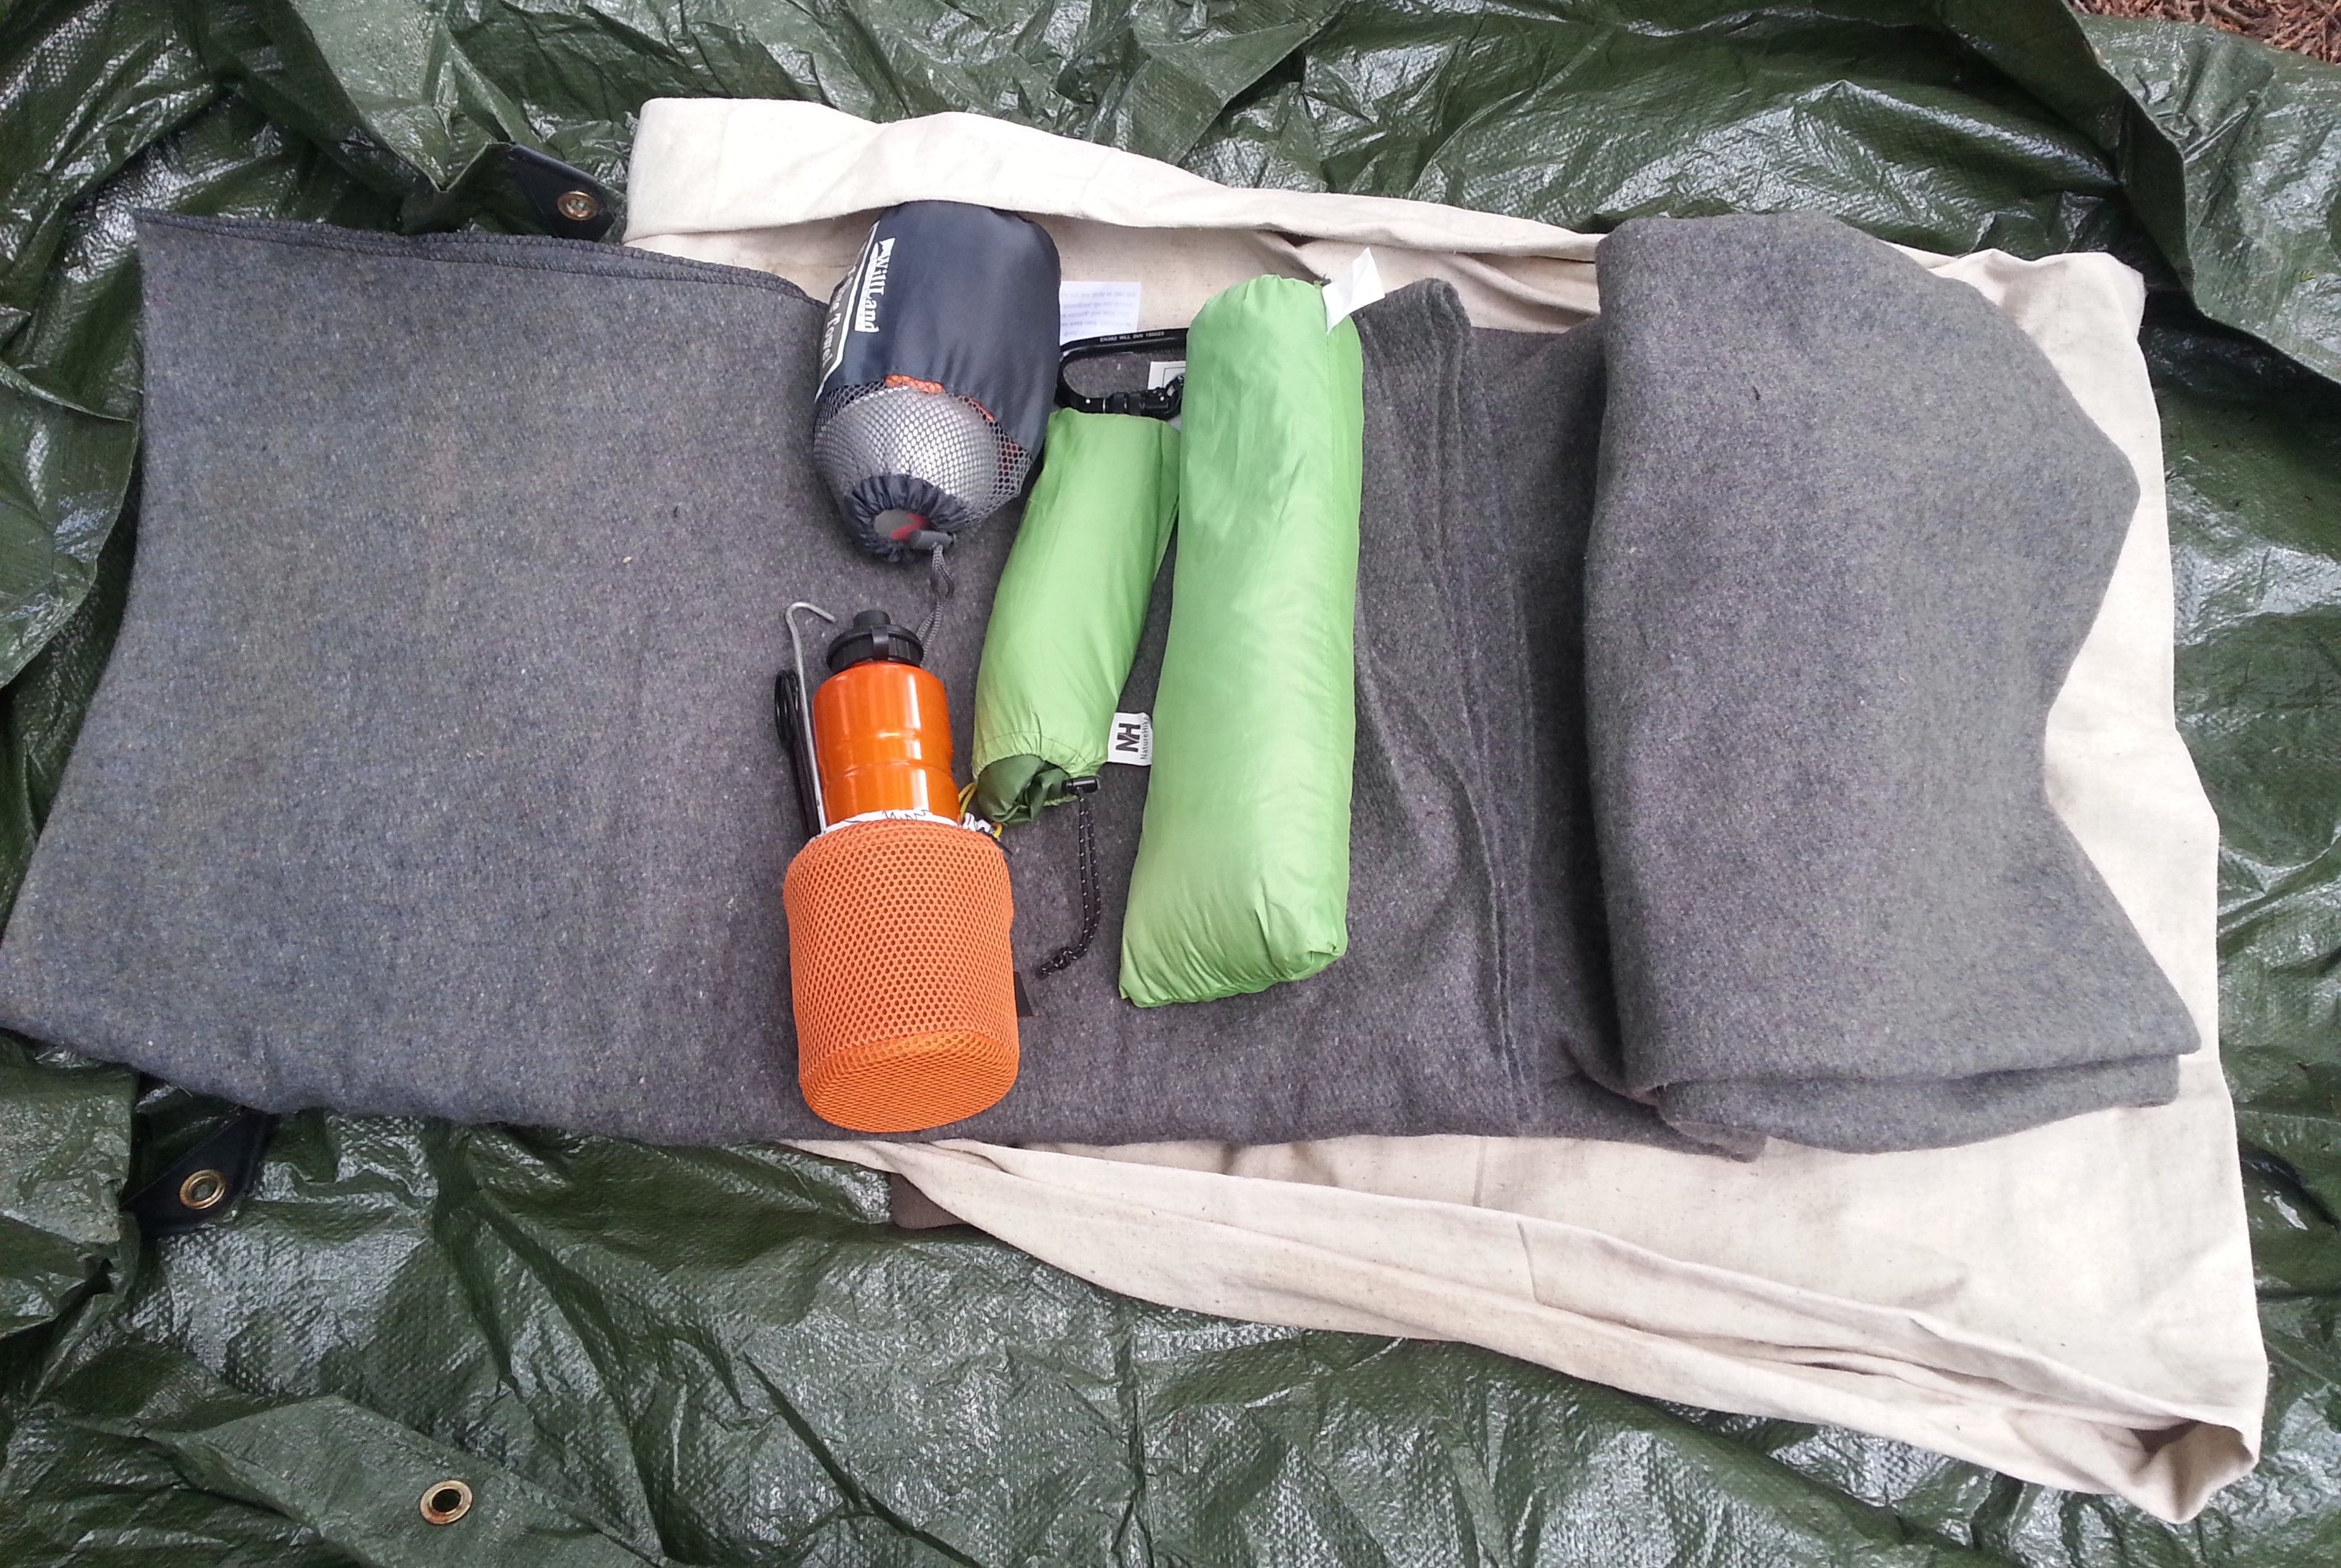
In the picture below you can see the items in the bed roll that we'll be focusing on - the cotton drop cloth sleeping bag, wool blanket sleeping bag, extra wool blanket, and sewing kit.
Cotton Drop Cloth Sleeping Bag
The thick cotton drop cloth is like a heavy duty bed sheet. It may be all that is need for spring and fall temperatures, and may be a little too warm for the summer. The thick cotton sheet isn't as warm as the wool blankets, and loses it's insulating properties when wet - but I like it for warmer weather, and as a protective outer shell for my cherished wool blankets. This cotton drop cloth actually was manufactured to be a drop cloth for painting - I purchased it at the local hardware store.
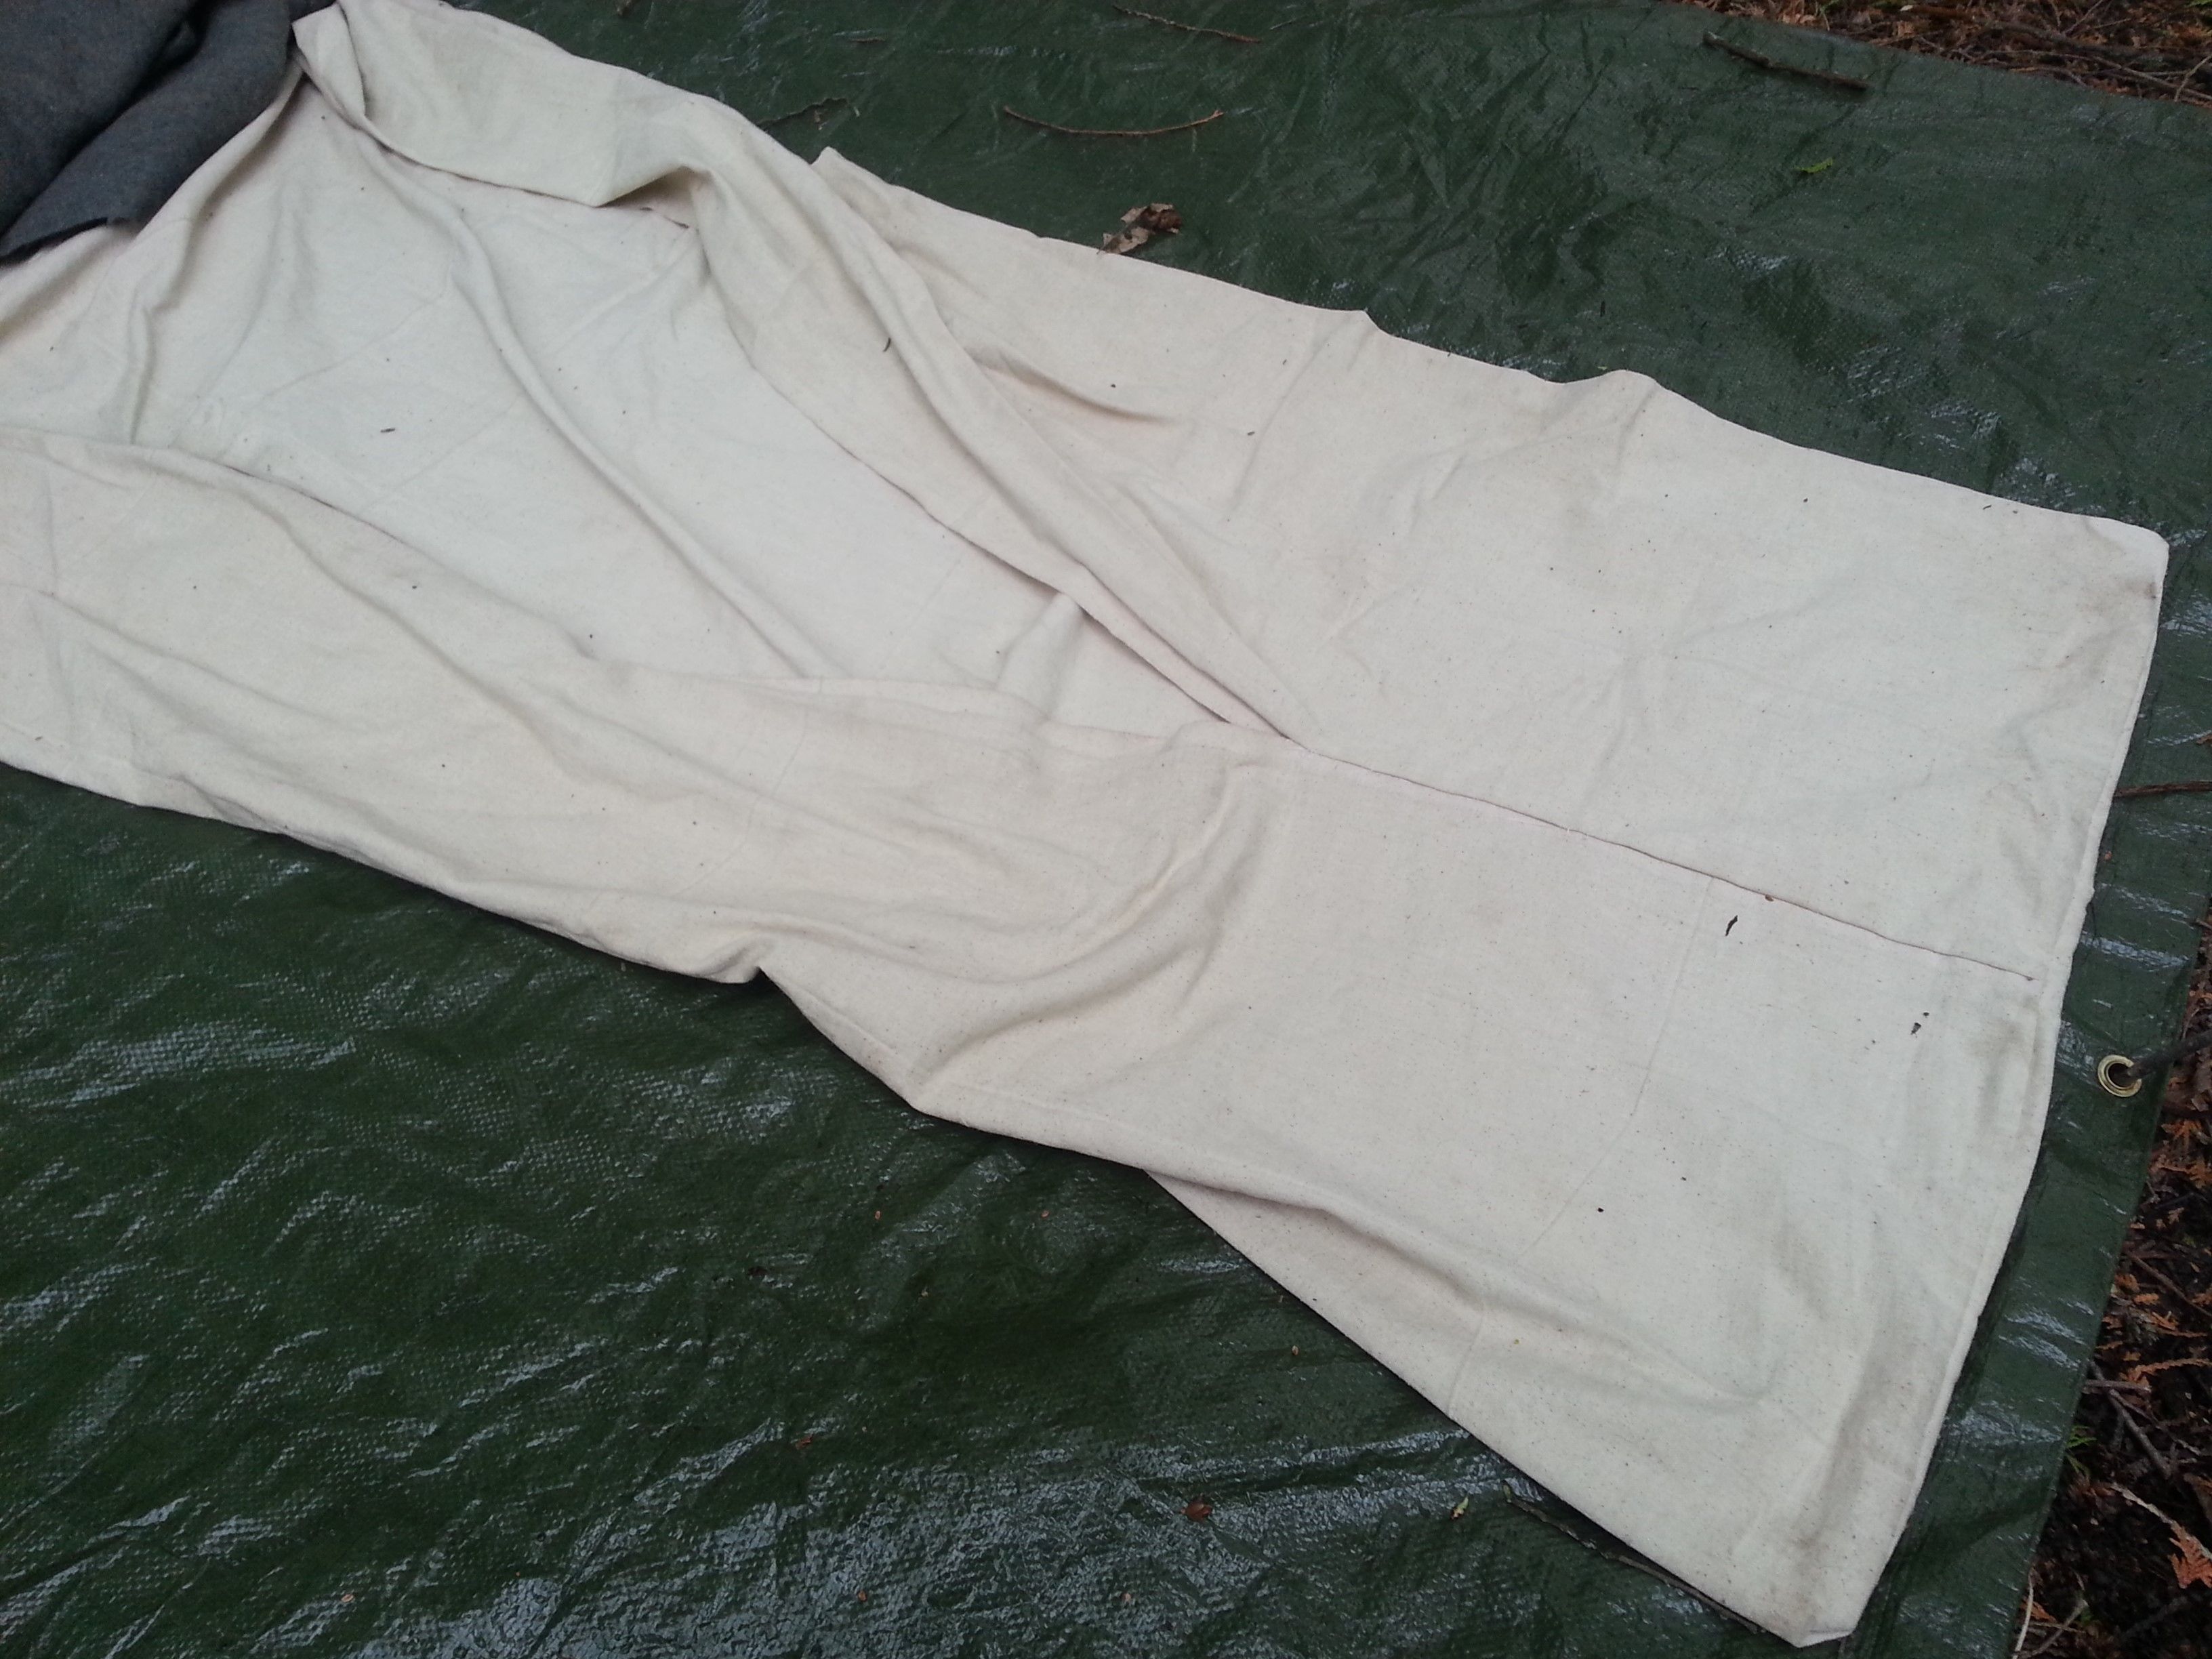
After enough nights of constantly adjusting the drop cloth sheet in my hammock - I grabbed the sewing kit and sewed the drop cloth into a non zippered sleeping bag. Later in this post I show how this was done with the wool blanket. In the picture below you can see the foot end of the drop cloth sleeping bag.
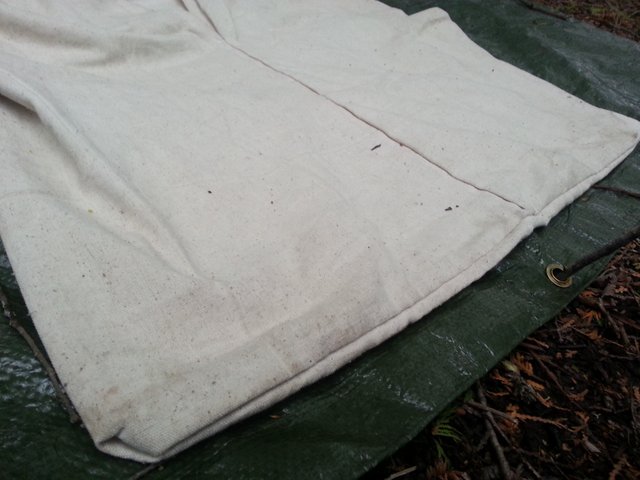
If a large drop cloth is ever needed for another purpose, it would be easy enough for to cut out the stitches to return the cotton drop cloth sleeping bag to it's original large drop cloth form.
Wool Blanket and Sleeping Bag
Wool blankets can be expensive, but to me they are worth every penny. Even when wet - wool blankets still provide some insulation - cotton when wet is the opposite of insulation, it pulls the heat from the body and wicks it away. A soon as I put my feet under a wool blanket, I can feel the warmth from them being contained and held close.
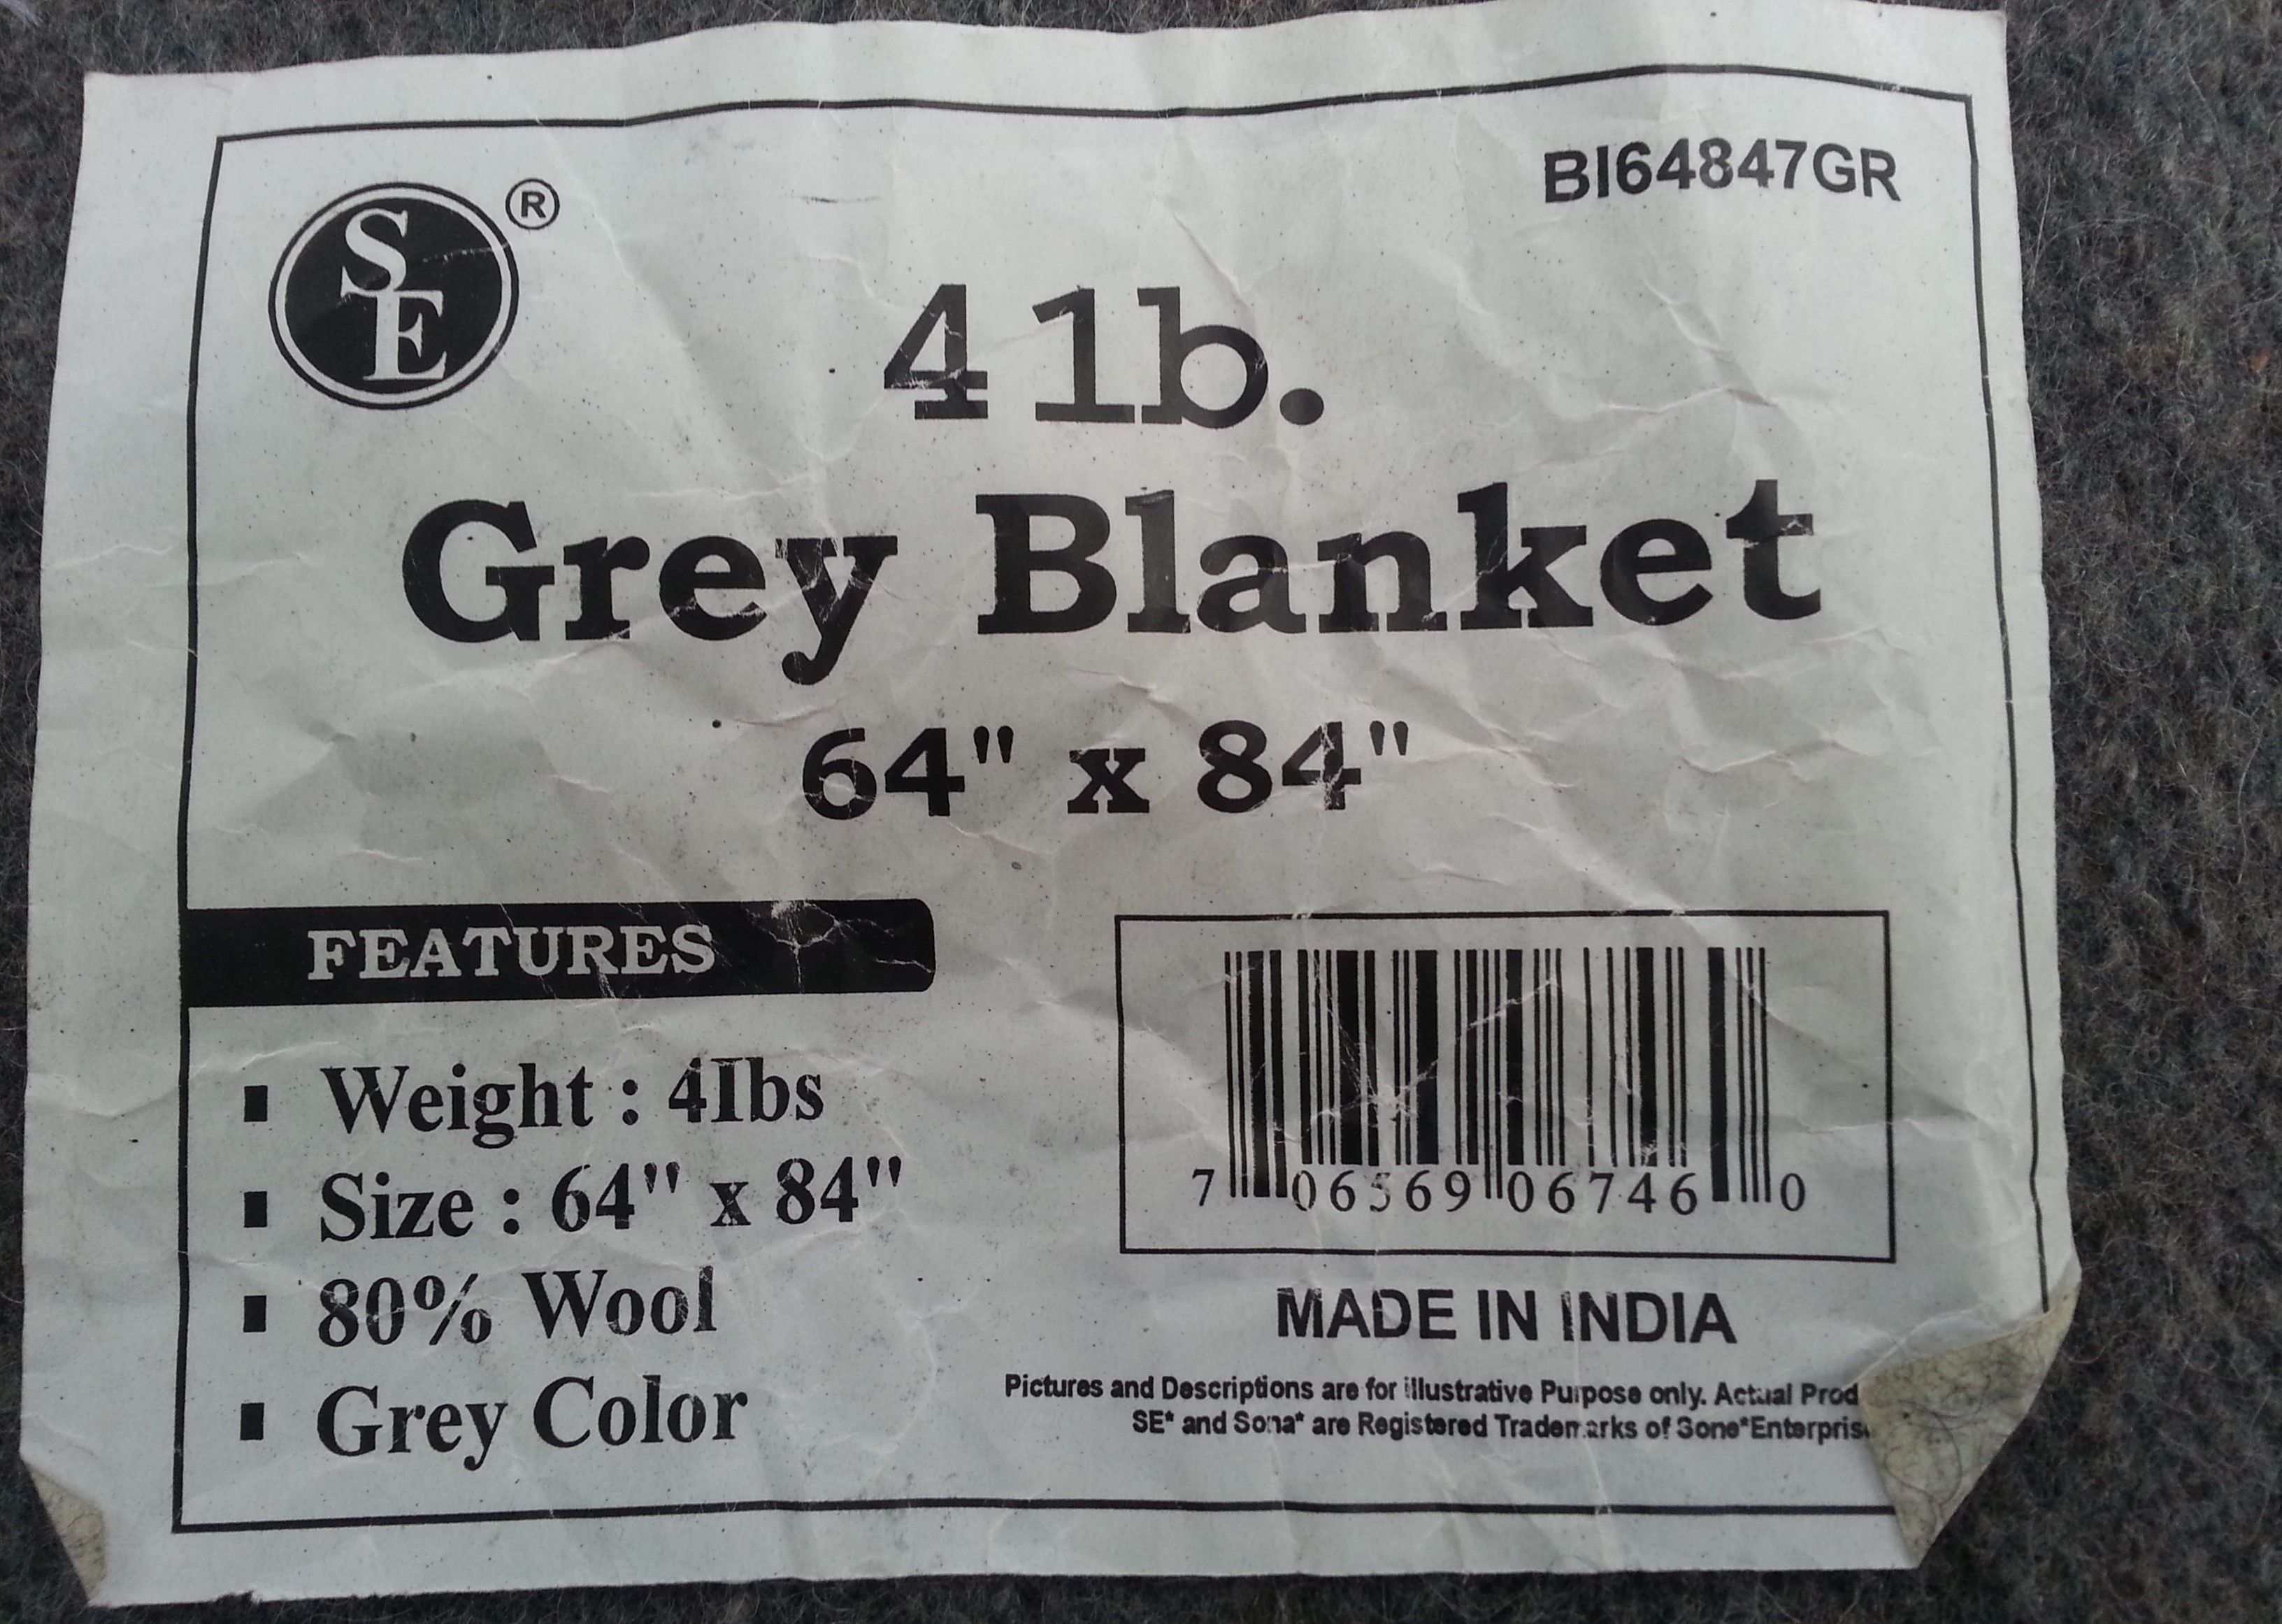
You can see the label for the wool blanket above. If you would like to know more about the science of wool qualities: sciencelearn.org.nz: Wool Fibre Properties
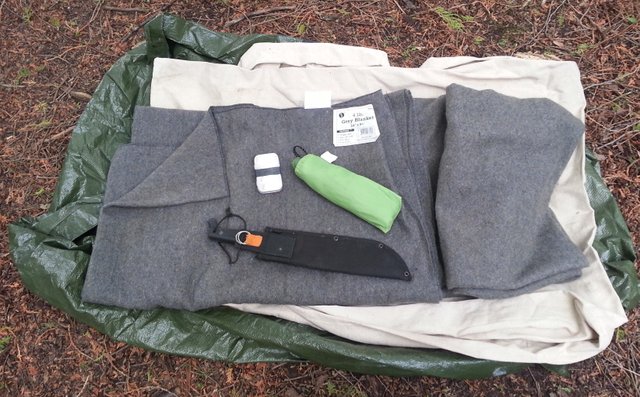
In the picture below you can see the wool blanket sewn into a sleeping bag. You can also see the folded second wool blanket.
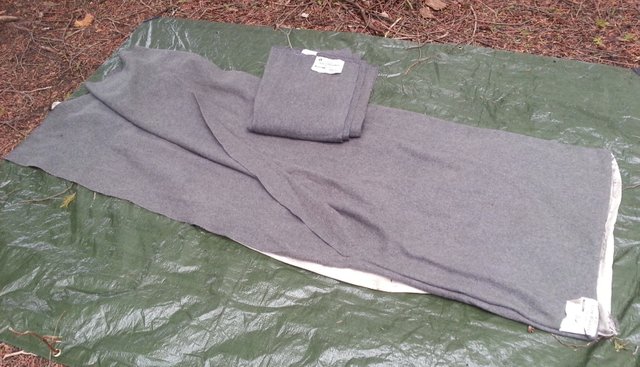
The second wool blanket has not been sewn into a sleeping bag. An extra blanket for those colder nights or draped over the hammock sides to prevent loss of heat from air movement under the hammock. It could also be draped over the shoulders to add comfort around the campfire on a cold night. Wool is also somewhat fire resistant - a good quality to have around campfires.
This cotton drop cloth sleeping bag, wool sleeping bag, and wool blanket is a great setup for me in the spring, summer, and fall. In the summer I would leave the extra wool blanket at home. For winter time camping an adequately built more permanent shelter and possible wood fire heating combination with this bed roll system would be necessary for a restful sleep.
Sewing Kit
In the picture below you can see my simple sewing kit. I keep the kit in a small metal box - held closed with a large rubber band to keep it from opening unexpectedly.
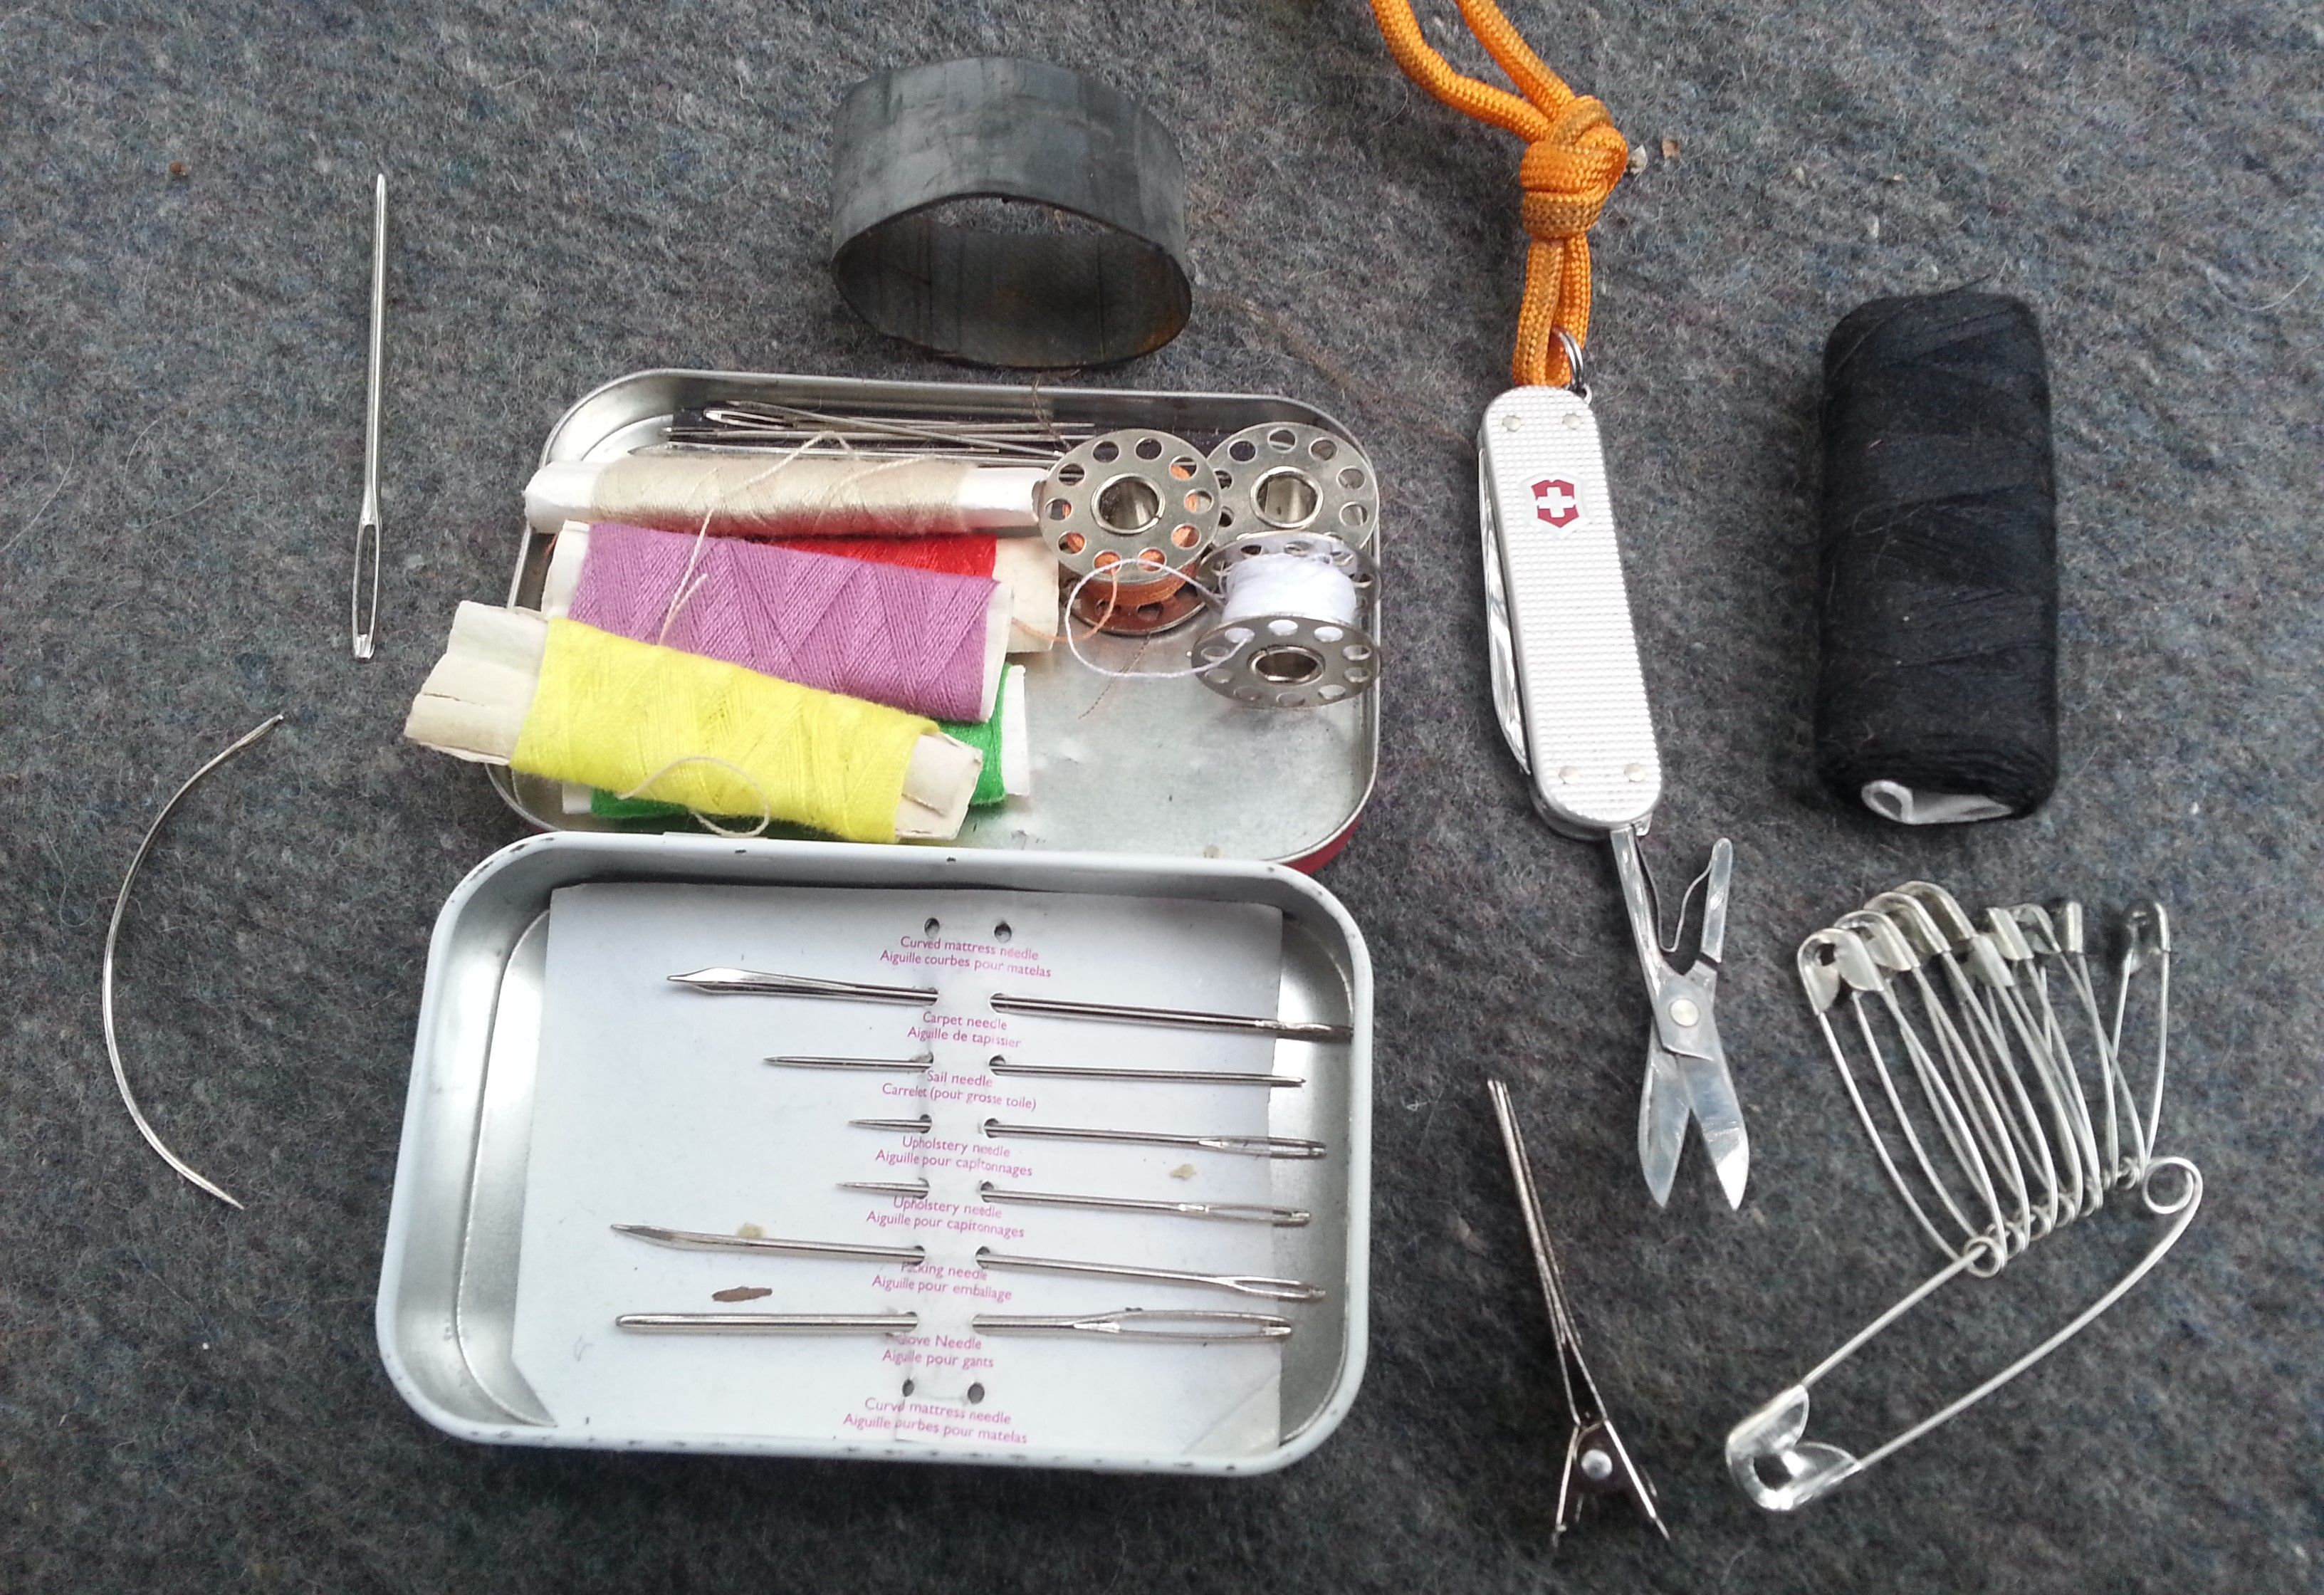
Sewing Kit Contents:
- My favorite needle, the only one I use, is the Curved Mattress Needle - on the far left-bottom of the picture above. Great for plunging into fabric when you can't poke straight through. This needle is tough with it's thickness, I always ended up bending or snapping the smaller needles. No need for a thimble, there is only one sharp end on this needle, and the curve is comfortable to press on. The curve in the needle also gives nice leverage for sliding through thicker fabric.
- In the bottom part of the open sewing kit box you can see an assortment of needles with their names. The Carpet Needle at the top looks like it could be useful for piercing leather.
- Above the needles are an assortment of threads. There is also a magnet strip with more needles clinging to it.
- To the right of the sewing kit box is the Swiss Army Knife - with Scissors for snipping thread.
- You can also see a small clamp and safety pins for holding fabric together while sewing.
There are many different types of hand and machine sewing needles for various uses and material types: en.wikipedia.org: Sewing Needle
How to Sew a Wool Blanket or other fabric into a Sleeping Bag
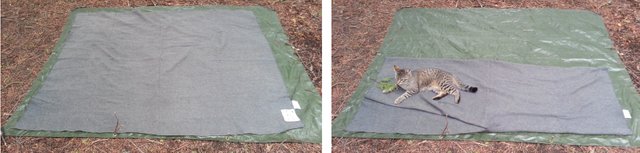
In the picture below on the left you can see the wool blanket. I the right you can see the lengthwise folded in half wool blanket. You can also see the cat that can appreciate the insulating comfort of wool.
- In the picture below on the left you can see how the wool blanket is slightly folded over on the lengthwise side where the opposite sides of the blanket meet when folded over. I folded it over more than I would normally so that it would be more obvious to the viewer. The stitch line would go lengthwise up the center of the folded over hem - pushing through 4-layers of wool blanket.
- In the picture on the right, you can see how the bottom of the folded wool blanket is then folded up a little, then the stitch line along the width of the hem to close off the bottom of the wool blanket sleeping bag.
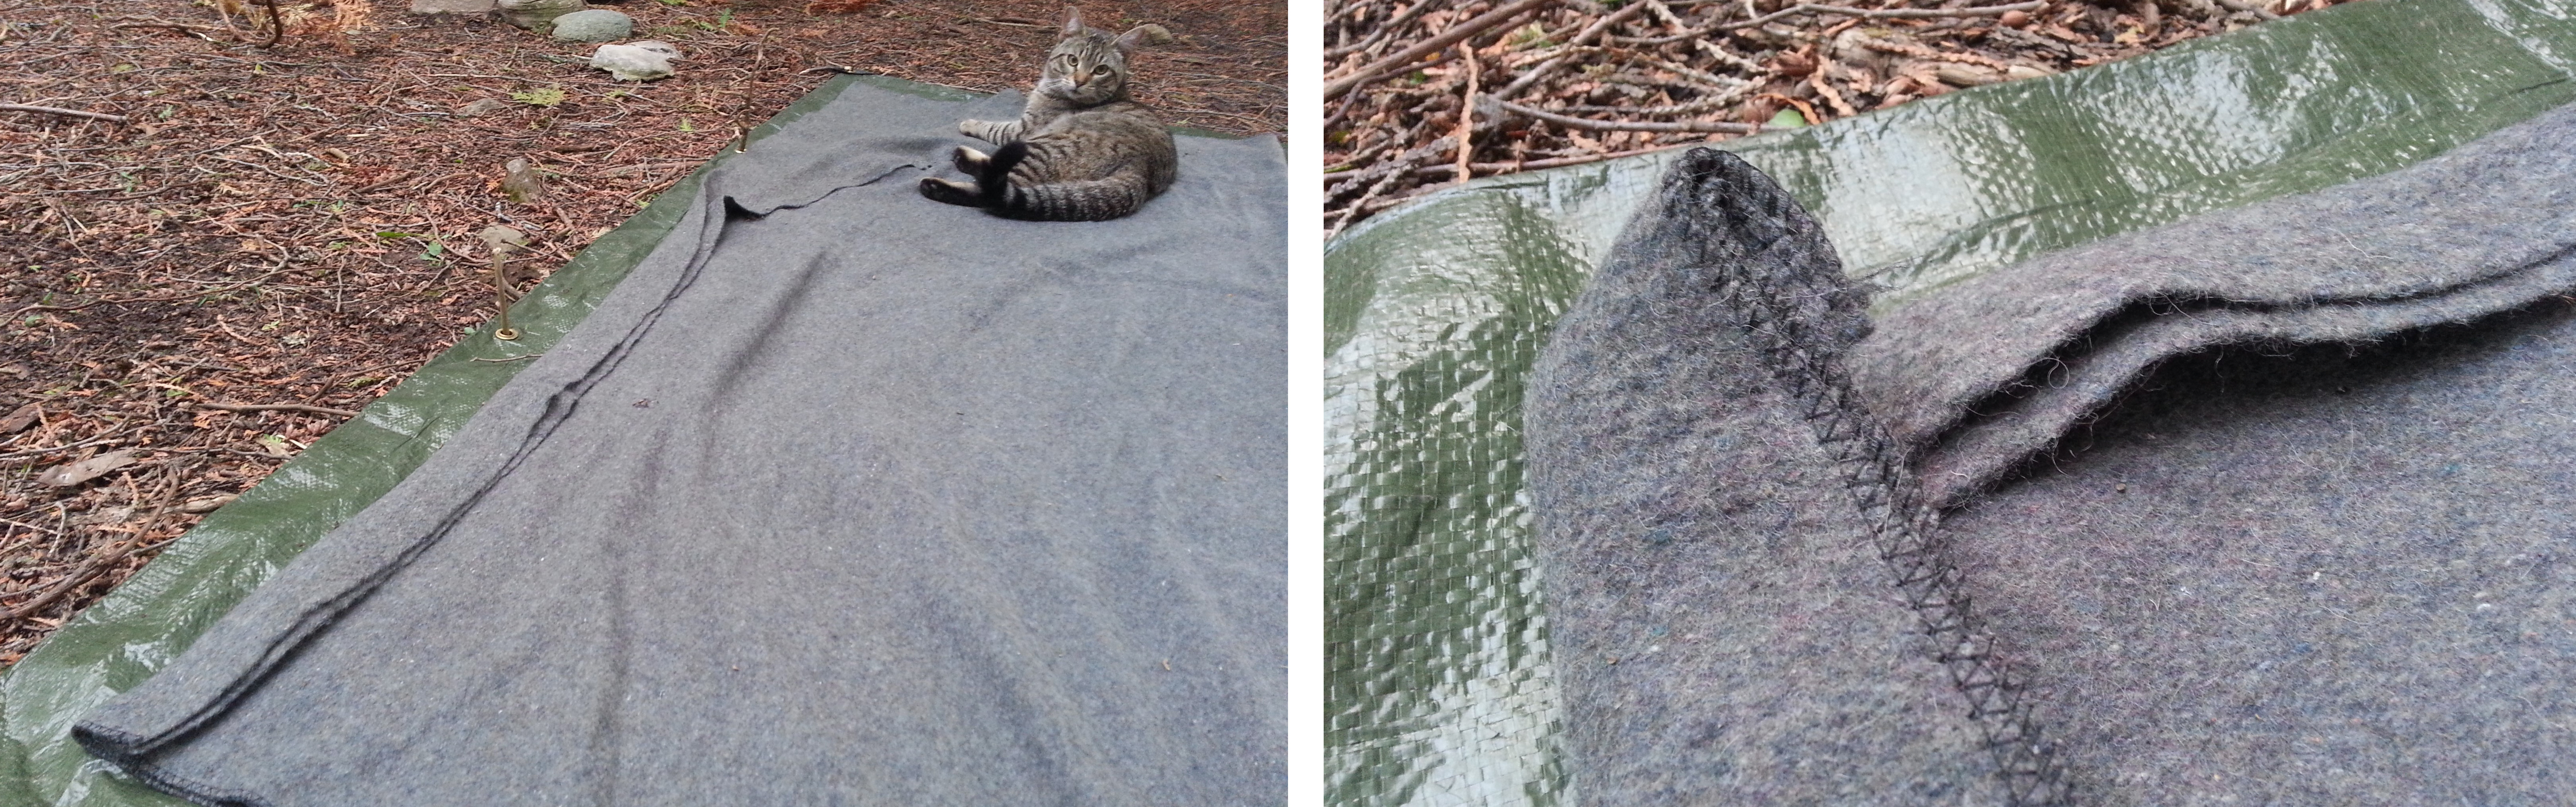
In the picture below you can see how the stitches looks on the inside of my wool blanket sleeping bag. I don't the nicest looking stitches, I may one day get a small sewing machine, but for now the small sewing kit works well enough for the odd gear alteration or clothes mending.
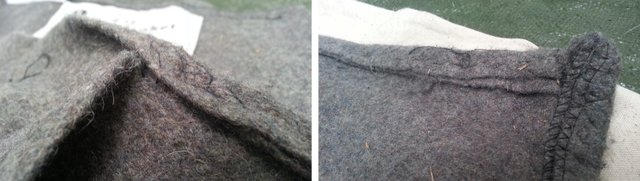
- After stitching, the wool sleeping bag is then turned inside out to hide the stitching.

In the picture above you can see the wool sleeping bag sewed half way up the side from the foot end.

In the picture above you can see the sewed foot end.
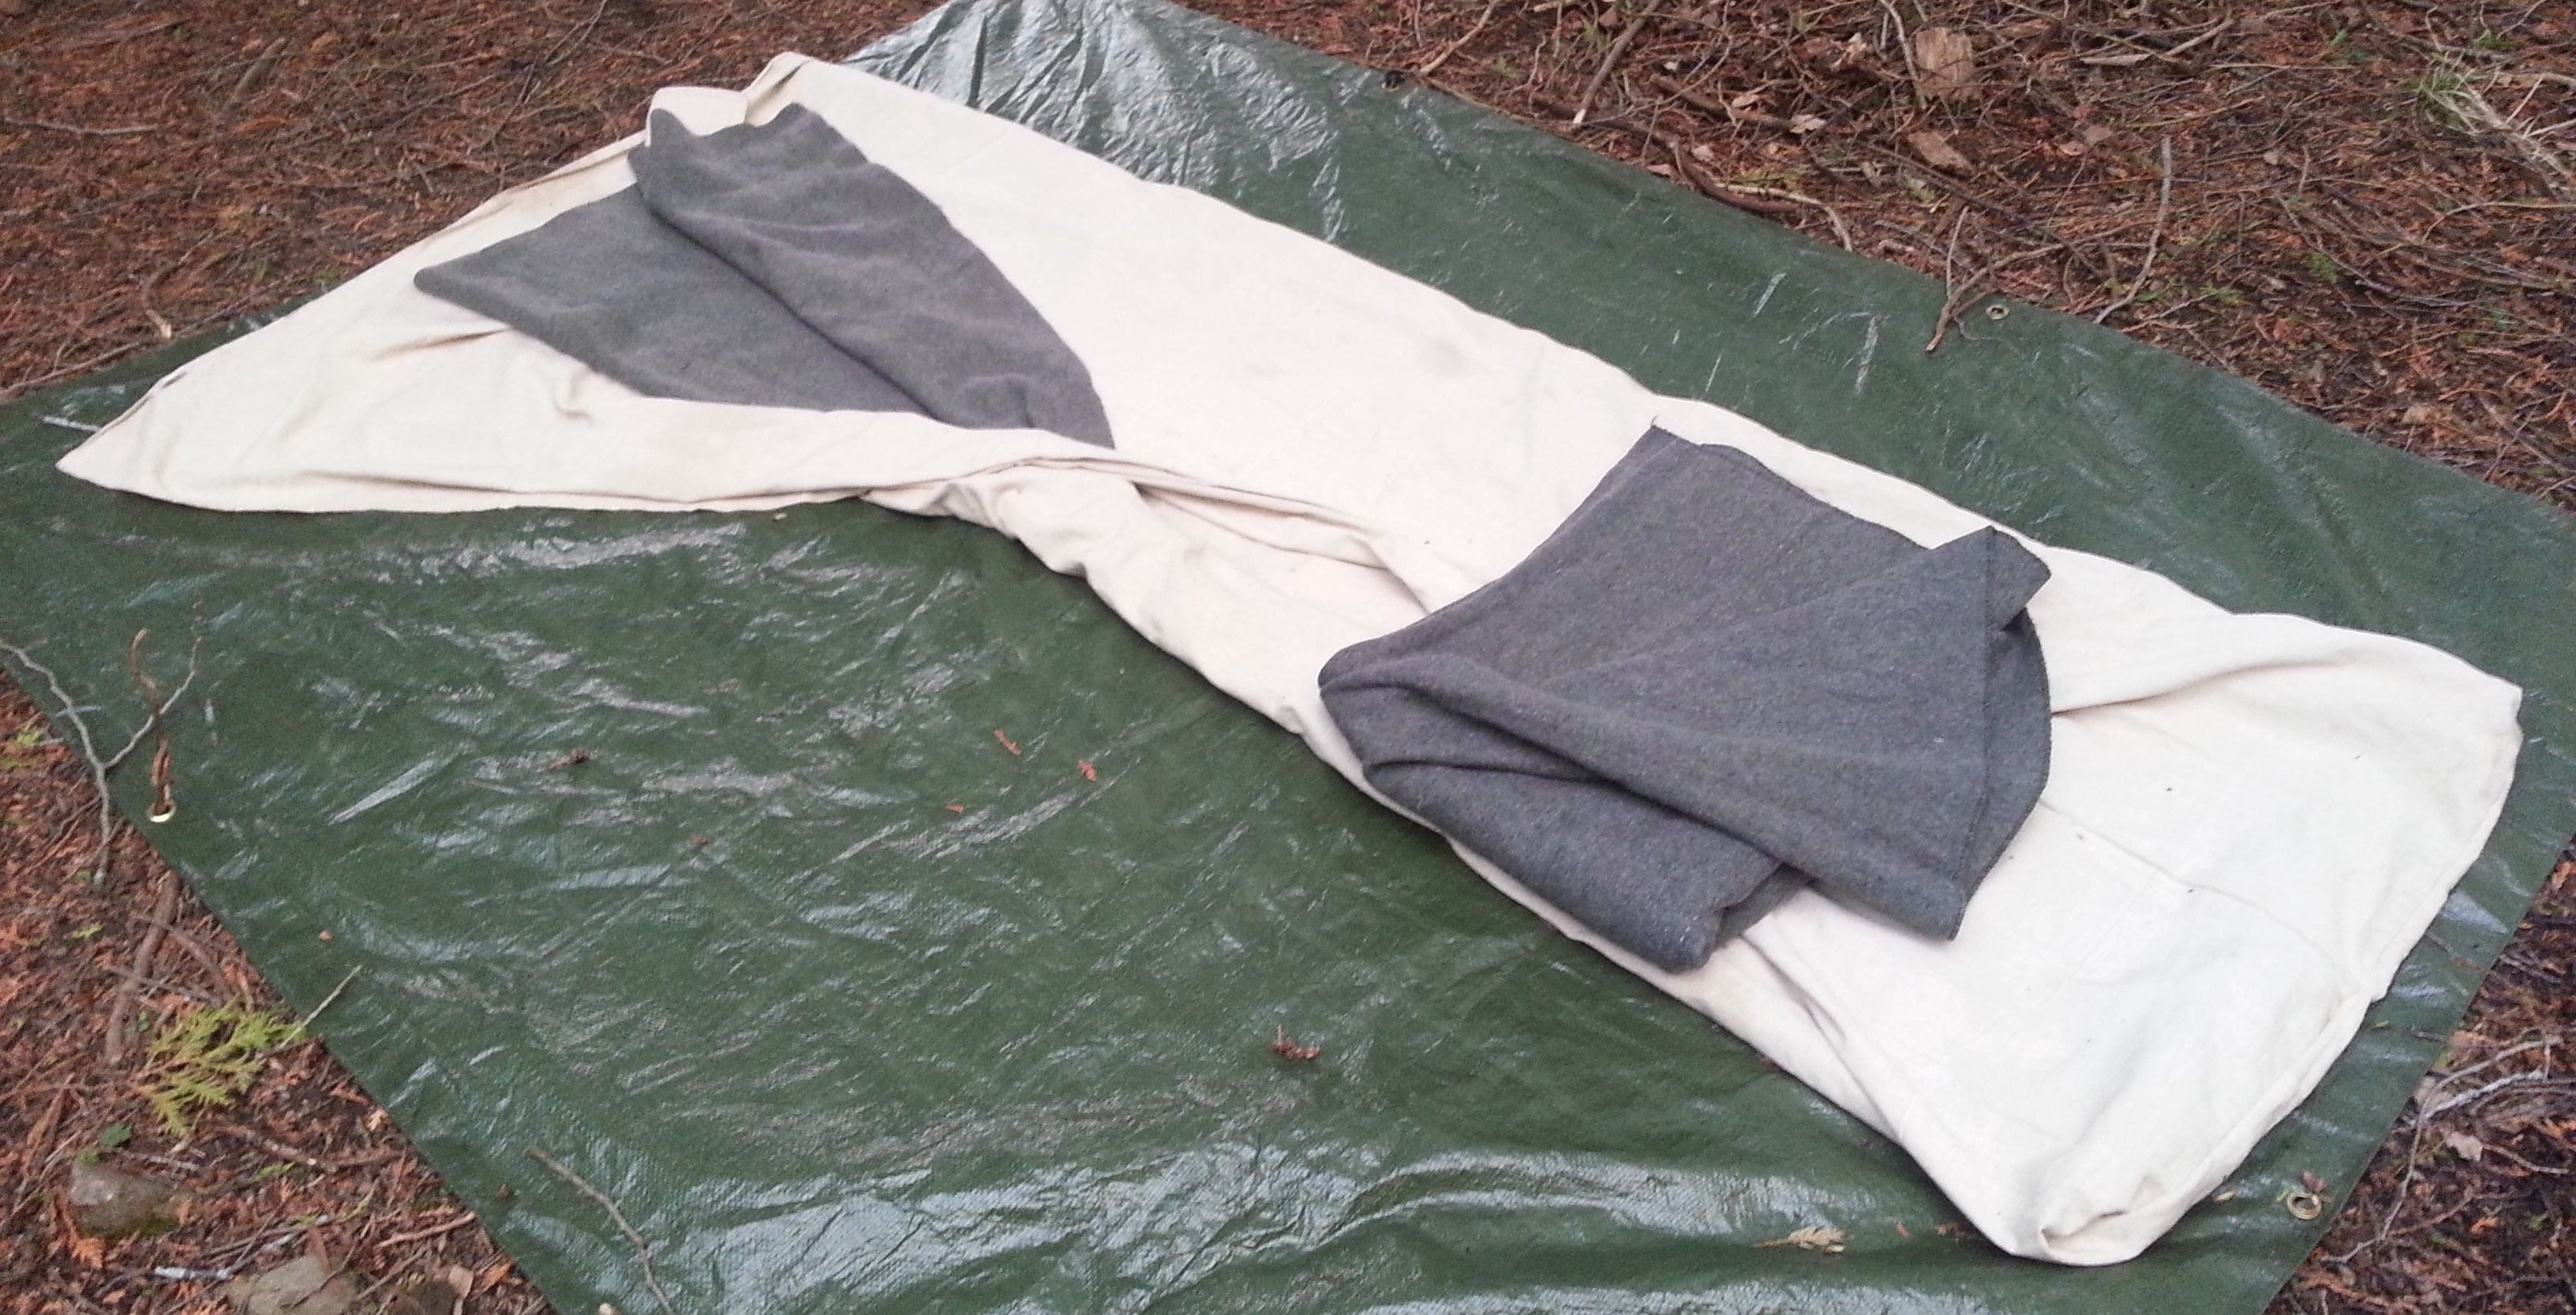
Above is the assembled bed roll bedding - with the extra wool blanket.
Previous posts you may find interesting:
- Bushcrafting: Five Simple Tools that can be Made in the Woods
- Survival: Starting a Fire with a Ferrocerium Rod - Multiple Methods
- Bushcrafting: Machete, Folding Saw, and Fixed Blade Tools
- Back Acres: Small Knife Sharpening with a Pocket Sharpener - Regular, Serrated, and Gut Hook
- Off-Grid: Backpack Solar Panel - Portable 2.4 amp USB Charging
- USB Induction Charging with BioLite Camp Stove - Burns Wood - Boils Water
Have a great day!
Nice set up man.. (Nice cat too)...Is that a Cold-Steel Machete?
Good little rig regime, and versatile no doubt too, although i would suggest it is for experienced users because newcomers to this set up will have to discipline themsleves in the art of blanket use & keeping it dry etc...
I like the fact that you have a sewing kit with it (good thinking).
I also like the self-contained roll-up style, kin of reminds me of an Australian type rig.
Thanks @preppervetuk - definitely for more experienced in the winter season - you would basically need to build a shelter with heating most likely .. that's an Ontario Knife Company 1095 steel machete :)
Roger that man.
This was a quality job. I could tell because the QC supervisor was in the photos. :))
But seriously, this is a really good post with good info. I like the blanket ideas, 1 sewn, 1 not.
Thanks - it was windy that day, so the cat was doing a great job holding down that side of the blanket. A gust of wind finally blew the other side of the blanket blew over top of him - mr cat wasn't very amused :)
Congratulations! This post has been chosen as one of the daily Whistle Stops for The STEEM Engine!
You can see your post's place along the track here: The Daily Whistle Stops, Issue #128 (5/8/18)
The STEEM Engine is an initiative dedicated to promoting meaningful engagement across Steemit. Find out more about us and join us today.
For someone who has only ever camped with a down sleeping bag and thermarest beneath (or even more cushy setups), this is fascinating to me. Part of me loves the idea of this kind of minimalist survival. The other part of me asks, "Wouldn't you rather have a sleeping bag?" So, if you'd humour me, why this sleeping kit over a stuff sac full of "modern" sleeping bag? Methinks this is more versatile, giving you layers to use instead of sweaty summer nights in a mummy bag that doesn't like campfire sparks. :)