Steemit Tutorial - Turning My Steemit Art Into A Children's Book On Lulu - Part Two
In my first article, Turning My Steemit Art Into A Children's Book On Lulu, I said I would leave the instructional details about Lulu for this second post. In Part Two, I want to explain what I think are the relevant points about publishing your work on their platform, as it pertains to a Steemit member. Basically what's in it for you, for the most part. In a nutshell, Lulu was a very easy to use, and an effective tool to publish a book in both written and visual formats for me. Let me get to the nuts and bolts first and I'll leave the "why you should do all this" part till the end.
The Lulu Studio Interface
When you start a new project and begin creating your book, the Lulu Studio opens in it's own window. It's a clean environment to work in and runs very smoothly on it's own. It never lagged or froze at all. Most of it's features are the basic stuff, SAVE, UNDO, REDO, etc. There's a standard menu at the top and the tools are well organized and simple. You choose a theme before you start and you can easily change that at any time. In the image below, I'm creating the front and back covers. You add all of your images from the panel on the right side and choose the page layout from the one on the left.
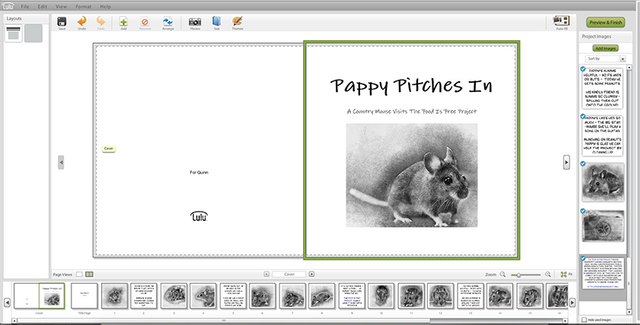
The bottom row is the page navigator that allows you to jump from page to page. After you've uploaded your images, you just drag and drop them into place into grayed out placeholders in the main windows. Here's a few tips:
- Start your book first in Lulu and save the project. Choose the type, size, theme, etc. When inside and editing, the grayed out image placeholder will tell you the optimal size your image needs to be for that book and theme. Then, size and crop your images according to that. They'll look a lot better and fit perfectly if you do it that way. Later, when you create more, then you'll already know what size to manipulate them into beforehand. In my case, the majority were 2333 X 2333 pixels.
- When you select the theme, it puts sample pages in based on the number of pages you choose for the size of your book. It's pretty much a variety of formats. I only wanted a picture book with mostly the same size picture. I found it best to remove everything back to page four and add them as I went. You just highlight your last page in the main window, click the ADD button, and the App will place whatever style page you have selected from the LEFT menu.
The Left Side
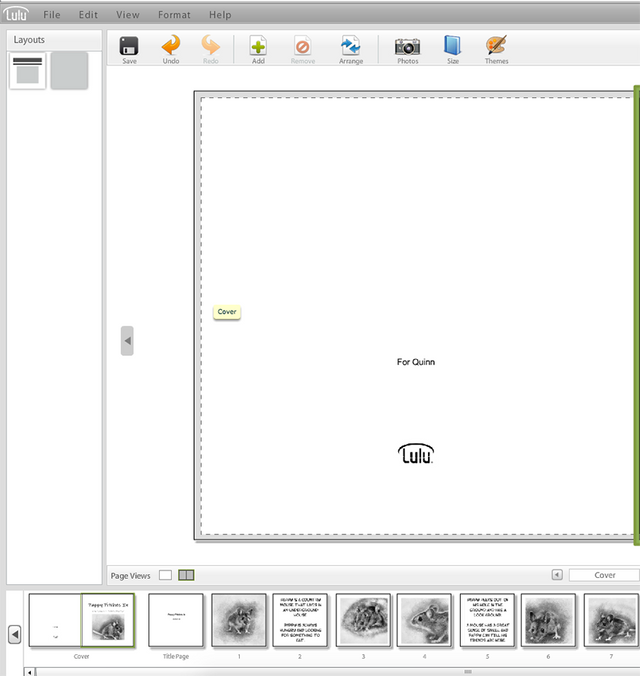
The next image is a closeup of the left side of Lulu Studio. Here you can better see the LAYOUTS panel on the left, as well as the MAIN menu and EDIT menu. In this view you're seeing the back cover and can edit it accordingly. For the Theme I chose, I was only able to edit the text and not add any more images. I'm unclear if that's the case for all themes, or just this one.
The Right Side
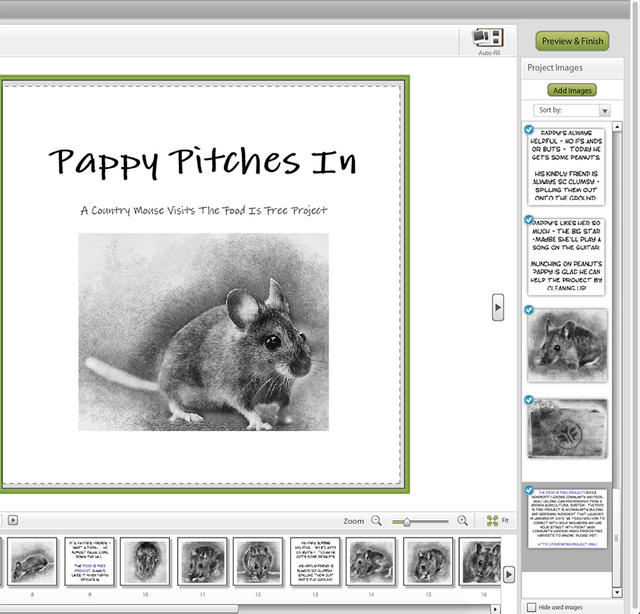
Here you see the right side of the Lulu Studio. This has the right side Image Navigator and where you add and delete your graphics. Also there's the Preview and Finish Button, which you click to complete the project and publish it. I didn't use the Auto Fill Button, but I looked into it and it's a way to the automatically add the images you've uploaded into a project. This could be avery powerful feature for someone like an artist or digital artist who has a lot of images to create picture books from. If you name your pics with numbers first and upload them in the correct order, then they would be sorted that way here. Auto Fill could be a means for you to create a lot of books fast.
The Left and Bottom Pane
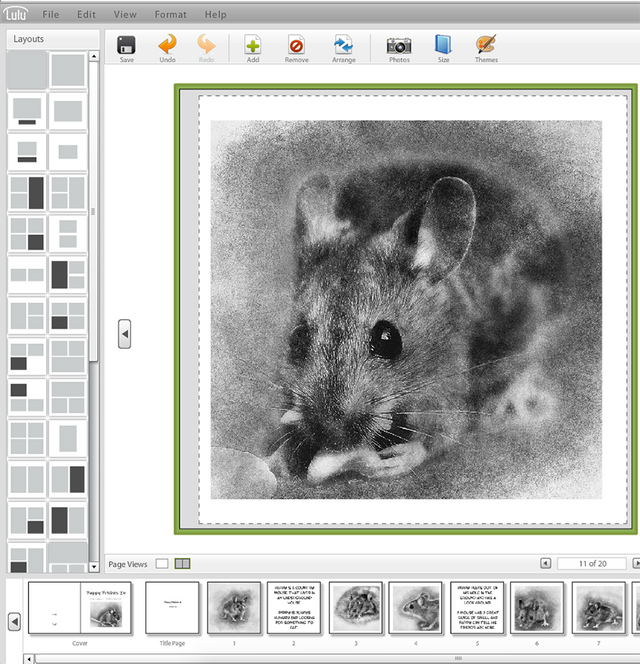
This next image shows the Left Pane with all the various image and content types listed. This would be where you could mix things up and make some different kinds of book pages. Also, the page you have highlighted here will be the one that's inserted when you click the green ADD button. The Bottom Pane is more visible here too.
One thing I wanted to note here is that if you notice the one labeled "1" is a full size image. This theme happened to make the first image one that's full-size on the page for layout reasons. The reason I mention it is that you could choose this type of page for every part of your book. It would make them all full size and look pretty nice going to the edges the way it appears in the editor.
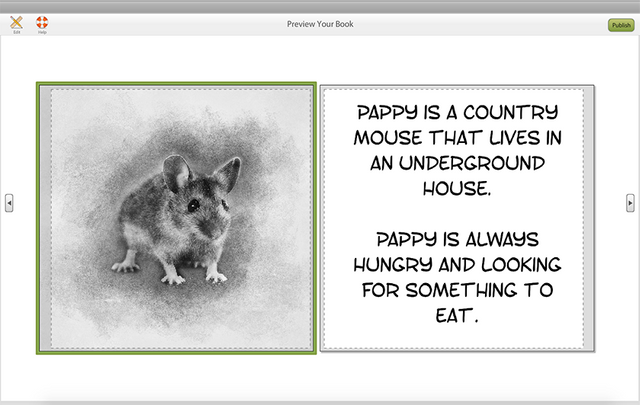
The Preview Screen
The following image is what you'll see after you click the Preview and Finish button at the top right. This screen will let you flip through your book before publishing it and exit if you want to go back and make any changes. This is also a good look at what the full-size type image looks like on the page. From here you just click Publish to start finishing things up.
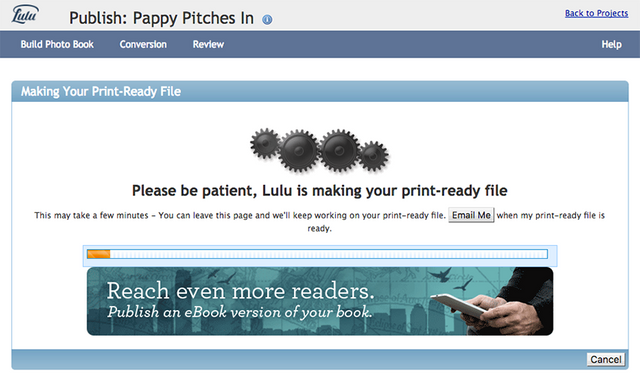
The Publishing Progress Screen
This is basically the progress bar you get to look at while The Lulu Studio creates your book. If you have a large book, you can choose to have an email sent to you while you go do other things. Mine wasn't that big, so I didn't do that part.
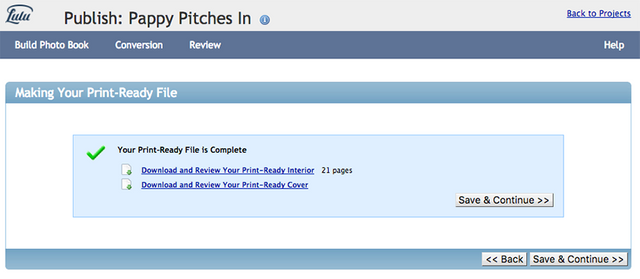
Print Ready Files
This screen, for me, is probably one of the best parts about the Lulu publishing process. Lulu takes your book and makes the content and cover available for immediate download in PDF format. On the surface, this may not seem like such a major feat, but if you want to have a readable copy of your work, they give you one right off the bat. The best part is that the way they format the PDF. Each image is it's own page and Photoshop will import the PDF and create individual images, sorted chronologically and numbered real nice like. More on that below.
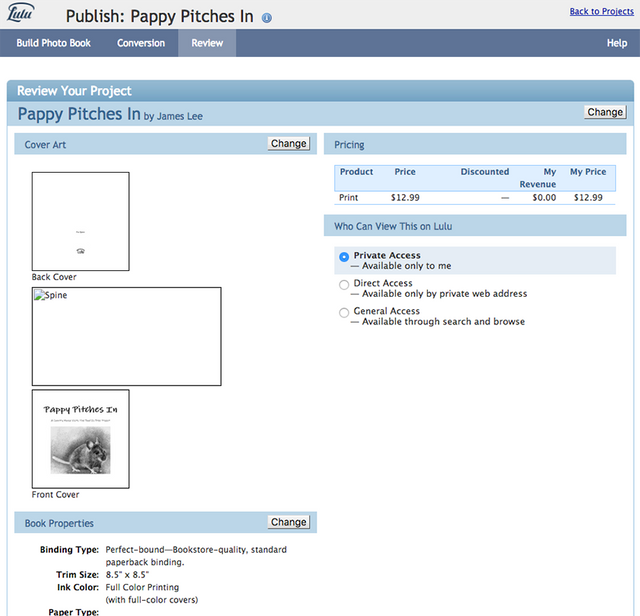
The Final Page
This is where Lulu recaps everything you've done. They detail the cover art, and this is where I dropped the ball a bit. I need to do more research into what the spine is. I'm not sure if that's an image you can upload for the edge of your book specifically, or just an image of your book laid flat for publishing purposes. I'll figure that out and post it in the next one, along with digital publishing versions, Amazon KDP and a few other issues I want to look into.
Additionally, they detail the pricing structure of what your cost is to buy your own book, as well as assigning access to the work by Private, Direct or General. I also need to do more research into revenue and what the markup can be. Most times, you're allowed to set it to mostly whatever you want, but I'll need to figure that out.
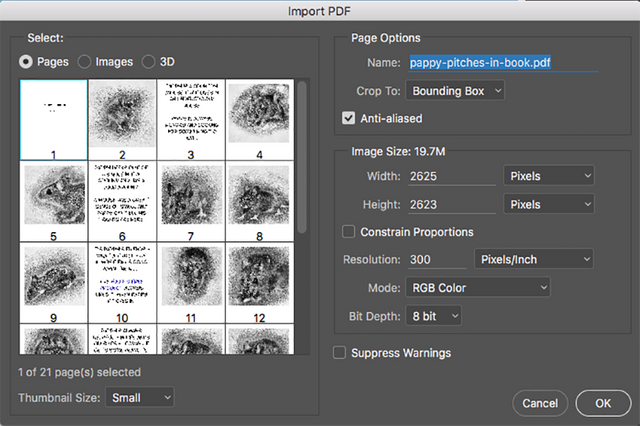
Editing The Print Ready Version
I just wanted to show what Adobe Photoshop does when you open the PDF Lulu produces for you. I like this a lot because the time spent creating and mostly, manipulating images for Steemit can add up pretty fast. When you open your Lulu PDF in photoshop, PS will sort the individual pages into images, number them in order and let you set the size, resolution, color mode, etc. A big one for me is to click "Constrain Proportions" and change the width to 840 PX formatted for Steemit.. (maybe it's actually 850, but I use 840 for old school reasons).
This is a big time saver and organizes the book into the correct order for me so I can FTP the folder to my server in Filezilla, grab one image URL and add it once into Stackedit. Then just copy/paste the same image URL over and over - change the number for each one and all my images are in the editor in order ready to go. I then just write my content from there. But that's just me.
Finally, I wanted to summarize why publishing your work on Lulu, or anywhere else for that matter, should be important for someone engaging on Steemit. It shouldn't matter if you're an Author, Artist, Digital Artist or Blogger on Steemit. If you're creating the content, and would like to broaden your reach via that content, then you might want to move that into book format and get your work into other places as well. Lulu is a means to make your creations into books, both printed and digital format. That should interest most everyone here on Steemit.
I liked doing this in Lulu very much and after checking out a similar service, (CreateSpace by Amazon) I'll know better if I'm going to keep using them going forward or find something else. I like what I see so far though.
@vegascomic OT : are you still playing in the FF league? did you see my post to you on here the other day??? ;)
I guess I am. maybe I can get back after it and make a comeback.
Well, even if you can't make a comeback it makes it a little more fair for the other players when opponents rosters are completely filled out ... despite you not needing to do so with 2 players to defeat my sorry ass 2 weeks ago lulz. ;)
It's to my own detriment if I have holes in the roster.
Great title for your book I think it will do well
I agree on the title. but I'm making the next post and have discovered the book needs to be 32 pages long to be eligible for distribution. So I'm going to make a longer version where he goes to a park and gets fed peanuts.
Great post. I can tell this took a lot of time and effort. Great formatting. Thanks for sharing. STEEM ON!
Thank you. Will post more on this.
Up vote and following !
Thanks so much. Your's is true art!
@vegascomic congrats and I hope it sells big time - that would be chaching while you're sleeping!
Thank you. I haven't taken the book off draft status yet. I want to finish this tutorial then release it. Post what's happened later down the road.