Stippling Art Tutorial: How to Make Order Out of Chaos (Step-By-Step How-To)
Don't Tell Me You Can't Draw!
 t. In fact, I would like to share one of the recent creations I have made. I won't lie, I am actually kind of proud of her and honestly... I didn't know until I did this piece, but I love doing stippling art. I would have liked this image to come up a little smaller, but hey, you get to see the details.
Hint: Anyone, got a simple and quick way to resize? I'm still learning! Let me know!
Looks pretty neat, right?
This is why I wanted to share some work that I have been doing lately on the art front. So let's get to it...
Stippling, if you aren’t familiar with it, is a type of art form where you use rows of dots to create shapes and shading. Learning how to do this is a fairly simple practice and I have found that people that say that they “aren’t good at art” usually have an easy enough time with the artform.
The concept is simple and all you need to get started is some markers or pens. It is one of those mediums that it is pretty flexible on what you use. Personally, I am fond of Sharpies...
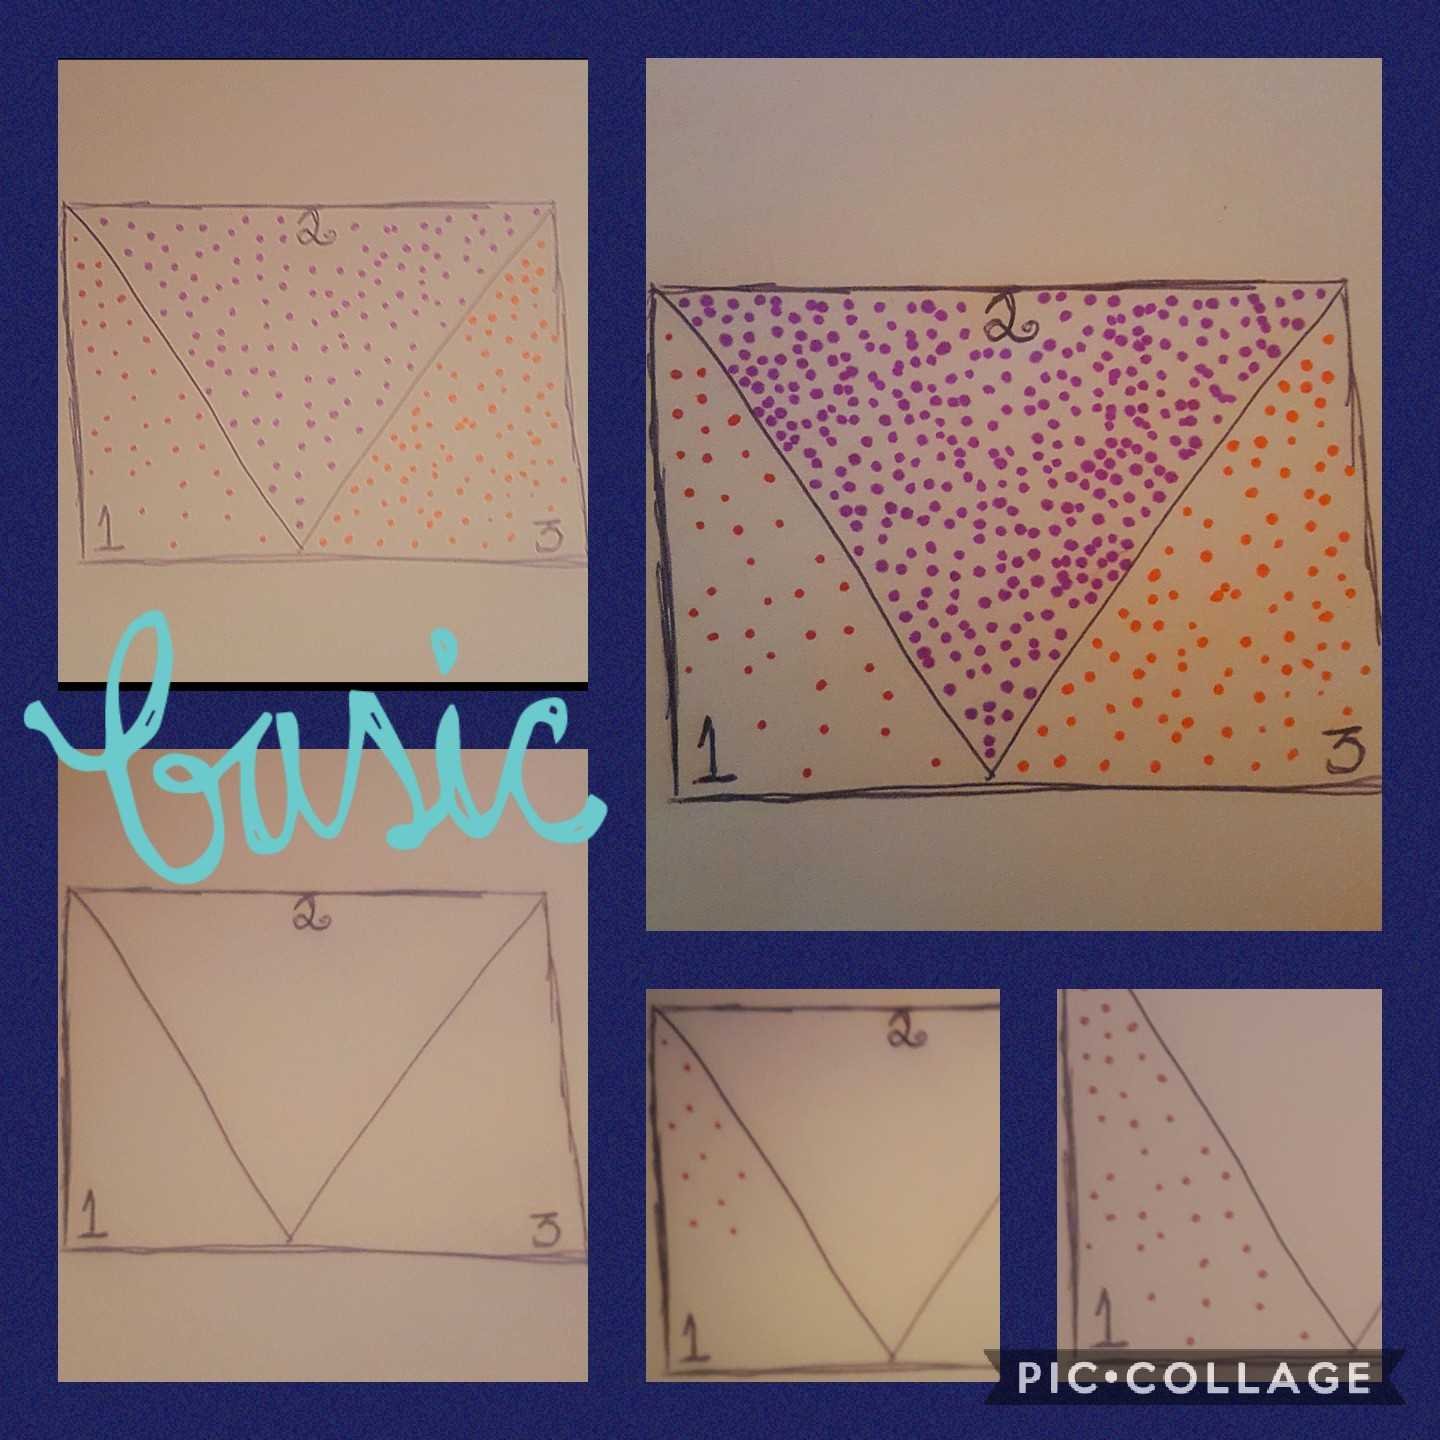
So, now here I have taken a quick sample to show you the concept. Basically, follow the boxes and you will see them change in color and density as I add more dots.
All collages are done with the program Pic Collage. I'm a fan AND you can use it on the phone or the computer!
Simple enough, right? If anything, it requires some patience but even if you don't have an eye for shapes or shading, you can get some neat patterns and color schemes.

To create a more dynamic pattern you simply need to use different pens or colors. In this case, I had begun with purple but added a hot pink. My original marker was a standard sized purple sharpie. The additional smaller detailed dots were done with a fine tip Sharpie, as you can see in the collage above.
Simply add more dots, being careful to not bleed or make straight lines. The key is keeping the dots somewhat independent and scattered. Try to avoid making lines out of the dots. Rather, apply in a speckled random pattern to give a more natural shadowed look and to create depth or texture. If you start with the lighter colors, all you have to do then is to add on top of it.
This is what makes it easy for just about anyone to do, no matter how much skill they have.
Step By Step Guide to My Art Creation
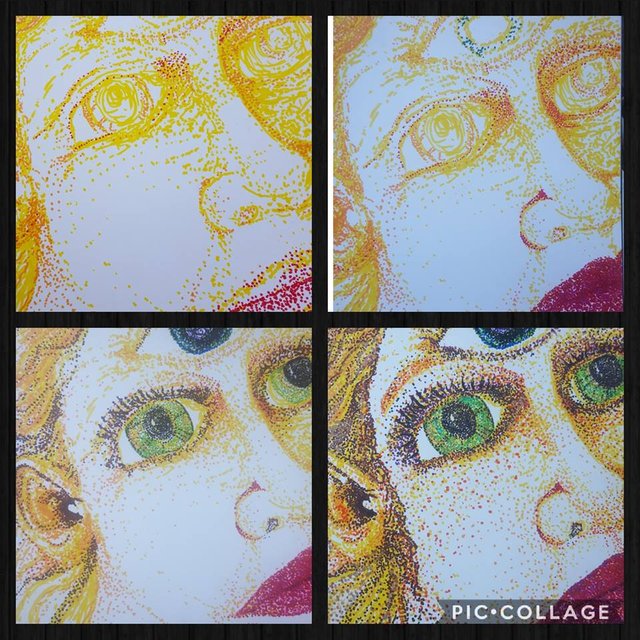
Here is the step by step of the stages as I createfd the final outcome that you saw above.
My suggestions is to start with the lightest colors first. This way if you make a mistake, you can cover it with depth and shadows with darker colors later.
Starting at the top left corner, you will see that I used the pink for the lips, a orange and yellow for markers where I wanted eyes and other shapes to follow. I didn't actually draw this first, so there is no guide. Next time, I may try to do that but for now, this was the first kind of art I had done like this and I was doodling and honestly, I didn't know it would come out this good. I have to say, I am glad I did this now.
As I added darker colors, you can see the depth increases and it takes form.
Here is this piece in the raw, "just about done" format.
Personally, I tend to leave the drawn format at this level with a bit of white left.
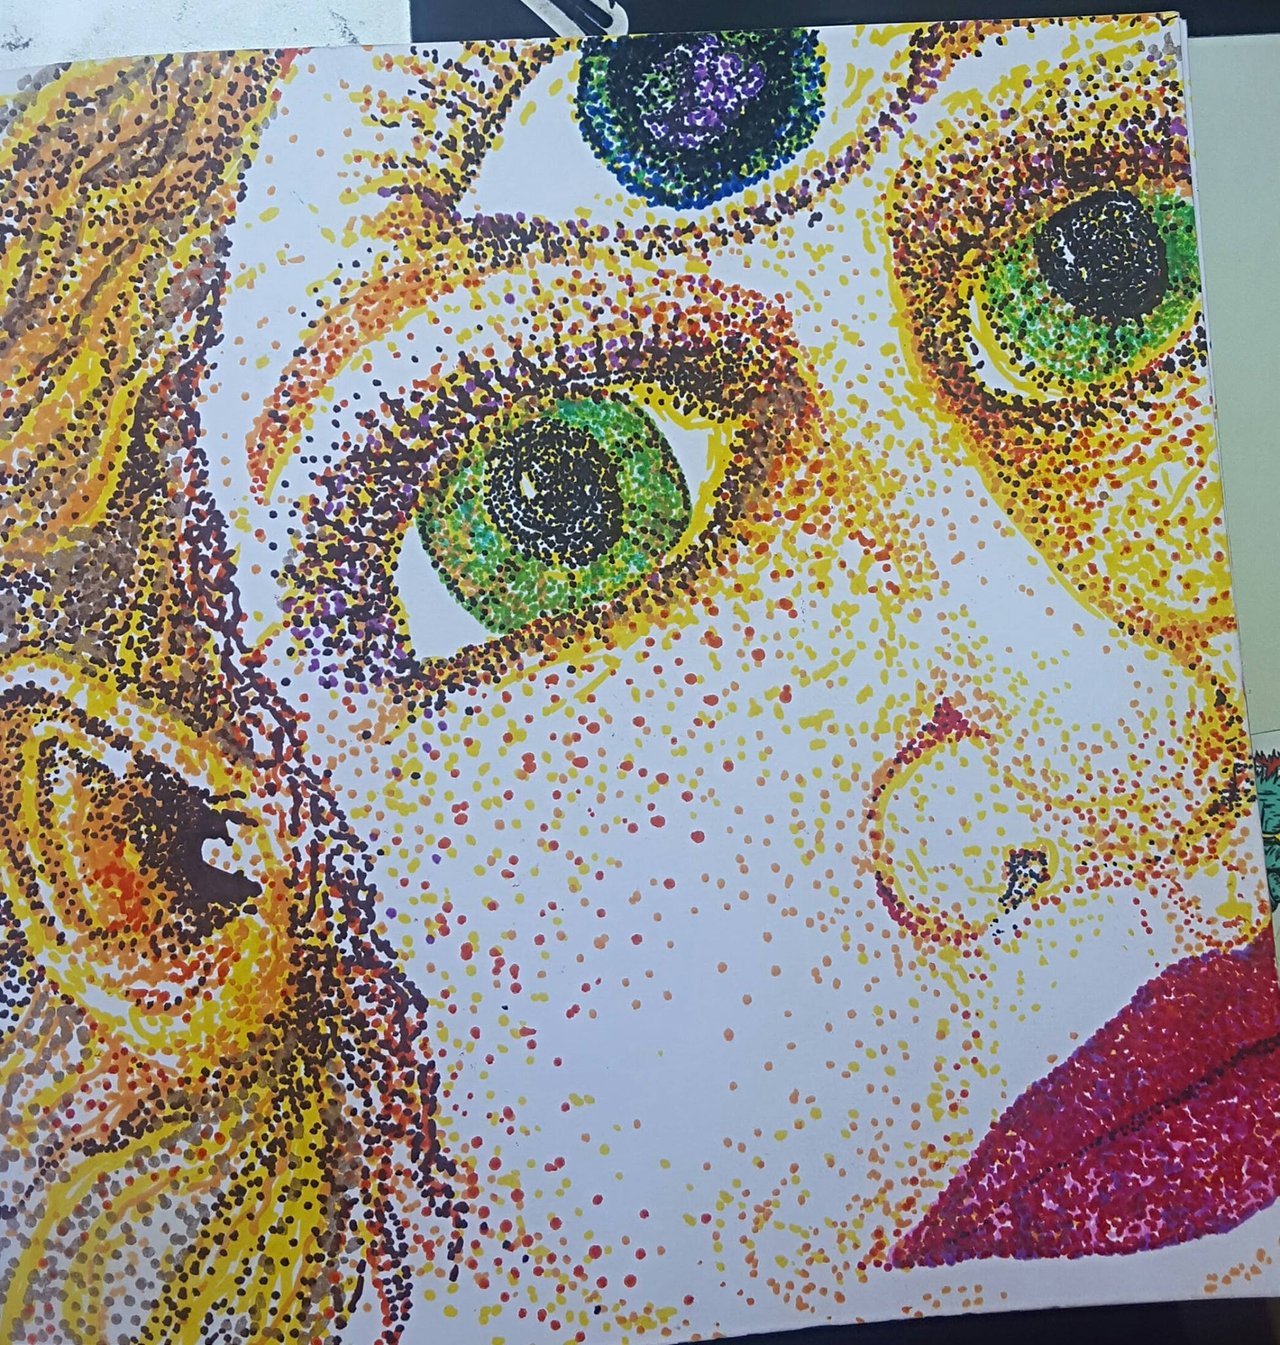
The reason for this is, I like to digitalize the art next. I will probably post that tonight when I have the next step completed.
For now, I hope you enjoyed this. Give it a try and see for yourself. Feel free to tag me in your samples if you do. I would love to see your art and how this process works out for you!
Wanna See More Art?
You may also like the following articles:
Karma / Lotus drawing with light stippling art
DeviantArt and Steemit.com @RumDancer
Twitter: RumDancer770
Oodles of Doodles rumdancerart.tumblr.com
I really appreciate authentic posts like this (and love pointillism) and I look forward to seeing more of your content in the future. Hoping you’ll follow so we can connect and continue to evolve and learn from each other! Remember, be yourself, because nobody else does it better -- Full #Steem ahead @rumdancer :)
Much ❤
@Tayken
Thank you and you are right about learning from each other. It has been a journey and I am liking it for sure. I just noticed the gif and what he was saying. I love that so much <3
Yes, pointilism. It's great shading technique used by artists. I like the outcome but I do not have the patience to do it lol. There is this artist I admire alot who used this technique to create some beautiful drawings of animals and portraits. Her name is Nadya Vasilkova. Btw, thank you for sharing the tip. I love the outcome and you are right, everyone can definitely do this 🙂
Pointilism. Thank you @coloringiship and @tayken :) I am going to definitely work on it some more. I have fun and get lost process of it all. Thanks for looking! Nadya Vasilkova. On it!
thanks for share:) I will be happy if you visit my work and support me thanks :)
This is awesome!
Why thank you good sir! I liked it a lot! It was fun and I plan to do more in ze future!
Awesome! Love it!
Thank you :) It's coming along!