Sketchup - "Step by Step" Entry 2 (Rexona Men V8)
Ok, so we are back with the second part of the Sketchup "Step by Step" series retail version "Rexona Men V8). Do you 'member, we stop at this part.
"If you liked it you should have put a ring on it"
- 3.0 Lets continue.. with the details, and mechanical parts of the object.
We modeled the "Head" now we go for the "Neck".
We start with the same Circle that we used for the Half Sphere in the first entry, we offset it and pull to create a ring, then we cut 1/4 of the ring and Unfold it with the "Flattery" or the "Unwrap and Flatten" plugin, either way we need to make the 1/4 ring faces flat.

- 3.1.- We do this so we can later on wrap around and bend the shapes that we need to detail the object.
Lets check this out, i draw and pull the shape of an arrow and some sticks group each one and then select all of them and group it again. (Why are we doing this? You may ask, well just keep reading.)
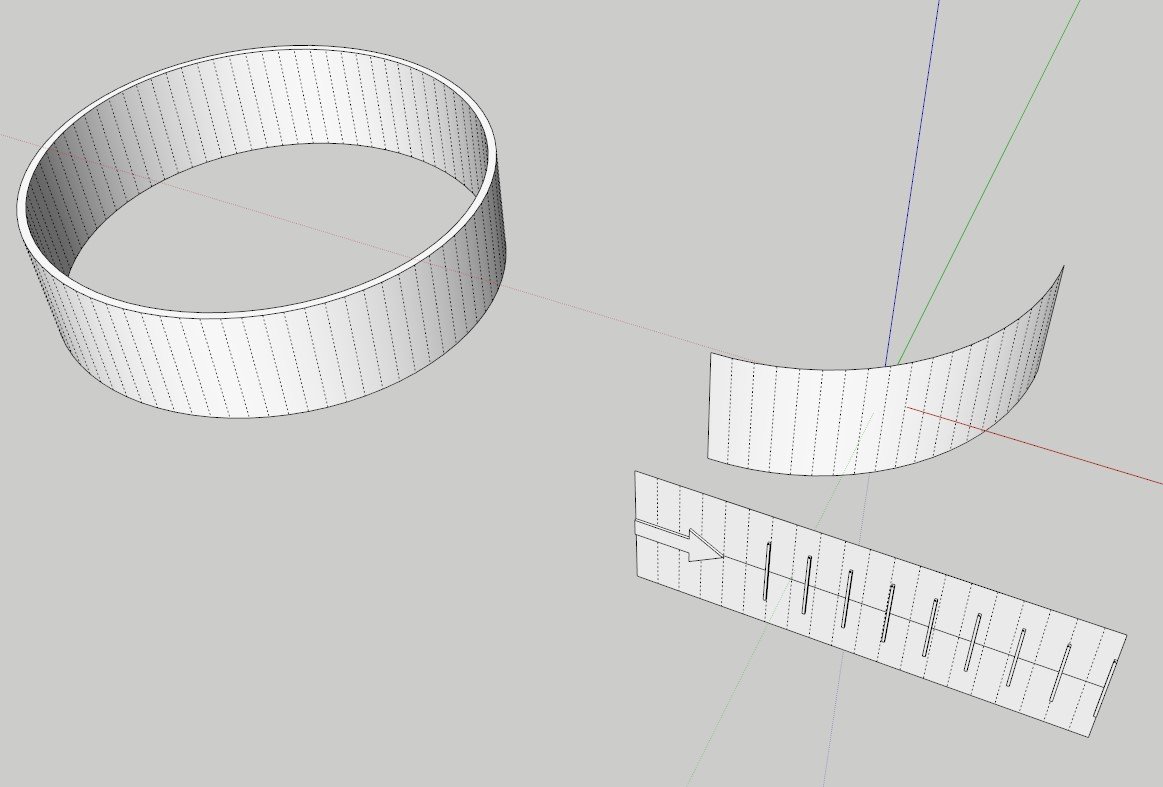
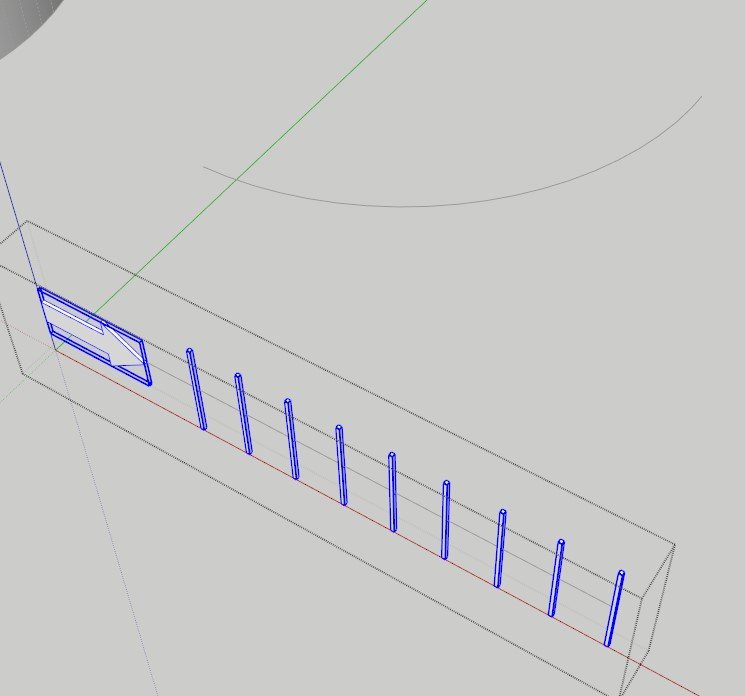
Now wee need the "ShapeBender" Plugin to do his magic. We need a straight line outside going through the middle of the group and the curved line of the 1/4 ring for this step to work.

*IMPORTANT: When using the "ShapeBender" plugin you can press the arrows ←↑→↓ on your keyboard and see different results and options, so don't panic and try it out till you get the desired result.
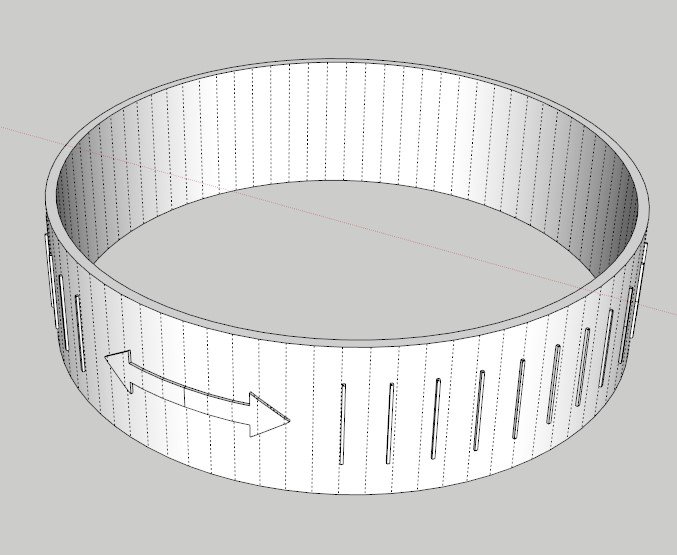
- 3.2.- Now that we have this we make it a Component and Mirror it Left Right and Front Bottom, so the whole ring has the details.
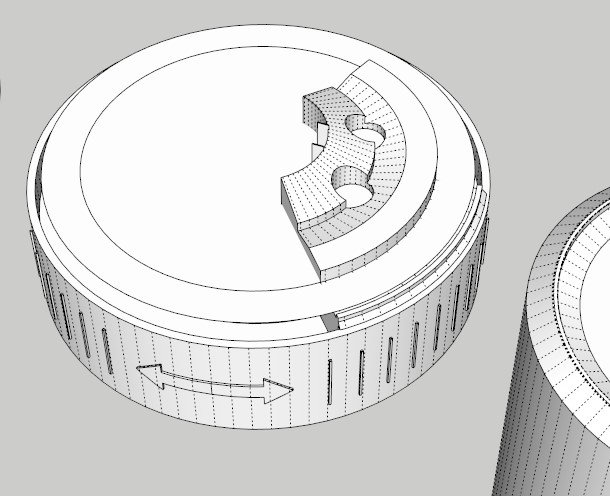
The inside of the beast.
- 3.3.- Lets start with the interesting part.. the mechanical parts.
First we need to draw a rectangle, Then in our heads (The most difficult part) cut or simulate how this part is going to look cutted and its section, then draw it.

Then we select the circle, use the "Follow me" tool from Sketchup and fill it with the section.


We need to create 2 more rectangles and place them in an X shape to cut the geometry and intersect the rectangles and the new part that we created, NOW SLICE THEM!! Use the "Intersect with model" tool. Karate chop.mp3
(Don't forget to keep GROUPING and making COMPONENTS out of everything!!)

Time for Self-Reflection
- 3.4.- Ok lets pause here, and check how far you made it.. .. . Time is up. Continue.
Now that we have this sections sliced we just select one of the shapes and make it a Component, then mirror it so we don't make any mistakes and everything comes symmetrical, then we create 2 small vertical rectangles and place them in the middle as so..

(Look at those 4 small rectangles in the middle, they'r so cute)
Then create 2 cylinders and intersect with the base, apparently this part is just aesthetic and not really needed for the mechanical part.

This is what it should look like.

- 3.5.- Now we need to make the functional part so it can rotate to open and close the spray.
We need to cut half of this piece. "Chop 'em good"

And make the ring that we had before into a base with some offsets.

We place the Half component on top to see how it fits.
And model around it on the "Ring" component. Create a circle or use the same offset-ed circle of the "sphere" give it some volume and a little tilt downwards.
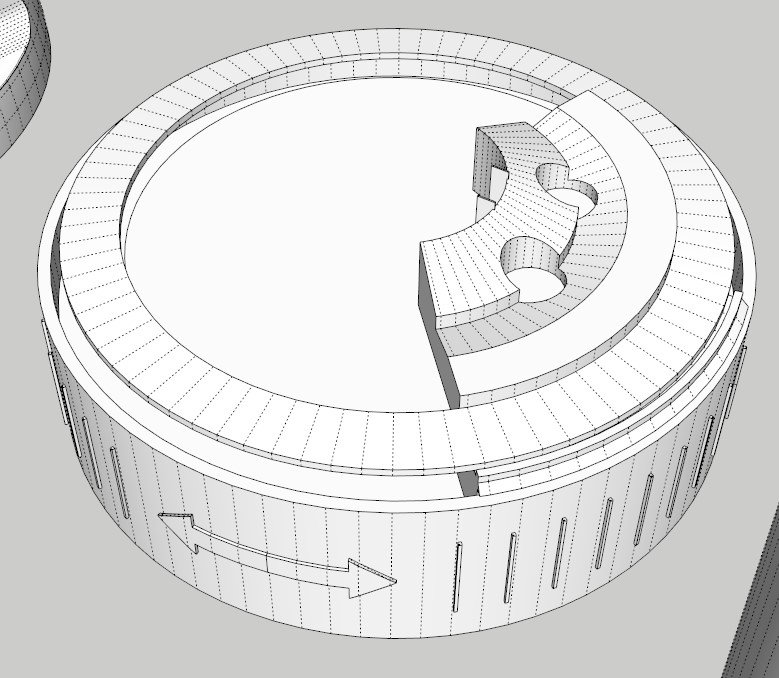
Since we cutted the top part in half we start there and we select just 4 lines, or as many as you want just keep it small, and pull them down to create a wall and a floor, then offset them and you have this.

Select this parts and group them into a component so you can copy them 3 times with the rotation tool+ctrl. All of this under the "RING COMPONENT"

- 3.6.- Ok so we are kind of done with that part of the mechanism and now we just need to add details.
Offset one rectangle of the inner ring and round the corners.

Copy with the rotation tool+ctrl until you fill it.


Paint it like an emo kid from the 90's, Red and Black and you're done
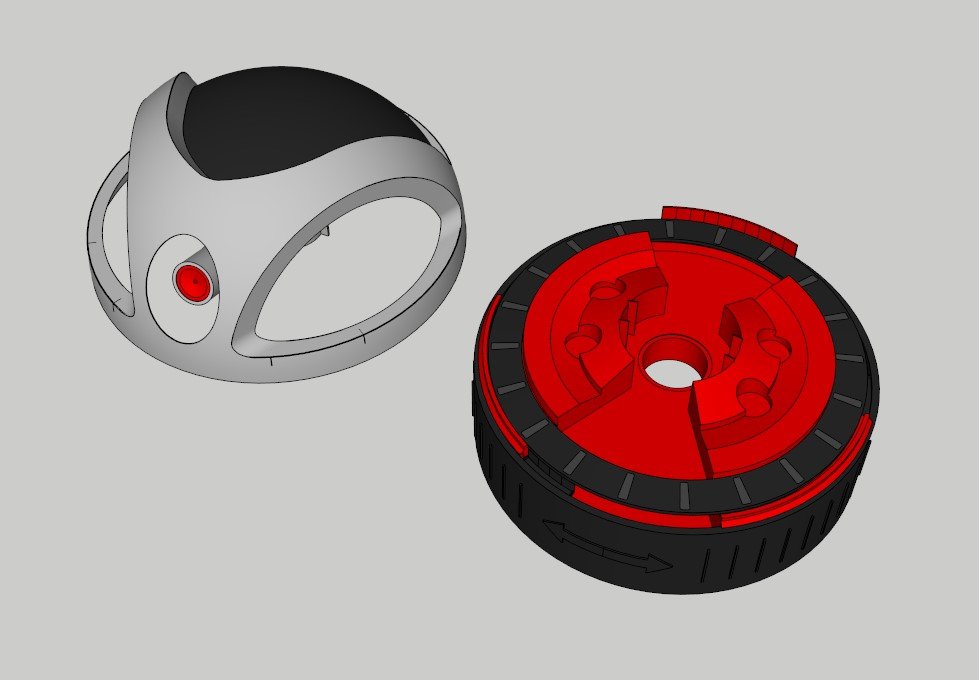
There it is, we have the "Neck", and a bit of a spoiler of the spray part under the "Head"
Lets keep going to the entry number 3, hopefully later this week...
Previous Posts:
Lovely designs @pablopcb . It sure was well elaborately designed , and it seems you love photos a lot.
You can check the contest tag, under the trending pages, to see the contests on drawing or photography you can take part in, and have fun and win prices as well, cause your work is very neat and professional. Wishing you the best.
I'll sure love to see more from you, so am following you now. Thanks for sharing this.
I resteemed and upvoted you,so more people will see this.
Please Am on a contest now and I really need your vote. Am low at this point in the contest . All you need do is click this link
https://steemit.com/contest/@jaynie/the-never-would-i-ever-challenge-3-hygiene
And then upvote my comment @lucyc in the comment section.
That will help me win the hygiene contest. Thanks a lot for your anticipated help. You can join the contest if you desire. Thanks for your help
Thank you I'll look for the contest and help you with the vote.
Thanks for your good posts, I followed you! +vote
Congratulations @pablopcb! You received a personal award!
Click here to view your Board of Honor
Congratulations @pablopcb! You received a personal award!
You can view your badges on your Steem Board and compare to others on the Steem Ranking
Vote for @Steemitboard as a witness to get one more award and increased upvotes!