Retrieving a particular user and initiating GET requests in play 2.6.x(Scala)
Welcome to our tutorial on the scala play framework. In this tutorial we shall attempt to retrieve a particular user in a database. In my previous tutorials found I talked about how to insert data in a database and retrieve all users in in JSON format. Links to both tutorials can be found below in the curriculum section
Repository
https://github.com/playframework/playframework
What Will I Learn?
In this tutorial you will learn how to do the following
- How to Retrieve a particular user in a database
- How to initiate GET requests
- How to create controller actions
Requirements
The following is required for you to follow this tutorial.
- Intellij IDEA
- sbt
- playframework with slick installed
- Web browser
Difficulty
- Intermediate
Tutorial Contents
In this tutorial we will be looking at how to how to retrieve a particular user. So let's begin
Defining our models
So let's fire up our IDE and start creating our project. We will start by creating a file inside the app/models package and for the sake of this tutorial we shall be calling it UserRepository. Inside this file we will be making some imports
package models

import javax.inject.{ Inject, Singleton }
import play.api.db.slick.DatabaseConfigProvider
import slick.jdbc.JdbcProfile

import scala.concurrent.{ Future, ExecutionContext }
The DatabaseConfigProvider, JdbcProfilecontains database functions which we will be using in our application
Now its time for us to define our table, which will have 3 columns, id, name and age , the id column will be the primary key and will auto increment anytime a new user is added to the database .
private class UserTable(tag: Tag) extends Table[User](tag, "people") {

    def id = column[Long]("id", O.PrimaryKey, O.AutoInc)

    def name = column[String]("name")

    def age = column[Int]("age")
After initializing our table we will need to create a default projection which defines how the columns are converted to and from the User object. We will be passing the id, name and age parameters to the User case classes apply and unapply methods.
 def * = (id, name, age) <> ((Person.apply _).tupled, Person.unapply)
  }
It's time to start querying our database, to do that we must first create a starting point for our database which involves calling the ```TableQuery`` function and will accept our defined table as a parameter. So we will define our query by typing the following code:
private val people = TableQuery[UserTable]
So now let's run our actual query. We will be attempting to create a query similar to the SQL statement that reads: SELECT * FROM tablename WHERE name == somename. To do that in play(scala), we will define a function which accept a parameter for us to filter our query. To do that we will type the following code:
  def select (name: String): Future[Seq[User]] = db.run {
    people.filter(p => p.name === name).result
  }
In Scala functions are defined using the def keyword. In the above code however we have created a function known as select, which contains a String parameter known as name and it will return a Future of the User. In slick the filter function works like a WHERE clause, and we are returning a particular User where name == name.
Creating Controller Actions
Our queries cannot be executed unless their functions are called inside a controller action. Actions are methods that execute requests. So we will be creating a controller action known as selectPerson which will accept a single parameter known. Inside the action we will create an implicit request to run our query and display the result as JSON. So we can do that by typing the following code:
 def selectPerson(name: String) = Action.async {
    implicit request =>
      repo.select(name).map { people =>
        Ok(Json.toJson(people))
      }
  }
Initiating GET requests
Our routes file is where we can initiate both post and get requests, also like I said in my previous tutorial routes enable us to navigate our application. For this purpose we shall be creating a GET request that contains the name of the user we want to retrieve.
GET /person/:name controllers.UserController.selectPerson(name: String)
/person is the route of our application and :name is the name of the parameter that will be passed from the browser. In other words if we want to retrieve user 'john' , we will simply type localhost:9000/person/john
Also the selectPerson function of the UserController controller will be executed
Creating some sample data
Now let's create some sample data for our application. To do that we will create a function inside app/models and call it ```insertSample.
def insertSample (): Future[Int] = db.run {
    people.map(p => (p.name, p.age)) += ("John",25)

  }
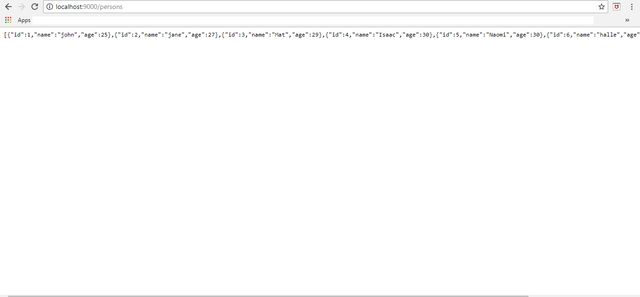
Let's run our application and see the results. You can learn how to add sample data through forms by visiting one of my previous tutorial found here. I have already added some sample data, so let's see the results
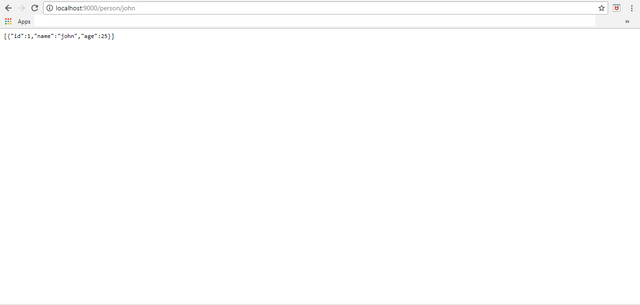
To retrieve a particular user we will type in a browser http://localhost:9000/person/john , john is the name of the user we want to retrieve, we can replace it with any name that is in the database, if you enter a name that is not in the database, we will get an error message.
Code
The code for this tutorial can be found here
.png)
.png)
.png)
Hey @leczy
Thanks for contributing on Utopian.
We’re already looking forward to your next contribution!
Contributing on Utopian
Learn how to contribute on our website or by watching this tutorial on Youtube.
Want to chat? Join us on Discord https://discord.gg/h52nFrV.
Vote for Utopian Witness!
Thank you for your contribution.
While I liked the content of your contribution, I would still like to extend few advices for your upcoming contributions:
Looking forward to your upcoming tutorials.
Your contribution has been evaluated according to Utopian policies and guidelines, as well as a predefined set of questions pertaining to the category.
To view those questions and the relevant answers related to your post, click here.
Need help? Write a ticket on https://support.utopian.io/.
Chat with us on Discord.
[utopian-moderator]
Thanks for the advice, I will take necessary corrections