Creating a user registration system in play 2.6.x (Scala) using mysql part2: Retrieving data in JSON format and navigating with routes
Welcome to my tutorial where I will be teaching you how to develop a user registration system using play 2.6.x. In my previous tutorial I explored how to store we can store data inside a MySQL database using play framework for Scala. In this tutorial I will explore some concepts not treated in the previous tutorial. Hopefully by following my series you will be able to develop web applications using play.
Repository
https://github.com/playframework/playframework
What Will I Learn?
In this tutorial you will learn learn the following
- Navigating a play application by using routes
- Setting up controllers
- Creating and Retrieving data in JSON format
- Adding validation constraints to forms
Requirements
The following are required in order to properly follow along this tutorial.
- An Operating system (Windows or MAC)
- An IDE (Preferably IntelliJ IDEA)
- SBT
- Play framework
- XAMPP Server
Difficulty Level
- Intermediate
Tutorial
In this tutorial I will be talking about how to retrieve data using JSON as well as how to navigate your application by creating route.
Updating the models
So let’s start by opening the models/User file and create a JSON format, we can do that by typing, since we want to retrieve the data as JSON, you have to create a JSON format inside the case class.
object User {
implicit val userJsonFormat = Json.format[User]
}
After that we will then open the models/UserData file which was created earlier and we will type a query that will retrieve all users from the database.
  def show(): Future[Seq[User]] = db.run {
    allUsers.result
  }
Creating a JSON end point in the controller
Let’s open our controller called UserController file located at app/controllers, here we will create end point for our JSON. We will retrieve the query and display it as JSON. We will create a method known as getUsers to retrieve JSON data.
def getUsers = Action.async { implicit request =>
    repo.show().map { people =>
      Ok(Json.toJson(people))
    }
  }
The getUsers method uses an asynchronous action to display the data as JSON using the Json.toJson() function.
We will now add some validation rules to our form to control the type of data received. We will set various constraints to the various input types to ensure that users enter the correct type of data into the form.
First let’s make some imports
import play.api.data.Form
import play.api.data.Forms._
import play.api.data.validation.Constraints._
The import play.data.Forms._ is a play library that holds various functions for our form, whereas the import play.api.data.validation.Constraints._ contains functions for form validation.
Adding validation constraints
So now let’s begin the process of validating our form
val userForm: Form[CreateUserForm] = Form {
    mapping(
      "name" -> nonEmptyText,
      "phone" ->number,
      "email" -> email,
      "age" -> number.verifying(min(0), max(200))
    )(CreateUserForm.apply)(CreateUserForm.unapply)
  }
So in the above code, the name input type must not be empty, also the phone field will only accept numbers, whereas the email field validates using the email regular expression, so unless the @ symbol is present the email is not valid, also we have set a limit for the age field to only accept numbers between 0 and 200.
The complete code for our UserController class looks like this
package controllers

class UserController @Inject()(repo: UserData,
                                 cc: MessagesControllerComponents
                                )(implicit ec: ExecutionContext)
  extends MessagesAbstractController(cc) {

  val userForm: Form[CreateUserForm] = Form {
    mapping(
      "name" -> nonEmptyText,
      "phone" ->number,
      "email" -> email,
      "age" -> number.verifying(min(0), max(200))
    )(CreateUserForm.apply)(CreateUserForm.unapply)
  }

  def index = Action { implicit request =>
    Ok(views.html.index(userForm))
  }

  def addUser = Action.async { implicit request =>
    userForm.bindFromRequest.fold(
      errorForm => {
        Future.successful(Ok(views.html.index(errorForm)))
      },

      person => {
        repo.createUser(person.name, person.phone, person.email, person.age).map { _ =>
          Redirect(routes.UserController.index).flashing("success" -> "user has been created")
        }
      }
    )
  }

  def getUsers = Action.async { implicit request =>
    repo.show().map { people =>
      Ok(Json.toJson(people))
    }
  }
}
case class CreateUserForm(name: String, phone: Int, email: String, age: Int)
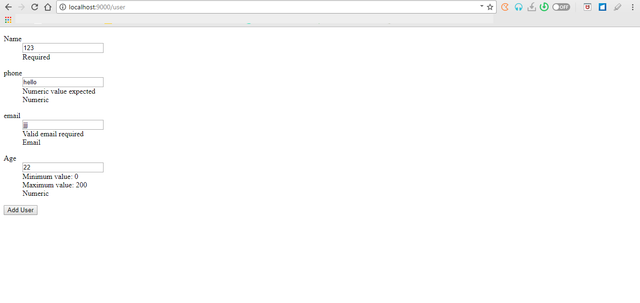
So let’s view our form and see if there are any changes
.png)
When we enter wrong data we get an error message and the form won’t submit unless the correct data is entered into the form fields.
Updating routes
Play uses routes to navigate between pages in an application. When a page is requested, play uses a GET method to fetch the requested pages. If the no methods have been created in the controllers then an error message is returned instead.
We will update our routes by typing the following code
GET /users controllers.UserController.getUsers
The url to view the list of users entered is /users which will call the getUsers method in the UserController controller.
The complete code for our routes looks like this
# Home page
GET     /                           controllers.UserController.index
POST    /user                     controllers.UserController.addUser
GET     /users                    controllers.UserController.getUsers
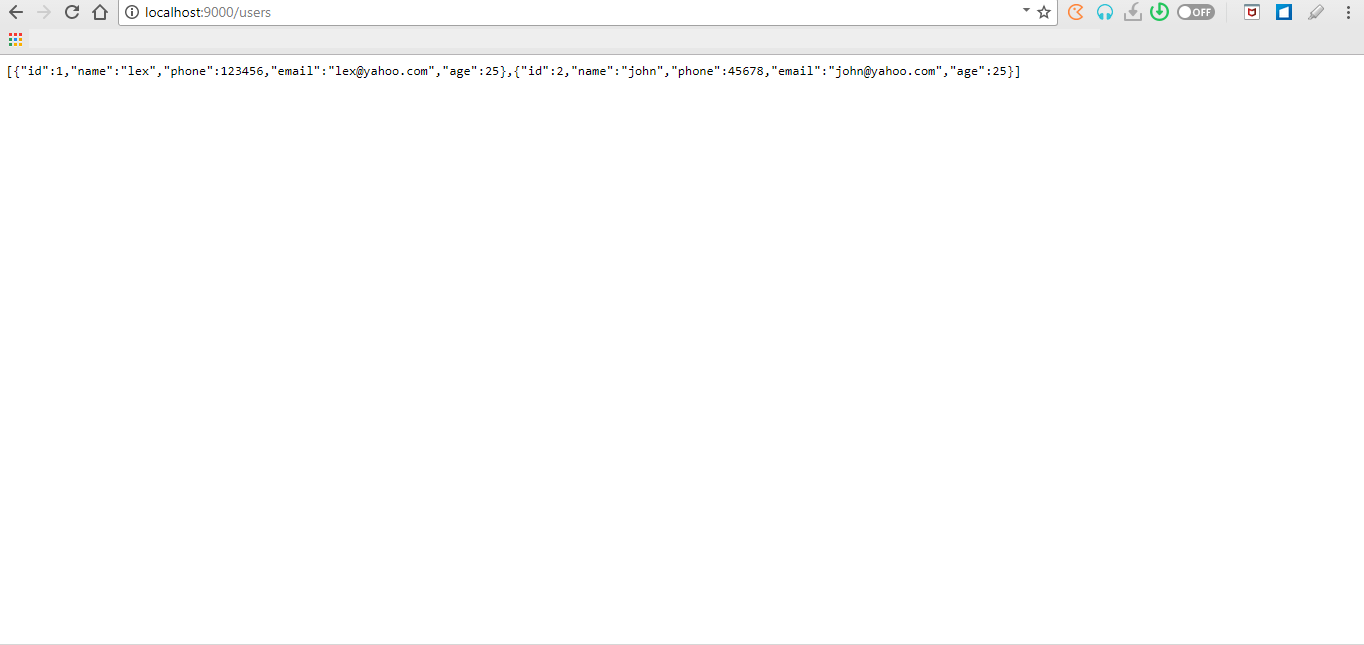
so, open up a web browser and view the changes made. To view the data in JSON format after the form is submitted navigate to localhost:9000/users
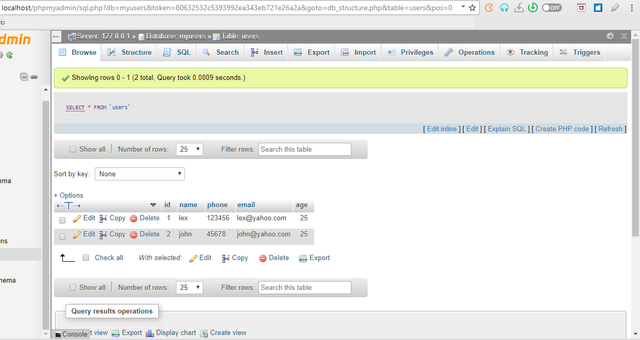
Just for confirmation let’s view the database to ensure that the data has been stored in the database.
.png)
Code
The code for this tutorial can be found here
.png)
.png)
Thank you for your contribution.
While I liked the content of your contribution, I would still like to extend few advices for your upcoming contributions:
Looking forward to your upcoming tutorials.
Your contribution has been evaluated according to Utopian rules and guidelines, as well as a predefined set of questions pertaining to the category.
To view those questions and the relevant answers related to your post,Click here
Need help? Write a ticket on https://support.utopian.io/.
Chat with us on Discord.
[utopian-moderator]
Thank you for your evaluation. I will work towards making the necessary corrections
Hey @portugalcoin
Here's a tip for your valuable feedback! @Utopian-io loves and incentivises informative comments.
Contributing on Utopian
Learn how to contribute on our website.
Want to chat? Join us on Discord https://discord.gg/h52nFrV.
Vote for Utopian Witness!
Hey @leczy
Thanks for contributing on Utopian.
We’re already looking forward to your next contribution!
Contributing on Utopian
Learn how to contribute on our website or by watching this tutorial on Youtube.
Want to chat? Join us on Discord https://discord.gg/h52nFrV.
Vote for Utopian Witness!