Building A Content Management System Using The MEAN Stack - 10 (Front-End Development)
Repository:
https://github.com/nodejs/node
What Will I Learn
The codebase for this tutorial is based on MEANie an open source content management system by Jason Watmore.
This is the tenth and last tutorial in the series of tutorials on building a content management system using the MEAN technology.
In the last tutorial I created the different views for the home, blog posts and pages.
In this tutorial I will show you how to create the archive and contact views for the blog section of the CMS.
N.B;- LINK TO THE EARLIER TUTORIALS IN THIS SERIES CAN BE FOUND AT THE END OF THIS POST
Requirements
- NodeJS and NPM,
- Angular
- MongoDB
- Code Editor
Difficulty
- Intermediate
Tutorial Contents
Archive
The archive section will contain an archive of all posts that has been created in the application.
In order to create the posts archive I added a new directory archive in the blog directory and in this directory add the file index.view.html which will contain all code for the posts archive
In the index.view.html file the following code is used
<div  class="archive-details">
    <div  class="container">
        <h5>Archive</h5>
        <table  class="table">
            <thead>
                <tr>
                    <th>Date</th>
                    <th>Title</th>
                </tr>
            </thead>
            <tbody>
                <% posts.forEach(function(post) { %>
                    <tr>
                        <td><%= post.publishDateFormatted %></td>
                        <td><a  href="<%= post.url %>"><%= post.title %></a></td>
                    </tr>
                <% }) %>
            </tbody>
        </table>
    </div>
</div>
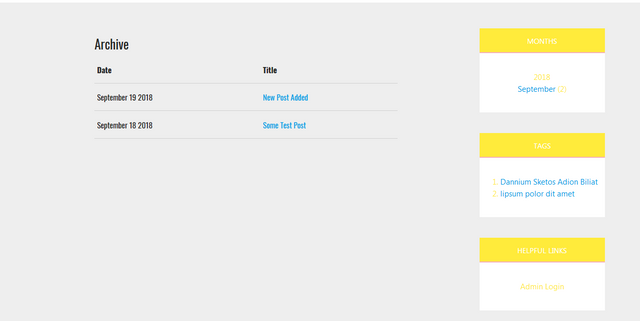
The entire posts archive is outputted as a table containing two columns for each row in the code above.
The first column contains the Date the post was created while the second column contains the Title of the post.
Inside the <tbody></tbody> element which indicates the body of the table we use the forEach() method to iterate through the array of posts.
What this statement does is that for each post in posts the view outputs a new row in the table which contains two columns.
The Date column will output the date using the directive <%= post.publishDateFormatted %>.
The output column will display a link containing the post title leading to the full post using the following code
<a href="<%= post.url %>"><%= post.title %></a>
Screenshot of the post archive
Contact
Contact View
Every website visitors that might wish to reach out to the admin will require a contact form.
In the blog directory I will create a new folder contact and in that new folder create a file index.view.html for the contact form code.
The following is the code for the contact form
<div class="contact-area container">
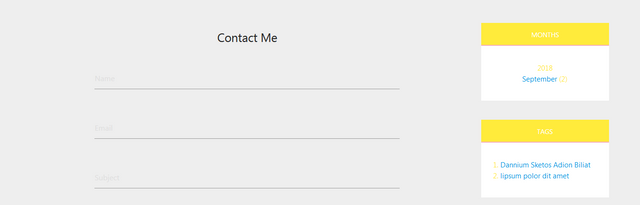
<h5 class="center-align">Contact Me</h5>
<form name="f" ng-submit="f.$valid && vm.submit()" novalidate>
<div class="input-field" ng-class="{ 'has-error': f.$submitted && f.name.$invalid }">
<input id="name" name="name" type="text" placeholder="Name" ng-model="vm.name" required>
<div ng-messages="f.$submitted && f.name.$error" class="help-block ng-cloak">
<div ng-message="required">Name is required</div>
</div>
</div>
<div class="input-field" ng-class="{ 'has-error': f.$submitted && f.email.$invalid }">
<input id="email" name="email" type="text" placeholder="Email" ng-model="vm.email" required>
<div ng-messages="f.$submitted && f.email.$error" class="help-block ng-cloak">
<div ng-message="required">Email is required</div>
<div ng-message="email">Email is invalid</div>
</div>
</div>
<div class="input-field" ng-class="{ 'has-error': f.$submitted && f.subject.$invalid }">
<input id="subject" name="subject" type="text" placeholder="Subject" ng-model="vm.subject" required>
<div ng-messages="f.$submitted && f.subject.$error" class="help-block ng-cloak">
<div ng-message="required">Subject is required</div>
</div>
</div>
<div class="input-field" ng-class="{ 'has-error': f.$submitted && f.message.$invalid }">
<textarea id="message" name="message" type="text" placeholder="Message" class="text-input" ng-model="vm.message" required></textarea>
<div ng-messages="f.$submitted && f.message.$error" class="help-block ng-cloak">
<div ng-message="required">Message is required</div>
</div>
</div>
<div class="input-field center">
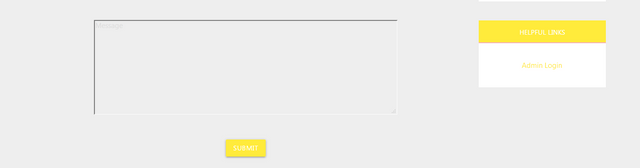
<a class="waves-effect waves-light btn yellow center" ng-disabled="vm.loading">Submit</a>
</div>
</form>
<div ng-if="vm.error" class="alert alert-danger ng-cloak">{{vm.error}}</div>
</div>
The entire form is enclosed in the <form name="f" ng-submit="f.$valid && vm.submit()" novalidate></form> tag.
Upon clicking the form submit button ng-submit="f.$valid && vm.submit()" does two things, first each form component is evaluated for validation to prevent the wrong input from being submitted and secondly the vm.submit() method runs.
Upon validation if any of the form fields happens to have a wrong input, the form displays a message around the said field indicating that the input is wrong.
Each field in the form except for the submit button is wrapped with the tag <div class="input-field" ng-class="{ 'has-error': f.$submitted && f.name.$invalid }"></div>.
All the input fields in the form including the <input /> and <textarea></textarea> tags has a ng-model directive which specifies the the entry each field should accept.
The first field will accept the name of the person trying to contact the admin so it has the ng-model="vm.name"
The second field has the ng-model="vm.email" which means it will accept the email of the person trying to contact the admin.
The third field will accept the email subject for the message and has the ng-model="vm.subject".
The fourth and last input field will contain the actual message , it has the ng-model="vm.message".
All of these field are required and cannot be omitted hence the orm won't submit, each field is indicated as required using the directive required in all the input and textarea tags.
Contact Controller
The contact view requires a controller module to serve as a bridge between the view and the server.
In the contact directory there is a file index.controller.js which will serve as the contact controller for the view created above.
The code for the contact controller
(function () {
    'use strict';

    angular
        .module('app')
        .controller('Contact.IndexController', Controller);

    function  Controller($location, ContactService) {
        var  vm  =  this;

        vm.submit  =  submit;
        initController();

        function  initController() {

        };

        function  submit() {
            vm.error  =  null;
            vm.loading  =  true;
            ContactService.Send(vm)
                .then(function () {
                    $location.path('/contact-thanks');
                })
                .catch(function (error) {
                    vm.error  =  'Error: '  +  error;
                })
                .finally(function () {
                    vm.loading  =  false;
                });
        };
    }
})();
The contact controller has one main function Controller().
The function sets the value of vm.submit to submit where submit() is a function inside Controller().
submit() runs when the submit button is clicked in the view by the user.
The submit() function sets the vm.error to null to indicate that the form does not feature any erroneous entries.
The function also confirms that the view model is currently loading by setting vm.loading to true.
The entries in the view are then sent to the ContactService module using the method Send(vm).
Contact Service
For the contact section to actually communicate with the database a service module is required.
The contact service will be created in a separate folder directly inside the blog directory.
The folder is named _services and in the folder there is a file contact.service.js which will contain all the code for the contact service
The following is the code used for the contact service
(function () {
    'use strict';

    angular
        .module('app')
        .factory('ContactService', Service);

    function  Service($http, $q) {
        var  service  = {};

        service.Send  =  Send;

        return  service;

        function  Send(form) {
            return  $http.post('/api/contact', form).then(handleSuccess, handleError);
        }

        // private functions

        function  handleSuccess(res) {
            return  res.data;
        }

        function  handleError(res) {
            return  $q.reject(res.data);
        }
    }

})();
The contact service has one main function Service() which contains a variable service which is an object.
The service.Send object property is set to the Send() method.
The Send() method uses the http post request to send the captured data to the api/contact .
If the execution is successful then the handleSuccess() function runs.
Otherwise if any errors are encountered while executing then handleError() runs.
Screenshot of the contact view
Curriculum
Building A Content Management System Using The MEAN Stack - 2(Create Controller Modules 1)
Building A Content Management System Using The MEAN Stack - 3 (Create Controller Modules 2)
Building A Content Management System Using The MEAN Stack - 4 (Create Services Modules)
Building A Content Management System Using The MEAN Stack - 5 (Front-End Development)
Building A Content Management System Using The MEAN Stack - 6 (Front-End Development)
Building A Content Management System Using The MEAN Stack - 7 (Front-End Development)
Building A Content Management System Using The MEAN Stack - 8 (Front-End Development)
Building A Content Management System Using The MEAN Stack - 9 (Front-End Development)
Hello! Your post has been resteemed and upvoted by @ilovecoding because we love coding! Keep up good work! Consider upvoting this comment to support the @ilovecoding and increase your future rewards! ^_^ Steem On!

Reply !stop to disable the comment. Thanks!
Hi @gotgame!
Your post was upvoted by @steem-ua, new Steem dApp, using UserAuthority for algorithmic post curation!
Your post is eligible for our upvote, thanks to our collaboration with @utopian-io!
Feel free to join our @steem-ua Discord server
Hey, @gotgame!
Thanks for contributing on Utopian.
We’re already looking forward to your next contribution!
Get higher incentives and support Utopian.io!
Simply set @utopian.pay as a 5% (or higher) payout beneficiary on your contribution post (via SteemPlus or Steeditor).
Want to chat? Join us on Discord https://discord.gg/h52nFrV.
Vote for Utopian Witness!
Congratulations @gotgame! You have completed the following achievement on the Steem blockchain and have been rewarded with new badge(s) :
Click here to view your Board of Honor
If you no longer want to receive notifications, reply to this comment with the word
STOPDo not miss the last post from @steemitboard: