Make social media applications with Flask #6: View decorator and Post the first status
Repository
What Will I Learn?
- View decorator
- Post the first status
Requirements
- Basic Python
- Install Python 3
- Install Flask
Resources
- Python - https://www.python.org/
- Flask - http://flask.pocoo.org/
- Peewee http://docs.peewee-orm.com/en/latest/
- Sqlitebrowser https://sqlitebrowser.org/
Difficulty
Basic
Tutorial Content
Hi everyone, this is a continuation of my tutorial project about building applications with social media concepts, for those of you who are just following this tutorial, I suggest you look and teach my previous tutorial. You can find it in the curriculum section. In my tutorial, I previously discussed and completed the authentication feature in the application that I made. Well, this time I will discuss new features. I will discuss features similar to tweeter applications. but before going into the discussion I will explain in advance some of the methods we use are applied that I made. we just start this tutorial.
View Decorator
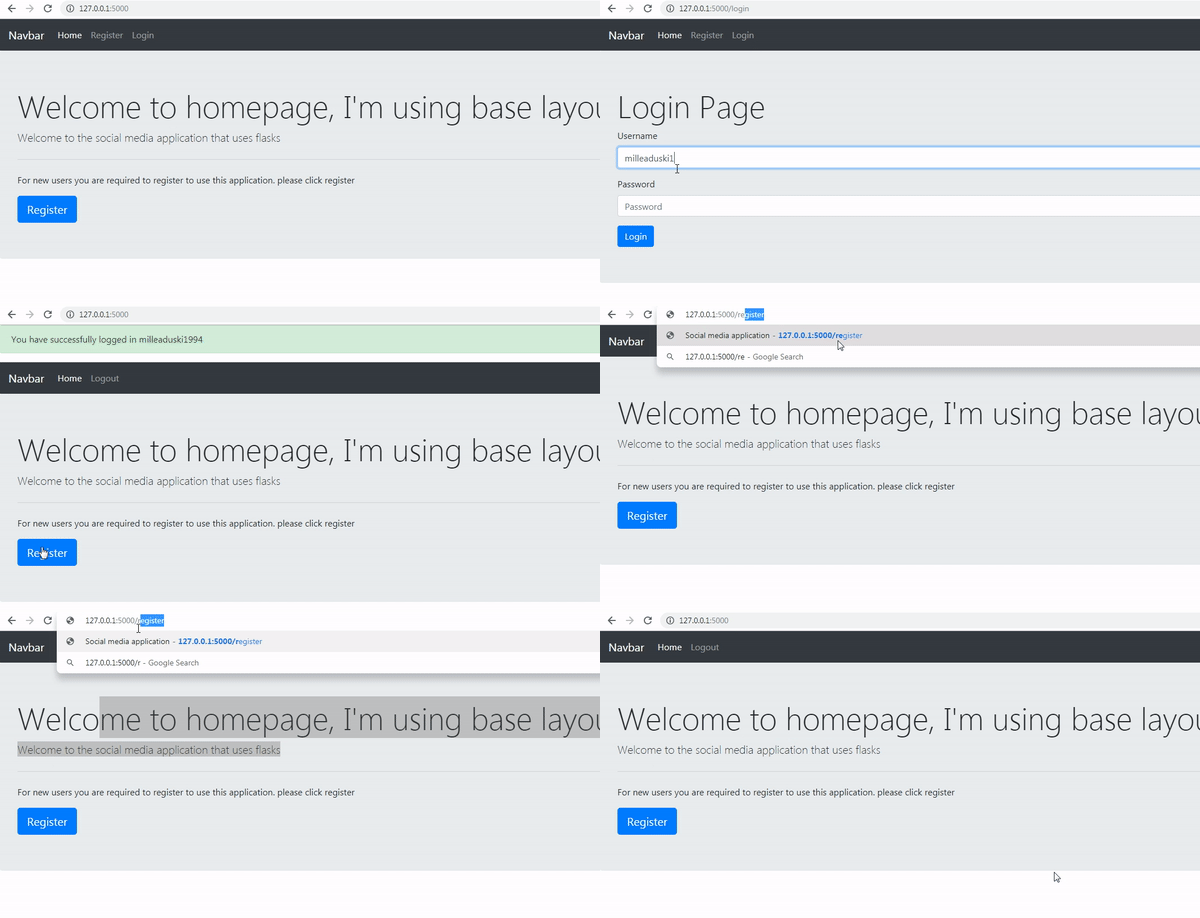
I will discuss the new method in Flask that I will apply to this project. I will discuss the view decorator in Flask. We will know the use of view decorator If we have used it. For example in the authentication process that I have made, even though I am in a login state I can still access the login page, of course, in reality it can't be like that. we can see the example I said as shown below:
we can see in the picture above, we can still access the URL http://127.0.0.1ambat000/ at login. We should be redirected when we are logged in, for that we will see the use of the view decorator.
- Middleware with view decorator
I will create a middleware concept using the decorator view. I will check whether we are in a logged in when accessing a URL. Of course, we can use If else to check whether we are logged in or not, but it will be neater if we can use the view decorator and other benefits we can use the function repeatedly.
When the user is not logged in
What we will do first is to create a view decorator function when the user is not logged in, that means we will direct the user to log in before being able to access other menu menus on our application. For more details, we can see the example below:
import tools
from functools import wraps
I will import the function wrap that is on the functools module. then I will make the function as follows:
app.py
def not_login(f):
    @wraps(f)
    def decorated_function(*args, **kwargs): //define decorated_function
        if session.get('logged_in'): // check if user is logged in
            return redirect(url_for('showHomePage')) // redirect to home page
        return f(*args, **kwargs) // return result decorated_function
    return decorated_function // return function
I will check whether the user is logged in or not, we can check it through a session that is created when the user logged in.
And then if the user is in a log in the result is true then we will automatically redirect the user to the home page
return redirect(url_for('showHomePage')).Use the decorator view function: We have created a function from
not_login()as a middleware function, to use it we can use it in the route section, for more details we can see this example:
@app.route('/register', methods =['GET', 'POST'])
@not_login // Use the function middlewate
//Your code
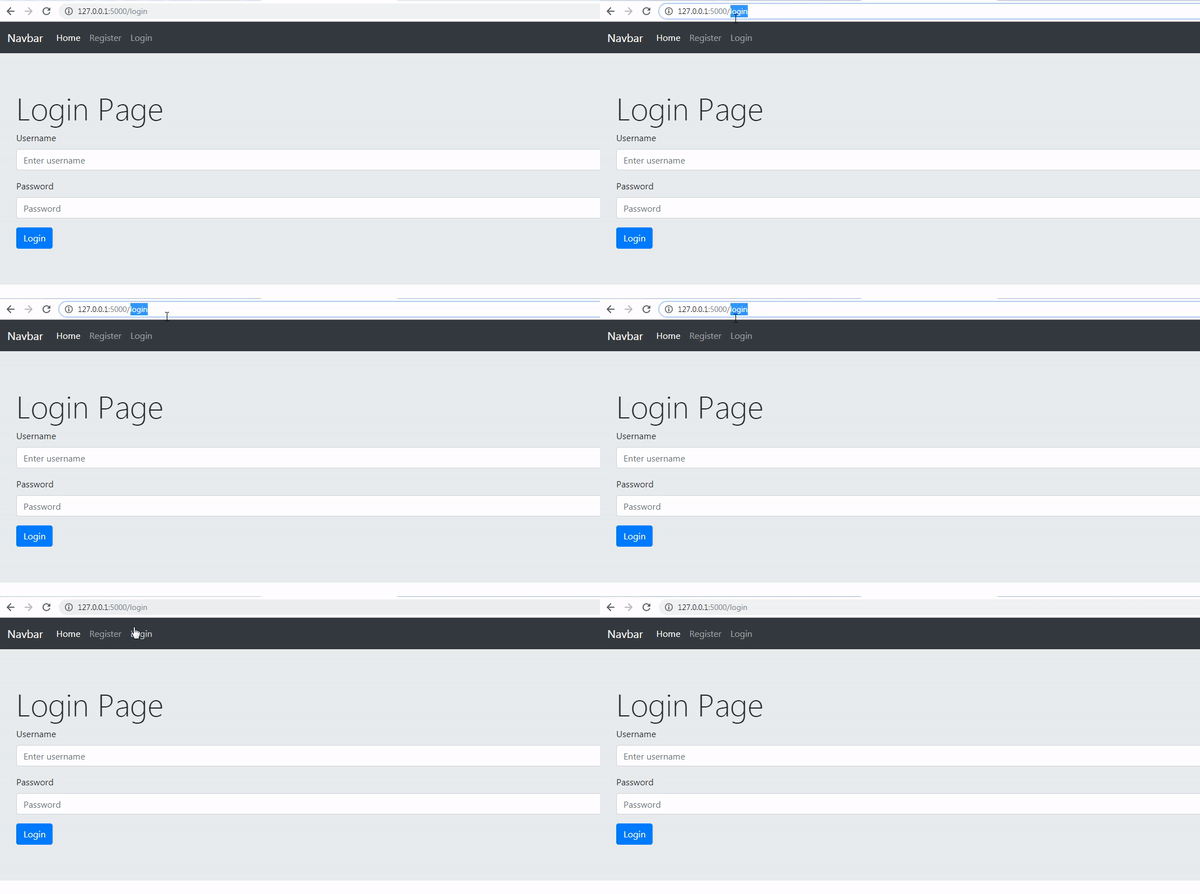
In this section, I will exemplify its use in the register section '/register'. I use it after defining the route. we can use @ and then the name of the function. For more details, we can see the demonstration below:
We can see the results of the demonstration above. we can no longer access the routing register when we are logged in.
When the user is logged in
So also when the user is not logged in, we can protect what menus can be accessed by users who are not logged in, for that we can see the code as below:
app.py
def login_required(f):
    @wraps(f)
    def decorated_function(*args, **kwargs): //define decorated_function
        if not session.get('logged_in'):  // check if user is not logged in
            return redirect(url_for('loginPage')) // redirect to login page
        return f(*args, **kwargs)
    return decorated_function
The function is almost the same as the not_login () function, but I will change the condition to
if not session.get('logged_in'):This means that when the user is not logged in, he will be directed to the login pagereturn redirect(url_for('loginPage')).And then we will use the
login_required()function in the home page section, this means we cannot access the homePage page before we log in.
@app.route('/')
@login_required
def showHomePage():
    return render_template('index.html')
- For more details, we can run our application and we can see the results like this:
We can see in the example above that we cannot enter homepage at all. This means the protection is worked.
Post tweets
Now we will create a new feature. I will make the post tweets feature to post the user's status. for that I will start to create a new routing that we will use for this feature:
app.py
@app.route('/add-post', methods =['GET', 'POST'])
I will add a new route that is /add-post and this route will accept two methods methods =['GET', 'POST'].
In this routing I will use the createPost() function, in this function I need user data, so we can use the function we have created before, namely get_current_user(). we can see the function of get_current_user() like the following:
get_current_user()
def get_current_user():
    if session.get('logged_in'):
        return User.get(User.id ==  session['user_id'])
In this function I will retrieve user data from the user session, We can retrieve the data from the User model User.get().
- Post tweet layout
We have made routing '/ add-post', now I will create a layout for the routing, here I will add a form that will be used to post data. I created a new file with a name newPost.html, We can see the layout below:
newPost.html
{%extends "layout.html" %}
{% block body %}
<div class="jumbotron">
    <h1 class="display-4">New Status</h1>
    <form action="{{url_for('createPost')}}" method="POST" autocomplete="off">
        <textarea name="content" rows="8" cols="80"></textarea>
        <button type="submit" class="btn btn-primary">Update Status</button>
    </form>
</div>
{% endblock %}
This form will post data to the
createPost()function of the routing that we will create in the next section, on this form we will have a text area<textarea name="content" rows="8" cols="80"></textarea>and submit button<button type="submit" class="btn btn-primary">Update Status</button>.We have to pay attention to the name of the
<text-area>that we use because later that key will be received in the backend.
Now we have finished making the layout, we will continue by creating the createPost() function. to see the createPost() function, we can see it more detail below:
@app.route('/add-post', methods =['GET', 'POST'])
@login_required
def createPost():
    user = get_current_user()
    if request.method == 'POST' and request.form['content']:
        message = Message.create(
            user         = user,
            content      = request.form['content']
        )
        flash('Your status has been updated successfully')
        return redirect(url_for('showHomePage'))
    return render_template('newPost.html')
If you followed the previous tutorial, In the previous tutorial we created a function to protect the route when the user is not logged in, the function is
@not_login.We will test whether the method I received is a post and input request is available
if request.method == 'POST' and request.form['content']. As I said before the name of the input will be the keyrequest.form['content']that is post input.Message model: At the beginning of this tutorial we have created a database structure and created a model as an abstraction table in the database, we have a model that is related to a message table, namely message model. like this is the code structure:
app.py
class Message(BaseModel):
    user = ForeignKeyField(User, backref = 'Messages') // user id or name
    content = TextField() // the content of message
    published_at = DateTimeField(default=datetime.datetime.now()) // insert time
Insert post to table Message: we will store the status or post of the user into the message table because we have made the model we can enter the data with the
create ()function.I will fill in two fields from the table, namely the user id and the contents of the content that the user wrote.
Insert data
message = Message.create(
            user         = user, // user data
            content      = request.form['content'] // content from the name user input
        )
We can enter data with a key that has been defined in the message model. They are user and content.
- If our data is saved, we will get a flash message
flash('Your status has been updated successfully')and we will be directed to the homepagereturn redirect(url_for('showHomePage')).
- Add menu new post in navbar
Well, now we just need to enter the menu in the Navbar and be directed to route /add-post. We can add it to the base layout we have created as follows:
<!DOCTYPE html>
<html>
<head>
    <meta charset="utf-8">
    <meta name='viewport' content="width=device-width, initial-scale=1.0">
    <link rel="stylesheet" href="https://stackpath.bootstrapcdn.com/bootstrap/4.2.1/css/bootstrap.min.css"  integrity="sha384-GJzZqFGwb1QTTN6wy59ffF1BuGJpLSa9DkKMp0DgiMDm4iYMj70gZWKYbI706tWS" crossorigin="anonymous">
    <title>Social media application</title>
</head>
<body>
    {% for message in get_flashed_messages() %}
        <div class="alert alert-success" role="alert">
         {{ message }}
        </div>
    {% endfor %}
<nav class="navbar navbar-expand-lg navbar-dark bg-dark">
  <a class="navbar-brand" href="#">Navbar</a>
  <button class="navbar-toggler" type="button" data-toggle="collapse" data-target="#navbarSupportedContent" aria-controls="navbarSupportedContent" aria-expanded="false" aria-label="Toggle navigation">
    <span class="navbar-toggler-icon"></span>
  </button>

  <div class="collapse navbar-collapse" id="navbarSupportedContent">
    <ul class="navbar-nav mr-auto">
      <li class="nav-item active">
        <a class="nav-link" href="{{url_for('showHomePage')}}">Home <span class="sr-only">(current)</span></a>
      </li>
      {% if not session.logged_in %}
      <li class="nav-item">
        <a class="nav-link" href="{{url_for('registerPage')}}">Register</a>
      </li>
      <li class="nav-item">
        <a class="nav-link" href="{{url_for('loginPage')}}">Login</a>
      </li>
      {% else %}
      <li class="nav-item">
        <a class="nav-link" href="{{url_for('createPost')}}">New Status</a> // New Route to create a new post
      </li>
      <li class="nav-item">
        <a class="nav-link" href="{{url_for('logout')}}">Logout</a>
      </li>
      {% endif %}
    </ul>
    <form class="form-inline my-2 my-lg-0">
      <input class="form-control mr-sm-2" type="search" placeholder="Search" aria-label="Search">
      <button class="btn btn-outline-success my-2 my-sm-0" type="submit">Search</button>
    </form>
  </div>
</nav>
{% block body %}

// Your dynamic template

{% endblock %}
</body>
</html>
- This is a new route that we will use to create a post status user
<a class="nav-link" href="{{url_for('createPost')}}">New Status</a>, We can see how it looks like this:
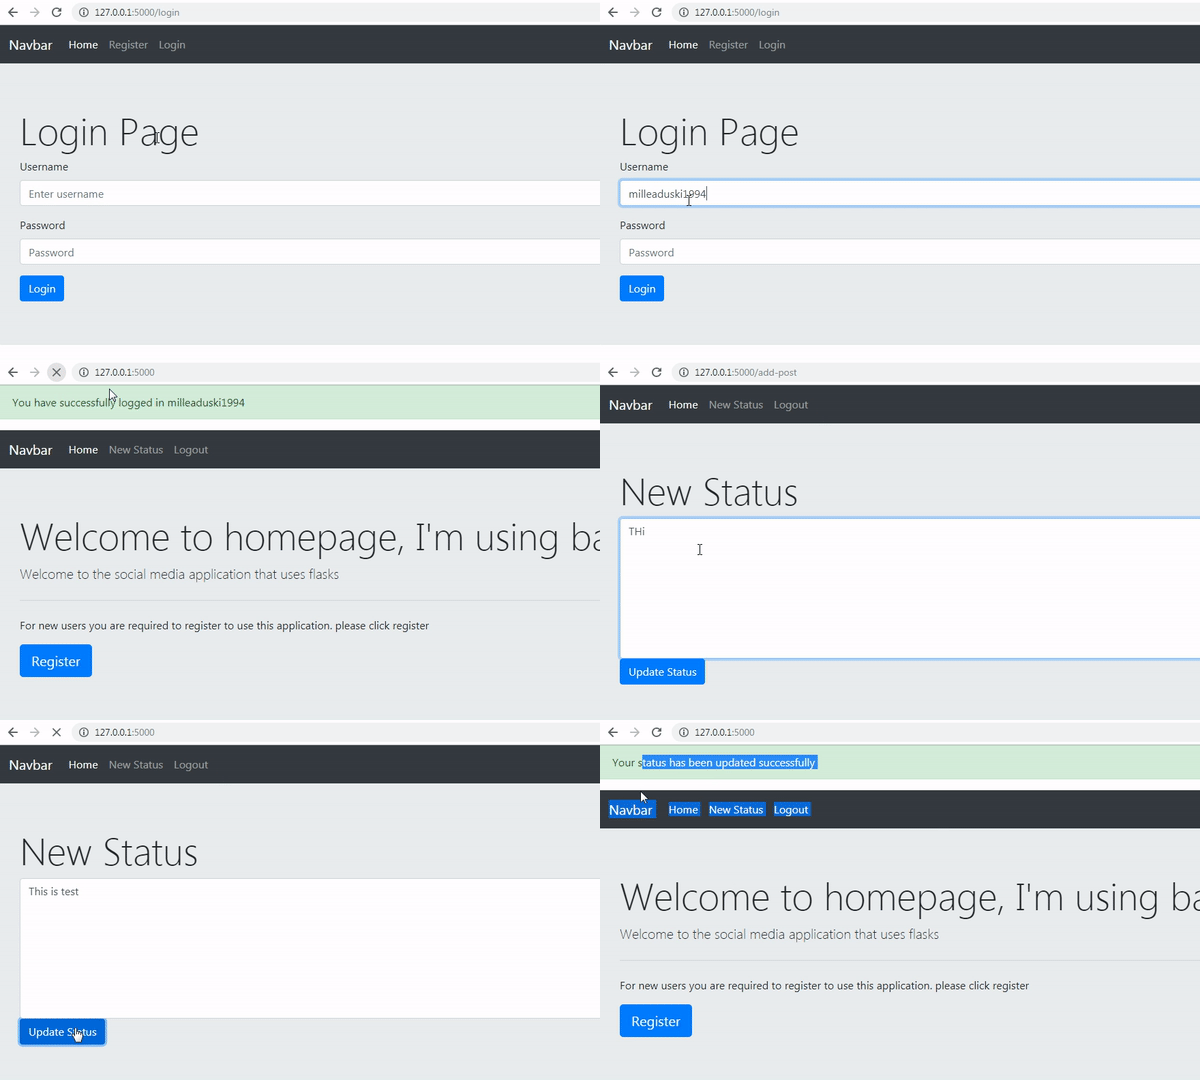
We will demonstrate the results of our code by running our application flask run, If there is no eating error we will see the status that we posted successfully inserted the table message:
We can see in the example above we managed to update the status and managed to get a flash message and then rid it to the home page, now we will see if the data is successfully stored in the table Message.
Check the database
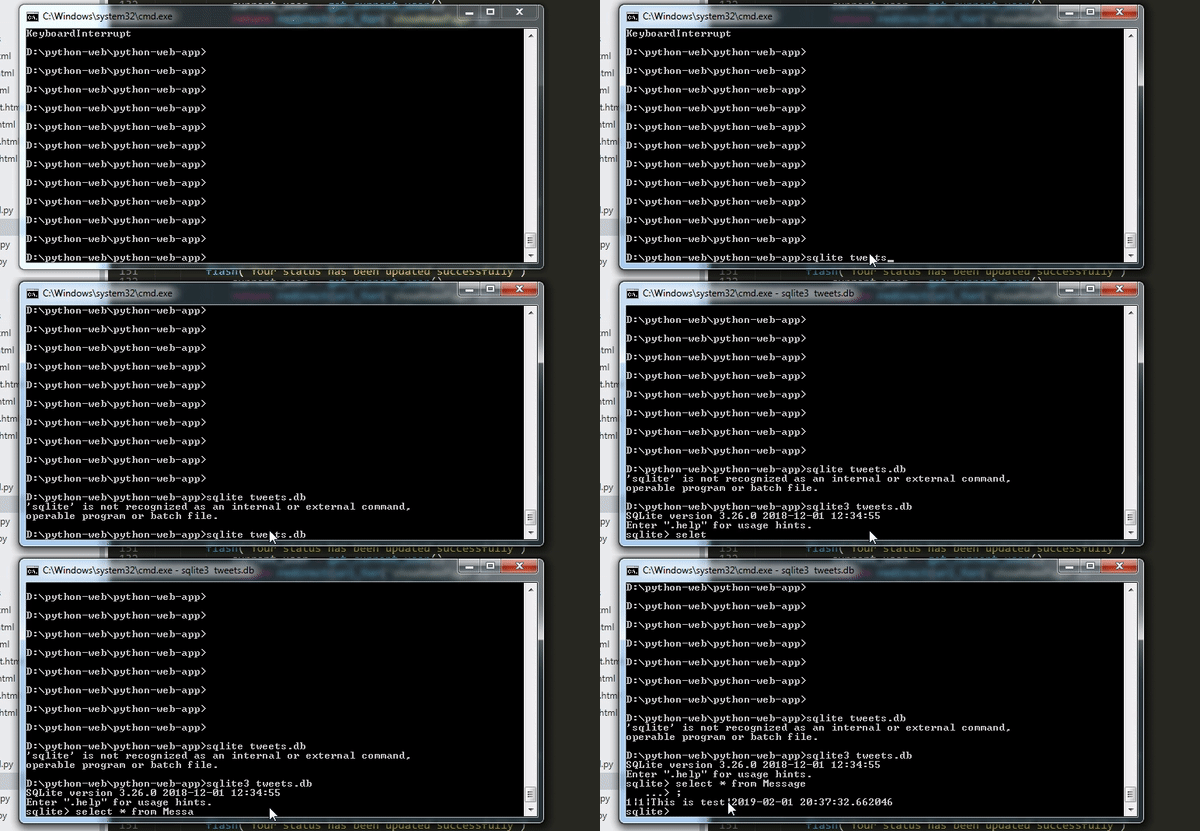
I will run sqlite3 and check the following table message for the demonstration:
Like what we saw in the demonstration above the data successfully entered the database means our post was successful. We have learned to make new features in this application, I hope you can develop it according to your needs, just as much as my tutorial this time, hopefully, it is useful. thank you.
- Web development with flask
Web developement with python #1 : Flask initialization and Routing system
Web development with python #6 : Use flash message and combine it with framework boostrap
- File in python
File in python #1 : Read file and Write file and Modes file
- Class-based views
Create Aplication social media with flask
Make social media applications with Flask #2: System routing and Templating, Make user register
Make social media applications with Flask #3: Register user and Store data in SQLite, Base Layout
Make social media applications with Flask #4: Login system and Use session to manage user data

.gif)
.gif)
.gif)
.gif)
Thank you for your contribution @duski.harahap.
After analyzing your tutorial we suggest the following points below:
Your tutorial seems a bit repetitive with the Login page. In the next tutorial bring something more innovative in your social media applications with Flask.
The section of your resume begins to get very large. We suggest that you only place the links related to this tutorial.
Using GIFs to show results is definitely better than standard still images. Good Job!
Your contribution has been evaluated according to Utopian policies and guidelines, as well as a predefined set of questions pertaining to the category.
To view those questions and the relevant answers related to your post, click here.
Need help? Chat with us on Discord.
[utopian-moderator]
Thank you for your review, @portugalcoin! Keep up the good work!
Hey, @duski.harahap!
Thanks for contributing on Utopian.
We’re already looking forward to your next contribution!
Get higher incentives and support Utopian.io!
Simply set @utopian.pay as a 5% (or higher) payout beneficiary on your contribution post (via SteemPlus or Steeditor).
Want to chat? Join us on Discord https://discord.gg/h52nFrV.
Vote for Utopian Witness!