Make social media applications with Flask #2: System routing and Templating, Make user register
Repository
What Will I Learn?
- System routing and Templating
- Make user register
Requirements
- Basic Python
- Install Python 3
- Install Flask
Resources
- Python - https://www.python.org/
- Flask - http://flask.pocoo.org/
- Peewee http://docs.peewee-orm.com/en/latest/
- Sqlitebrowser https://sqlitebrowser.org/
Difficulty
Basic
Tutorial Content
This tutorial is a continuation of my previous tutorial on social media applications using a flask. In the next tutorial, we have designed a database for our application and made the initial configuration. We have made a system of following and following our application. In this tutorial, we will start creating interfaces for index pages and register pages, For those of you who don't understand what flask and python are, you can see in the curriculum section. okay, we just start this tutorial.
Create user interface
I will create an interface for index pages and registers on our application. I will make the template. Of course, the pages we make will be as minimal as possible because of the core of this tutorial so that we learn to understand the backend structure of the social media applications that we make. You can develop the interface to suit your needs.
- Create Templates
We start our template by creating a folder that we will use as a source of templates in our application. I will create a template folder in the main directory as you can see below:
Then to render the template we need a function from the flask that is render_template, to use the function we have to import it like the following:
app.py
from flask import Flask, render_template
Then I will create a routing system and I will create a separator between the database part and the routing section. Routing that we will create for the index page and registration page. for more details, we can code below:
app.py
# ================================================================
# ========================ROUTING=================================
# ================================================================

# Homepage routing
@app.route('/')
def showHomePage():
    return render_template('index.html')

# Registerpage routing
@app.route('/register', methods =['GET', 'POST'])
def registerPage():
    return render_template('register.html')
Note: the following code is just a piece of the full code in app.py
We will start our application on the home page
('/')and we can useroute()function to declare path@app.route('/'). In this routing we will run a functiondef showHomePage()that will return the template index.htmlreturn render_template('index.html').
Home Page
- I will make the index.html page as simple as possible because we will see how the backend works do not focus on the look that spoils the eyes. I will use the bootstrap 4 to beautify the template.
index.html
<!DOCTYPE html>
<html>
<head>
    <meta charset="utf-8">
    <meta name='viewport' content="width=device-width, initial-scale=1.0">
    <link rel="stylesheet" href="https://stackpath.bootstrapcdn.com/bootstrap/4.2.1/css/bootstrap.min.css" integrity="sha384-GJzZqFGwb1QTTN6wy59ffF1BuGJpLSa9DkKMp0DgiMDm4iYMj70gZWKYbI706tWS" crossorigin="anonymous">
    <title>Homepage</title>
</head>
<body>
    <div class="jumbotron">
      <h1 class="display-4">Welcome to homepage</h1>
      <p class="lead">Welcome to the social media application that uses flasks</p>
      <hr class="my-4">
      <p>For new users you are required to register to use this application. please click register</p>
      <a class="btn btn-primary btn-lg" href="{{url_for('registerPage')}}" role="button">Register</a>
    </div>
</body>
</html>
Note:
It should be noted to make routing URLs we can use {{url_for('registerPage')}} to print out the URL. We can use url_for ('registerPage') and define the function of our routing instead of the routing URL
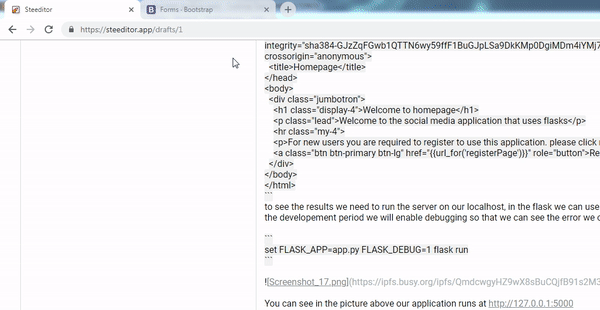
to see the results we need to run the server on our localhost, in the flask we can use flask run in the command line. For the development period, we will enable debugging so that we can see the error we can use FLASK_DEBUG =1
set FLASK_APP=app.py FLASK_DEBUG=1 flask run
You can see in the picture above our application runs at http://127.0.0.1:5000
.gif)
- Register Page
then I will make a view for the register page that the user will use to register with our application. I will create a register.html file the following is the code. The following is a function of the register page:
# Registerpage routing
@app.route('/register', methods =['GET', 'POST'])
def registerPage():
    return render_template('register.html')
When making routing we can define what methods we will use in the routing. In routing '/register' I allowed two methods, namely GET and POST. The following is a template that will be used in the register page.
register.html
<!DOCTYPE html>
<html>
<head>
    <meta charset="utf-8">
    <meta name='viewport' content="width=device-width, initial-scale=1.0">
    <link rel="stylesheet" href="https://stackpath.bootstrapcdn.com/bootstrap/4.2.1/css/bootstrap.min.css" integrity="sha384-GJzZqFGwb1QTTN6wy59ffF1BuGJpLSa9DkKMp0DgiMDm4iYMj70gZWKYbI706tWS" crossorigin="anonymous">
    <title>Register</title>
</head>
<body>
    <div class="jumbotron">
    <h1 class="display-4">Register Page</h1>
    <form action="{{url_for('registerPage')}}" method="POST">
        <div class="form-group">
            <label for="username">Username</label>
            <input type="text" class="form-control" id="username" aria-describedby="emailHelp" placeholder="Enter username">
        </div>
        <div class="form-group">
            <label for="exampleInputEmail1">Email address</label>
            <input type="email" class="form-control" id="exampleInputEmail1" aria-describedby="emailHelp" placeholder="Enter email">
            <small id="emailHelp" class="form-text text-muted">We'll never share your email with anyone else.</small>
        </div>
        <div class="form-group">
            <label for="exampleInputPassword1">Password</label>
            <input type="password" class="form-control" id="exampleInputPassword1" placeholder="Password">
        </div>
        <button type="submit" class="btn btn-primary">Submit</button>
    </form>
    </div>
</body>
</html>
After we run the application then we can see the results as shown below:
.gif)
Register User
I have made the display and routing of the index and page registers, then I will make a function to register on our application with sqlite3, for those of you who have not installed SQLite I suggest you follow my previous tutorial.
app.py
You must import
There are things we have to import in order to use the functions of our application to register users.
import datetime
from flask import Flask, render_template, request
from peewee import *
from haslib import md5
- I use md5 to hash the user password
from haslib import md5 - then get the request with
import flask from request
The routing
We will register the user in this routing. before we save user data we can do the validations. For more details, we can see the code below with the explanation.
app.py
@app.route('/register', methods =['GET', 'POST'])
def registerPage():
    if request.method == 'POST' and request.form['username']: //check if request is POST
        try: // Atomic transaction
            with database.atomic():
                user = User.create( //Save to database
                        username    = request.form['username'],
                        password    = md5(request.form['password'].encode('utf-8')).hexdigest(),
                        email       = request.form['email']
                )
            return redirect(url_for('showHomePage'))
        except IntegrityError: // Catch any error
            return 'There is something error'

    return render_template('register.html')
Make validation: We have imported the request, now we can use the function to check the method used in the URL in this way
request.method == 'POSTand with the request function we can also get the values on the form, here's howrequest.form['username']. username is the name of input in the form.Atomic transaction: I will use atomic transactions in this way the function that we will use will be canceled if one of the functions occurs an error. If we use PHP, we will use this method with try and catch. In Python the method is not much different like the following:
        try: // Atomic transaction
            with database.atomic():
                ## Your function or logic
        except IntegrityError: // Catch any error
Insert to database: We need to know we use the SQLite database, In the previous tutorial we have created a class model from the user, namely User. well to save the data we can use the create function on the user model like this
User.create(). I will insert 3 data based on the input value of the form, namely username, password, and email. We will hash the user password with the has methodmd5(). We have imported this function at the topfrom haslib import md5.Catch the error: We can catch an error in the
except integrityerror section. If one of the functions we use is an error, we will enter theIntegrityErrorcode block.
We have succeeded in creating routing and templates in the application, and I have added a feature to the user register, in the next section we will enter data from the interface that we created and I will create an authentication system. I hope you can understand the concept of routing and templating in this application. thank you for following this tutorial. may be useful.
Curriculum
- Web development with flask
Web developement with python #1 : Flask initialization and Routing system
Web development with python #2 : Templating jinja2 and Method POST on routing system
Web development with python #3 : Get method, Query parameter and Navigate Routing
Web development with python #4: Store cookie and Get cookie in template
Web development with python #6 : Use flash message and combine it with framework boostrap
- File in python
File in python #1 : Read file and Write file and Modes file
File in python #2 : The interaction between user input, Read CSV file
File in python #3 : Write CSV file, Read and Write JSON file
- Class-based views
Tutorial Django - Class based view #2 : Use Class based view method and Get and Post method
Tutorial Django- Class based view #3 : Authentication in Django and Urls Protection globally and specifically
Create Aplication social media with flask
Thank you for your contribution.
Your contribution has been evaluated according to Utopian policies and guidelines, as well as a predefined set of questions pertaining to the category.
To view those questions and the relevant answers related to your post, click here.
Need help? Chat with us on Discord.
[utopian-moderator]
Thank you for your review, @mcfarhat! Keep up the good work!
Hi @duski.harahap!
Your post was upvoted by @steem-ua, new Steem dApp, using UserAuthority for algorithmic post curation!
Your post is eligible for our upvote, thanks to our collaboration with @utopian-io!
Feel free to join our @steem-ua Discord server
Hey, @duski.harahap!
Thanks for contributing on Utopian.
We’re already looking forward to your next contribution!
Get higher incentives and support Utopian.io!
Simply set @utopian.pay as a 5% (or higher) payout beneficiary on your contribution post (via SteemPlus or Steeditor).
Want to chat? Join us on Discord https://discord.gg/h52nFrV.
Vote for Utopian Witness!