Create a forum application using django #10: Detail page for forums, Use Slug as the parameter URL and Implement get_context_data to assign data
Repository
What Will I Learn?
- Detail page for forums
- Use Slug as the parameter URL
- Implement get_context_data to assign data
Requirements
- Basic Python
- Install Python 3
- Install Django
Resources
- Python - https://www.python.org/
- Django- https://www.djangoproject.com/
- Bootstrap 4 - https://getbootstrap.com/docs/4.0/getting-started/introduction/
Difficulty
Basic
Tutorial Content
We will continue this series of tutorials. In this tutorial, we will learn how to make a detailed view page using the slug concept that we have made before. We will also how to manage the data that you want to display, edit and delete using the CRUD method. For those of you who have just followed this tutorial, I suggest taking part in the previous tutorial in the curriculum section
Detailed view
If you have followed the previous tutorial, in the previous section we discussed Slug and we have also pressed slug based on the title of the forum created. Now we will use the Slug to display the detail view page. the detail view page will contain detailed pages from each of the forums. This is an example of the slug that we have successfully generated by adding unixtime to make it unique.
- Order by
We will start by doing an order on the data forums, we will use queryset to order our data. the following is the explanation.
forums/views.py
class ForumListView(ListView):
    model = Forum
    queryset = Forum.objects.order_by('-created_at') // Use queryset
- With the code above we have implemented the queryset function. We will place an order on the forum model
Forum.objects.order_by('created_at). We can order by using theorder_by()function with the column name parameter that we will order with an additional'-'. The following results:
Well, we see in the picture above, we managed to add a little experience that is good for the user.
- Use Slug as parameter
We will use the slug as a parameter in URL which will later be a marker of a forum detail. We will use slug as a unique parameter that will distinguish each forum data from the others. We will use this URL to see details from each forum. For more details, we can see the example below:
forums/urls.py
from django.urls import path
from .views import ForumCreate, ForumListView, ForumUserListView, ForumDetailView

urlpatterns = [
    path(' ', ForumListView.as_view(), name='forum-list'),
    path('<slug:slug>', ForumDetailView.as_view(), name='forum-detail'), // forum-detail
    path('by/<username>/', ForumUserListView.as_view(), name='forum-by'),
    path('add/', ForumCreate.as_view(), name='forum-add')
]
The path used will be dynamic, so we can accept the URL parameters like this
'<slug:slug>'. We have learned from the previous tutorial, that each path or URL must have a view class that will be used. In this path, we will use the ForumDetailView view class.To use the ForumDetailView class we must import it as well as the following
from .views import ForumCreate, ForumListView, ForumUserListView, ForumDetailViewand we will also use the aliasname = 'forum-detail'.
Create a ForumDetailView
We have used and imported the ForumDetailView class, but haven't created it and defined it. To make it we can make it like the following example:
forums/views.py
from django.shortcuts import render, get_object_or_404
from django.views.generic import CreateView, ListView, DetailView // import the DetailView
from .models import Forum
from django.contrib.auth.models import User
from django.contrib.auth.decorators import login_required
from django.utils.decorators import method_decorator

class ForumDetailView(DetailView): // Use the DetailView As parameter
    model = Forum
In the previous tutorial, we knew and implemented CreateView and ListView. In the above code we know the new view, That is DetailView:
We have used and imported it and now we will make it
ForumDetailView(DetailView)and use DetailView as a parameter.
Use URL Slug in frontend
We have created the URL and we have created the ForumDetailView view class. In this section, you will render the URL in HTML.
forums/forum_list.html
{% extends "base.html" %}
{% load humanize %}
{% block title %} List Forum{% endblock %}
{% block content %}
<div class="jumbotron">
<h1>Forums</h1>
<ul>
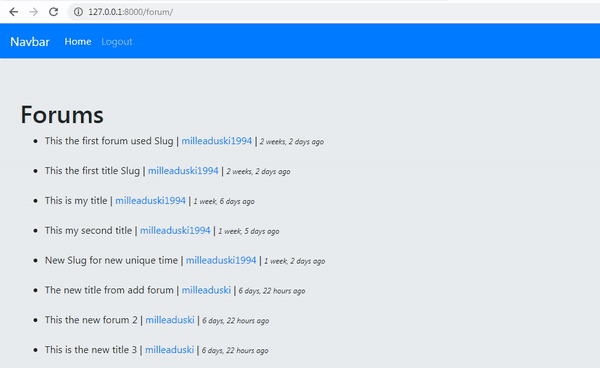
{% for forum in object_list %}
<li><a href="{% url 'forum-detail' forum.slug %}">{{forum.title}}</a> | <a href="{% url 'forum-by' forum.user %}">{{forum.user}}</a> | <span style="font-size: 12px;"><i>{{forum.created_at | naturaltime}}</i></span></li><br>
{% endfor %}
</ul>
</div>
{% endblock%}
To render slug, we can use like this
<a href="{% url 'forum-detail' from.slug %}">{{forum.title}}</a>. 'forum-detail' is the alias of routing and thefrom.slugis the slug parameter we got from from .slug.Then you can see if it is successfully rendered in the template then we can see the slug in the
<a>tag. As we see in the picture below:
.gif)
We can see we have successfully rendered the URL and when we click the URL we are going to, we will get a warning like this:
This warning occurs because we haven't created a template for forum_detail.html. So this template is what we will create next.
- Create a template forum-detail
Here you can create a template that will be used for forum-detail, here we will load the data details in the forums. In rendering templates we can use data on objects. For more details, we can see the template as follows:
forums/forum_detail.html
{% extends "base.html" %}

{% load humanize %} // Load time humanize

{% block title %} {{object.title}} {% endblock %}

{% block content %}
<div class="jumbotron">
  <h1>{{object.title}}</h1> // Render title
  <p>{{ object.desc }}</p> // Render Description
  - <span><i>{{object.created_at | naturaltime}}</i></span> // Render time
</div>
{% endblock%}
- In this template we will load additional plugins in the forum_detail.html template, the plugin is
{% load humanize %}. with this template, we can make the time display better and easier to understand. This time like two months ago, just now, or etc. to use this plugin make sure you have defined it at INSTALLED_APPS
app/settings.py
INSTALLED_APPS = [
    'django.contrib.admin',
    'django.contrib.auth',
    'django.contrib.contenttypes',
    'django.contrib.sessions',
    'django.contrib.messages',
    'django.contrib.staticfiles',
    'django.contrib.humanize', // Installed
    # Init forums
    'forums',
    'account'
]
- We can render the data we need on object. This object refers to the model that we took from the Forum in the ForumDetailView class. The Object is a default variable that can be used automatically.
- In object we can render title, desc, and create_at according to the fields in the forum model. For more details we can see in the picture below:
.gif)
- Assign data to the template using
get_context_data()
We see at the top we have successfully rendered the forum_detail.html template and at the same time rendered the data in the object. Now we will learn how to assign other data to the template. The way we will use one of the often used methods is get_context_data (). Here's how to implement it on the project forums:
forums/views.py
class ForumDetailView(DetailView):
    model = Forum
    def get_context_data(self, **kwargs): // Define get_context_data
        context = super().get_context_data(**kwargs) // load the main variable
        context['additional'] = 'this is the value of the additional variable' // load the additional variable as array
        return context // return the context
What we have to do first is define the function
get_context_data (), in this function, we have two parameters namely **self and kwargs (keyword arguments).Then we load the main variable which we will pass to the template.
context = super().get_context_data(**kwargs). Main variables can be accessed withsuper ()functions and then we store them in context variables.Well, the most important part is when we pass an additional variable we have to assign the value in the form of an array. like this example:
context['additional'] = 'this is the value of the additional variable'
additional is the key that we will render in the template and we give the value as follows, just as an example 'this is the value of the additional variable'and the last we return the context.
- In the frontend, we can render the value like the following with the key.
{% extends "base.html" %}

{% load humanize %}

{% block title %} {{object.title}} {% endblock %}

{% block content %}
<div class="jumbotron">
  <h1>{{object.title}}</h1>
  <p style="font-size: 20px;">{{ object.desc }}</p>
  - <span><i>{{object.created_at | naturaltime}}</i></span>
  <p>{{additional}}</p> // key
</div>
{% endblock%}
We can render directly with the key name that we assign to the array variable in the ForumDetailView class section. For more details, we can see the picture below:
.gif)
Curriculum
- Class-based views
Tutorial Django - Class based view #2 : Use Class based view method and Get and Post method
- Forum app
Create a forum application using django #1 : Init projects and dependencies and Database schema
Create a forum application using django #2: Template system and Class-based view implementation
Create a forum application using django #3: Base template, Login and Register system
Create a forum application using django #4: Admin dashboard ang setting redirect
Create a forum application using django #6: CRUD system and URL protection,redirect system
Create a forum application using django #7: Unique slug and Manage Modules in admin dashboard
Thank you for your contribution @duski.harahap.
After reviewing your contribution, we suggest you following points:
We suggest that you put a smaller title, however that has the key words of what you will explain in your tutorial.
Try to improve the structure of your tutorial, overall it looks like it gets poorly structured.
The section of your curriculum begins to get big in the contribution, could put for example:
Curriculum: django#1, django#2...
Overall the tutorial has good content and is well explained.
Your contribution has been evaluated according to Utopian policies and guidelines, as well as a predefined set of questions pertaining to the category.
To view those questions and the relevant answers related to your post, click here.
Need help? Chat with us on Discord.
[utopian-moderator]
Thank you for your review, @portugalcoin! Keep up the good work!
Hi @duski.harahap!
Your post was upvoted by @steem-ua, new Steem dApp, using UserAuthority for algorithmic post curation!
Your post is eligible for our upvote, thanks to our collaboration with @utopian-io!
Feel free to join our @steem-ua Discord server
Hey, @duski.harahap!
Thanks for contributing on Utopian.
We’re already looking forward to your next contribution!
Get higher incentives and support Utopian.io!
Simply set @utopian.pay as a 5% (or higher) payout beneficiary on your contribution post (via SteemPlus or Steeditor).
Want to chat? Join us on Discord https://discord.gg/h52nFrV.
Vote for Utopian Witness!