Guide to Creating a Discord Auto Upvote Bot for MS Windows using Javascript

Dear Friends,
I recently finished coding and launched my very own Upvote Bot for my Discord Server. For some people, this is an easy task, but for other coding challenged individuals like myself this was not an easy task. For the longest time I had help creating my more advanced Bots and this one was no different. I initially started scripting my own java based bots with the help of various Youtube videos. Although they were helpful, more complex bots such as an upvoting bot were far out of my reach since the available templates were coded in Ruby/Python which I did not understand or have any knowledge in coding.
I eventually got help from @mahdiyari who built and deployed an upvote bot for me. This was helpful and I had what I needed, but anytime I needed to make updates or changes, I would need to seek his help to do so. Eventually @mahdiyari posted two guides which provided step-by-step instructions on how to create a bot from scratch. YYou can refer to his two posts below:
- Complete Guide to Creating Discord Auto Upvote Bot by Javascript.
- [Update] Voter.js v0.02: Discord Auto Upvote Bot - How to Add Registering Feature
These two articles were helpful, but like most people, my understanding of Linux/Ubuntu was limited and I preferred the point-click-drag-drop functions of windows instead to manage my bot easier. As a result, I followed his directions and adapted some of the knowledge to Windows, pulling from many resources to finally deploy my own upvote bot hosted in Microsoft Windows.
Below is a step-by-step guide for those who are interested in doing something similar, but need help doing so. Please keep in mind, credit goes to @mahdiyari for posting his initial guides. A lot of the information in this post is sourced and compiled from his original posts above and adapted for a Windows environment - He has given me permission to use snippets of information from his post in order to create this guide for a Windows-hosted bot.
First-things-First - This guide was written for the complete "noob." There are sections you can skip if you are a seasoned coder.
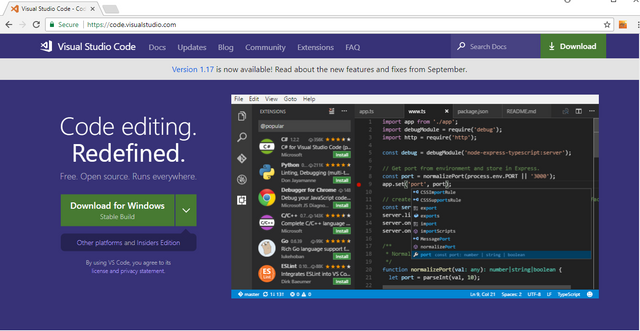
Although not required, I prefer coding using an application such as Virtual Studio Code - Most of my screenshots during coding are done within this application. You can download Virtual Studio Code HERE. You may also use DOS, but I prefer the nicer interface of VS Code.
Once you are done installing Virtual Studio Code you need to install node.js which you can download HERE. Download the current version (as of this writing version 9.0.0 is the most current) and install it.

This software package will allow you to initiate terminal commands needed to setup your bot and install/initiate other dependencies easier.
Onto the Bot Itself. Keep in mind, this bot is setup for use in Discord. A user will input a keyword (in this case - $upvote) and add the URL of the post they would like to upvote; the Bot will scan for the command and if the URL is valid, and the user has not upvoted another post in a set amount of time (this is adjustable) it will then auto-upvote the post on Steemit.com. In this guide I will cover both the baseline upvote bot and the bot requiring you to register.
First Step: Prepare and Install Mysql on Windows
Prior to installing Mysql on Windows, you will need to update and install the Update for Visual C++ 2013 and Visual C++ Redistributable Package. If you scroll down to the bottom of the page you can download and install the package in your preferred language. In this guide I have installed the English version.
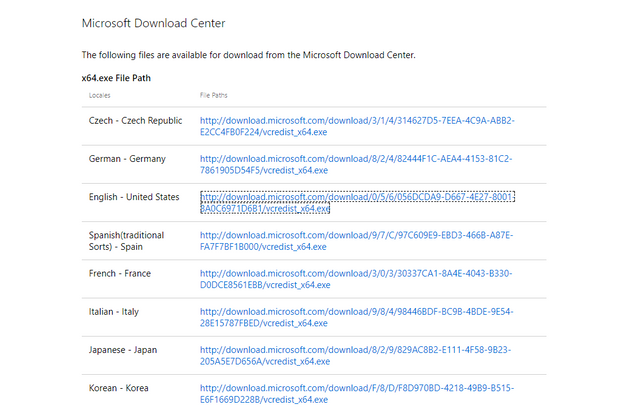
If you do not install this package, MySQL will fail to install. Once installation is complete, you can proceed to install MySQL which can be downloaded HERE.
You may skip this section if you used the direct link above:
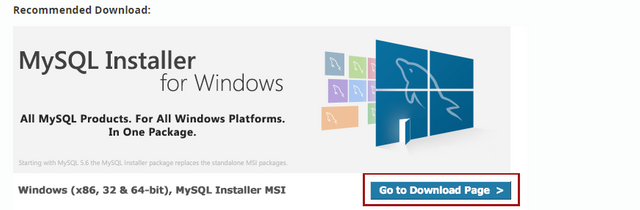
To ensure this post is always up-to-date and that you are always downloading the most recent version, the page to visit is the MySQL Community Server Installer for Windows. If you don't want to use the direct link mentioned above, below is a step-by-step walkthrough on navigating the MySQL site and downloading the correct version of MySQL.
Scroll half way down the page and click on the "Go To Download Page" Link.
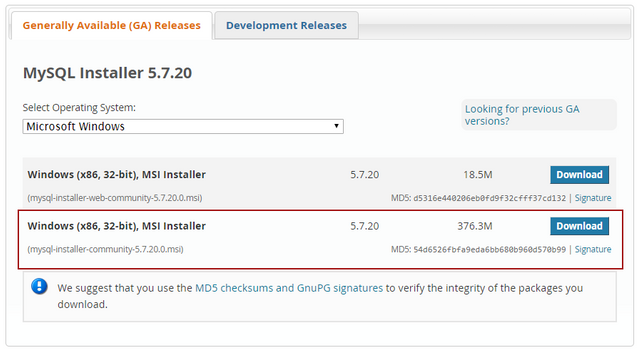
You will want to download the larger of the 2 files. Please note the installer is 32-bit, but during installation the appropriate version (32-bit or 64-bit) will be installed, or you can select the version you want to install.
On the following page, It is not necessary to Sign Up or Login. You can just click on the "No thanks, just start my download." Link.
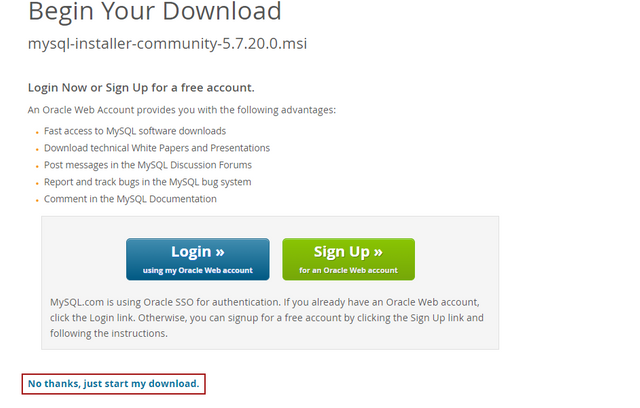
Your download will start.
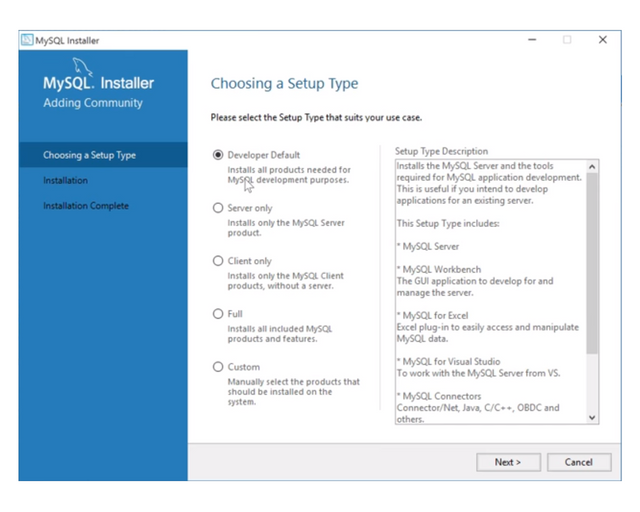
Once you download the MySQL Installation package, install it. During Installation you will be presented with a number of options. For the sake of simplicity you can select the default for everything.
The first selection you will get is the Server Setup Type - You will want to select the "Developer Default."
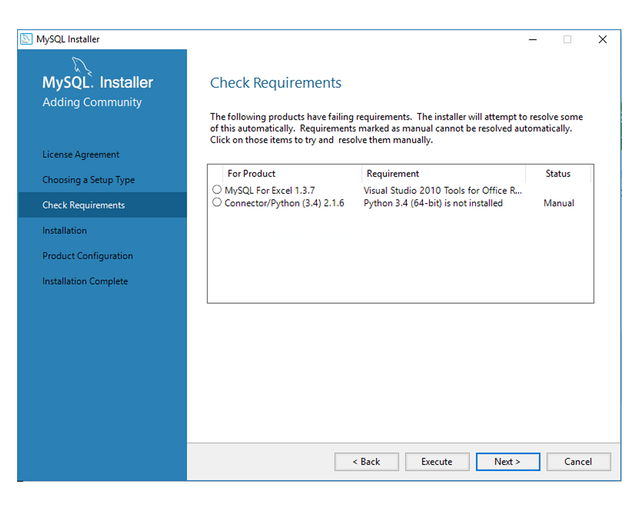
After you click "Next," You may get a screen stating that you may be missing or failing some requirements. You can ignore this and click "Next" and "Yes" to continue.

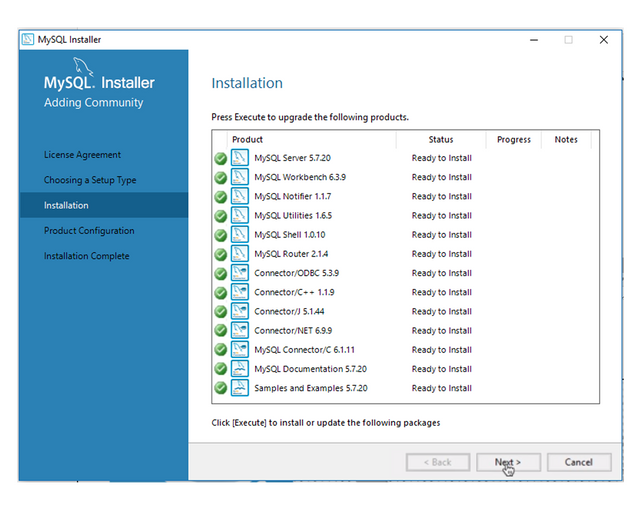
The next screen will be the Products and Features summary of what will be installed. Here you will select "Execute" for the installation of all the components to begin.
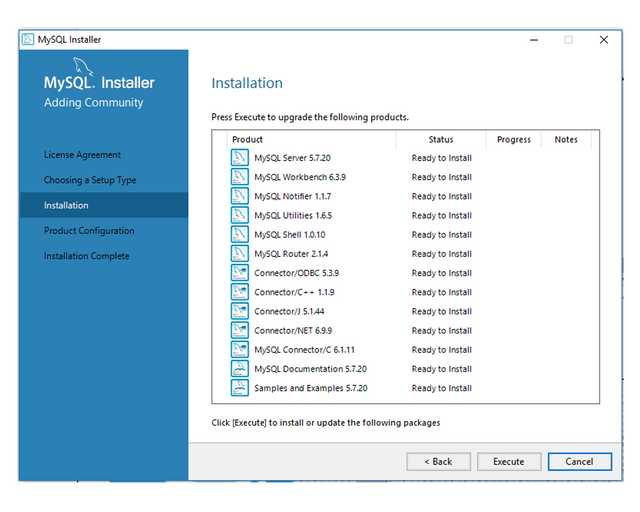
Once Installation is complete and all components have a  next to them, Click "Next."
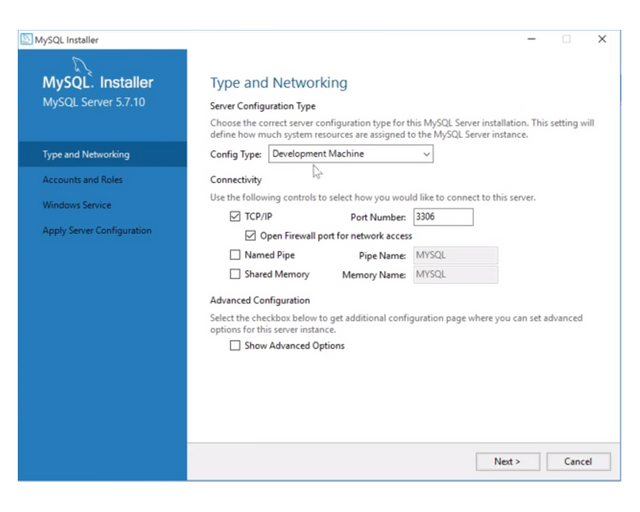
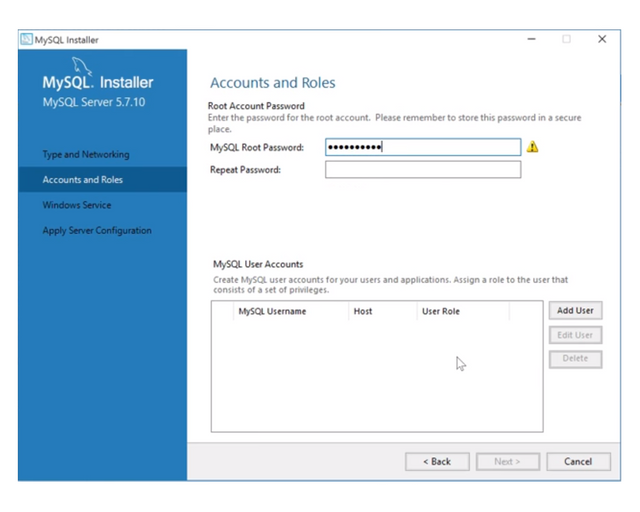
With the Exception of setting the password, you can leave everything else as default when completing the rest of the installation.
Create your own Password and Click "Next."
Again use the Default for the following sections
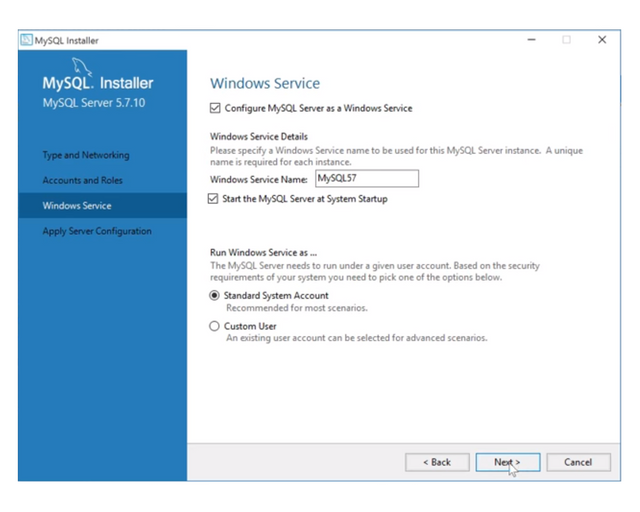
On the next screen, click "Execute" to allow the installation to test and launch your MySQL Server
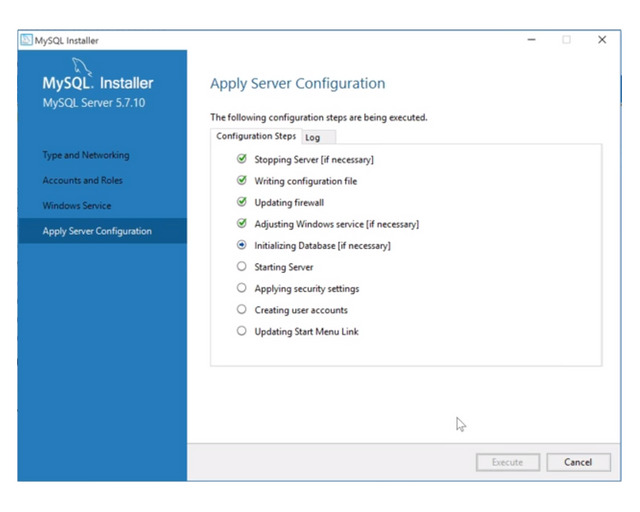
Once done, Click "Finish" to complete the Installation.
Creating your Bot on Discord:
Open the following link and login using your discord account: https://discordapp.com/developers/applications/me
Create a New Application.
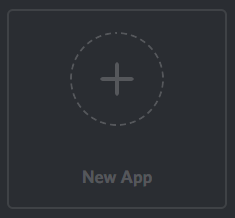
Follow this instruction and Create a new application - Name Your App, Select an Avatar/Icon, and click "Create App."

Once the App is created, select it and Click on "Create a Bot User." Confirm and Choose "Yes. Do It!" on the box that pops up.

Make sure to take Note of the Client ID and Token. You will need these later when you begin programming your bot. Do not share this information!
Next you need to invite the Bot to your Discord Server using the following link:
https://discordapp.com/oauth2/authorize?&client_id=YOUR_CLIENT_ID_HERE&scope=bot&permissions=0
Replace YOUR_CLIENT_ID_HERE with the Client ID from your created Bot.
For a detailed walkthrough of this section, you can follow the following link:
Creating a discord bot & getting a token
If you are not planning to use your Primary Steem Account for this Bot and/or you plan to create a completely separate Steem Account for your Bot then I recommend using the AnonSteem Tool by @someguy123 and Team. There is a fee associated with this service.
The bot will require your Private Posting Key as well, so have that ready along with the Discord Client ID and Token you took note of previously.
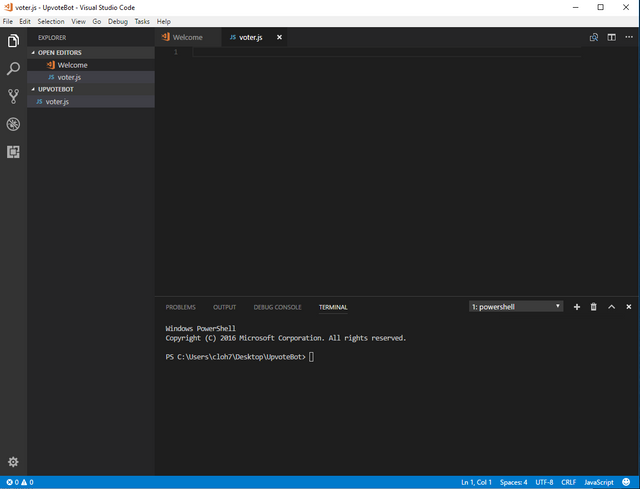
Open Visual Studio Code, DOS, or the Coding Application of your choice - In this guide I am using Visual Studio Code.
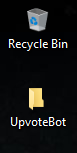
Select File->Open Folder->Select the Bot Folder you created
Once open, click the Create "New File" Icon and name it "voter.js"
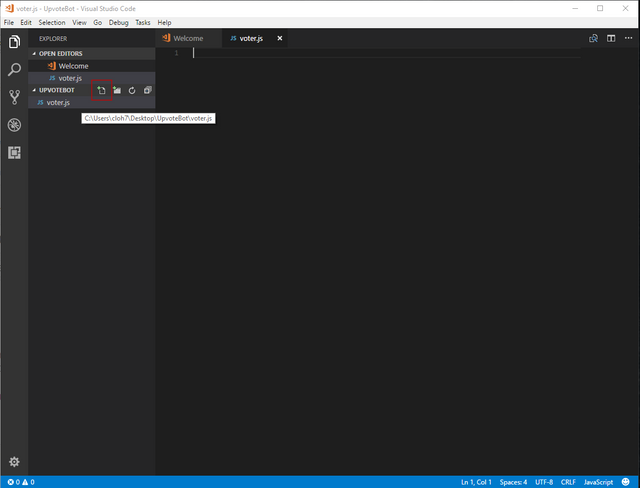
At the Navigation Bar at the Top, click View->Integrated Terminal to open a Terminal Window.
You should be in your Bot Folders Directory. You will need to type and execute the following commands in order to initialize and install the following libraries and dependencies your Bot will need to function:
Run These codes one by one:
npm install steem --save
npm install --no-optional eris
npm install mysql
npm install pm2 -g
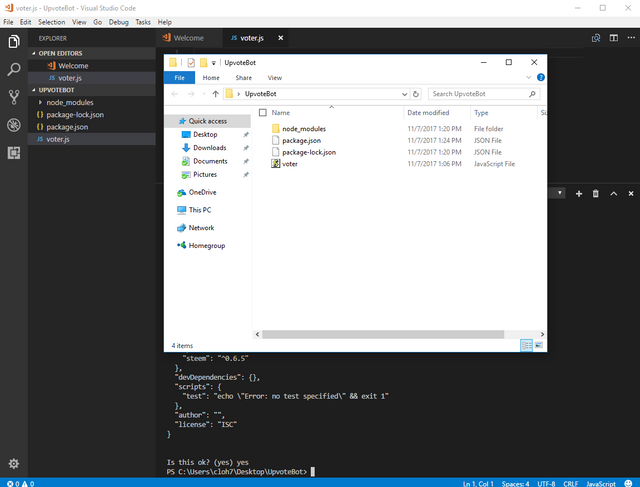
npm init - Just press Enter all the way through (except description, where you can enter a description like "Upvote Bot" and then type "yes" when asked "Is this OK?" and press Enter.
You can Ignore all the  Notices.
Once complete, you should have a number of new files and folders in your Bot Folder
Programming Your Bot:
This section will be separated into two Sections:
- Section 1 - Creating a simple Upvote Bot that will just Upvote a users post when the command $upvote [post url] is executed by the user.
- Section 2 - Creating an Upvote Bot that requires users to register first before being able to use the bot to Upvote their post.
Feel free to Navigate to the Section for the specific Bot you want to create.
Section 1 - Creating a Simple Upvote Bot
Step 1 - Create a Database using MySQL. If you are following this guide, you would have already installed and setup your MySQL server earlier.
From the Windows Start Menu, Open the MySQL Command Line Client. You will be prompted for the password you created earlier during setup.
Once logged in and at the prompt, You will need to create a database by typing the following:
CREATE DATABASE voter; - In this guide, I have named my database "voter."
Next you will want to switch to the database you just created by typing the following command:
USE voter;
Next we will create a new table for your Bot to use by typing the following command:
CREATE TABLE voter (id int(11) NOT NULL, user text NOT NULL, lastvote text NOT NULL, userid text NOT NULL); - This should be all one line of code.
Once complete, switch back to Visual Studio Code or whichever Coding App you are using and copy and paste the following full code that @mahdiyari has provided:
const Eris = require("eris");
const steem = require("steem");
var mysql = require('mysql');
var con = mysql.createConnection({
  host: "127.0.0.1",
  user: "root",
  password: "PASSWORD",
  database: "voter"
});
con.connect();
var bot = new Eris("YOUR BOT TOKEN");
var regex = /(\$)+(upvote)+.+(https:\/\/)+.+(@)+.+(\/)/;
var regex1 = /(@)+.+(\/)/;
var wifkey = 'PRIVATE POSTING KEY';
var votey = "YOUR STEEM BOT ACCOUNT NAME";
var weight = 2000; // 10000 = 100%
var per = 86400; // 86400 seconds = 24hour
bot.on("ready", () => {console.log('voter bot started! weight '+weight+' %');}); //when it is ready
bot.on("messageCreate", (msg) => { // when a message is created
    if(msg.content.match(regex)){
        var permlink= msg.content.replace(msg.content.match(regex)[0],"");
        var au = msg.content.match(regex1)[0];
        var aut = au.replace("@","");
        var author = aut.replace("/","");
        var channel = msg.channel.id;
        var uid = msg.author.id;

        var x = '0';
        con.query('SELECT EXISTS(SELECT * FROM `voter` WHERE `userid` = "'+uid+'")', function (error, results, fields) {
            for(i in results){
                for(j in results[i]){
                    x = results[i][j];
                    if(x == '1'){
                        var last;
                        con.query('SELECT `lastvote` FROM `voter` WHERE `userid`="'+uid+'"', function (error, results, fields) {
                            for(i in results){
                                for(j in results[i]){
                                    last = results[i][j];

                                }
                            }
                            var time = Math.floor(new Date().getTime() / 1000);
                                if((time - last) > per){
                                    con.query('UPDATE `voter` SET `lastvote`="'+time+'" WHERE `userid`="'+uid+'"', function (error, results, fields) {
                                        steem.broadcast.vote(wifkey,votey,author,permlink,weight,function(downerr, result){
                                            if(downerr){
                                                setTimeout(function(){bot.createMessage(channel,'Already Upvoted!');},1000);
                                                con.query('UPDATE `voter` SET `lastvote`="'+last+'" WHERE `userid`="'+uid+'"', function (error, results, fields) {
                                                });
                                            }
                                            if(result) {
                                                setTimeout(function(){bot.createMessage(channel,'Done! Your Post Upvoted By @YOUR STEEM BOT ACCOUNT NAME');},1000);
                                            }
                                        });
                                    });
                                }else{
                                    var come = per - (time - last);
                                    setTimeout(function(){bot.createMessage(channel,'Sorry! Come back after '+come+' seconds.');},1000);
                                }
                        });

                    }else{
                        var time = Math.floor(new Date().getTime() / 1000);
                        con.query('INSERT INTO `voter`(`user`, `lastvote`, `userid`) VALUES ("'+author+'","'+time+'","'+uid+'")', function (error, results, fields) {
                            steem.broadcast.vote(wifkey,votey,author,permlink,weight,function(downerr, result){
                                if(downerr){
                                    setTimeout(function(){bot.createMessage(channel,'Already Upvoted!');},1000);
                                    con.query('UPDATE `voter` SET `lastvote`="10" WHERE `userid`="'+uid+'"', function (error, results, fields) {
                                    });
                                }
                                if(result) {
                                    setTimeout(function(){bot.createMessage(channel,'Done! Your Post Upvoted By @YOUR STEEM BOT ACCOUNT NAME');},1000);
                                }
                            });
                        });
                    }
                }
            }
        });

    }
});
bot.connect();
Make sure you change the fields in BOLD above to your own details (Mysql Password, Bot Token from Discord, Your Steem Account Private Posting Key, Your Bot Voter Account Name, Voting Weight, and Voting Cooldown Period)
Once you have made all the necessary changes above, you can execute the Bot by typing the command:
pm2 start voter.js
You can stop the bot at anytime by typing the following command:
pm2 stop voter
If you make any changes, you can restart the bot by typing the following command:
pm2 restart voter.js
Section 2 - Creating a Bot that requires users to register first
Step 1 - You will first need to add the registration feature to your bot.
Open Visual Studio Code, DOS, or the Coding Application of your choice (Assuming you no longer have it open from the previous sections)
Select File->Open Folder->Select the Bot Folder you created
At the Navigation Bar at the Top, click View->Integrated Terminal to open a Terminal Window.
You should be in your Bot Folders Directory. You will need to type and execute the following command to install the registration library:
npm install xmlhttprequest
Step 2 - Create a Database using MySQL. If you are following this guide, you would have already installed and setup your MySQL server earlier.
From the Windows Start Menu, Open the MySQL Command Line Client. You will be prompted for the password you created earlier during setup.
Once logged in and at the prompt, You will need to create a database by typing the following:
CREATE DATABASE voter; - In this guide, I have named my database "voter."
Next you will want to switch to the database you just created by typing the following command:
USE voter;
Next we will create a new table for your Bot to use by typing the following command:
CREATE TABLE voter (id INT NOT NULL AUTO_INCREMENT , PRIMARY KEY (id), - This should be all one line of code.
user text NOT NULL, lastvote text NOT NULL, userid text NOT NULL);
If you previously created a Database and Table by following Section 1 and decided that you wanted to create a bot that requires you to register first, I found it easier to just delete the first Database and then recreate the Database and Table from scratch. You can delete the previous Database and Table by typing the following command:
DROP DATABASE voter;
If you however want to keep the information that is already stored in your database, then you can follow the directions that @mahdiyari provided in his post HERE to alter the fields in your table.
Once complete, switch back to Visual Studio Code or whichever Coding App you are using and copy and paste the following full code that @mahdiyari has provided:
const Eris = require("eris");
var steem = require("steem");
var mysql = require('mysql');
var XMLHttpRequest = require("xmlhttprequest").XMLHttpRequest;
var con = mysql.createConnection({
  host: "127.0.0.1",
  user: "root",
  password: "PASSWORD",
  database: "voter"
});
con.connect();
var bot = new Eris("YOUR BOT TOKEN");
var regex = /(\$)+(upvote)+.+(https:\/\/)+.+(@)+.+(\/)/;
var regex1 = /(@)+.+(\/)/;
var wifkey = 'PRIVATE POSTING KEY';
var votey = "YOUR STEEM BOT ACCOUNT NAME";
var weight = 5000; // 10000 = 100%

bot.on("ready", () => {console.log('voter bot started!');}); //when it is ready
bot.on("messageCreate", (msg) => { // when a message is created
    if(msg.content.match(regex)){
        var permlink= msg.content.replace(msg.content.match(regex)[0],"");
        var au = msg.content.match(regex1)[0];
        var aut = au.replace("@","");
        var author = aut.replace("/","");
        var channel = msg.channel.id;
        var uid = msg.author.id;

        var x = '0';
        con.query('SELECT EXISTS(SELECT * FROM `voter` WHERE `userid` = "'+uid+'")', function (error, results, fields) {
            for(i in results){
                for(j in results[i]){
                    x = results[i][j];
                    if(x == '1'){
                        var last;
                        con.query('SELECT `lastvote` FROM `voter` WHERE `userid`="'+uid+'"', function (error, results, fields) {
                            for(i in results){
                                for(j in results[i]){
                                    last = results[i][j];

                                }
                            }
                            var time = Math.floor(new Date().getTime() / 1000);
                                if((time - last) > 86400){
                                    con.query('UPDATE `voter` SET `lastvote`="'+time+'" WHERE `userid`="'+uid+'"', function (error, results, fields) {
                                        steem.broadcast.vote(wifkey,votey,author,permlink,weight,function(downerr, result){
                                            if(downerr){
                                                setTimeout(function(){bot.createMessage(channel,'Already Upvoted!');},1000);
                                                con.query('UPDATE `voter` SET `lastvote`="'+last+'" WHERE `userid`="'+uid+'"', function (error, results, fields) {
                                                });
                                            }
                                            if(result) {
                                                setTimeout(function(){bot.createMessage(channel,'Done! Your Post Upvoted By @YOUR STEEM BOT ACCOUNT NAME');},1000);
                                            }
                                        });
                                    });
                                }else{
                                    var come = 86400 - (time - last);
                                    setTimeout(function(){bot.createMessage(channel,'Sorry! Come back after '+come+' seconds.');},1000);
                                }
                        });

                    }else{
                        setTimeout(function(){bot.createMessage(channel,'You Are not Registered.');},1000);
                    }
                }
            }
        });

    }
    var regex2 = /(\$)+(register)+(\ )/;
    if(msg.content.match(regex2)){
        var sender = msg.content.replace(msg.content.match(regex2)[0],"");
        var memo = 'register';
        var transaction = 'Receive  0.001 SBD from '+sender;
        var r = 0;
        var channel = msg.channel.id;

        con.query('SELECT EXISTS(SELECT * FROM `voter` WHERE `userid` = "'+msg.author.id+'" OR `user`="'+sender+'")', function (error, results, fields) {
            for(i in results){
                for(j in results[i]){
                    x = results[i][j];
                    if(x == 1){
                        setTimeout(function(){bot.createMessage(channel,'Already Registered!');},1000);
                    }else if(x == 0){
                        var xmlhttp = new XMLHttpRequest();
                        xmlhttp.onreadystatechange = function() {
                            if (this.readyState == 4 && this.status == 200) {
                                var response = JSON.parse(this.responseText);
                                for(i in response){
                                    if(response[i].transaction == transaction && response[i].memo == memo){
                                        con.query('INSERT INTO `voter`(`user`, `lastvote`, `userid`) VALUES ("'+sender+'","0","'+msg.author.id+'")', function (error, results, fields) {
                                            r = 1;
                                            setTimeout(function(){bot.createMessage(channel,'User '+sender+' Registered by <@'+msg.author.id+'>');},1000);
                                        });
                                        break;
                                    }
                                }
                                setTimeout(function(){if(r == 0){
                                    setTimeout(function(){bot.createMessage(channel,'Please Send 0.001 SBD to '+votey+' with memo:`'+memo+'` and Try again.');},1000);
                                }},2000);
                            }
                        };
                        xmlhttp.open("GET", "https://steemfollower.com/voter-tx.php?user=" + votey , true);
                        xmlhttp.send();
                    }
                }
            }
        });
    }
});
bot.connect();
Make sure you change the fields in BOLD above to your own details (Mysql Password, Bot Token from Discord, Your Steem Account Private Posting Key, Your Bot Voter Account Name, Voting Weight, and Voting Cooldown Period)
Once you have made all the necessary changes above, you can execute the Bot by typing the command:
pm2 start voter.js
You can stop the bot at anytime by typing the following command:
pm2 stop voter
If you make any changes, you can restart the bot by typing the following command:
pm2 restart voter.js
Enjoy!
This Guide will hopefully help you get started with setting up your own Upvote bot in a Windows environment. Thanks to @mahdiyari for taking the time out of his busy schedule to provide the initial Linux/Ubuntu directions which built the foundation for me to create my own bot and this guide for Windows Users.
If there are any updates, feedback, input, or suggestions - please let me know in the comments below. If you found this helpful, please consider visiting my Steemit profile and upvoting, resteeming, and voting for my witness cloh76.witness. I appreciate the support!
Open Source Contribution posted via Utopian.io
This is so explanatory.
Thank you so much.
You're so selfless.
img credz: pixabay.com
Nice, you got a 23.0% @trafalgar upgoat, thanks to @cloh76
Want a boost? Minnowbooster's got your back!
The @OriginalWorks bot has determined this post by @cloh76 to be original material and upvoted(1.5%) it!
To call @OriginalWorks, simply reply to any post with @originalworks or !originalworks in your message!
Hey @cloh76 I am @utopian-io. I have just super-voted you at 15% Power!
Suggestions https://utopian.io/rules
-Utopian has detected 9 bot votes. I am the only bot you should love!!
Achievements
-Good amount of information. Thank you!
-Much more informative than others in this category. Good job!
-Votes on this contribution are going well. Nice!
-You are having more votes than average for this category. Nice!
-You are generating more rewards than average for this category. Super!
-This is your first accepted contribution here in Utopian. Welcome!
-You have just unlocked 6 achievements. Yeah!
Up-vote this comment to grow my power and help Open Source contributions like this one.
Hello @cloh76 thank you very much for this amazing contribution. Unfortunately there are few things before I can accept it in Utopian.
The above points are to ensure the quality of the contributions. I hope you understand. To edit this post go here https://utopian.io/utopian-io/@cloh76/guide-to-creating-a-discord-auto-upvote-bot-for-ms-windows-using-javascript click on Edit Post and let me know once done. I will then accept your contribution.
[utopian-moderator]
Congratulations! This post has been upvoted from the communal account, @minnowsupport, by cloh76 from the Minnow Support Project. It's a witness project run by aggroed, ausbitbank, teamsteem, theprophet0, someguy123, neoxian, followbtcnews/crimsonclad, and netuoso. The goal is to help Steemit grow by supporting Minnows and creating a social network. Please find us in the Peace, Abundance, and Liberty Network (PALnet) Discord Channel. It's a completely public and open space to all members of the Steemit community who voluntarily choose to be there.
Hello @cloh76. I have accepted your contribution since you are only breaking a soft rule in Utopian about using banners. Your contribution deserves to be listed on Utopian, therefore I am accepting it but I will be happy if you could remove the banner anyways. Thank you
[utopian-moderator]
Thanks elear. I have made some updates!
Bit late in checking this out but there's a typo "YYou" in the post :-)
lol. Thanks. Sorry for the late reply. Too late to change the typo now unfortunately.
Oh well. not a big deal :-)
Holy, wow. Super undervalued post here. I missed it, hope I got in my vote before the payout for you.
Excellent guide, sorry I missed this when you posted. I thought I had followed you.
Anyways, thanks for the most excellent contribution to the platform.
Rob
Thanks @rcarter.witness for the feedback and support. It means a lot!
Hey I created a bot using your guide but I see that my Bot is offline. How do I bring it online?
what does it say in your terminal window when you type: pm2 start voter.js
If I may ask, where do I type in (input) the channels? (what command lines)
&
Hope you can assist with this. Thanks.