My writing tools Part V - Howto include pictures on your Steemit blog
A Personal perspective on pictures in blogs on Steemit

For a long time, I've wanted to create posts with pictures on Steemit. I've looked around for tutorials and tried what I could find and just could not get it to work the way I wanted it to work. So I've held back from using pictures in my posts for much of my time on Steemit so far.
But I've also learned that if I want to get noticed on Steemit, I need to include pictures. There is just something in our brains that loves eye-candy. Plain text gets a pass. Add pictures and you can pique the interest of your audience. In one picture alone, you can give people a sense of what they will get if they click on your link.
Proof of this concept can be found in two people I admire for the quality of their posts and their use of pictures:
@heart-to-heart - travel
@gringalicious - cooking
Both of them provide excellent pictures in their posts and they use them judiciously, to entice their audience to read the post and inform the reader of their experience. To be fair, there are a few more that I admire, but these two most readily come to mind. If you're looking for an expert with pictures on Steemit, check them out. They're great examples of what can be done with pictures.
While working on two fairly recent posts of mine, it just so happens that I've developed the determination to learn how to include pictures in my posts:
My writing tools, Part IV - The StackEdit Markdown Text Editor
When writing those posts on the StackEdit Markdown Text Editor, I just got really determined to figure it out. I also wanted to figure out how to center my pictures in my blog. So today, I want to walk you through the steps of using the PostImage.org website, and inserting the pictures.
During this process I also learned through experimentation, how to select an area for a screenshot using a touchpad mouse on a Google Chromebook. I will get into a bit of that too, for those who may want to know. The goal here then, is to walk you through each step in some detail so that you can easily follow along.
Where to put the pictures you use or create
So let's start with the first step: picking a place for you to store your images. It's important to note that Steemit doesn't store images on the blockchain, so you have to store them in a place external to Steemit. In the articles I've read, several sites were suggested, and I'm sure there are more that I don't know about. I've tried a few and settled on postimage.org, mainly because they provide code you can copy straight into your blog. The following steps assume that you have an account on postimage.org.
If you take pictures with your phone, you can create a bookmark for the postimage.org website on your phone, sign in, and upload any pictures you want there. If you have a camera, you will then use a USB cable to transfer the pictures from your camera to a directory designated as a repository for your pictures.
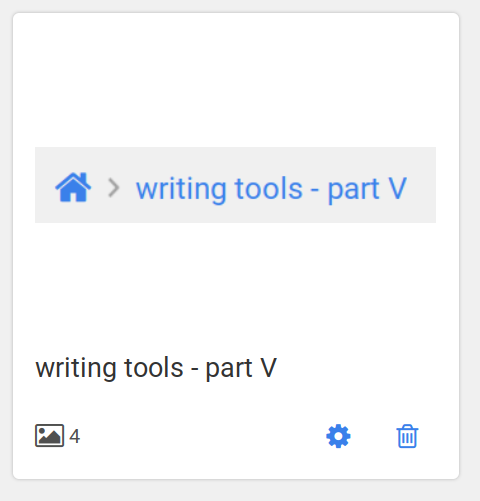
Once you have a picture ready for upload, you may or may not want to create a gallery for your articles. I like to create a gallery for each article, like so:


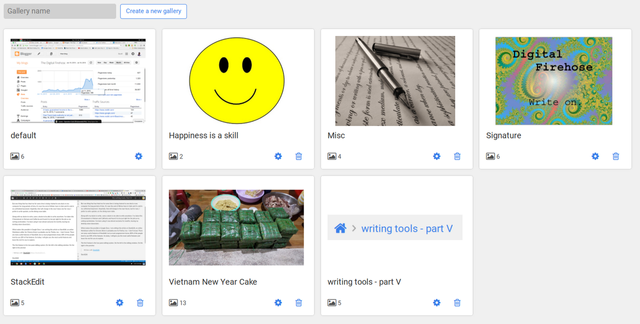
Note the new gallery at the end of the second row in the image above.
The code
Now let's look at the code to use to place an image in your blog:
Note: to show the code as above in Markdown text, use 3 backticks, put the code in the next line, then 3 more backticks on the following line after that. This key is usually under the escape (esc) key on most English standard keyboards. (A backtick loos like this: ` ) Here is a picture of the key from my own computer:

The code above will place the image in the center of the page for your blog. Remove the center tags if you're not that concerned about centering the picture. All that is needed to place the image in your blog is the image tag, "img src", followed by the equals sign. The address of the image must be in quotes, and all of that must be bracketed by less than and greater than signs (<>). The center tags wrap the text or object you want to center:
<center>Like this.</center>
It's also important to note that Steemit supports markdown code like this:
The problem I've found with using Markdown code is that centering an image is not supported, and combining HTML code with Markdown code doesn't work. I've tried it and just could not make that work. If you're going to use HTML just use HTML, or just use Markdown. They are mutually exclusive when it comes to inserting and centering images.
It is also worth noting that you can use the img tag to place images in comments, too. Check out this example here of my comment on a post by @flamingirl:
There, I was reading an article about a restaurant in Paris called, "Alcazar". Well, I could not help but be reminded of the character, General Alcazar from Herge's Adventures of Tintin. So I put a link to a couple of the pictures there from the Tintin Wiki. Here is an example:
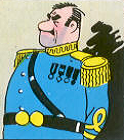
Here is the code used to insert the image above:

One last word about images. Steemit takes the first image in your article and uses that as a thumbmail when it shows in the feed page (the stream of articles you see in your Steemit feed). So make sure the first image is the one you want people to see in their feeds when they follow you. There might be a way to change, this, but I'm not aware of any yet.
Get the screenshot
Now a word about screen capture in Chromebooks (and probably most laptops without right and left buttons - like MacBooks). You may well know the frustration of using a touchpad to select text or an area in a picture, like when you want to crop the picture just right. You might even have connected a mouse to your computer to relieve you of your frustration.
Well, I have news for some of you, and for others in the know, this is old hat. I only just discovered this a few days ago and feel it worthy of a share at this point.
Selecting an area of space on your laptop screen can be maddening. I've tried it with just one finger many times, but by experimentation, I figured it out. The steps are simple:
- Use the keyboard shortcut for partial screen capture, ctrl+shift+switch window. That key looks like this:
.
- Locate the cursor, now a cross-hair, at the top left corner of the area you want to select.
- With one finger, depress the touchpad until it clicks.
- With the other finger, drag the cursor down and to the right until the area you want is selected.
- Release both fingers.
- One a Chromebook, your selection is saved instantly as a PNG image file that can be uploaded to your image storage location of choice.
One other, somewhat related thing: you can also use two fingers to drap and drop objects on a Chromebook, too.
I think that about wraps it up. If you find this post useful, please feel share it. If you have questions, post them below in the comments section. I will do my best to answer them.
Thank you for reading this far.
Image sources in this article: Images without attribution are from my humble phone, created by me or are screenshots create from applications I used for demonstration purposes.


A basic guaranteed income in the context of Maslow's Hierarchy of Needs
A sort of political movie review: Star Wars: Rogue One
Happiness isn't getting everything you want - happiness is a skill
The opposite of love is not hate, it is apathy
Fate, impunity and altruism
Nice post! Vote and resteemed
Thank you @digitalfirehose for sharing your knowledge. I want to learn how to do these kinds of things on my future postings. I think you just gave me insights that will help me. I'll study this on my off-line time. I feel there's so many things to learn and I'm kinda overwhelmed. But I'm hopeful. Thanks again. By the way, am following and resteeming. God speed.
You're welcome, sir.
I think you'll find images much easier to handle with practice. I have found that the more I use images, the more adept I get at using them. With each use, I solve a little problem here and there. Eventually, the common problems are solved and documented. Then using images becomes easy, even second nature.
So just keep writing. Consistent action over time will yield prodigious results.
Write on.
Thank you @digitalfirehose for your encouragement response. I truly appreciate it. Oh, btw, I am a she; not a he. No apologies needed. I understand. I know names can be confusing at times especially if you don’t see them in person or face-to-face. But yes, my name is actually derived from the male named Roger. My parents just feminized it by adding i-n-e, making it Rogerine. Anyway, thanks. I think I will be seeing you around here. Have a wonderful day. Beautiful smile.
Hi, I have a question. I'm sure you can help me. I was about to join the community for StackEdit, but it asked me for an account. What account should I provide? The steemit acct? or any of the accounts one may have such as (Msn, google, yahoo, etc)? Thank you.
Use Google Gmail account. It will store your documents in Google Docs and/or Dropbox, etc
Thanks. :-)