STEEMIT ESSENTIALS: How to Submit A Blog (with Screenshots)
#steemitessentials are a series of ‘ How To’ tutorials designed for newcomers and the SteemIt community
This blog post is a guide on HOW TO SUBMIT BLOG POSTS on SteemIt.
1. Click on the "Submit a Story" button in the top right hand corner of the page.
This button is accessible from any page on the SteemIt site. Once pressed, you will be taken to the Submit page (https://steemit.com/submit)
2. Add tags in the “Tags (or Tags)” field
'Tags' are intended to help others find your post. Enter a category that most closely relate to post in this field. If your post fits into more than one category, you can enter more than one tag. You should separate the tags a space. Entering at least one tag is mandatory and you should use only lowercase letters, digits and one dash. You can enter any text you wish, however do try to categorise your post correctly, if you want people to easily find it. It is better to match the text of an existing tag in Steemit than create a a new topic a minor variation. The first tag you enter is your main tag, it will have significance so the first tag you enter should be the one that most closely relates to your post.
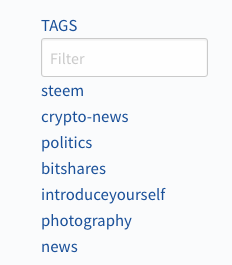
- Tip: To find more existing tags, go to the Steemit homepage (https://steemit.com), in the left sidebar, there is a longer list of the most popular tags.
You may find the appropriate category for your post there. There is also an ALL TAGS filters to further aid you in finding the right category. Simple begin typing a tag that best fits your post in the text box. The list will be filtered based on what you type. It will search from all main tags in Steemit. It will not however search for tags that are only secondary tags).
- Tip: You can can embed tags ( # ) into. Read more about tags below
3. Enter the title of your blog into the “Title” field
- Tip: Please choose carefully as this is the first thing other people are likely to see when they view your blog.
4. Enter a Summary into the “Summary (optional)” field or leave this field blank, your choice
If you wish, you can enter a strap line, sub-heading or summary text for your blog here.
- Tip: Markdown styling is available in this field (see further below).
[I’m not 100% sure what material difference adding content here makes (as oppose to just posting the main section? If any knows, please enter a comment and I'll update]**
5. Enter the main content of your blog into the "Reply" text box
This is where you add the main content of your blog.
- Tip: Markdown styling can be used to enhance the look of your page. Click on the “Styling with Markdown is supported” link to go to the ‘Mastering Markdown’ guide on github.
There are further guides on Steemit and across the internet. It is worthwhile grasping at least the basics of Markdown to make your blog more appealing to readers.
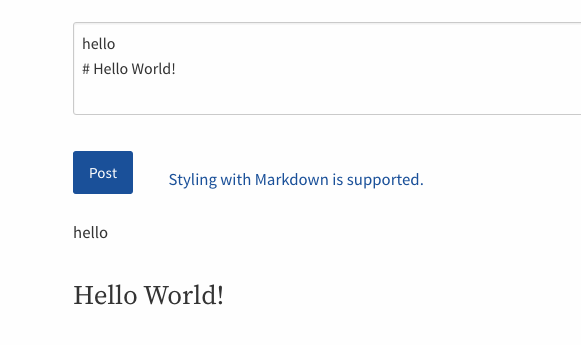
- Tip: You can preview your blog in real time (i.e. as you type). Simply look at the space below the Post button and type something into either the Summay or Reply box. You will notice that what you type appears in the space. If you use Markup styling syntax in the text box (try typing: # Hello World!) you will notice that you can preview how the styling will look on your blog.
- Tip At present Steemit does not support 'saving as a draft' so you may with to copy and paste to and from your favourite text editor to ensure you do not lose your work as you type/ amend your Markup.
6. Click the "Post" button to Submit Your Blog Post.
That’s it! Congratulations you’ve submitted a post on Steemit.
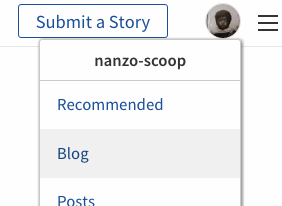
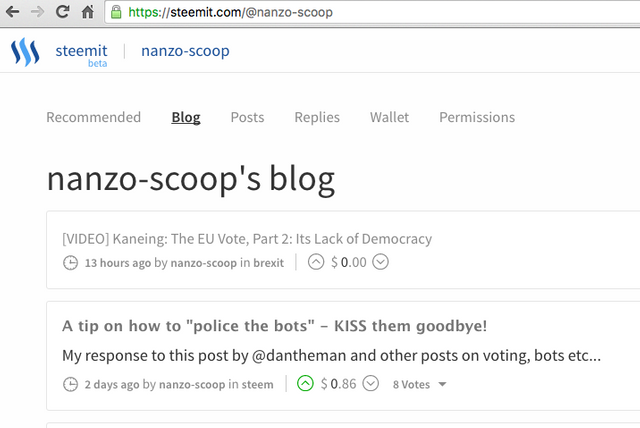
- Tip: To view your blog posts, Click on the Picture Icon in the far right hand corner of the page.
Then click ‘Blog’ from the dropdown.
You will be taken to your blog page (https://steemit.com/ [@yourUSerName]), where you can see your post.
Related content:
Improve this page
If you have suggestions on how to improve this page, please leave details in the comment section below. These are your tutorials, I’m merely the curator. Suggestions with the most up votes will take priority.
Where next?
If you want more tutorials like this please visit this useful tips page. It contains a list of Steemit Essential Tutorials and links to lots more other hints and tips from other contributors. Keep checking that page as new updated material will be constantly added. If you have a suggestion for a tutorial, leave a comment with your suggestion there.
Please share your thoughts in the comments section and/ or up-vote if you found this useful. Remember it pays to do so!






What this help doesn't provide for me as a newcomer to Steemit, is how to add pictures to my posting. I know that there must be a way, as I have seem most of the articles posted having pictures and even video added
You can upload your image to an online picture sharing site (I use snag.gy.com, however there are others). You can then paste the url for your image here and the image will show.
The online service you use will need to store your image using secure http (https ) for the image to show here.
Youtube videos will embed automatically if you paste in the url.
Hope this helps.
Thanks for this easy to follow tutorial. Will definately use as reference when submitting a post.
@nanzo-scoop could you please list maybe some other sites apart from snag.gy.com, I cannot navigate to this one. What about videos other than YT that I would like to post? Thanks in advance for help!
Topic selector has been changed to take a space separated list of tags.
Thanks - I've updated the OP accordingly.
I would also suggest bolding your links within the article to make them stand out. Example vs Example
You're right. thanks. I've updated the OP.
Screenshots added - 5th June 2016