🎨 [Step by Step] - Tutorial: ✨ 🎁 🌻 Two-Colored Basic Decorated Box 🌻 🎁 ✨ - By: Tesmoforia.
"Do it the best you can until you know more. When you get to know more, do it better."
Approximately on 2015, I started a little adventure making custom gift boxes, with cute and eye-catching wrappings for every occasion; while this business lasted, it was really fun and satisfactory.
Earning money by doing something you love and it’s practically one of your many hobbies is very cheering and positive.

🍃 Boxes and Photos by @tesmoforia, with a Lumix/Panasonic DMC-FH2. Gif created by the Vanuzzian Gorgeousness, @vanuzza. 🍃From those ventures, not only did I learn a lot of experience on how to deal with customers and questions about how different their likes and demands can be (curiously, most of the orders I received came from executives, funny things since you would imagine this elegant people liking very sober and regal kind of things, but the truth is they had a soft spot for pink cardboards and golden stars as much as anyone), I was also left with tools that I use to the current day whenever a special occasion approaches.
I don’t have die-cut cardboards neither pearly paper or corrugated cardboard anymore, you cannot get that material in my city any longer, but today I want to show you that in fact even the most common school cardboard, can give you a cute and presentable result if you do the right inversion in a couple of specific tools and supplies.

T O O L S
&
S U P P L I E S
.png)
.png)
| 🍃 Long Ruler. | 🍃 Wooden Stick. |
|---|---|
| 🍃 Paper Scissors. | 🍃 School Glue. |
| 🍃 Pencil or Mechanical Pencil. | 🍃 White Cardboard. |
| 🍃 Small Crafting Punches. | 🍃 Yellow Cardboard. |
| 🍃 Paper Scissors for Crafting. | 🍃 Metallic or Reflecting Floral Tape. |
| 🍃 Hot Glue Gun (optional). | 🍃 Cold-Porcelain Decorative Appliques (optional). |
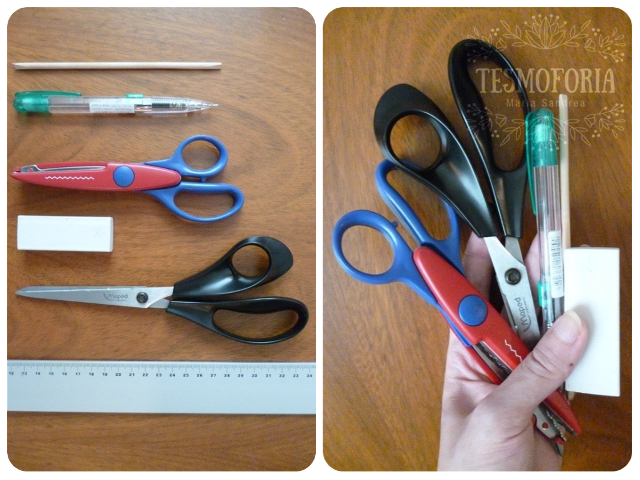
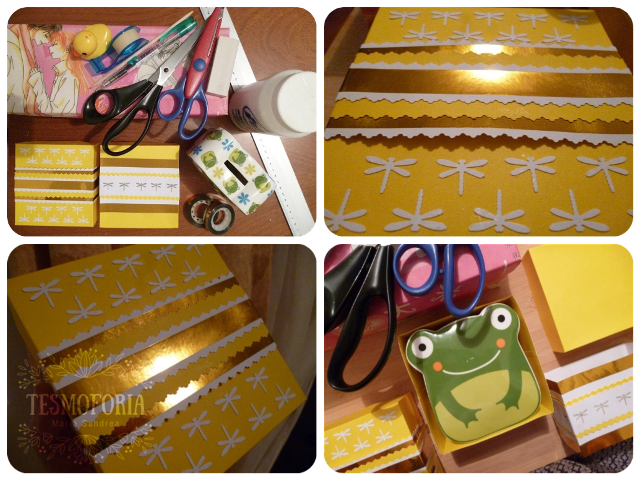
.png) " The Old Reliable ~ " - Photos by @tesmoforia, with a Lumix/Panasonic DMC-FH2
" The Old Reliable ~ " - Photos by @tesmoforia, with a Lumix/Panasonic DMC-FH2 
"School glue, normal white and yellow cardboard." - Photos by @tesmoforia, with a Lumix/Panasonic DMC-FH2 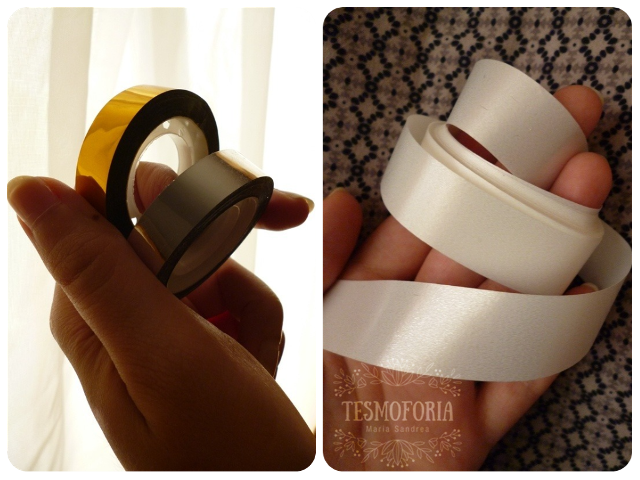
"Silver and Golden Metallic or Reflecting Floral Tape, and pearled paper tape, the latter is a more common option when we comparing it to the others. However, it is a less showy alternative." - Photos by @tesmoforia, with a Lumix/Panasonic DMC-FH2 
"This is one of my Magical Boxes!, what does one of those magical boxers contain?, well! It contains several fancy and varied supplies, from resin appliques to laminated gold, patches, and gems. There are also some imported stickers. All of those are good options for the final touches of a decorated box. Although, the ones we are going to make today are simple." - Photos by @tesmoforia, with a Lumix/Panasonic DMC-FH2 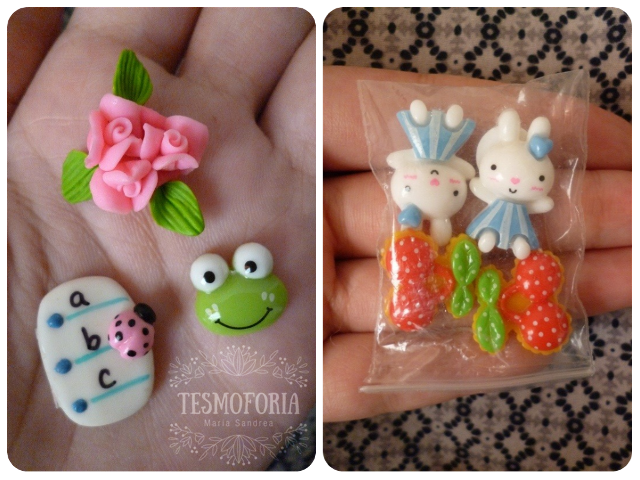
"I’m really a fan of retro or kawaii-culture kind of appliques." - Photos by @tesmoforia, with a Lumix/Panasonic DMC-FH2 
"Another magical box!, wrapped in Shoujo-Manga gift paper, because it strawberries my life. This little box contains my craft punches collection for paper/cardboard." - Photos by @tesmoforia, with a Lumix/Panasonic DMC-FH2 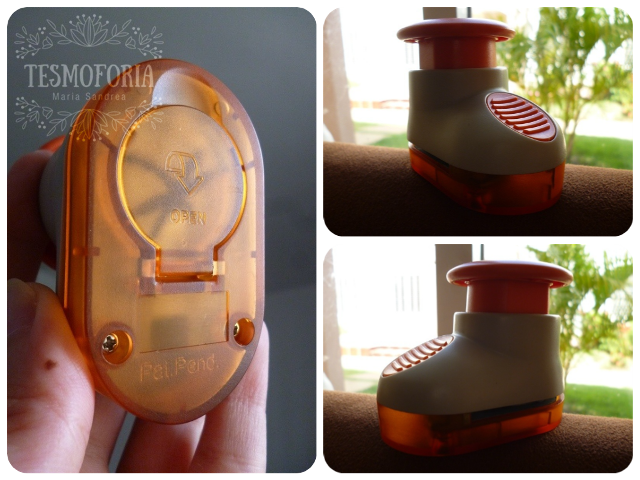
"This is my favorite crafting punch, is a big dragonfly and can cut through thick cardboard." - Photos by @tesmoforia, with a Lumix/Panasonic DMC-FH2 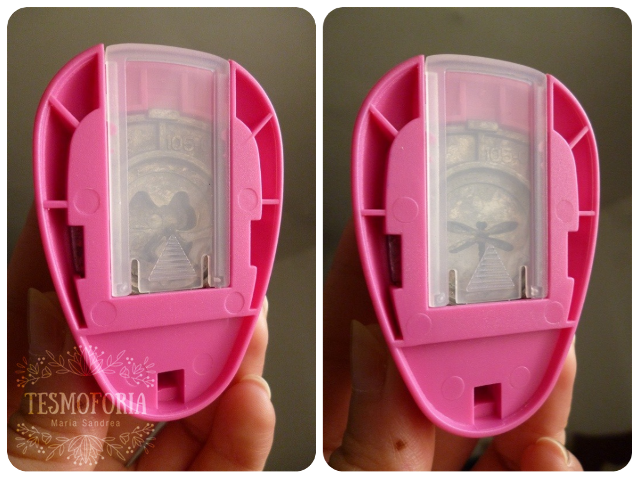
"Small Crafting Punches for paper, the first one has a bow shape, the second is a small dragonfly. The last one is what we are going to use today." - Photos by @tesmoforia, with a Lumix/Panasonic DMC-FH2 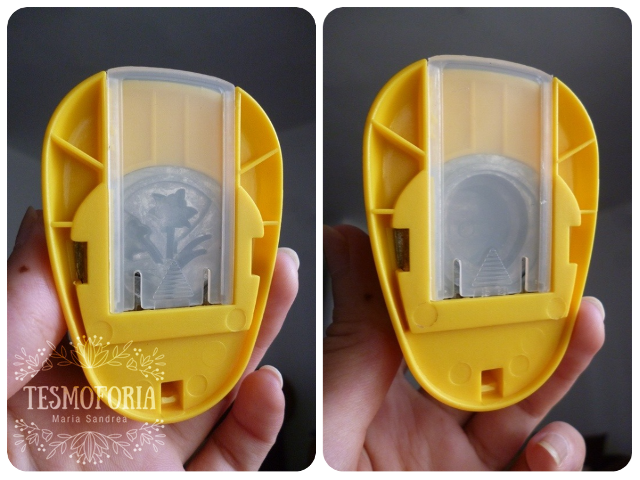
"Crafting Punches for paper and cardboards, medium size. The first one is flower-shaped, the second is a balloon." - Photos by @tesmoforia, with a Lumix/Panasonic DMC-FH2 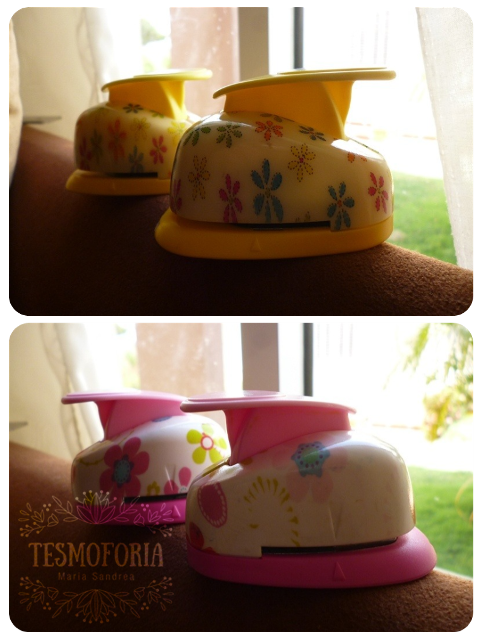
"Details~ " - Photos by @tesmoforia, with a Lumix/Panasonic DMC-FH2 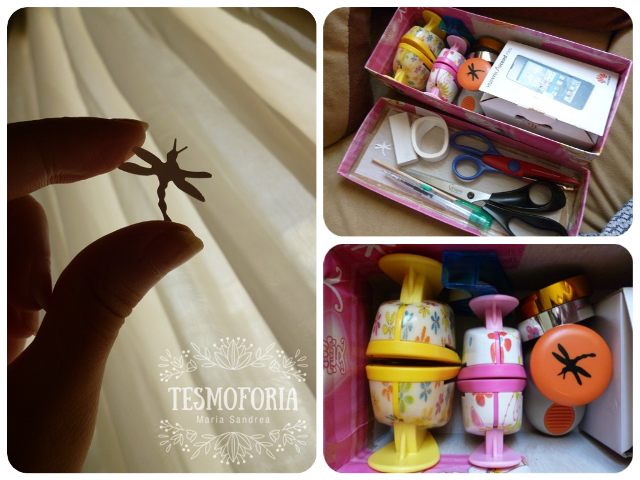
"That’s how the cardboard shape looks like, made by the big dragonfly crafting punch." - Photos by @tesmoforia, with a Lumix/Panasonic DMC-FH2 "How to get the correct measurements?"
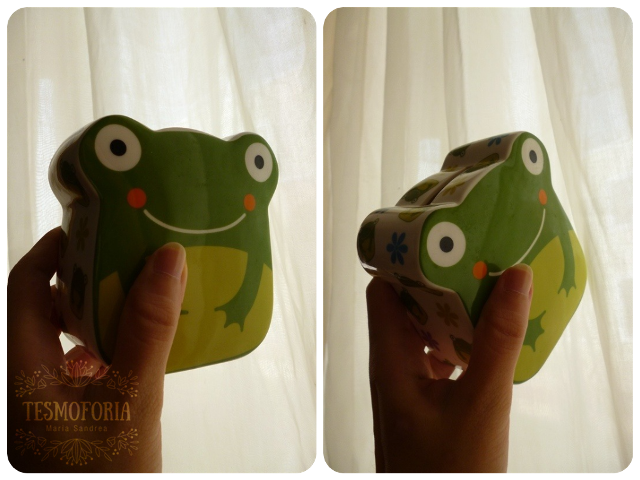
"We are going to use Mr. Little Frog as our gift model to make this custom box. More than once, we have the gift prior to the box, and then people encounter a huge difficulty to find the most suitable packing or with the right size nor shape to pack it." - Photos by @tesmoforia, with a Lumix/Panasonic DMC-FH2 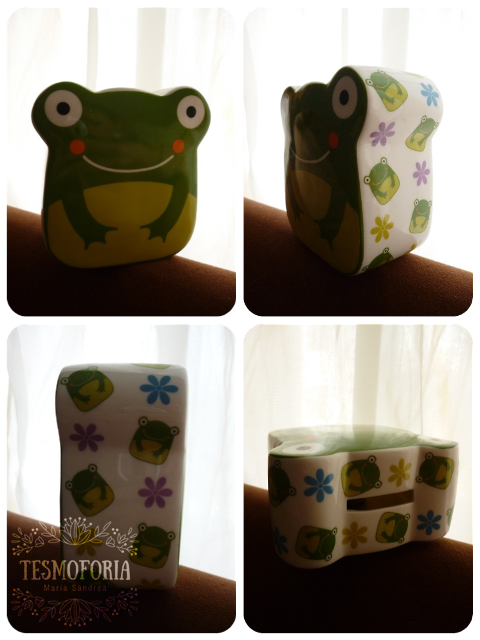
"The secret is to identify 3 exact size of the object to gift: Length, Height, and Width." - Photos by @tesmoforia, with a Lumix/Panasonic DMC-FH2 Mr. Little Frog’s Measures:
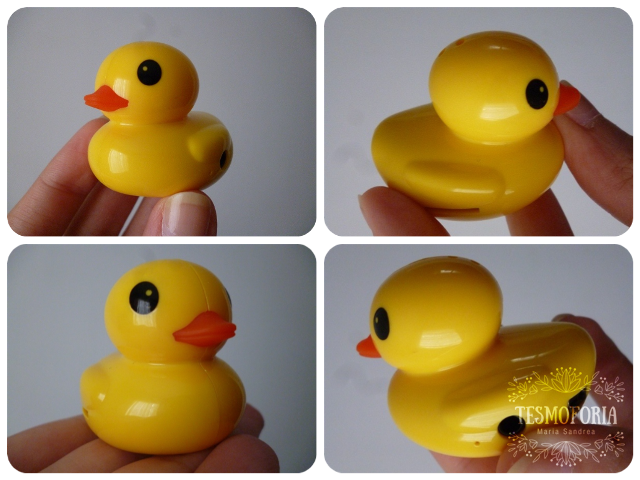
"Mr. Duckling is also a good model, and a good example of an irregular-shaped object. In this case we also use the same process used with Mr. Little Frog." - Photos by @tesmoforia, with a Lumix/Panasonic DMC-FH2 Mr. Duckling’s Measures:
« S T E P • B Y • S T E P »
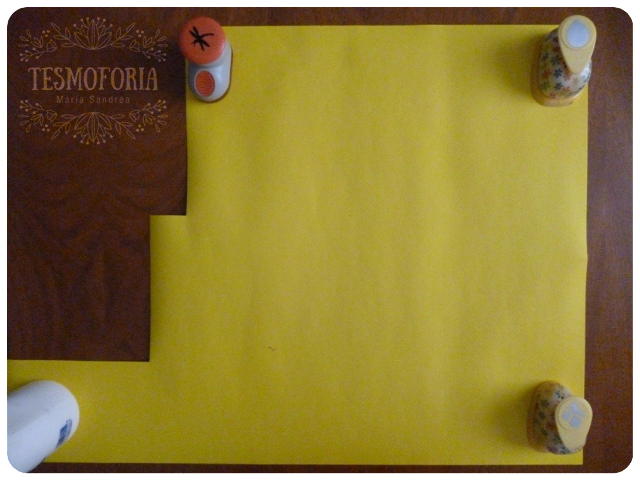
"We are going to extend our main cardboard, in this case: the yellow one, and we’ll use some heavy objects to help us keeping it in place; then, using the gift’s measures we just took, we are going to draw a rectangular form in this way." - Photos by @tesmoforia, with a Lumix/Panasonic DMC-FH2 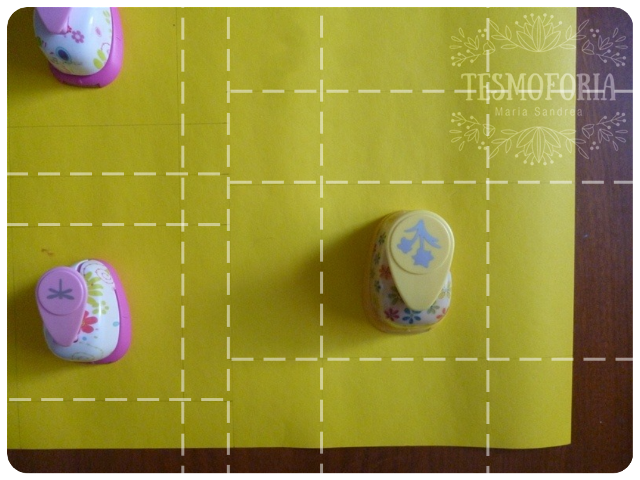
"First, we are going to draw the box’s body. This is going to be a two-pieces box, with a body and a top as separated elements." - Photos by @tesmoforia, with a Lumix/Panasonic DMC-FH2 .png)
"We will start by tracing the base, or body of the box: First, we mark, from the cardboard’s border to the center, a space of 5,5 centimeters, those are going to be our walls, the “height of the box”. Then, in order to mark the next wall, we trace a distance of 10 centimeters. For the parallel wall to the one we just formed and close this piece, we are going to mark a distance of 10,5 centimeters." - Photos by @tesmoforia, with a Lumix/Panasonic DMC-FH2 .png)
"We are going to repeat this action, now with the following measures: The border, or height is going to be 3 centimeters, a pair of walls is going to measure 10,3 centimeters, and the other is going to be 10,8 centimeters. " - Photos by @tesmoforia, with a Lumix/Panasonic DMC-FH2 The secret for box whose two pieces match perfectly, is adding within 2 to 3 millimeters to the measures of the top piece in comparison to the base measures.
« A S S E M B L Y »

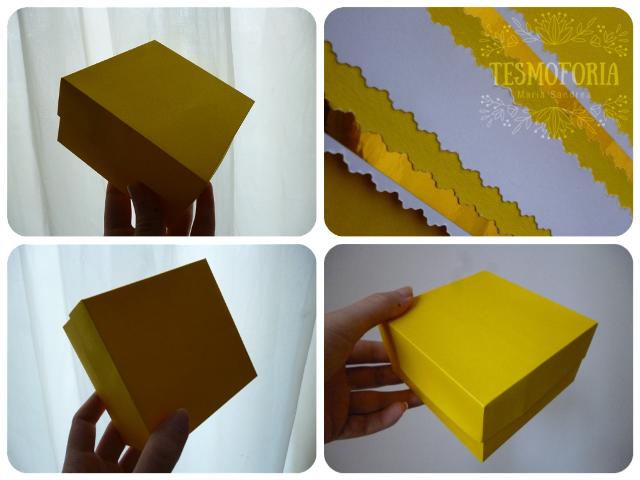
"We start cutting our precious rectangles, and proceed to trace the lines we draw using the wooden stick, using moderated pressure. YOU ONLY DO THIS STEP ONCE, NOT MANY, to avoid weakening the supply." - Photos by @tesmoforia, with a Lumix/Panasonic DMC-FH2 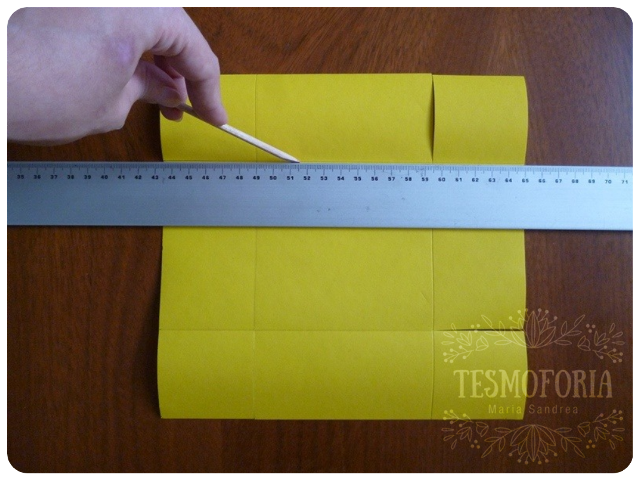
"Help yourself with the ruler, as seen in the photograph; so you will get the result that you see in the photos above when you fold all the walls inwards." - Photos by @tesmoforia, with a Lumix/Panasonic DMC-FH2 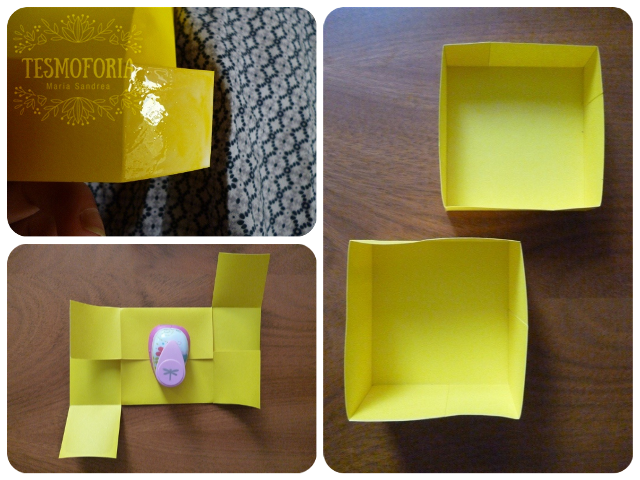
"Cut one of the lines inwards for each side of your rectangle, it should look like what is seen at the image. These tabs are the ones that will help you close the figure and also give it firmness; it's always recommended that the tabs are large, and not narrow. Apply school glue, wait 30 seconds, and close each side one by one." - Photos by @tesmoforia, with a Lumix/Panasonic DMC-FH2 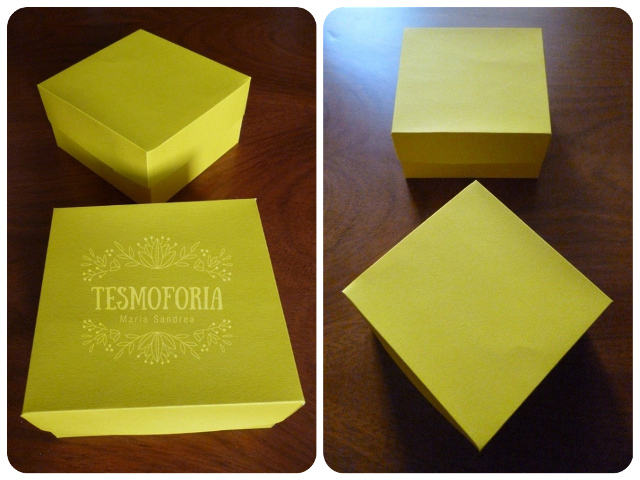
"You shall get a result like this. " - Photos by @tesmoforia, with a Lumix/Panasonic DMC-FH2 « D E C O R A T I O N »
• Box N° 1 •
"As I said before, the design we are going to use is the decorated band, a single long piece of thick cardboard which surrounds the box but not permanently, it’s only function is to be taken off and placed on by sliding it, it doesn’t only fasten the top against the base in a safely way, but it also acts like the main and only decorative element." - Photos by @tesmoforia, with a Lumix/Panasonic DMC-FH2 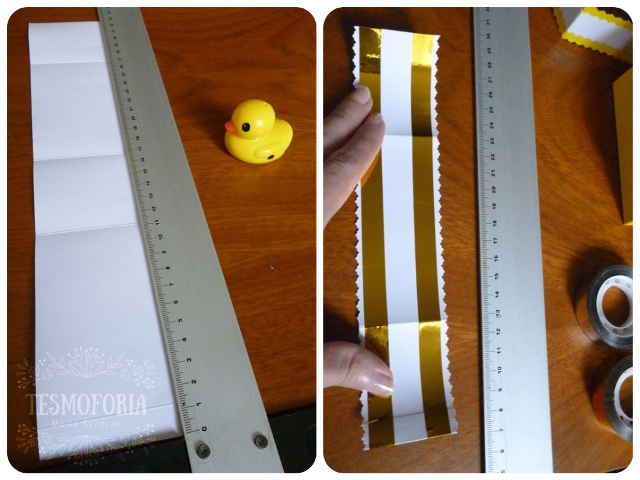
"We are going to take a long piece of white cardboard with a length of approximately 45 centimeters, and a width of 6 centimeters. We are going to cut its borders with the crafting scissors; and this is going to be our base cardboard piece, and next we are going to surround the little closed box with it in order to get the folds of each corner. This part does not have measures indicated in advance because the distance between each fold can vary according to the small variations in the measurements of the box after assembly." - Photos by @tesmoforia, with a Lumix/Panasonic DMC-FH2 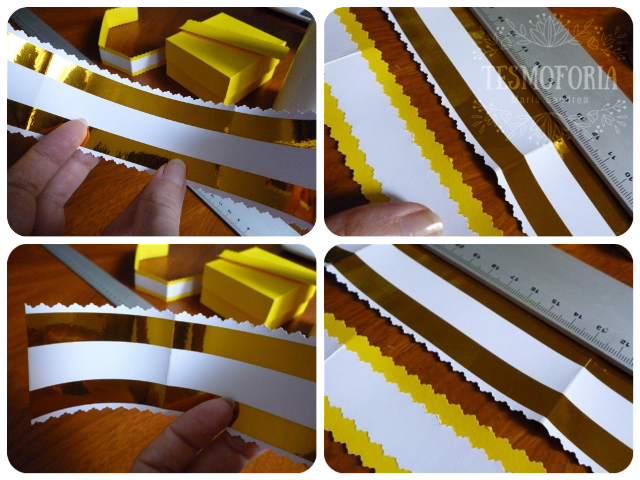
"Approximately from 3 to 4 millimeters from the border, we are going to use the metallic tape in two strips along the length of the base strip. It should look like the image above. We are going to repeat this action of creating strips, on the yellow cardboard, and again on the white one. The next yellow strip must be 4 centimeters wide, and the white one which is going to be at the center, shall measure 3 centimeters wide. Both of their borders shall be cut with the crafting scissors." - Photos by @tesmoforia, with a Lumix/Panasonic DMC-FH2 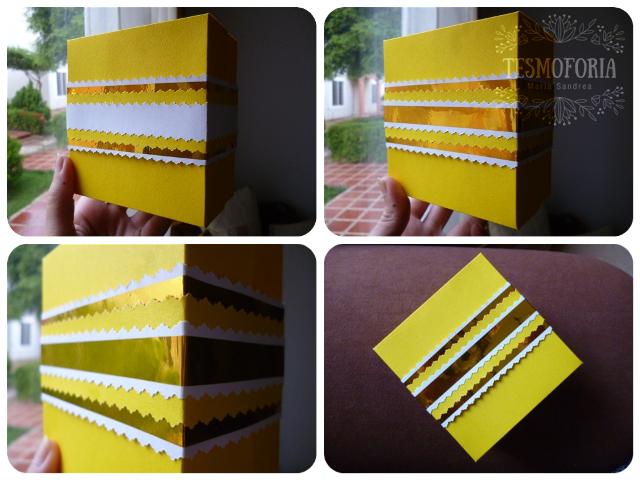
"Using the school glue evenly on the bottom of the last two strips adhered at the center, and attaching these to the white base strip with its golden borders are trimmed with the crafting scissors, we will obtain this result. This decorated white piece can be slid, and was closed with a little bit of glue on its bottom." - Photos by @tesmoforia, with a Lumix/Panasonic DMC-FH2 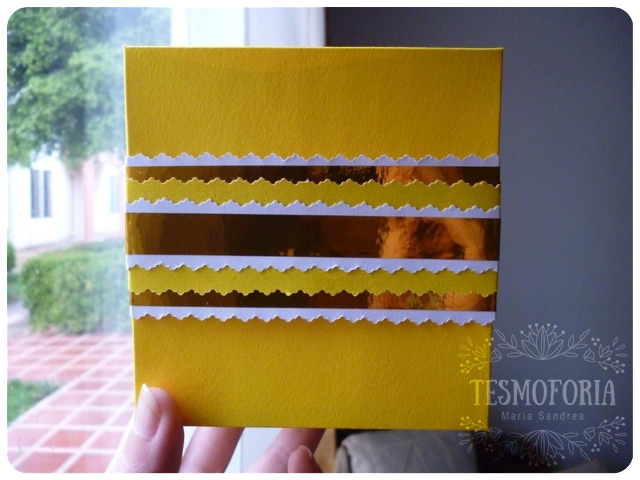
"This clean and presentable result is one of my favorites, however, it still looks a little simple..." - Photos by @tesmoforia, with a Lumix/Panasonic DMC-FH2 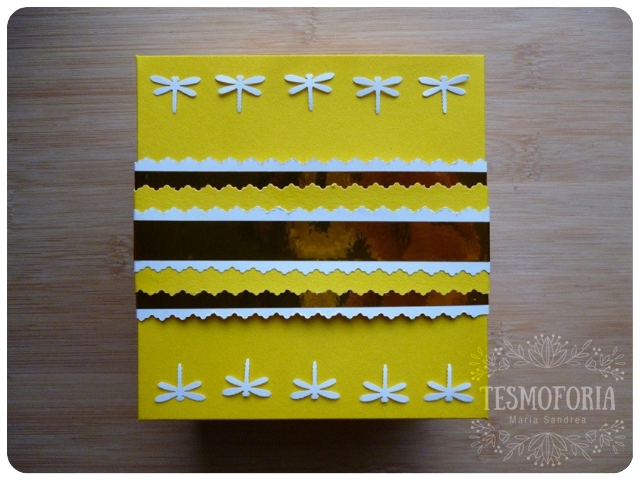
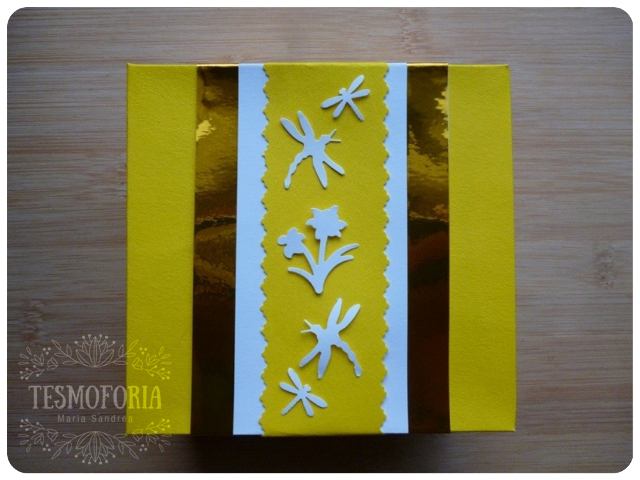
"To make it funnier, I used a small dragonfly-shaped crafting punch, and I cut many of those little friends to paste them on the top, making it more eye-catching and festive with a pretty romantic pattern." - Photos by @tesmoforia, with a Lumix/Panasonic DMC-FH2 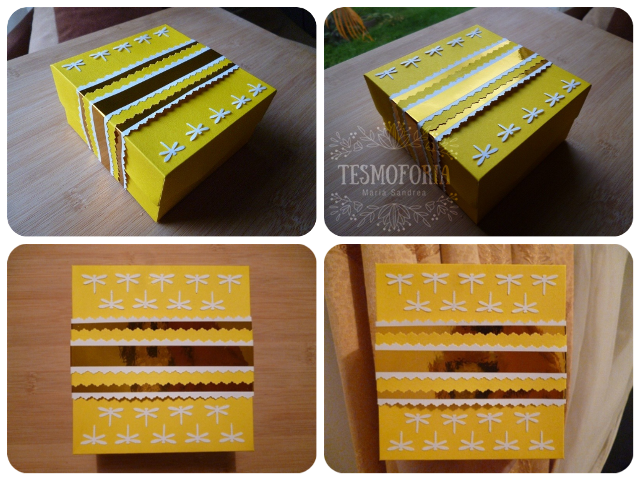
"Is amazing how the appearance of one of those kind of packing can change, depending on the lighting. A little of patience and some dragonflies at the end can mark the difference. And this is not even fine cardboard!" - Photos by @tesmoforia, with a Lumix/Panasonic DMC-FH2 « D E C O R A T I O N »
• Box N° 2 •
"Now, using the same box model as a base, we are going to make a little variation: We are going to repeat the step of cutting the long piece of white cardboard as base, but this time, we won’t use the crafting scissor for the borders, we will leave it smooth, and we will only place a yellow strip in the middle of 4 centimeters wide." - Photos by @tesmoforia, with a Lumix/Panasonic DMC-FH2 Or we could be a little more ambitious, and do as following:
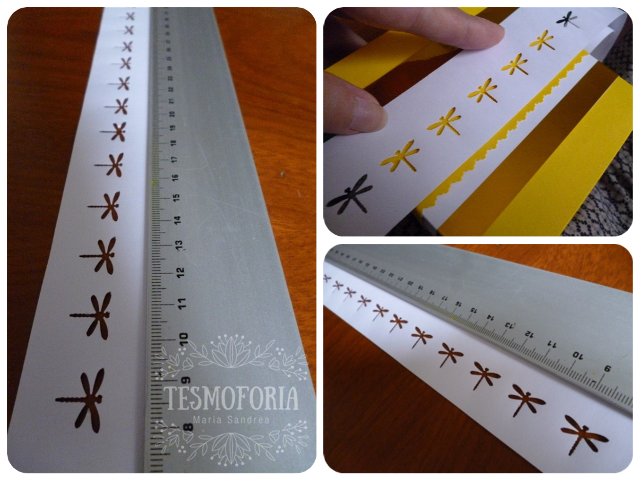
"We are going to cut a long strip of white cardboard, 3,5 centimeters wide, whose borders we will cut with the crafting scissor. Then we will use the small crafting punch on this strip, making dragonfly shapes every 7 millimeters. The outcome we are going to get will be as in the photo." - Photos by @tesmoforia, with a Lumix/Panasonic DMC-FH2 
"We will cut the borders of this delicate strip with the crafting scissors. Then, we will wrap the previously made supporting piece of the rectangular box, and we will center it this way before folding, assuring the dragonfly cuts aren’t left at the corners of the box. DO NOT APPLY PRESSURE ON THE DRAGONFLY STRIP BEFORE CENTER IT." - Photos by @tesmoforia, with a Lumix/Panasonic DMC-FH2 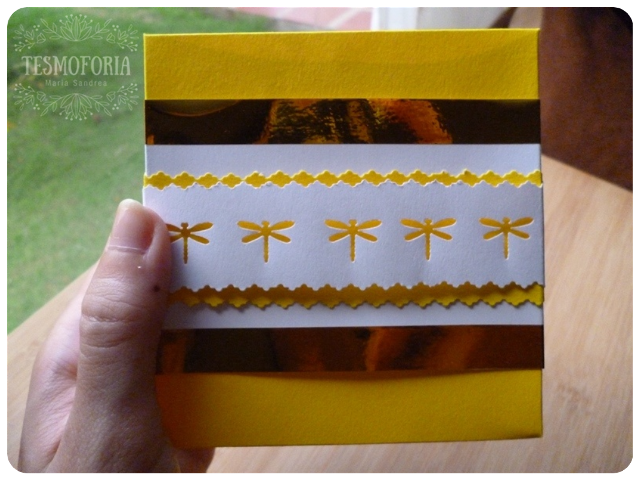
"This is how it shall look like when centered correctly. But don’t put glue on it yet!" - Photos by @tesmoforia, with a Lumix/Panasonic DMC-FH2 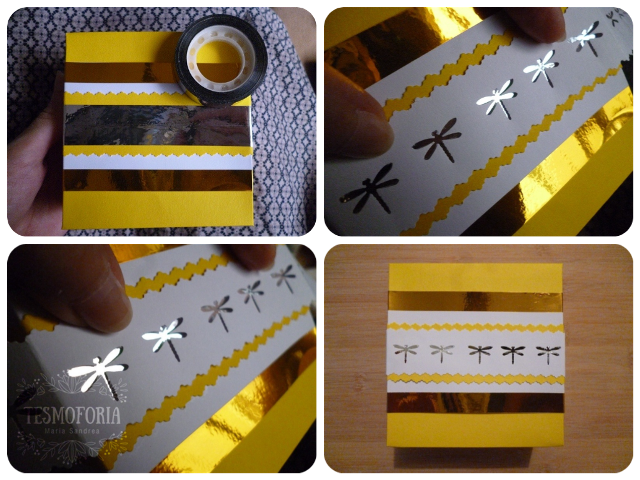
"We are going to place 2 lines together along the entire rectangular piece, with the reflective or metallic silver tape. This part should be done carefully since the diameter of both strips together at the center should not exceed the width of the cardboard strip with dragonflies." - Photos by @tesmoforia, with a Lumix/Panasonic DMC-FH2 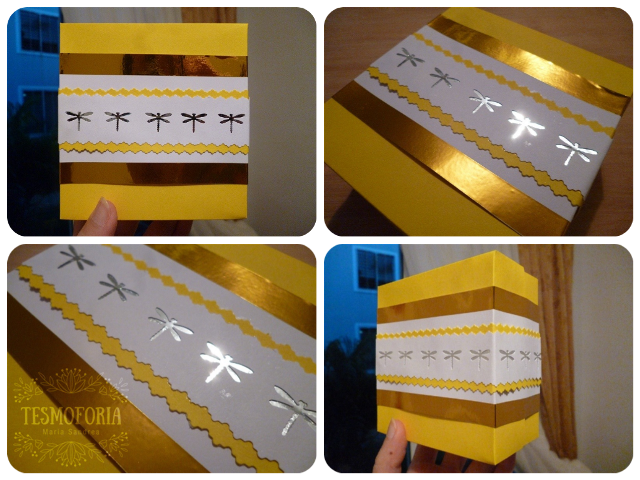
"Carefully and patiently, apply school glue to the back of the strip, especially around the dragonflies so that they don't look jagged when attached. Don't use too much glue or it will stick out or stain the golden part. If that happens, a swab dampened with water and a couple of gentle touches avoiding the paper, should solve the problem." - Photos by @tesmoforia, with a Lumix/Panasonic DMC-FH2 And we had finished!
Photos by @tesmoforia, with a Lumix/Panasonic DMC-FH2 So, did Mr. Little Frog fit in the Box?


I recommend investing in the Following Supplies:
🍃 CRAFTING SCISSORS: They are a very valuable investing that, if taken good care, will last for years with excellent outcomes. A Crafting Scissor able to customize decorative borders or cards is simply a need and an obligation in every crafter’s box of treasures.
🍃CRAFTING PUNCHES: Those tools do not only allow you to generate paper figurines for decoration, but also represent an economical and versatile way to create large quantities of appliques and confetti in an economical way and to your liking.
🍃 UNICOLOR OR METALLIZED DECORATIVE TAPE: They last a lot!, one single roll contents so many meters of this supply, that even if you use it exhaustively you will notice that its thickness doesn’t reduce that much. It is a yielding and timely material that can transform the simplest card or packaging into an elegant and very colorful piece. You can get those ribbons at places where they supply materials to assemble ornaments of artificial Christmas florists.
Photos by @tesmoforia, with a Lumix/Panasonic DMC-FH2 
.png)
👆 Last Thursday, June 21th, was the Summer Solstice, and the longest day of the year 👆
✨ 🍯 🐝 I must learn to bake cookies and honey bread 🐝 🍯 ✨
✨ T h a n k s t o ✨
💛 I have received a lot of wonderful surprises along this week! 💛


🔩 ENGRANAJE 🔩

👑 CURIE 👑

🔔 ESCUELA DE CURACIÓN 🔔

👇 Don’t forget to vote the Husbando @cervantes as Witness! 👇
✨ 💡 "How to do it and why?" 💡 ✨
✨ 🍃 ✨
✨
✨ 🍃 ✨
✨

🍓 Credits of Text and Images: @Tesmoforia 🍓
🍓 Translation: @Vanuzza 🍓
✨ Cute Separators: FlatIcon.com ~✨
💌 Thank you so much for reading! 💌

You've received an upvote from @slothicorn! Click Here to Read our New Curation Policy And Updated Rules
(@ghulammujtaba)