Self-Publishing with ProWebWriter on a $0 Budget - Part 4 - Createspace - Publishing in Paperback
Hello and welcome! This is a series I'm working on to help people just like you self-publish their books on Amazon, in paperback, and MORE!
If you missed the first 3 parts, here are a few links for you:
- Part 1 - The Manuscript
- Part 2 - Editing, Proofreading, and Cover Creation
- Part 3 - Uploading to Kindle Direct Publishing
Please check these out and scan through this entire post before you get started.
What You Will Need for Part 4
- Your manuscript in Word doc format
- A Createspace account - https://www.createspace.com/
- Your Kindle cover - we will use this to make a new cover for your paperback
What You Will Learn in Part 4
- How to covert your Kindle cover to work with Createspace
- How to publish in print
- Createspace vs. KDP Paperback
Before We Get Started
Createspace is a whole different animal from KDP. To put it simply, it's clunky.
So why are we doing this to ourselves?
Let's get this discussion out of the way now. You may choose to go the KDP paperback route which would negate your need to complete this tutorial.
Createspace vs. KDP Paperback
Createspace is an Amazon-owned company, so it's seems crazy that they launched a second Print-On-Demand option.
According to Gundi Gabrielle in this article, the reason for this was simply one of visibility. Amazon added a paperback option to KDP so more people would publish in paperback as many publishers were not bothering to go through the process I share below.
I'm going to cut to the chase and examine the pro's and con's, but you can get more details from Gundi's article that I linked above ^ if you want to know more.
What Createspace has that KDP doesn't (as of this writing):
- 30-day pay out
- Canada included in U.S. distribution
- Order you book at wholesale price
- Expanded distribution to libraries, bookstores, etc.
- Ability to order a hard copy proof
Advantages of KDP Paperback:
- Combined platform for both Kindle and paperback
- Easier
- Distribution to Japan
- Keeps your older versions available during updates - Createspace pulls your book completely meaning you lose ranking and reviews, etc.
I have not published through the KDP Paperback option yet. We'll give it a try and cover it later in this series.
At this point, you'll need to decide if you want to continue with this tutorial or:
- Wait for my post on that
- PIONEER! Try it out yourself!
Let's Do This!
Publishing with Createspace
I happen to have a book that I need to publish, so we will go through the full process.
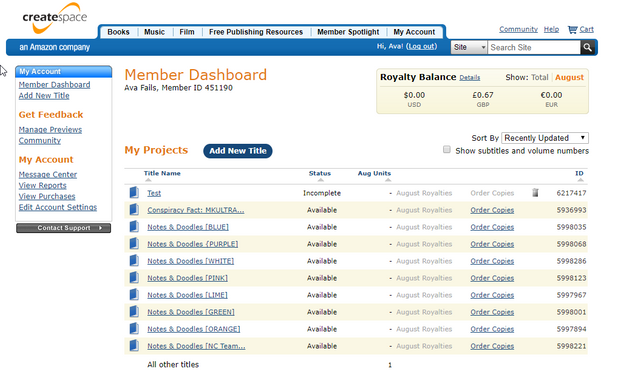
Step 1. Log into your Createspace account. Unlike KDP, you can't log in using your Amazon account credentials. You will be taken to your Dashboard. Click the blue Add New Title button.
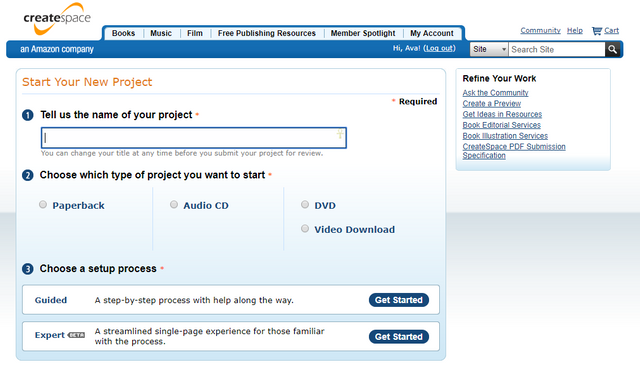
Step 2. Type the title of your book without the subtitle. Click the radio button next to Paperback. Click the blue Get Started button next to the first option: Guided A step-by-step process with help along the way.
Title Information
This is the first section we will work on. Your title that you typed on the previous page will be automatically added to the Title field.
I'm going to put up an image of the screen, and I will run through the fields and options below.
NOTE: This information should match your Kindle book exactly so your paperback links up with your Kindle edition in the Amazon store.
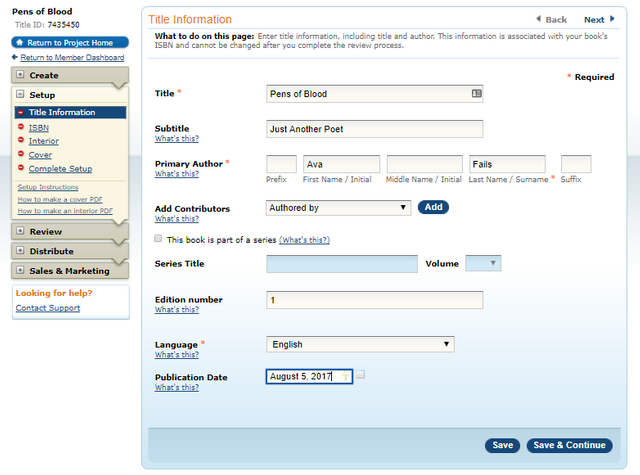
Title - Automatically populated from previous screen. If not, type your title.
Subtitle - Type your subtitle.
Primary Author - Type your name or pen name accordingly.
Add Contributors - Add any contributors to your book such as editor, illustrator, etc. If you don't have any contributors, just skip this.
Click the check box if your book is a part of a series.
Series Title and Volume - Type your Series title and volume number.
If your book isn't part of a series, skip this part.
Edition number - I always put a 1 in here in case I ever revise a book for any reason.
Language - Select the language your book is written in from the drop-down menu.
Publication Date - Type the date or click the calendar icon to the right of this field to select a date.
Click the blue Save & Continue button.
NOTE: None of this is set in stone. You can edit later if you need to before publishing.
ISBN
ISBN stands for International Standard Book Number. This is how your book is identified. If you bought an ISBN for your Kindle book, the ISBN for your paperback cannot be the same number because of the different formats.
You can buy ISBNs to use in your self-publishing endeavors, but they are expensive. In keeping with our ZERO budget motif, we will opt for the free one provided by Createspace.
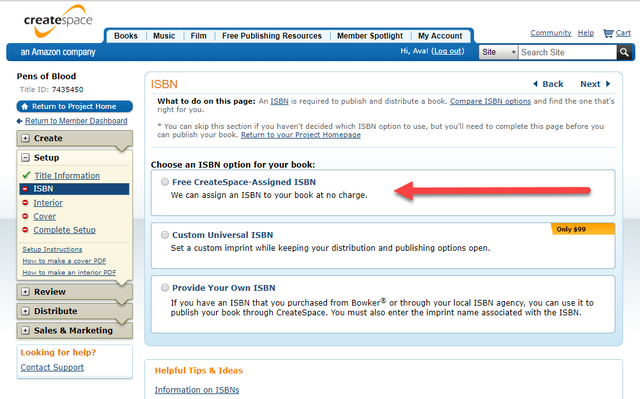
Click the radio button next to Free CreateSpace-Assigned ISBN.
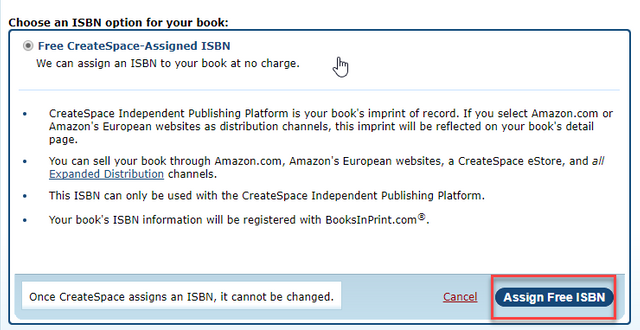
Click the blue Assign Free ISBN button.
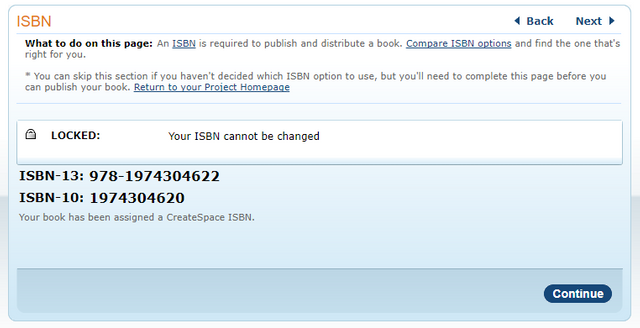
Alright, now we're going to create the barcode that represents our ISBN for use on our book cover.
Copy your ISBN-13 number. It looks like this: 978-1974304622
Go to https://bookow.com/resources.php
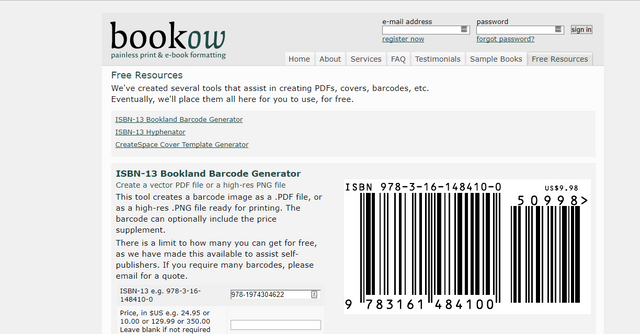
Paste your ISBN-13 into the first field.
Fill in the other fields as indicated. This site asks for your email simply so they can send your image files of your ISBN. I've never received any other type of email from them, so don't worry about spam, etc.
Select at least 300 dpi and click the email.PNG barcode button.
All done. Back to Createspace.
Click the blue Continue button.
Interior
Here's an image of the screen. I will run through everything below.
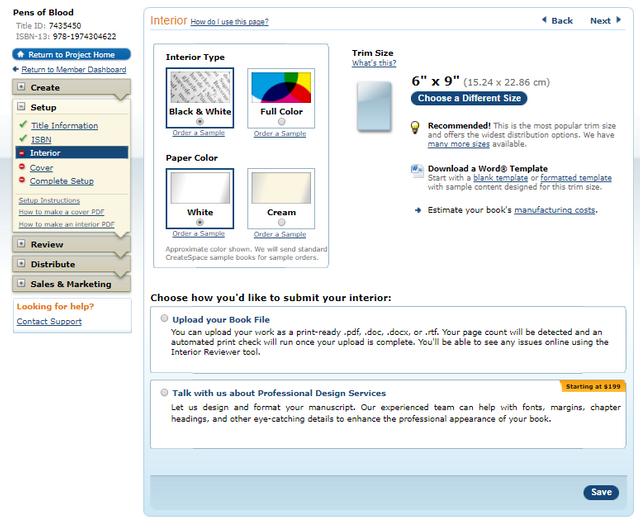
Interior Type - Remember, this is the Interior. Your cover will always be full color in print. If your book is just text, Black and White is your best option. If your book includes images, it's up to you to decide.
Keep in mind that your images will always appear black and white on Kindle E-reader devices like the Kindle, Paperwhite, Voyage, and Oasis. On Fire Tablets and other Android and iOS devices with the Kindle app, the images will be color if you choose the Full Color option here.
Paper Color - A good general rule here is that most fiction books are on cream paper. Non-fiction, text books, or books with a lot of images tend to be printed on white paper, so choose accordingly.
Trim Size - Createspace has trim sizes ranging from 5x8 inches to 8.5x11 inches which is the size of a standard sheet of printing paper. Choosing the trim size of your book is a matter of preference really. I always go with the default 6x9 which fits in the "trade paperback" market. Check out this article for some quick help on choosing your trim size.
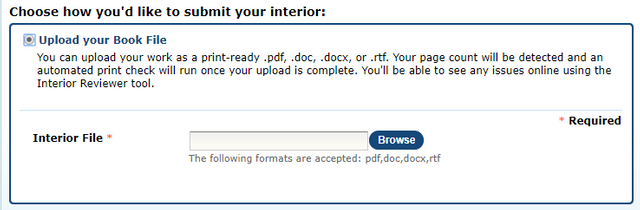
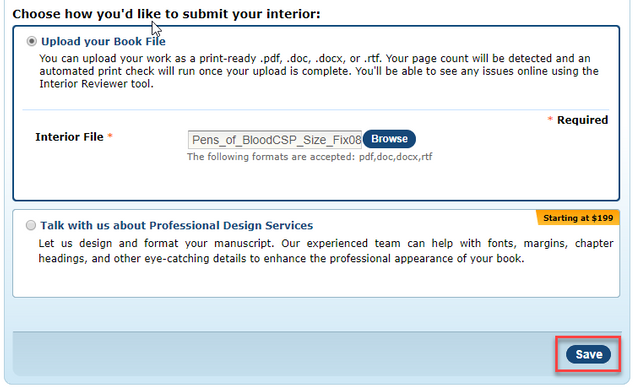
Choose how you'd like to submit your interior: - Click the radio button next to Upload your Book File.
Click the blue Browse button and navigate to your file on your computer.
Bleed - Click the radio button under Ends before the edge of the page unless you are publishing a photo book.
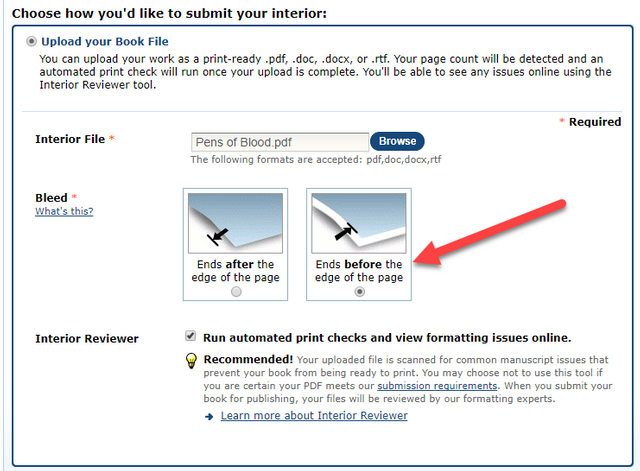
Leave the check box next to Interior Reviewer checked.
Click the blue Save button.
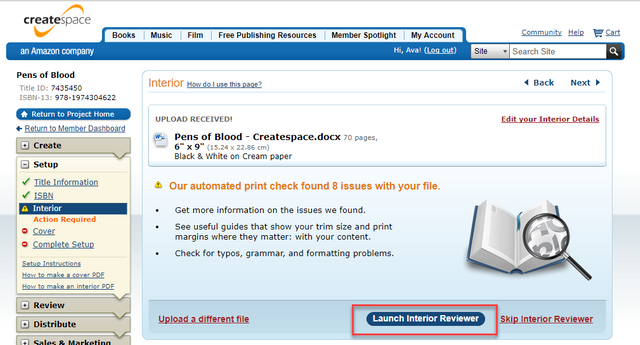
Createspace will upload and process your file. This may take a few minutes. You can actually start work on your cover while you wait, but we'll stay here for the sake of this tutorial.
You can navigate to any point in the publishing process by using the links in the left navigation.

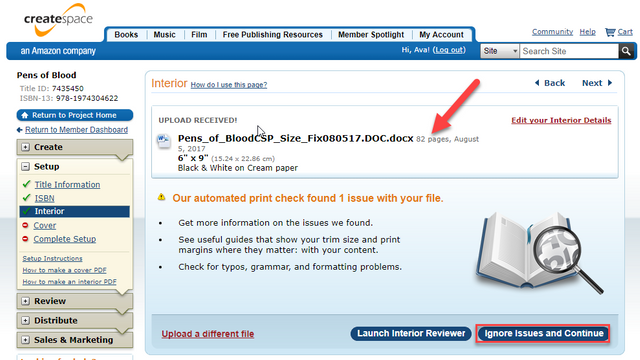
The automated print check found 8 issues with my file.
Click the blue Launch Interior Reviewer button to see what they are.
You book will open in the Reviewer. Click Get Started.
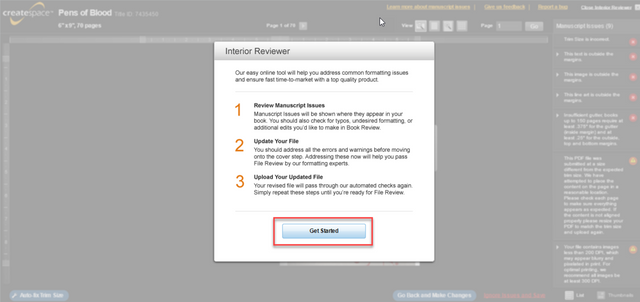
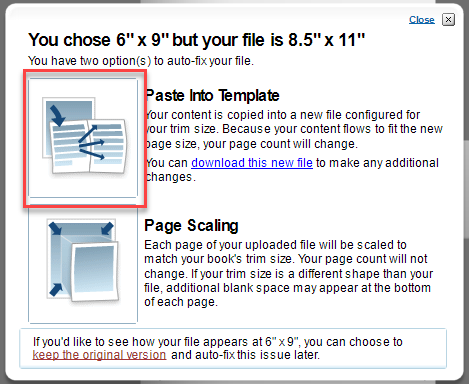
The first problem is that my book is formatted in 8.5x11. Click the button next to Paste Into Template to scale your pages to fit the trim size of your book.
The list on the right size of the Reviewer indicates print issues with your book. Most of these probably have to do with your content being outside the trim size. The step above should fix most of them.
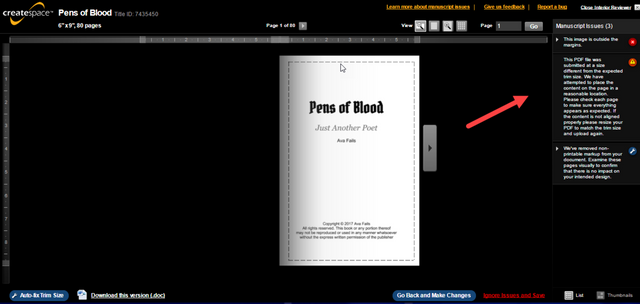
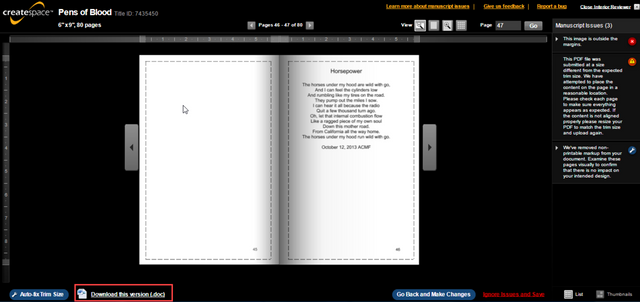
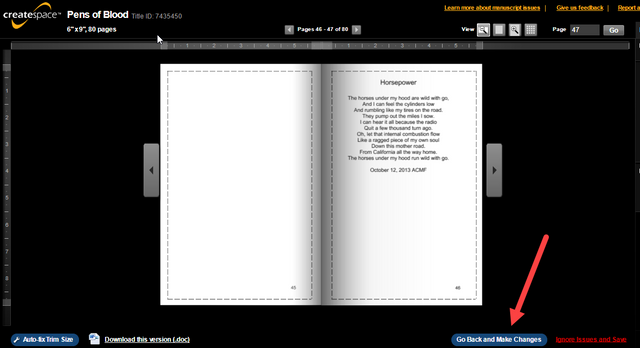
Flip through your book, using the left and right page buttons and look for formatting problems.
You will have problems, unfortunately. You may have some blank pages, or your headings and things may have moved around on the page. Click the Download this version link to download the newly formatted version of your file in Word doc format so you can fix it.
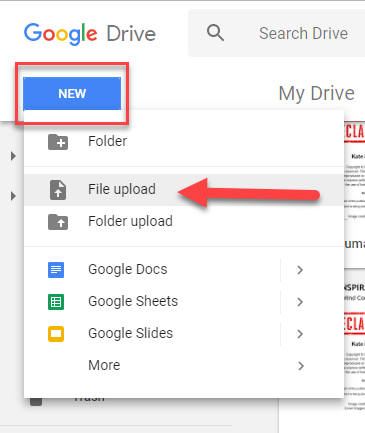
Upload the file to Google Docs by clicking the New button in Google Docs, then click File upload. Navigate to the file you downloaded from the Reviewer and upload it to Google Docs.
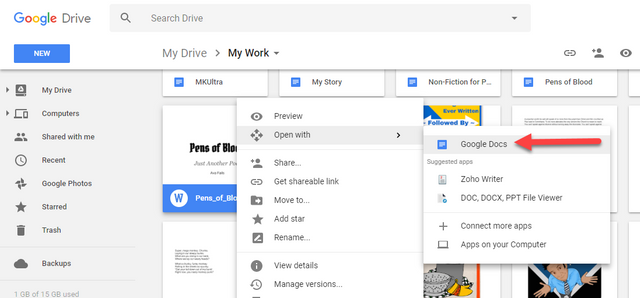
Right-click the uploaded file in your Google Drive, hover your cursor over Open with, and select Google Docs from the fly-out menu to open it.
Go through your file and make the necessary changes. Re-download it as a Word file. Delete the old one.
Go back to Createspace.
Click the Go Back and Make Changes button in the Reviewer.
Click the Upload a different file link.
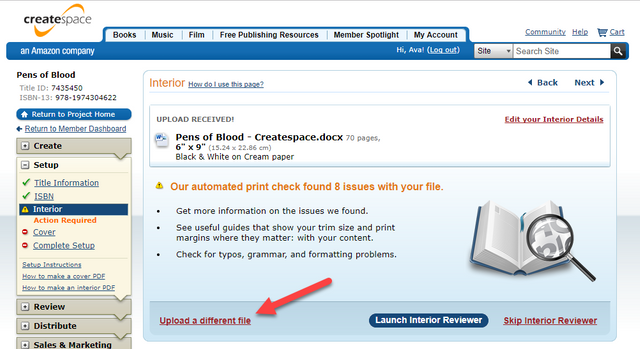
Click the Upload a different file link.
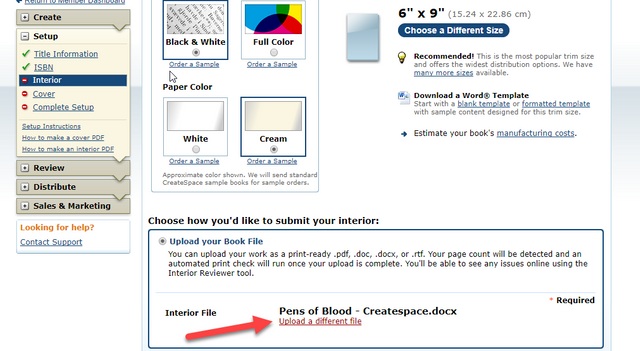
Click Browse and select your new file.
Click Save.
Deja vu? Yeah. This is the aforementioned clunky part.
Createspace will upload, process your file, and assess it for errors.....again.
It should have significantly fewer issues this time.
Launch the Interior Reviewer again.
Page through and make sure everything looks good. You can see I have no more issues. The Reviewer is telling me to the right that it resized my pages to fit. If all looks good, click the blue Save and Continue button.

You will be returned to the previous screen. It will probably still indicate 1 issue which is simply referring to the aforementioned page resizing.
Take note of how many pages are in your book. You will need this information for your cover template.
Click the blue Ignore Issues and Continue button.
Cover
1. Select a finish for your book cover: - This is a matter of preference. Click the radio button under Matte or Glossy.
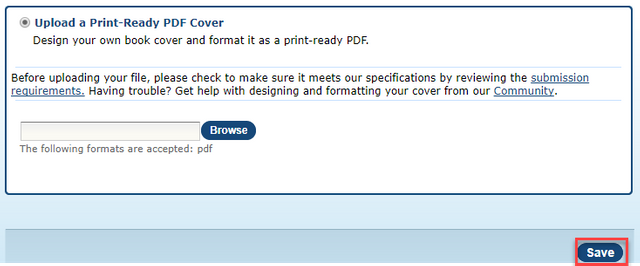
2. Choose how to submit the cover of your book:
Click the radio button next to Upload a Print-Ready PDF Cover.
Go here - https://www.createspace.com/Help/Book/Artwork.do
Fill in the details for your book. Don't necessarily copy these. They are mine. Click the Build Template button.
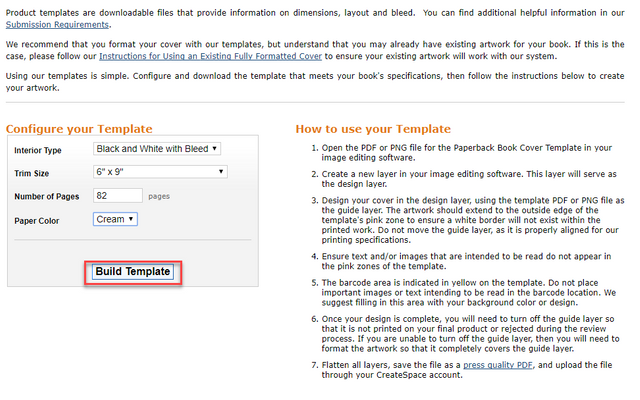
Click the link to download the zip file with your template inside.

Unzip the template.
Grab your barcode that we made earlier at Bookow from your email and download it to your computer.
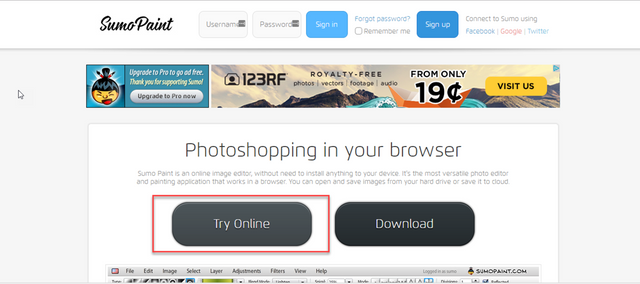
Go to https://www.sumopaint.com/home/
Click the big gray Try Online button.
Click File and click Open from My Computer in the drop-down menu.
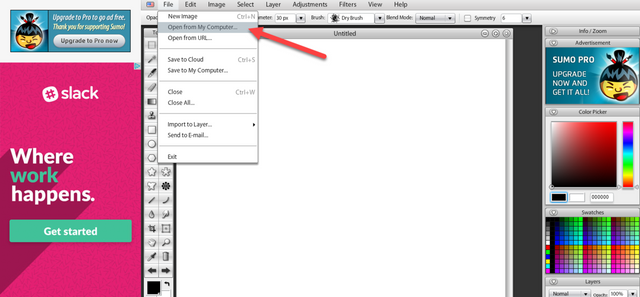
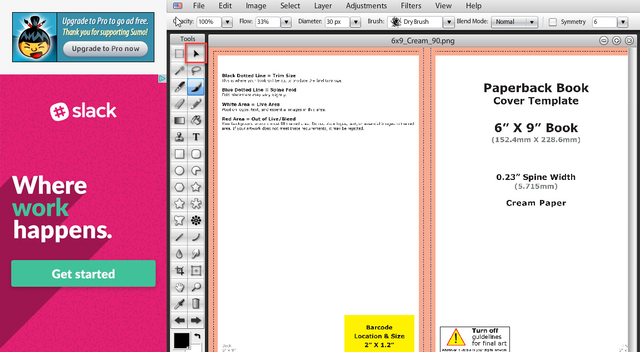
Navigate to the PNG file of your cover template inside your unzipped folder and open it. Your cover template will open in SumoPaint.
Go ahead and click the Move Tool in Tools.
Click File, hover your cursor over Import to Layer..., and click From My Computer... in the fly-out menu.
Navigate to your barcode file on your computer and import it into SumoPaint.
SumoPaint will import your barcode.
Repeat this process and import your Kindle cover JPG file as well.
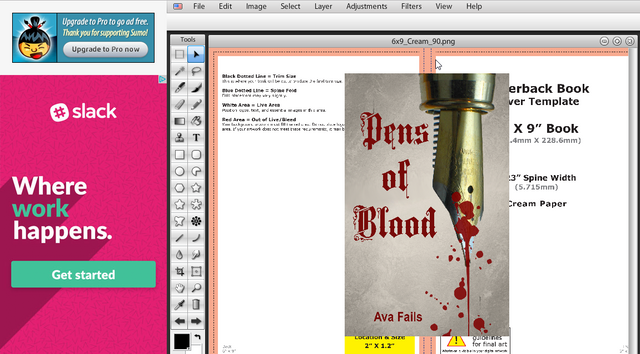
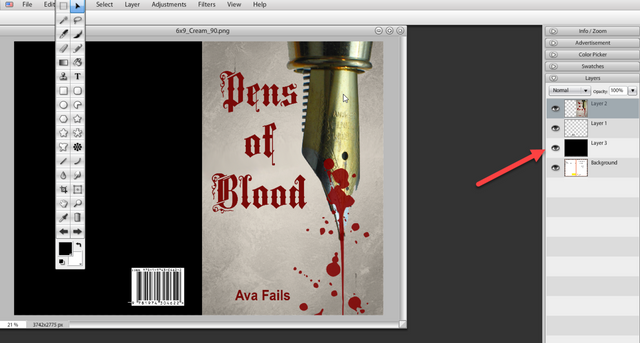
Move each item to the general vicinity it belongs in. You will need to make sure the layer that item is on is selected when you are working with it in the Layers menu in the right sidebar. If you can't move something, its Layer probably isn't selected. If the Layers are off-screen, click the arrows to shorten the other items like the Advertisement.
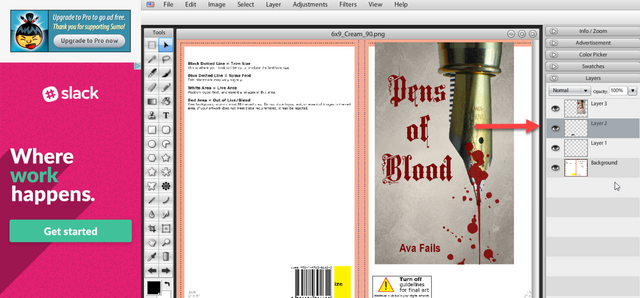
With your cover layer select, right-click and select Free Transform from the menu.
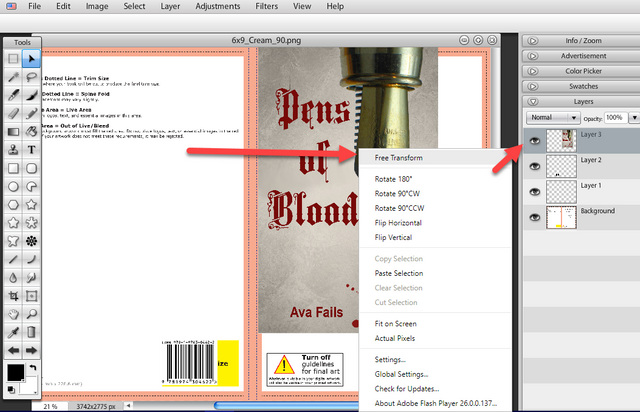
Resize the cover image to fill the right side of your template which makes up the front cover of your book up to the dotted line that indicates the spine. Fit the image all the way to the edges as shown. When you're done, click the Move Tool to deselect the image.
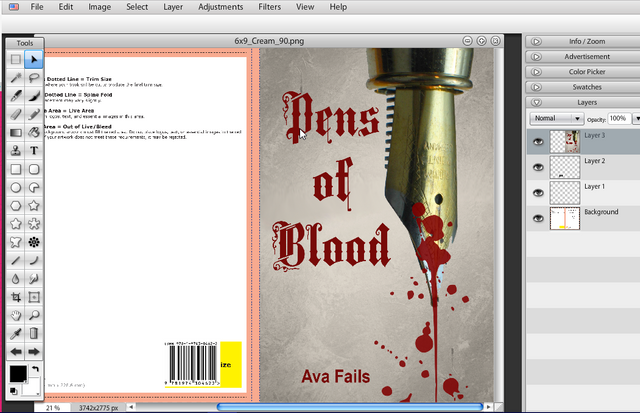
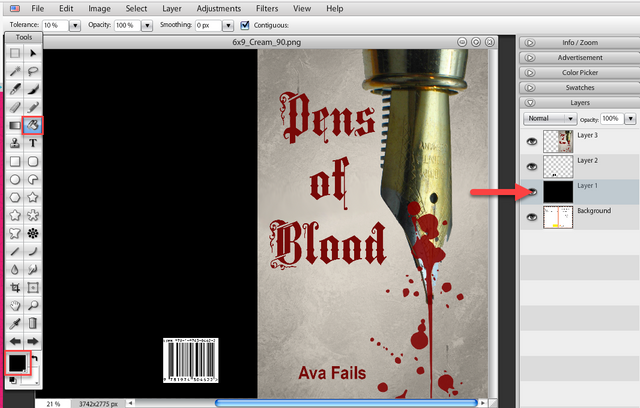
Click Layer 1 under Layers in the right sidebar. If there isn't a Layer 1, create one by clicking Layer and select Add New Layer from the drop-down menu.
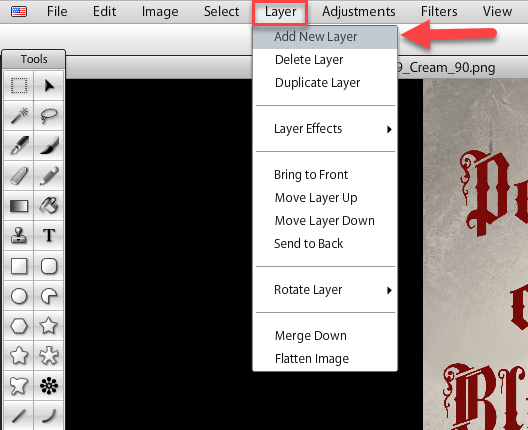
Drag and drop the new layer so it is between the Background and your barcode under Layers in the right sidebar.
Click the Paint Bucket Tool under Tools. The colored square at the bottom indicates the color. Black works fine for me, but I'll show you how to change it below.
SIDENOTE: Holy crap, I've been writing this post for 5 hours. As with KDP, you can Save, come back to this any time, and pick up where you left off. Take breaks as needed!
To choose a different color, click the Eyedropper Tool under Tools and click any color on your front cover to match it. It will be indicated in the Foreground Color square below.
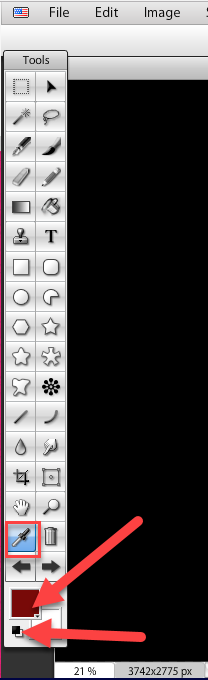
If you need to return to the Black/White squares, simply click the icon below the Foreground Color as indicated.
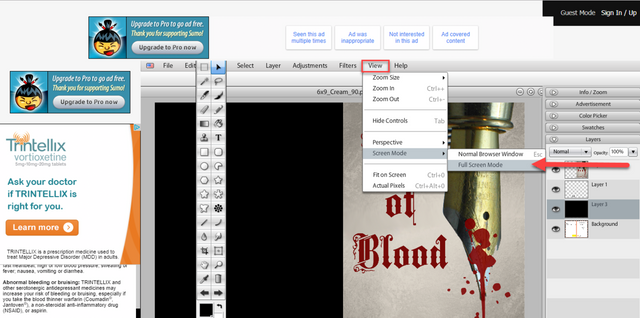
NOTE: You can use SumoPaint in full screen mode if you are having trouble with tools or your cover being offscreen. Click View, hover your cursor over Screen Mode, and select Full Screen Mode from the fly-out menu.
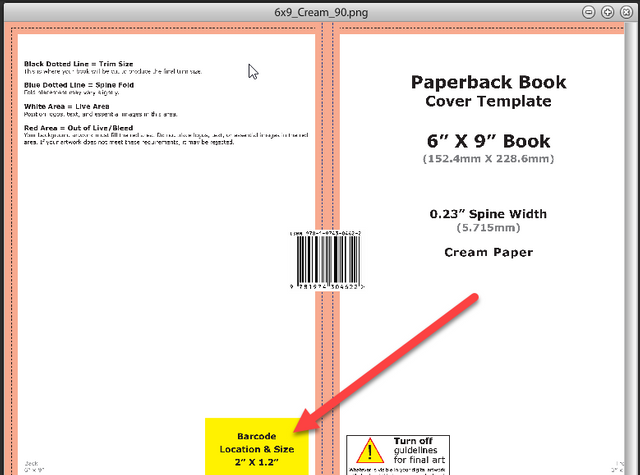
Move the barcode and resize it using the same steps you completed for your front cover. The barcode does not need to cover the entire yellow area. Just resize it to cover it height-wise and center it over the yellow area of the template.
NOTE: You can view the Background layer (your template) by clicking the Eye icon next to that layer to check your placement.
This Is Optional:
Add a new layer.
With the new layer selected in the right sidebar, click the Text Tool.
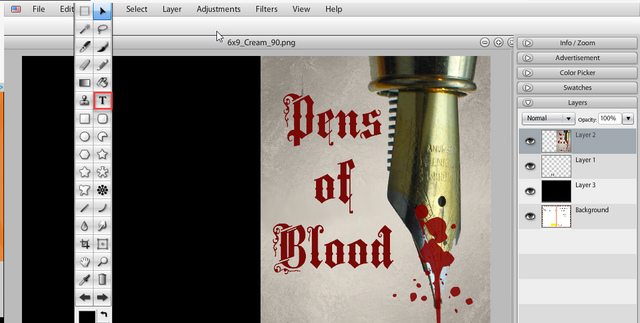
I usually just copy and paste my description here. Yes, the same one I used with Amazon. As you know the back cover is simply for your book's synopsis. You can put whatever you want here. Format your text and color it using the tools provided at the top of the SumoPaint screen.
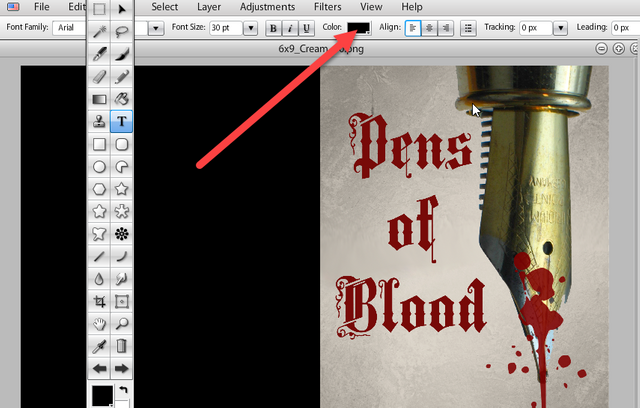
My spine is too thin to add my title and author there, but yours may not be.
Add a new text layer the same way you did above and type your Title and Author. Click Layer, hover your cursor over Rotate Layer and select Rotate 90 CW.
Click the Move Tool and place this on your spin accordingly. Once you are happy with your cover, click File, and then click Save to My Computer...
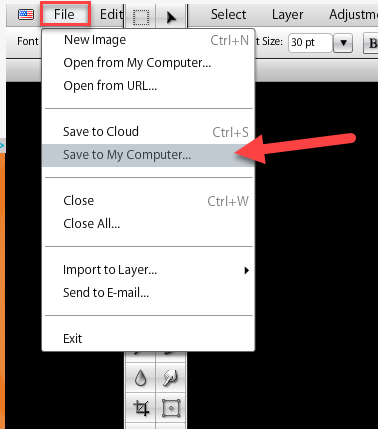
Your Createspace cover will be saved to your computer.
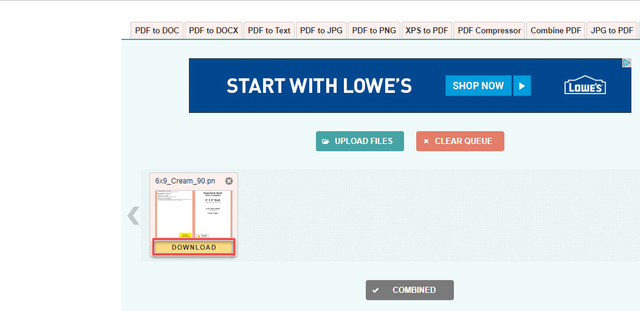
Go to http://png2pdf.com/
Upload your cover image PNG file. This will take a minute or so.
Click the yellow Download button to download your cover as a PDF.
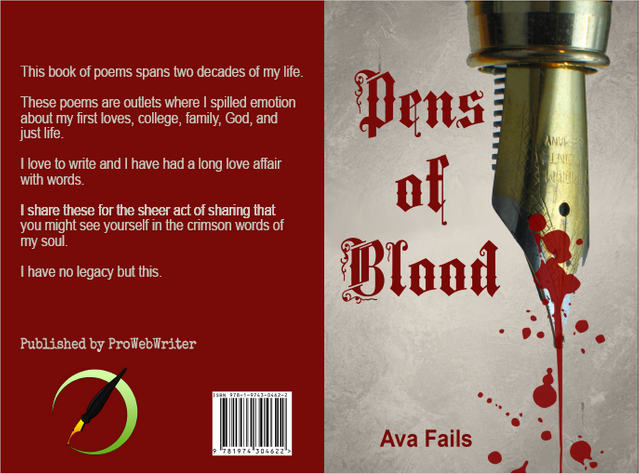
FINALLY!
Here's what my cover ended up looking like:
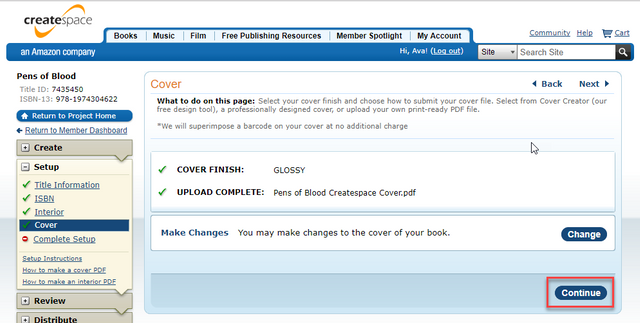
Go back to Createspace. Navigate to your cover file on your computer by clicking Browse. Click Save.
This will take a minute or so.
All done. Click the blue Continue button.
Complete Setup
Confirm that your book title, ISBN, book files and other elements are correct. Review the Member Agreement. Once you're satisfied with everything, click the blue Submit Files for Review button.
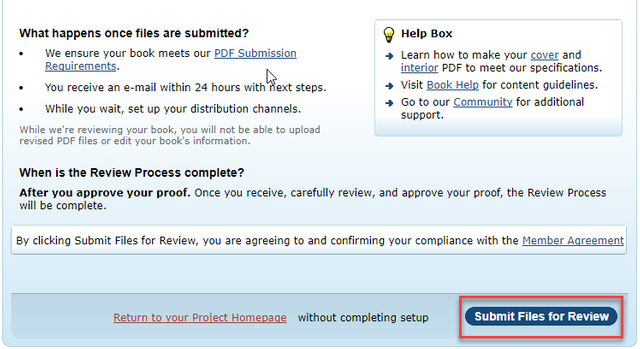
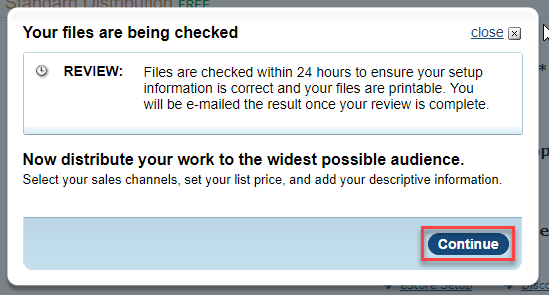
Createspace will review your files to ensure they meet their requirements and are printable. You will receive an email within 24 hours. Click Continue.
Channels
This is where you specify where and how you want your paperback book distributed. Standard Distribution includes the following which are all selected by default:
- Amazon.com
- Amazon Europe
- CreateSpace eStore
If for some reason, you don't want to distribute to one or more of these, simply click the blue arrow(s) to deselect that channel.

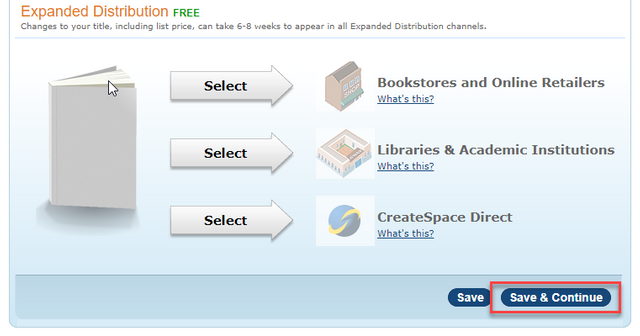
Under Expanded Distribution, you will notice that Bookstore and Online Retailers is grayed out. Click to select your BISAC code to make this channel available.
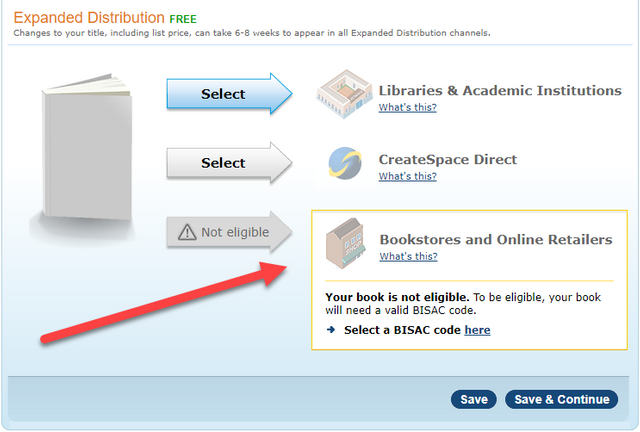
I'm going to post the image and then discuss what to do below:
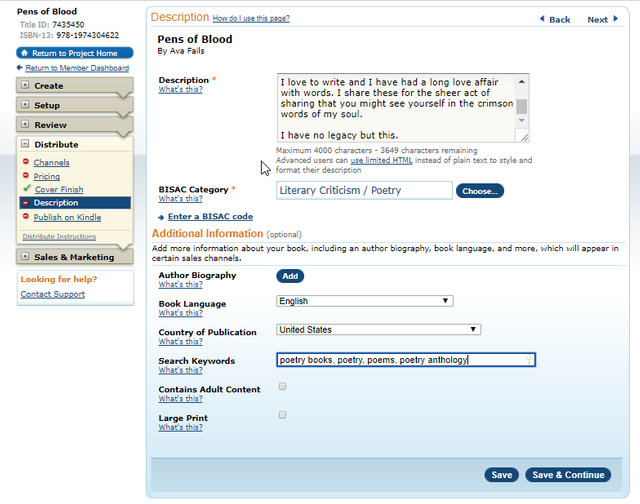
Description - Copy and paste your description. It's fine to use the same one from when you published your Kindle book in KDP.
BISAC Category - You can only select one, so select the most specific one that matches the ones you chose for your Kindle book by clicking the blue Choose button.
Author Biography - Add this by clicking the blue Add button.
Book Language - Select the language your book is written in from the drop-down menu.
Country of Publication - Select the country of publication from the drop-down menu.
Search Keywords - Type your keywords. These can be the same ones you used for your Kindle book.
Contains Adult Content - Check this is your book contains adult content. If not, leave unchecked.
Large Print - Check this if your book is in large print. If not, leave unchecked.
Click Save.
Click Channels in the left navigation. You will now be able to select your desired channels under Expanded Distribution. Once you're done, click Save and Continue.
Pricing
Last step! This takes forever! I think if KDP Paperback is indeed easier, it might be worth it!
You will notice that Createspace gives you a minimum list price. You will need to charge at least this amount, but preferably more to profit from your book.
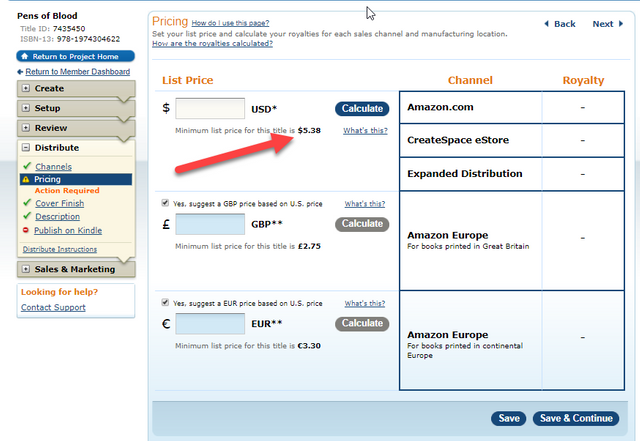
Type your price and click the blue Calculate button. Createspace will calculate your royalty and also convert the other prices on the page for you. Click Save and Continue.
Wrapping Up Part 3
Holy cow, this was a long process to explain!
You are done for now. If Createspace prompts you to publish to KDP, simply click out of the screen since we already published our book for Kindle.
Now it's a waiting game. Wait for your email from Createspace. Once you receive it and there aren't any changes to be made, you can order a print proof of your book to look it over for a few bucks or approve a digital proof for print.
After you approve your proof, your book will be available through the distribution channels you select. You should allow about 5 business days for it to begin showing up alongside your Kindle edition in the Amazon store.
CONGRATULATIONS!
Those paperbacks make awesome gifts!
Coming Up
In Part 5, we will go over some of the backend stuff like how to track your sales, reports, what KENP means, etc., so stay tuned!
If you found this post helpful, I hope you will follow me so you don't miss my future tutorials. If you want to check out my older stuff, here are a few links for you:
- Part 1 - The Manuscript
- Part 2 - Editing, Proofreading, and Cover Creation
- Part 3 - Uploading to Kindle Direct Publishing
If you have any questions about Part 4, please comment and I will do my best to answer them. You could help another Steemian!
Thanks for reading! Paperback! You're amazing. Your friends and family are going to love seeing you on their bookshelves.
Congratulations @prowebwriter! You have completed some achievement on Steemit and have been rewarded with new badge(s) :
Click on any badge to view your own Board of Honor on SteemitBoard.
For more information about SteemitBoard, click here
If you no longer want to receive notifications, reply to this comment with the word
STOPGood post friends, thank you for sharing.
Follow me @israruddin
Very amaizing stuff , good effort thanks
Thanks for your comment!
Great stuff. Thanks for sharing.
You're welcome. Thanks for taking the time to comment.
I can start writing my one book after reading this tutorial :)
Super post.
Thanks! Yes! No more excuses! Good luck!
Thanks for sharing in such great detail @prowebwriter. Very helpful. Much appreciated :)
You're welcome. Thank you for taking the time to leave you comment. I appreciate YOU!
Great article! Thank you for sharing
Thank you. I appreciate your comment.
Wow awesome post! Well deserved reward.
Hey, thanks for coming by and taking the time to comment. =)
Thanks for this helpful post, prowebwriter !!!
You're welcome. Thanks for your comment.
lot of content
Thank for sharing
You ain't lyin'! This post took me about 7 hours to write. =) It's all good. I enjoyed it. I had a book, I needed to publish to paperback anyway, and I was able to document the process in detail. Thanks for your comment.