Astrophotography: Volume Four - Getting The Photo
So, you've seen photos of the milky way stretching across the sky, and have wondered to yourself "how can I do that?". Well, wonder no more, as I'm here to (hopefully) help in assisting you to capture that elusive shot of the galaxy arching across the heavens! If you haven’t read my first how-to part, please take a look here - it details some of the camera equipment you'll require.
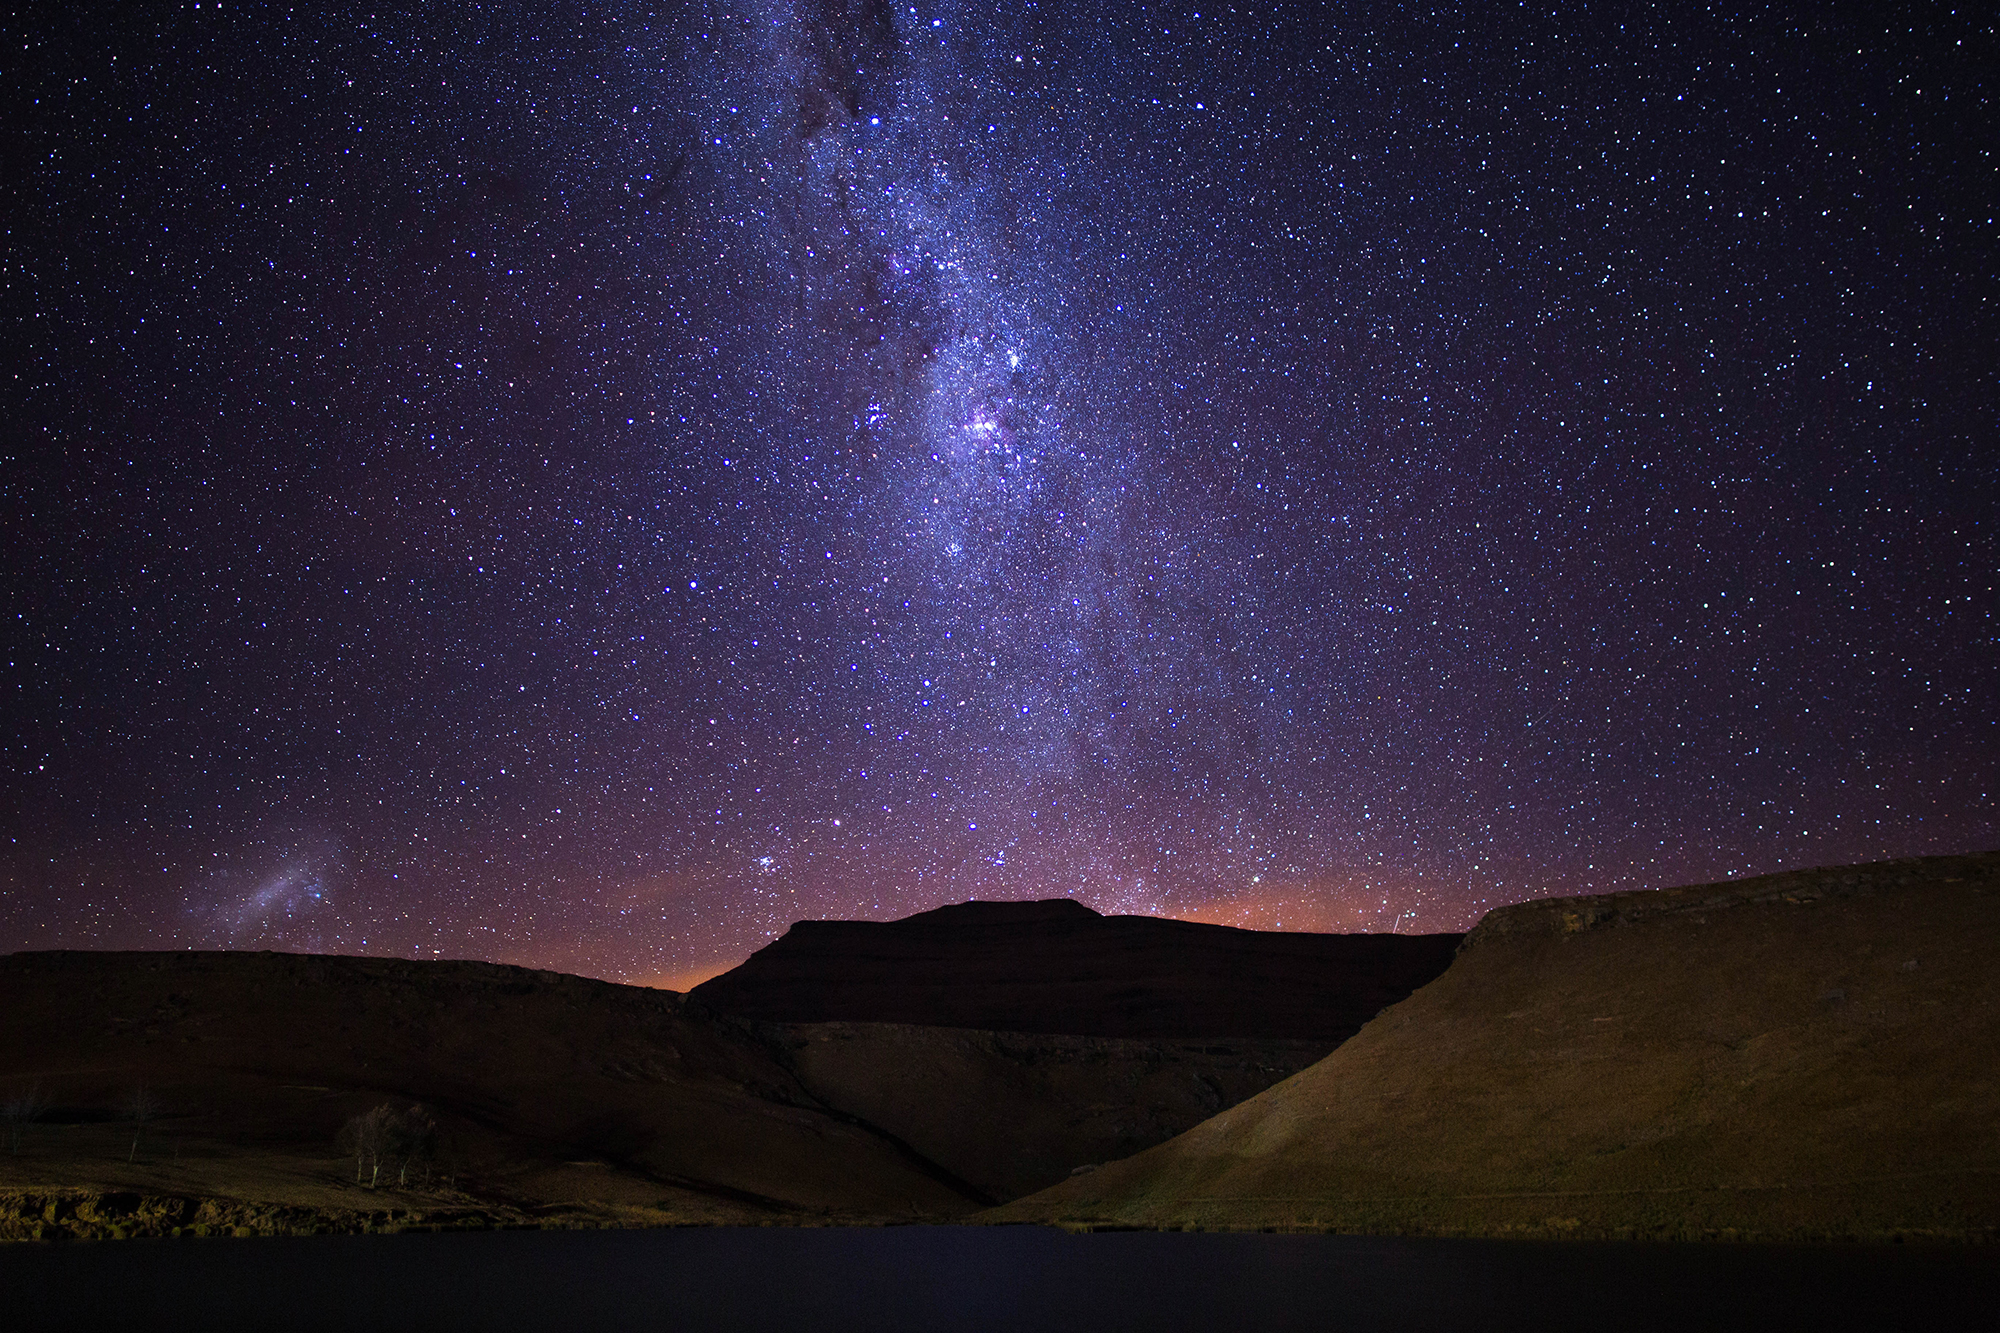
20 second exposure
Canon 6D
Rokinon 24mm f1.4
Up to speed? Great! Let’s begin with the fun part: actually taking a photo. But before we get trigger happy with our shutters, there’s some prep work to do that will save us a few headaches.
The most important thing to remember: CHECK THE WEATHER FORECAST. You’re not going to see anything if there’s a 100% chance of cloud cover.
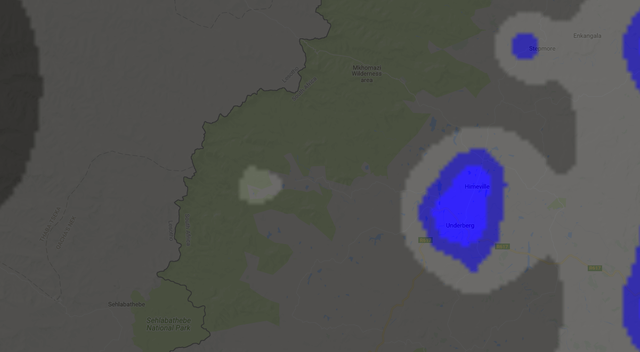
Secondly, LOCATION IS KEY. Meaning, you want to be as far away from light pollution as possible. Think about the last time you were in a big city, such as London, Tokyo, or New York. Do you remember looking up at the sky and seeing any stars? That’s right. None at all - or maybe a mere few. The surrounding artificial light will always blind out the stars above you in major cities, so you’re going to want to get out of there (and it’s a great excuse for a mini holiday). Luckily, we have a handy website at our disposal that lets us see the levels of light pollution anywhere in the world. Take a look at it here, or just have a glance at the screenshot below.
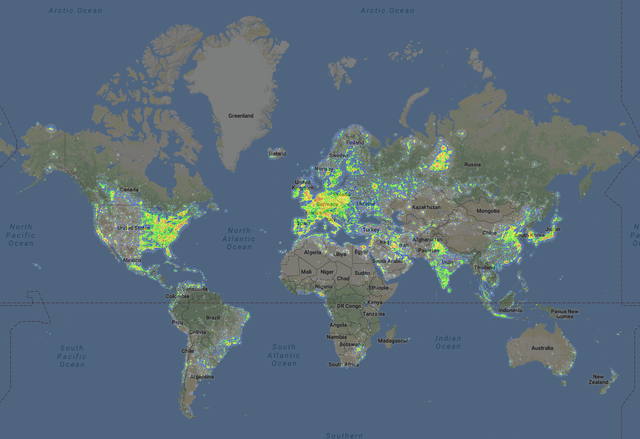

This map is essentially an overlay on top of your regular Google Maps that we all know and love - except it shows you an estimate of the amount of light pollution at a given place. Handy right? You can zoom in anywhere in the world, and find an area thats dark enough for a good star photo, but also close enough for you to conveniently get to. Pay attention to the small colour chart that appears on the top left, you’re going to want an area that falls in one of the three or four colours on the left.
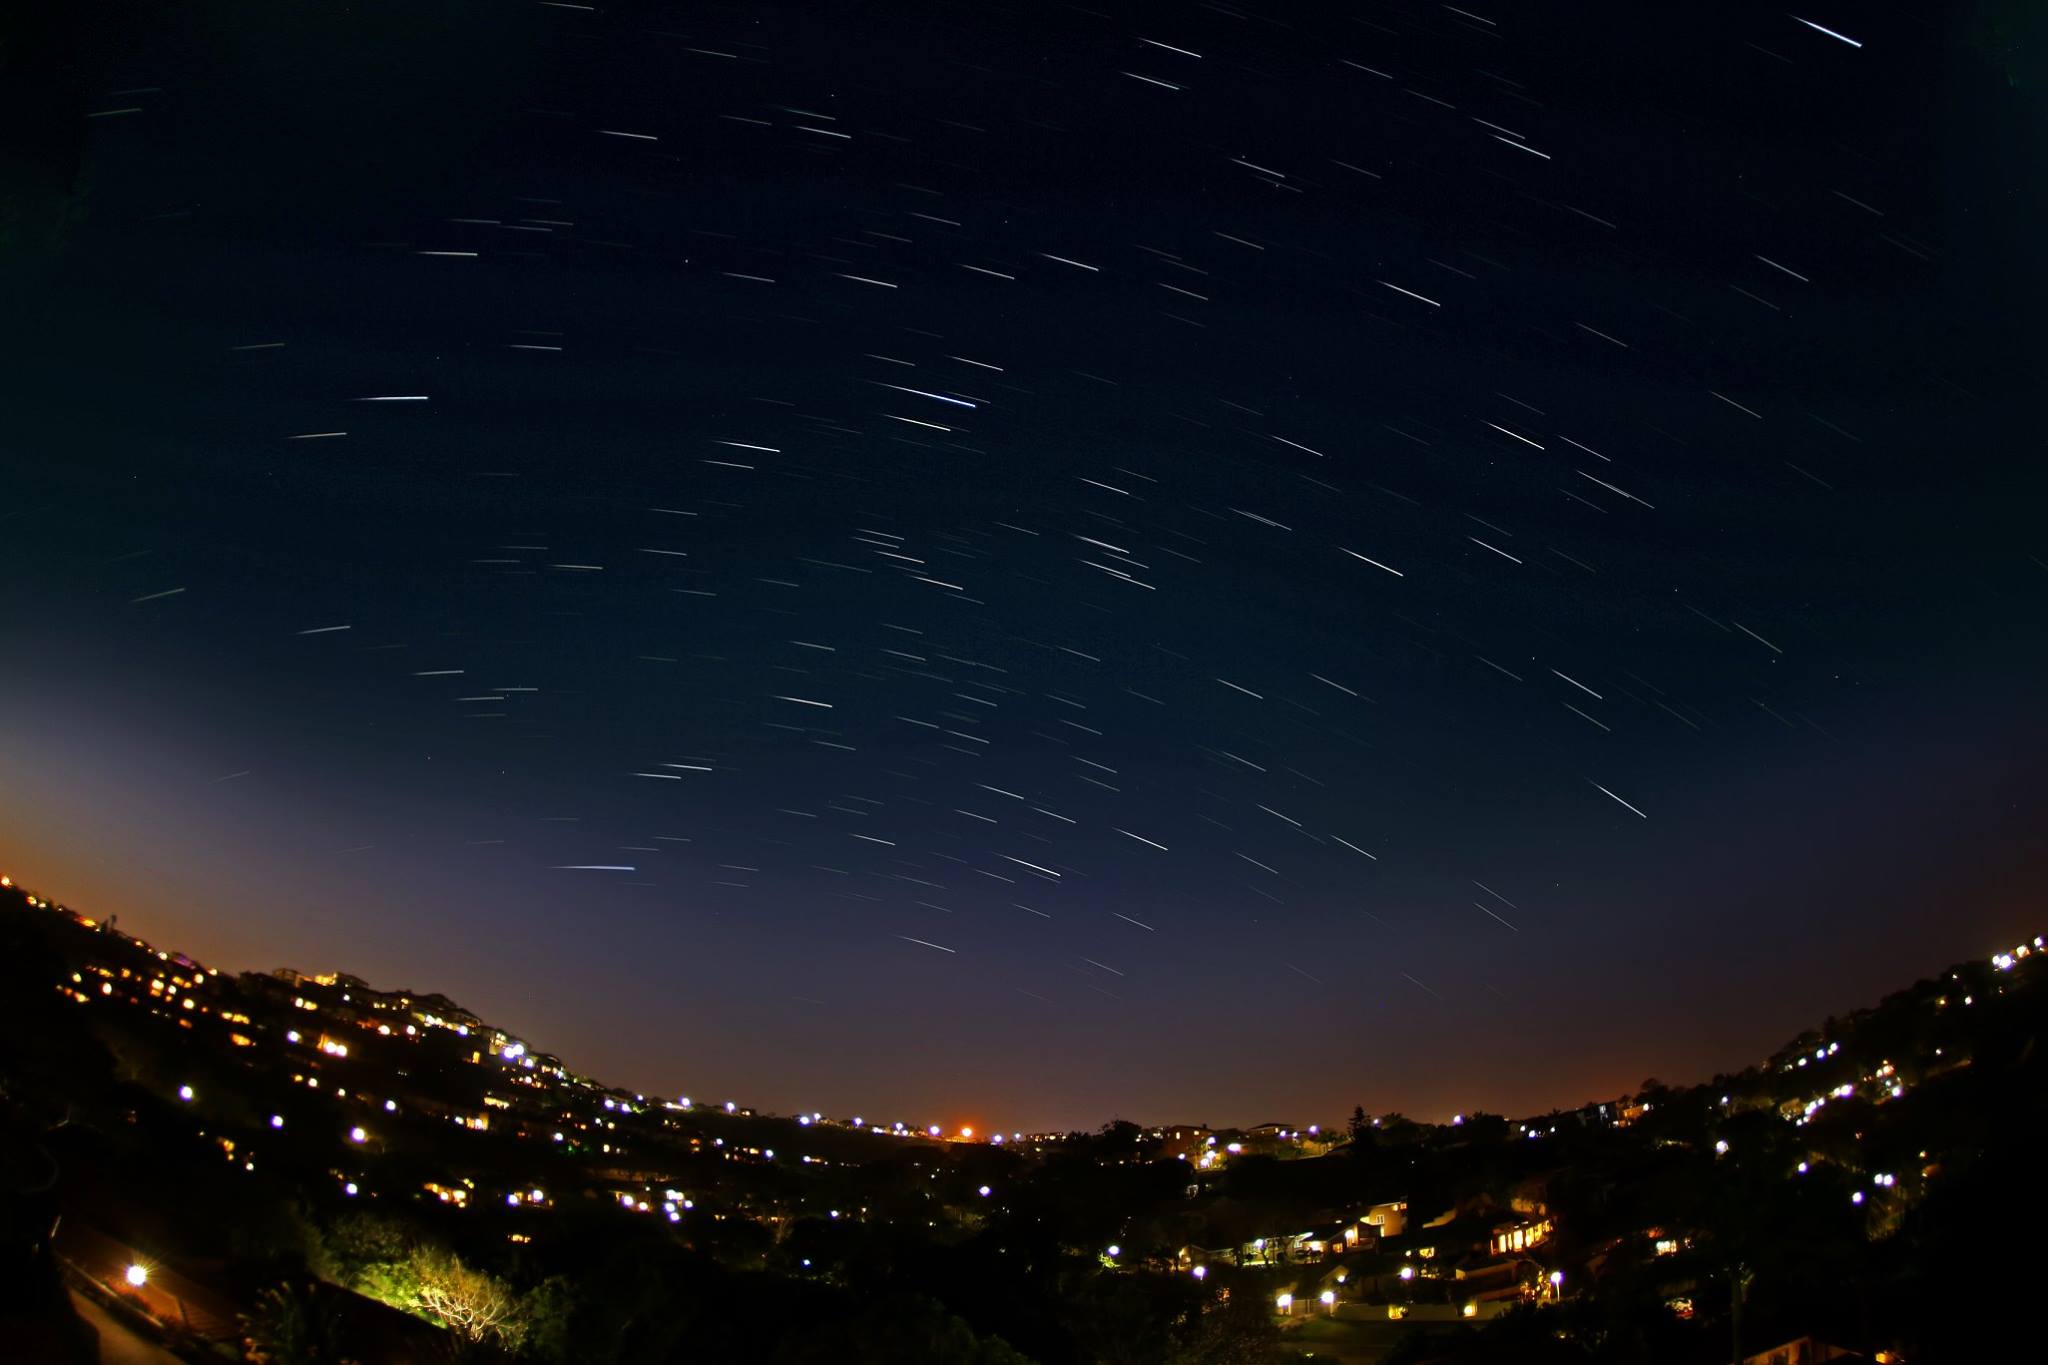
See that massive red mark on the right? I live on the outskirts of that, making my location not amazing for any type of astrophotography. Again, its not impossible to get done - just not ideal. I even made a startrail from my balcony below to prove that it’s possible if you’re ultra lazy. So, take a bit of time to get familiarised here, and find a location that's near enough for you.
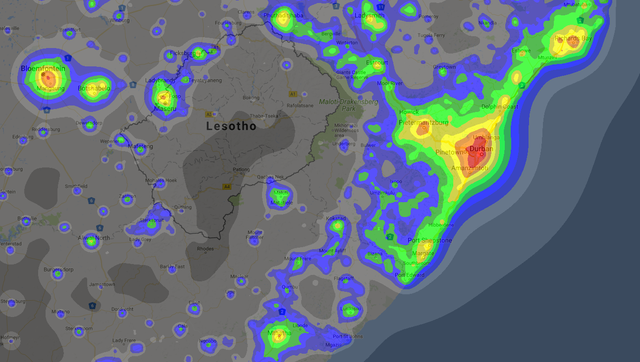
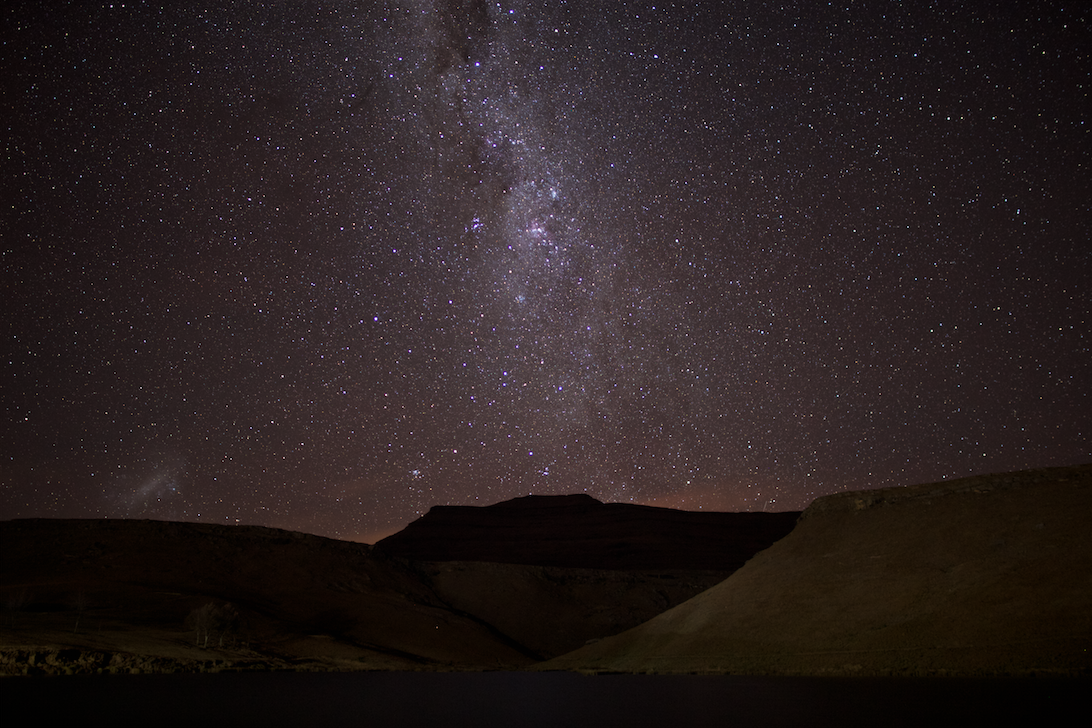
So, for the purposes of my demonstration, I’m going to take a drive to the small town of Underberg - a place you’ll have heard about from my previous posts. It’s about a 3 hour drive away from my home into the mountains, but it’s a journey I love doing, so no real complaints. And, it falls in one of the areas classified on our map as “darkest”, so it’s a great place to see the stars in the skies above. To be more precise, I’ve found a convenient spot inside the Drakensberg Gardens area, which is very close to my choice of accommodation. It’s far enough away from any artificial light, but still close enough to some creature comforts. This is South Africa after all…being alone outside after dark with a big camera isn’t exactly safe.
Yep. This massive area of greyness should do.
Lovely. So, now we’re in our chosen dark location with our camera equipment, but there is still one more small trick we can employ before shooting. This small trick comes in the form of Stellarium Mobile - a useful app that allows you to see exactly what the entire visible solar system will be doing at any point in time, including satellite positions, moon rise times, and the location of the milky way. You want to know where the milky way will be in a month’s time at 11pm at night? No problem. Enter the time and date, and watch all the info get presented directly to you. It’s a great way to plan ahead, and we all know preparation is key right? So, download Stellarium and play around in it for a while, you can use it wherever you are in the world. I took a look, and saw that the milky way will be rising from a WSW direction, so thats where I’ll be aiming my camera.
Ok, so now it’s finally time to take our first photo. I’ll be shooting with my Canon 6D and Rokinon 24mm f1.4 mounted on a Manfrotto tripod, which you hopefully read all about in my previous post detailing camera equipment. I’ve read that the 6D could marginally outperform the more expensive 5D MK3 in low-light situations, so I’m pretty happy with my choice. Also, I’m a cheapskate, and couldn’t be pushed to spend the extra money on the 5D. Sad but true…
THE SETTINGS:
EXPOSURE: If you’re looking at just getting a pure shot of the milky way, then it’s best to not have an exposure time exceeding 20 seconds. But why? Simply, “streaking” will become visible after 20 seconds - that is to say, that the stars will start to appear as trails, instead of just nice round dots. You can have a shorter exposure time obviously, but I’ve found 20 seconds to be the so-called “sweet spot”. If you want star trails, then that's a whole other story. We'll get there eventually...
ISO: I usually have this at a reasonably safe level of 800 - but could push this to 1600 with the 6D. Higher ISO = more noise, and more noise = a grainy image. You might have to play around with your own settings to find one that works for your set up, but your regular DSLR should be dandy between 400 and 800.
F-STOP: Simply, the lower, the better (like a squat - bad joke). But seriously, the lower your f number, the more light gets let into the camera. Since we’re trying to see tiny specks of light millions of miles away, we’re going to want all the help we can get here. The Rokinon lens I shoot with goes all the way down to f1.4, which is perfect for astrophotography. However, the Canon 50mm f1.8 will also do for some experimenting, as will you regular kit lens, which is probably f3.5. So, find your lens with the lowest f number, and you’re all set.
TL;DR version of camera settings (note: these are what I’ve found to be best for my set up)
- 15 - 20 second exposure
- f1.4
- ISO 800
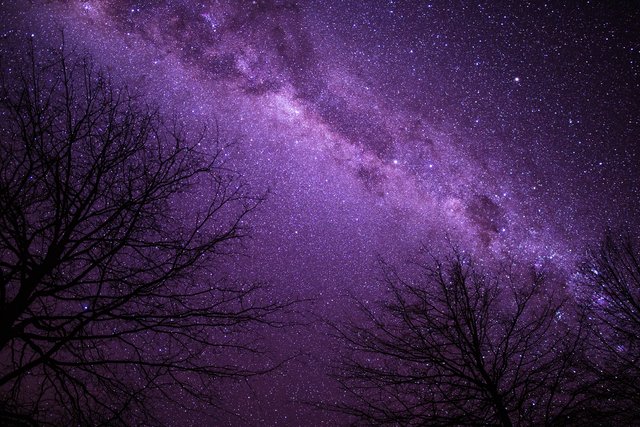
One of my random photos that doesn't have a home. Shot using the exact settings above - and very overly processed.
PROTIP 1: Focusing at night time is a nightmare, no matter how good your camera is. I usually set the focus point as far away as possible during the daytime, and dare not touch it again. Use live view and zoom in 10x to make sure you’re in focus.
PROTIP 2: Unless you’re using a wireless shutter release, set your camera to have a two second delay. Believe it or not, there is an incredibly minor bit of shake when you press the shutter, and having that two second delay gives the camera time to be entirely still again.
PROTIP 3: Is your camera set to .RAW? I hope so…
Ok, so now you’ve digested all of the above and have your camera set up in an ideal location with a great scene. What’s next? Well, push the shutter, and wait!
You’ll find an image like this on your camera, which doesn’t look anything like the main one at the top of this article. Surprisingly, it’s actually the same one (just the top photo has been edited). So, bear this in mind - your photos will need some editing to really make them “pop”…don’t get discouraged if they look a bit bland straight out of the camera. Lightroom CC will come to the rescue. But for the time being, you’re out shooting - so stay out there for as long as you can handle! Experiment with slightly different angles, change your camera settings a bit, and just keep shooting! You’ve come all this way, it’s a waste to only go home with one image.
Eventually, your evening of astrophotography will be complete, and it’ll be time to start the editing. Well, that’s all going to be detailed in the next post. Doing all the prep and taking the image is one thing, but editing it is another. Stay tuned for that.
Until then!
DISCLAIMER: I’m not sponsored by / affiliated with any of the apps or websites mentioned here. All of the star photos are my own original work.
Your post had been curated by the @buildawhale & @ipromote team and mentioned here:
https://steemit.com/curation/@buildawhale/buildawhale-curation-digest-02-23-18
Keep up the good work and original content, everyone appreciates it!
Underberg, Drakensberg...
Sounds like you were travelling across Middle-earth :D
Haha, yeah, I've heard that before :P It does have a bit of a fantasy-world sound to it right? Mountains, rivers, forests etc.
Yes you are making up all the names, I am sure of it 😂
Excellent explanation, I have always liked the pictures of the night sky. It's a pity that I do not have the equipment you describe to experience as well. I give you my vote
Thanks for the comment :) It doesn't cost much to get started, any regular DSLR will be able to get you on your way.
Thank you for responding. I live in a municipality near a big city, at the foot of a mountain, do you think I can take good pictures of the sky, from the roof of my house?
2.02% @pushup from @garethb
Seeing photos of the galaxy like that never ceases to amaze me.
Thanks @snrm, it's one of my favourite things to photograph :) Take a look here at some of my other astro photos if you're interested: https://steemit.com/photography/@garethb/astrophotography-volume-two-all-original-work
You got a 1.17% upvote from @buildawhale courtesy of @garethb!
If you believe this post is spam or abuse, please report it to our Discord #abuse channel.
If you want to support our Curation Digest or our Spam & Abuse prevention efforts, please vote @themarkymark as witness.
Basically the same for doing Aurora pics, they also need a lot of love in Lightroom afterwards to get the colour to pop. 👌
Have you shot the Aurora before? It's been a dream of mine for years
Yeah of course, nothing else to do up here at night!
https://steemit.com/photography/@jasonwhite/my-aurora-borealis-or-northern-lights-photos