Glimpse into earlier photographs. Lesson #2: backlighting and bokeh.
Hi again!
Back in 2012 I was certainly busy to get to know my camera, so I often took it to the streets of Lahti and tried shooting inconspicuously at different subjects. It was a bit difficult because I didn't want to disturb people.
Anyway, I found some nice buckets of Bell Heathers in front of an entrance to a building. They were so appealing I decided to take the photo.
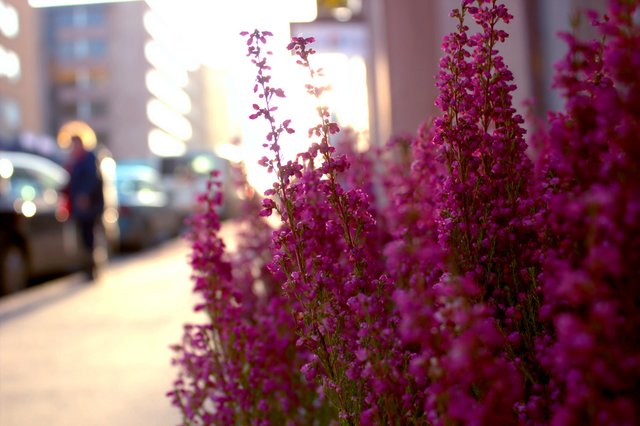
In the city – Behind the Heathers (Erica gracilis)
Now here's the question. Notice the person next to the car?
See how the sun gives a cool backlight on their hair, making it almost look like an aura?
Although the photo is shot with the Canon EFS 18 – 55 mm kit lens, it still retains some level of bokeh, meaning that it has a relatively shallow depth of field that renders what would normally be clutter, into a somewhat decent blur. And in that blur we have a point of interest that adds a story to the image.
Now I must admit I didn't notice the person in the background when I was shooting the picture. It's a good thing though, as I would probably have consciously tried to avoid the shot altogether and would've missed the moment.
Now – to replicate this image, you'll need to get relatively close to whatever you want to be in focus, and then use an aperture as wide as possible (keep the F-value on your camera as small as possible, lower number means shallower focus). This way your subject stays sharp, and whatever is in the background will get blurred. Leave some room for the background to fill the negative space.
If you are shooting into the light, the backlighting can definitely help give some character to the subject, or like in the case of my photo here, to the person in the background.
If you got it right, you will have obscured the otherwise possibly distracting background into a beautiful blur that adds to the picture instead of taking away from the appeal of the resulting image.
Ok, you can now go out and shoot your own beautiful photos with a creamy bokeh. :)
If you follow this advice, please link your resulting photos here so we can all see them, vote on them, and perhaps give pointers on how to improve on them! :)
See you with another photo lesson soon!
Lesson #1 – An older shot of mine & A prompt photography lesson.
Assignment
[Previous post: One photo every day: Joystick (162/365)]
If you liked the post, consider buying me a beer:

thanks for sharing such information for noobs like me who wants to start photography. Will use your guidelines for my next shoot
this shot is so beautiful i would like to set this as my wallpaper may i :)
Thank you so much. Go ahead! I don't see a reason why you shouldn't. :) In a matter of fact I would like it very much if people find use for my photos.
Thanks for taking me through the process. The technical info is very helpful but I also like knowing the thought-process that you used when you decided on this shot. It really helps to understand why you set up this particular subject this way.
I was a photography student back when it was all darkrooms and film but I really haven't kept up the way I would like to. I miss using the nice old camera but I don't even know if I can get real film or find a place to process it any more.
Wow, very beautiful , great photo!
wow good info this is really an art to learn photography for us noobswe only try to get a a clear photo :D
great shoot awesome photografhy.
thanks for advice about photography
informative post about flower thanks my friend i love all kind of roses
@gamer00,
This is wonderful! Blur of the background seems great! Excellent photography and useful article as well!
Cheers~
beautiful flower & i love red roses