Building the Circus Tent Part 2
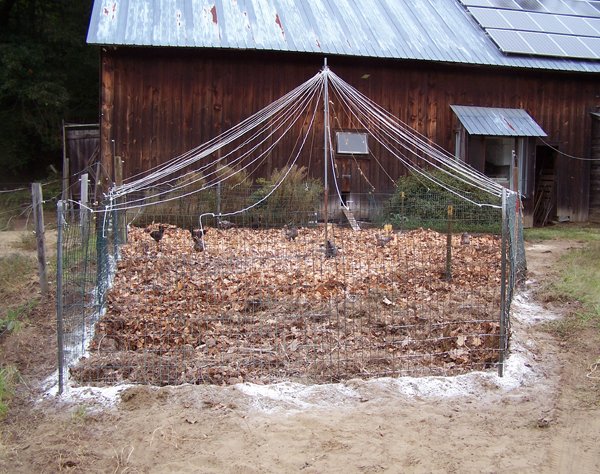
Newly rebuilt layer pen with white clothesline tent September 2014
This is part 4-2 of a 5 part series on our pastured chicken infrastructure. I started with the Salatin tractor: https://steemit.com/homesteading/@goldenoakfarm/building-the-salatin-pen
Next was the Mobile Coop: https://steemit.com/homesteading/@goldenoakfarm/building-the-pasture-coop
Then the Movable Pen for the coop: https://steemit.com/homesteading/@goldenoakfarm/building-the-mobile-pen
An explanation of how we came to use the tent: https://steemit.com/livesustainably/@goldenoakfarm/building-the-circus-tent-part-1
And now onto how to build it.
The original Materials list:

*We discovered that with nylon rope, the colors yellow and red deteriorated much faster than green. Blue deteriorated the least. We replaced the nylon with an expensive UV protected rope of bright yellow. It lasted about 6 months longer than the Acme rope.
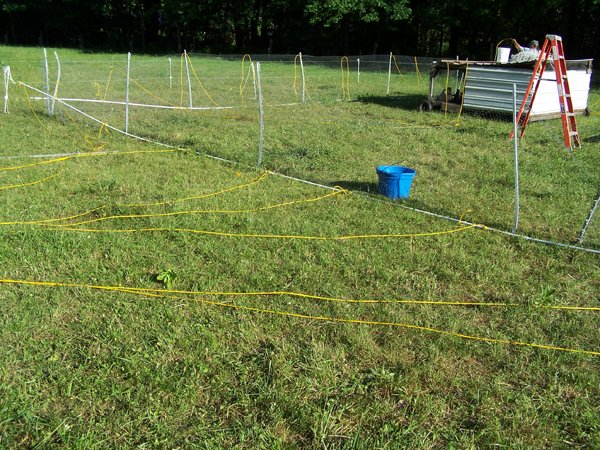
It occurred to me that we’d had the white plastic coated fiber clothesline on the clothesline for over 20 years and it was still in perfect condition. So we used that for the 50’ pen’s tent, cleaning out all sources in the area!
The original notes on distance:
*** This 5’ distance will work for Red tail hawks and larger. If you have Cooper’s or smaller hawks, set the ropes at 3’ or less. For the sides with corners, this will be 13 ropes, and 11 for the sides without. You will also need more rope, about 1200’.
Changes Made:
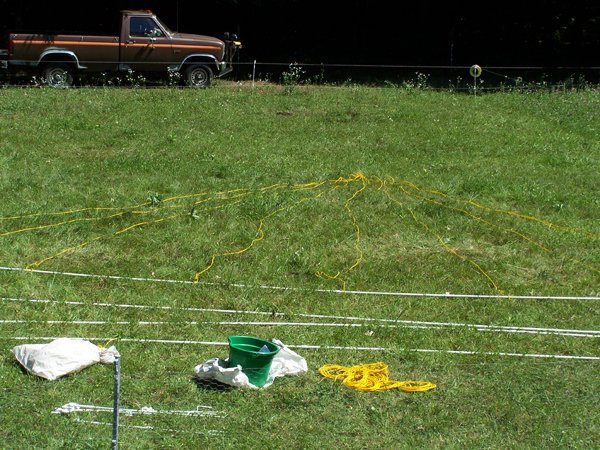
We changed the spacing to 3.5’ on the 40’ pen and so the 13 ropes/11 ropes was what was needed, roughly 1200’. For the layer pen we changed the spacing to 18” – 22” but it is an irregular size, so I have no idea how much rope it took.
We did the 3.5’ spacing on the 50’ pen and completely lost track of how much rope it took. I think there were 15 ropes on 2 sides and 13 on the other 2, for a total of 56 ropes. Minimum length would have been 30’ for the center ones, perhaps 42’ for the longer ones. A VERY rough calculation indicates about 2100’ of clothesline.
Onto building it:

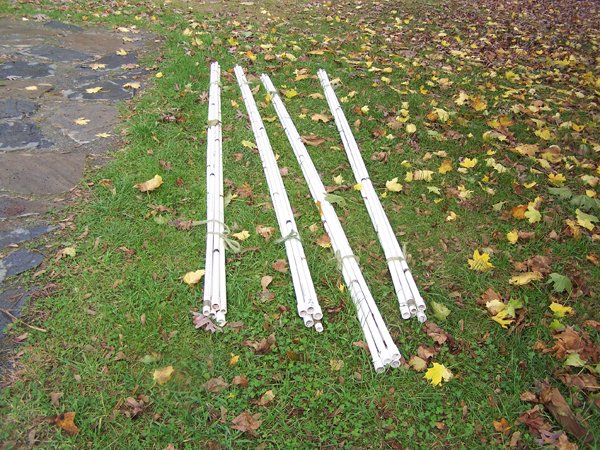
For the 40’ pen take 4 lengths of the PVC and couple them together.
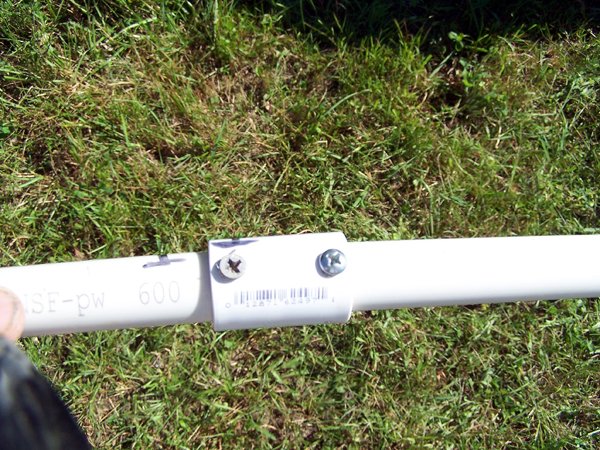
Drill holes at each end of the coupler and insert a screw at each end.
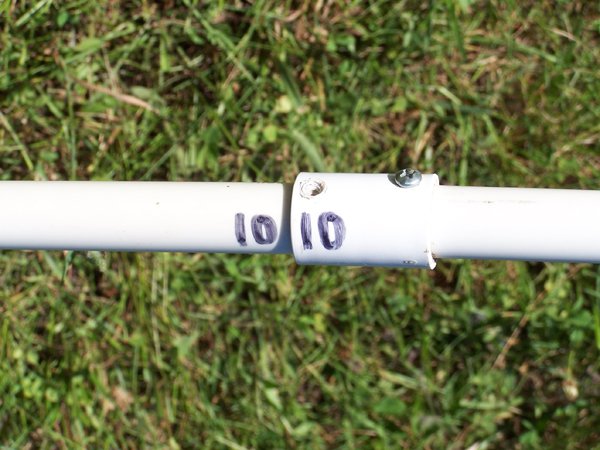
Number each coupling and its pipe end. It will be easier to fit them together at the beginning of the next season. Spray the numbers with acrylic spray so they don’t wear off during moves. (We used numbers 1 - 12, with the 6 underlined, to avoid confusion.) Save the screws in a pill jar as you remove them.
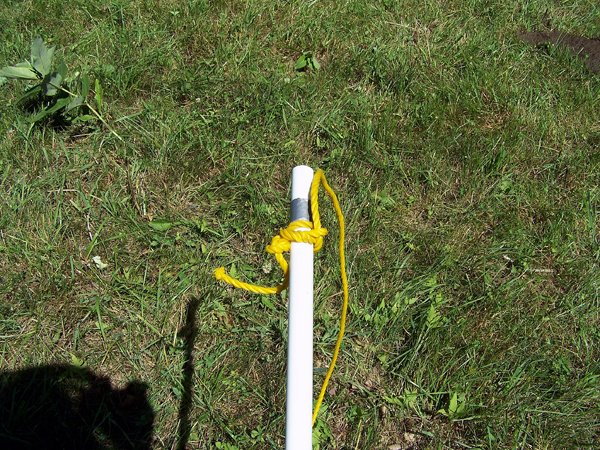
Wrap duct tape around each end of the PVC about 2” from the end. There needs to be a good thickness to keep the ropes from slipping off the ends.
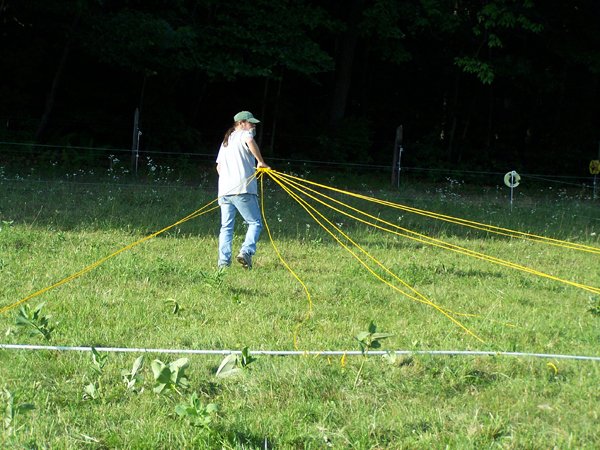
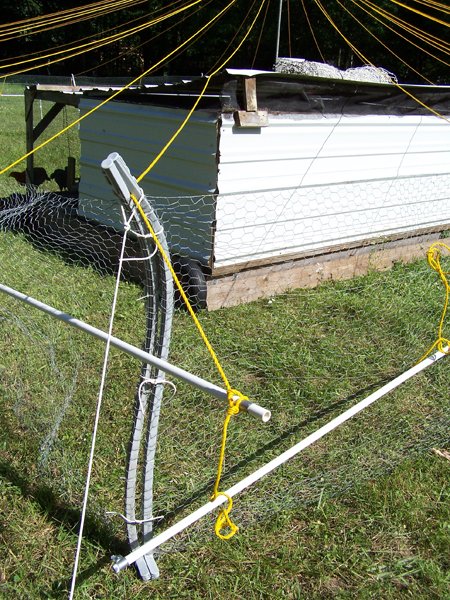
Take one of the 8” loops and lay it about 23’ back (if doing a 40’ pen) from and in the center of the 40’ coupled PVC. Tie the rope to it with a double half hitch and run it to one end of the PVC. Tie the rope to the end of the PVC, allow about 18” to hang below the knot and cut the rope. Tie a knot in the end to prevent raveling unless using clothesline. Repeat, doing the other end of the PVC.
To make the knot, wrap the rope around the PVC twice, then tie a half knot. But instead of putting the rope through once, put it through twice and pull tight. Then tie a half knot that rests against the first knot, seen on the left in the picture of duct tape
Repeat, running the rope to the PVC, but 3.5’’ in from the tied on piece. Do the other side. Repeat, moving in 3.5’ and doing one side, then the other. When it’s done, you will have 13 ropes.
It might help in future builds to mark the 3.5’ places with marker and spray with acrylic spray to keep them from being worn off during moves.
Repeat on a second 40’ coupled PVC length. You will have 2 pieces of PVC with13 ropes tied to them and a wire ring.
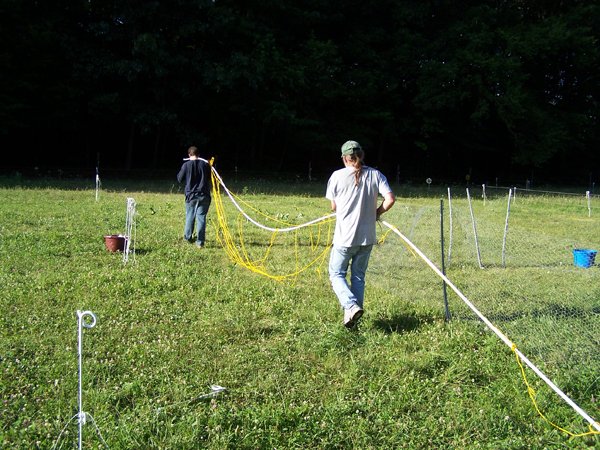
To do the remaining 2 sides, couple the PVC and put the duct tape on as before but when you run the ropes, START 3.5’ in on both ends, and then continue as before. Do both sides.
The reason for doing these sides set in 3.5’ is that the other 2 sides already cover the corners. You will have 11 ropes on the remaining 2 PVC lengths.
To put the circus tent up:
Take the 3’ high step-in post and go to the center of the pen. Have another person at one corner, outside. Have them sight from that corner to the diagonal opposite corner, making sure the upright is centered between them. Have the person go to the next corner, and repeat the process. Try to be as accurate as you can, as it will save having to adjust the ropes too much.

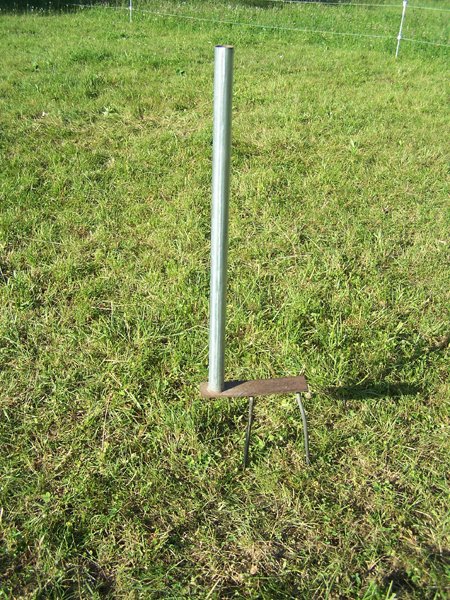
Close-up of the step-in base
The base is about 1’ on the step part, and about 9” for each spike.
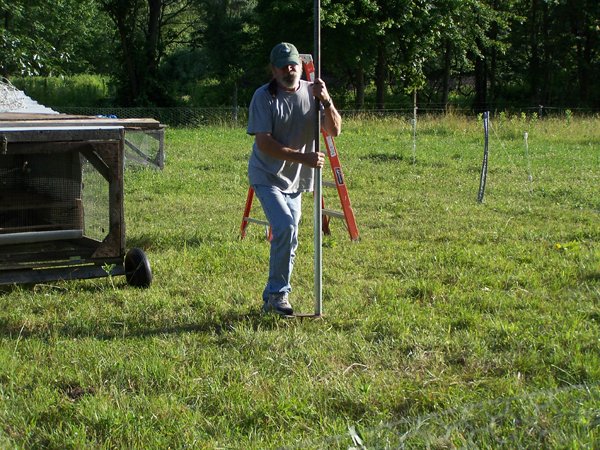
This should roughly center the post. Drive the step-in into the ground.
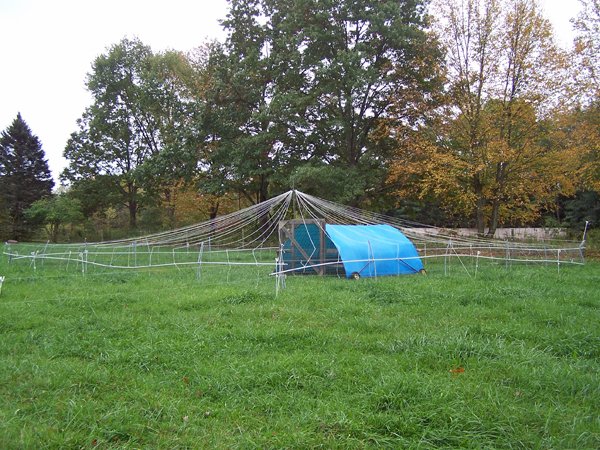
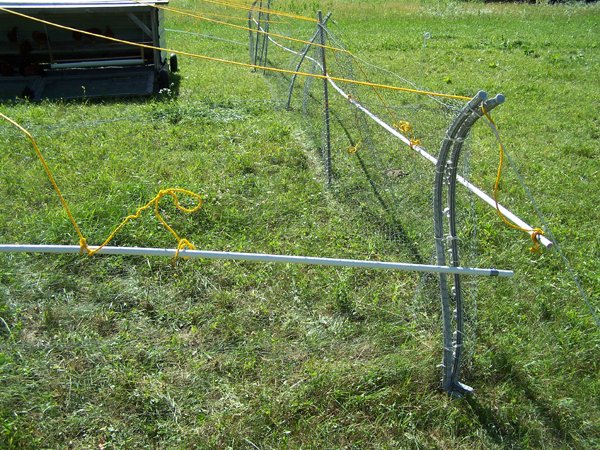
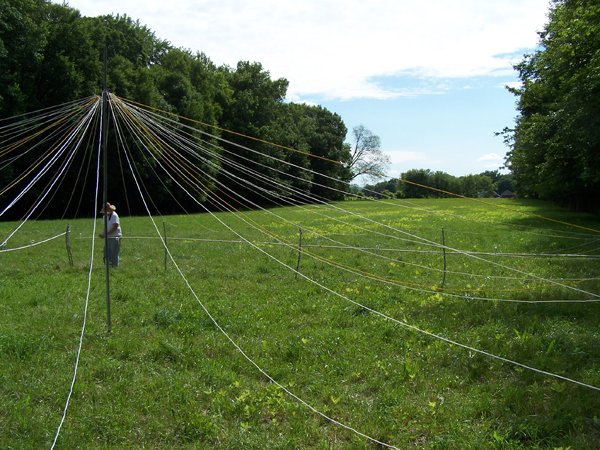
Take the 8’ pole and insert it into the 3’ pole, with the T at the top. You will need a 6’ step ladder for the next step. Following the directions below (To move the circus tent), move the 4 PVC sections so the 2 9-rope sections are opposite each other on the outside of the pen. Place the 7-rope sections opposite each other outside the pen.

Take one of the rings and pull it over the top of the side and over to the pole. Have a person move the ropes along the side into place as you pull.
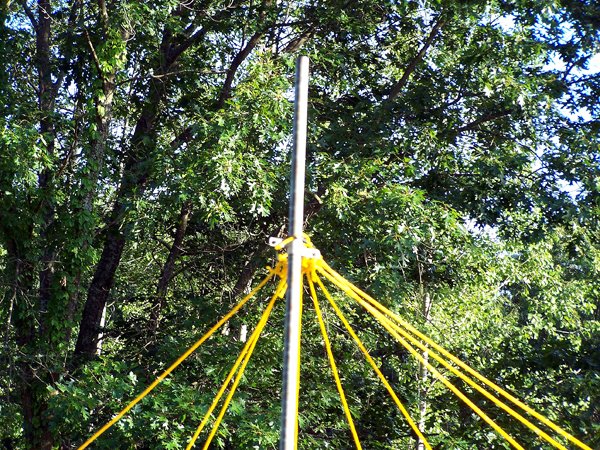
Place the ring over the top of the T on the pole. Repeat with the other 3 rings.
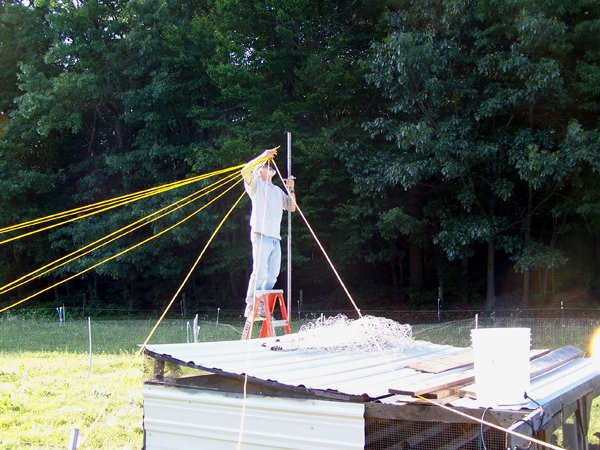
If all went well, each PVC length will hang evenly over the pen sides, about ½ way down the side. If not, untie and adjust the length of ropes as needed. Do not let the PVC touch the ground. Also you don’t want the PVC too near the top of the side, as it could go over the top in a wind.
Once it is adjusted, it is a good idea to tie the steeply angled ones at each end to the wire, to keep them in place. (Remember the hawk got in when 1 blew out of position…)
To move the circus tent:
Pull the top ring off and drag the ropes over the top of the supporting fence.
Then drag the PVC to the new location.
f you need to move it sideways, carefully gather the ropes against the PVC and carry it. It takes 2 people. Dragging sideways tangles the ropes.
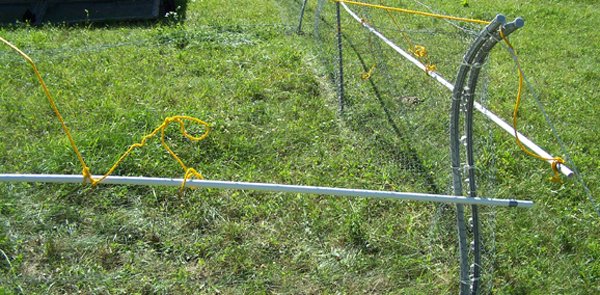
Once the pen is set-up and guyed (important to not do ropes before guying) and the circus tent is up, the tension and position of the ropes needs to be adjusted. You can see the 2 in the foreground are very slack and will need to be shortened to tighten them up. The one 2nd up the right side is too tight and will need to be loosened. Tie steeply angled ones to the fence as you work around.
The end ropes can be threaded between the corner posts to hold them in place.
To store the circus tent:
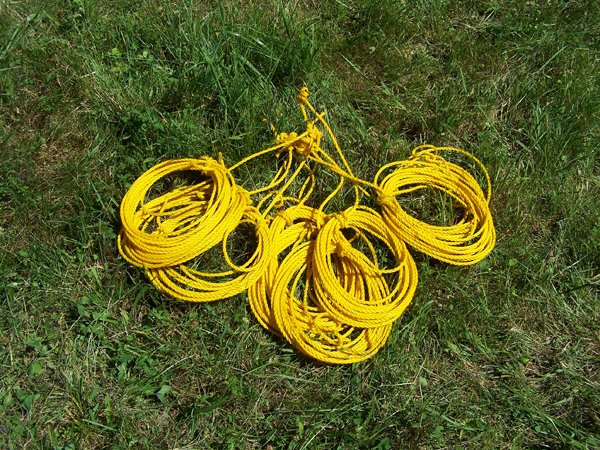
Untie each rope from the PVC and coil it neatly, securing each coil near the wire ring. Do this for each ring. It will condense down into about a 2’ long gather of ropes.
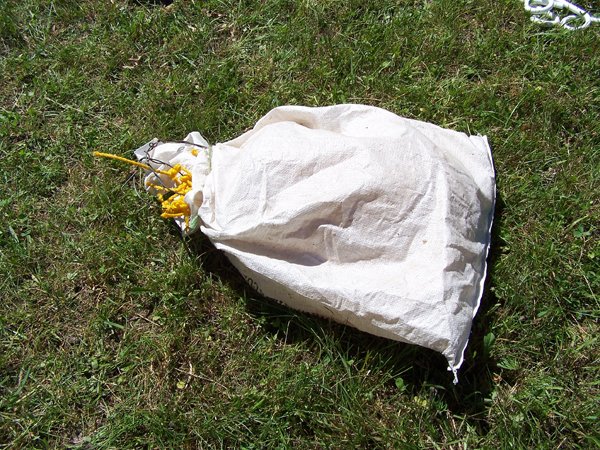
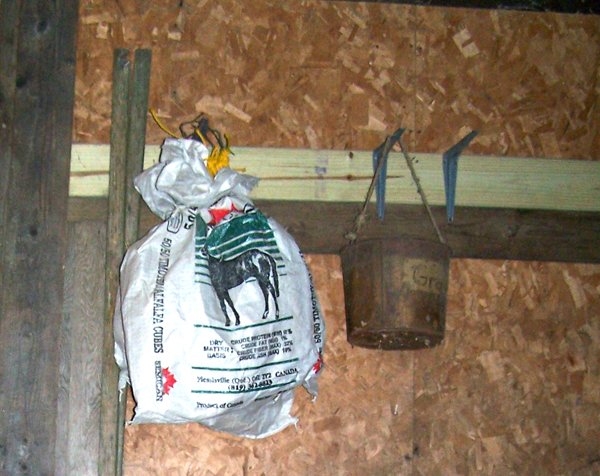
Two rings with the same number of ropes can be put into a bag and hung on a nail on a wall, neatly out of the way.
Group each set of 4 pipes together bound top and bottom.
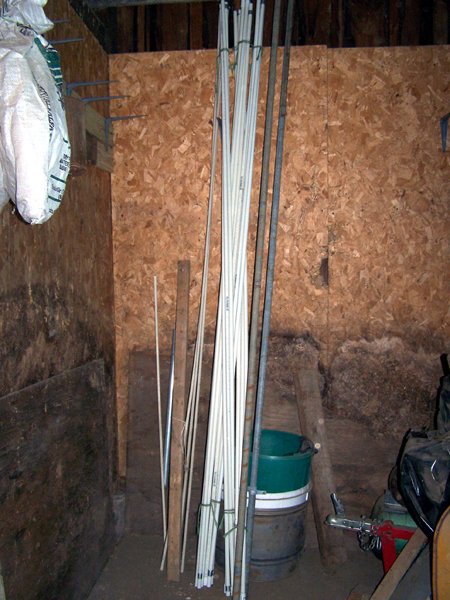
The 4 sets can stand against a wall, taking up about a foot of space.
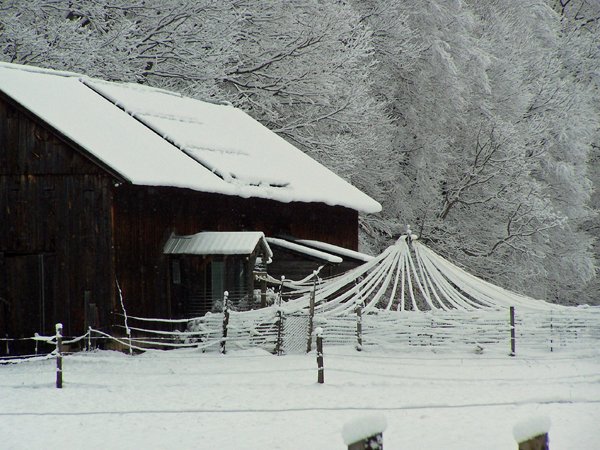
Holds up well to snow and ice.
The last in this series is Building the Hoophouse Coop, soon to come.
World of Photography
>Visit the website<
You have earned 6.50 XP for sharing your photo!
Daily photos: 1/2
Daily comments: 0/5
Multiplier: 1.30
Block time: 2018-05-26T09:34:09
Total XP: 149.50/200.00
Total Photos: 23
Total comments: 0
Total contest wins: 0
Follow: @photocontests
Join the Discord channel: click!
Play and win SBD: @fairlotto
Daily Steem Statistics: @dailysteemreport
Learn how to program Steem-Python applications: @steempytutorials
Developed and sponsored by: @juliank
I can remember when we would have our chicks in the spring and the chicken hawks would be circling overhead.
We ended up having to put chicken wire over the top of the coop to keep the chicks safe... but this is a cool idea!