Let's make organic lye soap in 11 easy steps!
Hey Guys! Today I have a 'How-to' post for you!
I know, I know, the past two-ish weeks have left me partially MIA - I say "partially", because I have done my best to keep my daily Holi-Art posts going. I have recently been super slammed with multiple things and I haven't had as much time to produce two Steemit posts a day.
BUT!
Hopefully you will forgive me...Because today I have something super fun for you all.
Have you ever wanted to know how to make your own soap? Yes? Then you are in for a treat! My wife's grandmother saw that I had been under pressure recently with several projects and decided to do the sweetest thing - She photo documented her process of soap-making, wrote down instructions and told me all I had to do was edit, format and post it. She's incredible, right?!
Ooooook, vamos!

Homemade Lye Soap
Ingredients:
- 5 Cups of your preferred oil/fat (In this tutorial I will use Palm oil)
- 2 Cups of your preferred liquid - poured into ice cube tray and frozen (In this tutorial, I will use a homemade pine needle tea)
- 1/2 Cup and 2 Tablespoons of Lye - this should be equivalent to 10 Tbs, but since it is super important to have exact measurements, using a 1/2 cup measuring spoon and two full 1 Tbs measuring spoons is the best way. (Side note: If you are buying Lye in the US, you will probably be questioned and looked down upon, since it can be used to make bombs, meth and to dissolve roadkill...Everyone in the states is now "guilty until proven innocent", so you may want to refrain from buying a 10lbs box of of it.)

Supplies (above picture):
- Two stainless steel bowls
- Fork for stirring
- 1/2 Cup measuring spoon
- 1 Tbs measuring spoon
- Soap mold lined with plastic wrap for easy removal - (In this tutorial, we will use a celery keeper, but silicone works best)
- Electric stick blender
- Silicone Spatula
- Ingredients (mentioned above)
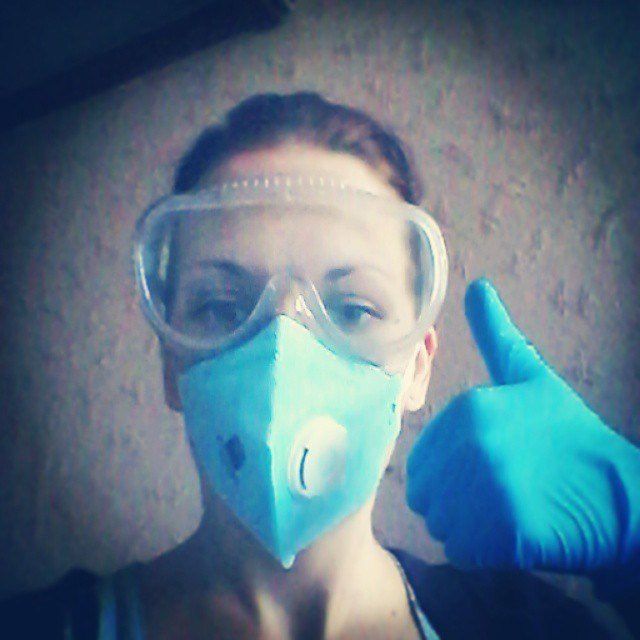
- Plastic/rubber cleaning gloves - to protect skin (Lye by itself, prior to neutralizing, can burn you and put holes in clothing...IF you burn yourself, I'm not responsible)
- Spray bottle with vinegar (handy for neutralizing lye if it gets on your skin, as vinegar counteracts the actions of lye - What? I said I'm not responsible for your burn, I didn't say that I was going to leave you on your own searching in agony for a remedy on the interwebz. I'm not a monster.)
- Eye protection (I'm just trying to cover my bases....if you get lye in your eye, or on your skin it's your own fault!)
- Old clothes (Again, if you think it is ok to make Lye soap in an $800 dress or tuxedo, you probably aren't smart enough to be doing this - Also not my fault.)
- If need be, a plastic trash bag can be used to protect your counter surface, but in our case, it was just being used as a backdrop for the photos.
In the above picture, you can see that the larger bowl holds the Palm oil, which comes in a firmer block similar to lard, and the smaller bowl holds the pine needle tea (you can use most any liquid - water, herbal tea, coconut milk, etc., etc.) that has been frozen into cubes.
Freezing the liquid prior to making this recipe, allows you to make the soap inside without the nauseating fumes. If for some odd reason, you decide to stray from the instructions that I am giving you, and keep the liquid unfrozen - do it outside in a properly ventilated area!

Step 1: Mix frozen tea and lye together
In the above picture, you can see that the lye is being sprinkled on top of the frozen tea.
It is very important that you add the lye on top of the ice cubes - NOT VICE VERSA. C'mon, trust me, just follow the directions.
Again NEVER PUT THE LYE IN THE BOWL FIRST!
Frozen liquid first, then lye on top. Got it? Good. 
Step 2: Stir
Keep stirring until the ice cubes are melted.

Step 3: Same as step 2
KEEP STIRRING!
Are the ice cubes melted and mixed evenly with the lye? Good. You're ready for the next step.
Side note: Check out that pink spray bottle! It has vinegar in it, just in case the lye splashes onto your skin. Remember I mentioned that in the supply list in the beginning? If you forgot about it, and your arms are now burning from the lye splashing up on you while you were stirring, you should try following directions better next time.

Step 4: Melt the oil/fat
If you are using a solid form of oil/fat like the Palm oil, then you will need to heat it until it melts into a clear liquid. If you are choosing to use an oil that is already a liquid like olive oil or the likes, you will need to use a cooking thermometer and warm it to 150°F (or 66°C).
Yes, that exact temperature. Just do it.

Step 5: Combine the two concoctions
Get that stick blender ready!
Once the oil/fat is up to temperature, put the blender in the melted Palm oil and turn it on. Now begin adding the lye mixture slowly. Continue mixing, as this is going to take a few minutes.

Step 6: Keep mixing!
Using a stick blender makes this process A LOT easier, without the blender, you would be stirring by hand for upwards of 2 hours...no fun. With the blender, it typically only takes a few minutes.
While blending, the mixture will suddenly begin to visibly saponify, similar to the way egg-whites become meringue. The texture should become like that of a thick pudding.
You can tell when it is thick enough, because it will hold it's form - note the rings in the mixture above that were created by pulling out the blender.

Step 7: Pour the mixture into a mold
In the above picture, you can see how thick the mixture has become, as I have to use a spatula to scrap it from the bowl and into the mold. This celery keeper made by Tupperware has been used for many, many batched of soap, I just have to make sure there is a liner in it - I use plastic wrap.
Silicone molds (like these) are the easiest thing to use for molds - especially if you are one of those people who like your soap to be in the shape of a rose or heart.
Or in the shape of a gun.
......or in the shape of a mustache.
Whatever floats your boat.

In case you were wondering just how much soap you are getting out of the deal, this recipe fills the celery keeper to the top. So about 13" x 4.5" x 3" (33cm x 11.5cm x 7.5cm) worth of soap, which can be sliced into 11-12 thick slices, or more if you would like the bars to be thinner.

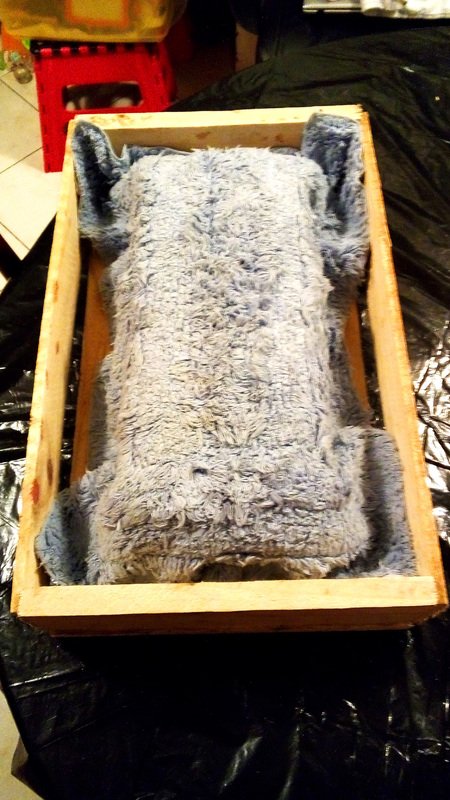
Step 8: Cover the container and let sit
The lid is placed on the mold and covered in two rugs (Yes, that is a rug - not the hide of a wild animal).This is an important step, because if it cools too rapidly it will not saponify completely, which means it will be much too soft.

Rule of thumb is to leave the soap to harden for 24 hours before removing it and cutting it into bars, but this batch was hard enough to cut at 18 hours. Use your own discretion - too early and the soap will be too soft, too late and it will be hard and brittle, so it may crack and crumble while cutting.
Not to mention that cutting hard soap with a large, sharp knife is dangerous, soooo...
But I mean, do what you want, I'm not your mom.

Step 9: Remove the soap from the mold
Here is a quick bit of advise to make your life easier:
Grease the walls of the mold before you line it with plastic wrap. This will make removal from a non- silicone mold much, much easier and in addition, will hold the plastic wrap in place as you pour in the pudding-like mixture. Trust me, there will be less cussing involved.

Step 10: Slice 'em and dice 'em
Cut that brick of soap into as many slices as you want! Unless you are a giant...in that case, don't slice it at all, it will be more effective whole.

Step 11: Let the soap sit and cure
As the soap is sliced, it is laid out to cure for 4 weeks to allow the remaining un-neutralized lye to fully dissipate. This is also an important step, because, like I have mentioned multiple times in this post, un-neutralized lye burns.
I use the rack in the above picture to store a separate batches until they are ready. I also like to label them with the date they were made and which ingredients were used so that so that in four weeks, I don't have to think about what I did the 4 weeks prior.
Aaaand a final message from the soap maker, herself:
"I hope this helps if you are wanting to try to make natural soap! I will answer any questions you may have about the process. Thank you and have fun!"
Alright guys, I hope you all enjoyed this original content! If you did, please feel free to upvote and follow! And as always, if you have questions or advice for me, please leave them in the comments.
Make sure to check out today's Holi-art!

HI!
what kind of lye had you used? Potassium or sodium ?
Hey @smailer!
Sodium Hydroxide is what we use, but either should work the same.
This one of those thing i have to try atleast once. Thanks for sharing
You bet! It's a very useful thing to know how to do!
Hey @rigaronib, are you cooking now? This is great man, congratulations.
Yeah dude! Like a regular Walter White! Haha
Thanks, buddy.
Fab post.
Making soap is something I have wanted to try for many years but will have to wait till my children are older.
That and they have no patients and would probably try to use the soap early.
It is a very handy craft to know, that's for sure.
How old are your children?
Cool. My girlfriend makes her own soap too and sometimes I help her a little in the process. I sent her the link to your tutorial. 🙂
Awesome! I would love to see some of her work and hear what she does differently.
I definitely like these posts! We ALL need to learn to less dependant on big companies for nessecities and become a lot more self sustainable for all our & childrens futures, i really want to learn to make my own cannabis/hemp infused or even just regular soap someday soon, this is helpful! Nice & thorough too! Nice post :) #upvoted & #followed !
Thank you so much @vapecat!
I agree fully. Self-sufficiency is definitely one of the most important things, if not the most important thing, that one can learn in this uncertain day and time.
it is great @rigaronib I love to make soap, it is so creative process, you can use different oils and butters, make it with tea or milk, or fruit or vegetable juice, add silk or cosmetic clay, or henna. I have made so many different types, so I have 3 big boxes and I have to use them a first and then do another. and by the way, I like hot processed soap, it allows to save more conditioning ingredients. thanks for sharing, it is awesome :)
Thanks so much @witchcraftblog! I truly appreciate your support!
My wife's grandmother loves making soap, severy chance she gets she is experimenting with adding or subtract things to see what smells and properties she can create. haha
It is me, preparing to make soap
Hahaha! This is awesome! Love it.
This is one of the most useful posts I ever read on Steemit. However, couldn't help myself:

Lmao! Perfect example as to what will happen if you don't use protective gloves and such. Thanks for this!
@rigaronib Bookmarked! This is why Steemit would succeed there's so much knowledge like this which would be very helpful to anyone who'd love to know how to make things ourselves.
THANK YOU !
Hey, you got it!
And thank you for such and awesome comment!
This is genuinely incredible man, I am going to try and source some lye and try it!!
Thanks @meesterboom! :D
Lye can gerally be found in the cleaning supplies - but it took us a while to find it in Chile, because everything is used differently here.
We finally found it in the automotive section under the name caustic soda . As long as it is pure sodium hydroxide with no additives, it will work. Make a post when you make it, I wanna see!