Redneck Wine Making or Making Wine for the Rest of Us
I know what you’re thinking, “REALLY? Yet ANOTHER tutorial on how to make wine!” but I have a different set of reasons for making wine.
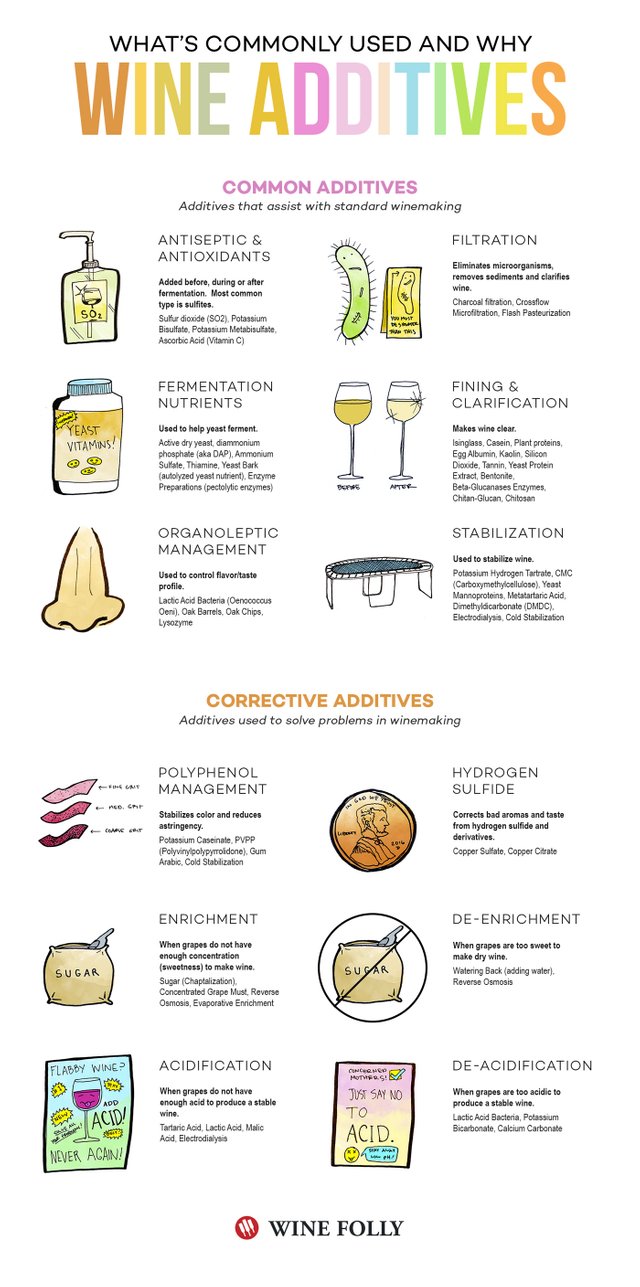
First, I’m NOT a wine snob. I do like wine and try to drink a glass with my supper, well, OK maybe two glasses. I used to think that the wine I bought was healthy and free of nasty stuff. I mean it’s wine right? What could they add to wine? I was wrong. Commercial wineries add LOTS of stuff to their wine. For example:
Well, the point is I didn’t want to have to worry about all that stuff. I decided it would be easier and cheaper to make my own, so for the last year I have. My goal was to make a drinkable table wine for less money than I could buy it. I doubt I’ll win any Wine Spectator awards but that was never my intention.
My requirements were that it had to be:
- easy,
- cheap,
- doable during the Zombie Apocalypse.
The wine making process is about as easy as it gets. As a minimum all you do is put a liquid containing dissolved sugar in a container, add yeast somehow, and wait. That will result in an drink containing alcohol. How it tastes depends on how one performs the details of those very simple steps. In the steps below I will explain WHY it do what I do and the results achieved. I make 6 liter batches every 3-4 weeks. (So now you know the seriousness of my problem! ;-)
Step #1 – Get your Stuff Together
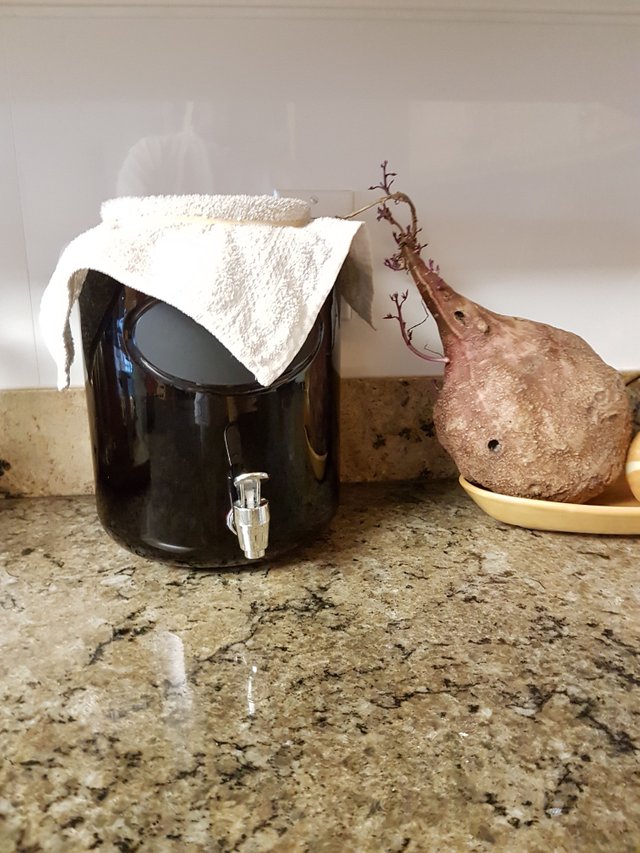
In this step we get our gear together BEFORE we need it. To need it and not have it is just stressful and to be avoided. I use glass. It’s easy to keep clean, easy to see the fermentation process and looks nice. Minimum required items are:
Materials and Supplies
- 1 - 6 liter primary fermentation jug (carboy) with wide mouth for easy cleaning. Mine also has a side spout for easy initial transfer.
- 8 (min 4) – 3 liter wine jugs with screw caps (best way is to buy them full and drink the contents, leaving the jug empty)
- 1 – Spoon, long handle
- 1 – Medium sized funnel that fits the jug openings
- 1 – Piece of cloth to cover primary fermentation jug opening
- 1 – Rubber band, large to hold above cloth in place (a piece of string will work too)
- 1 – Notebook and pencil to keep notes
- 1 – Package of labels to keep your vintages straight
- 1 – Hydrometer, to measure Potential Alcohol content (this is optional but fun)
Note: I initially did not use airlocks, siphon hoses, or any chemicals. I wash my glass and utensils in non-chlorinated water but I make no attempt to sterilize anything. Since I drink the wine young (3-4 months) I don’t run into any serious problems with oxygen entrained during transfers. I have started using a siphon for my last transfer since fermentation has stopped and therefore no CO2 is being produced. I want to see how well the wine will age.
Ingredients
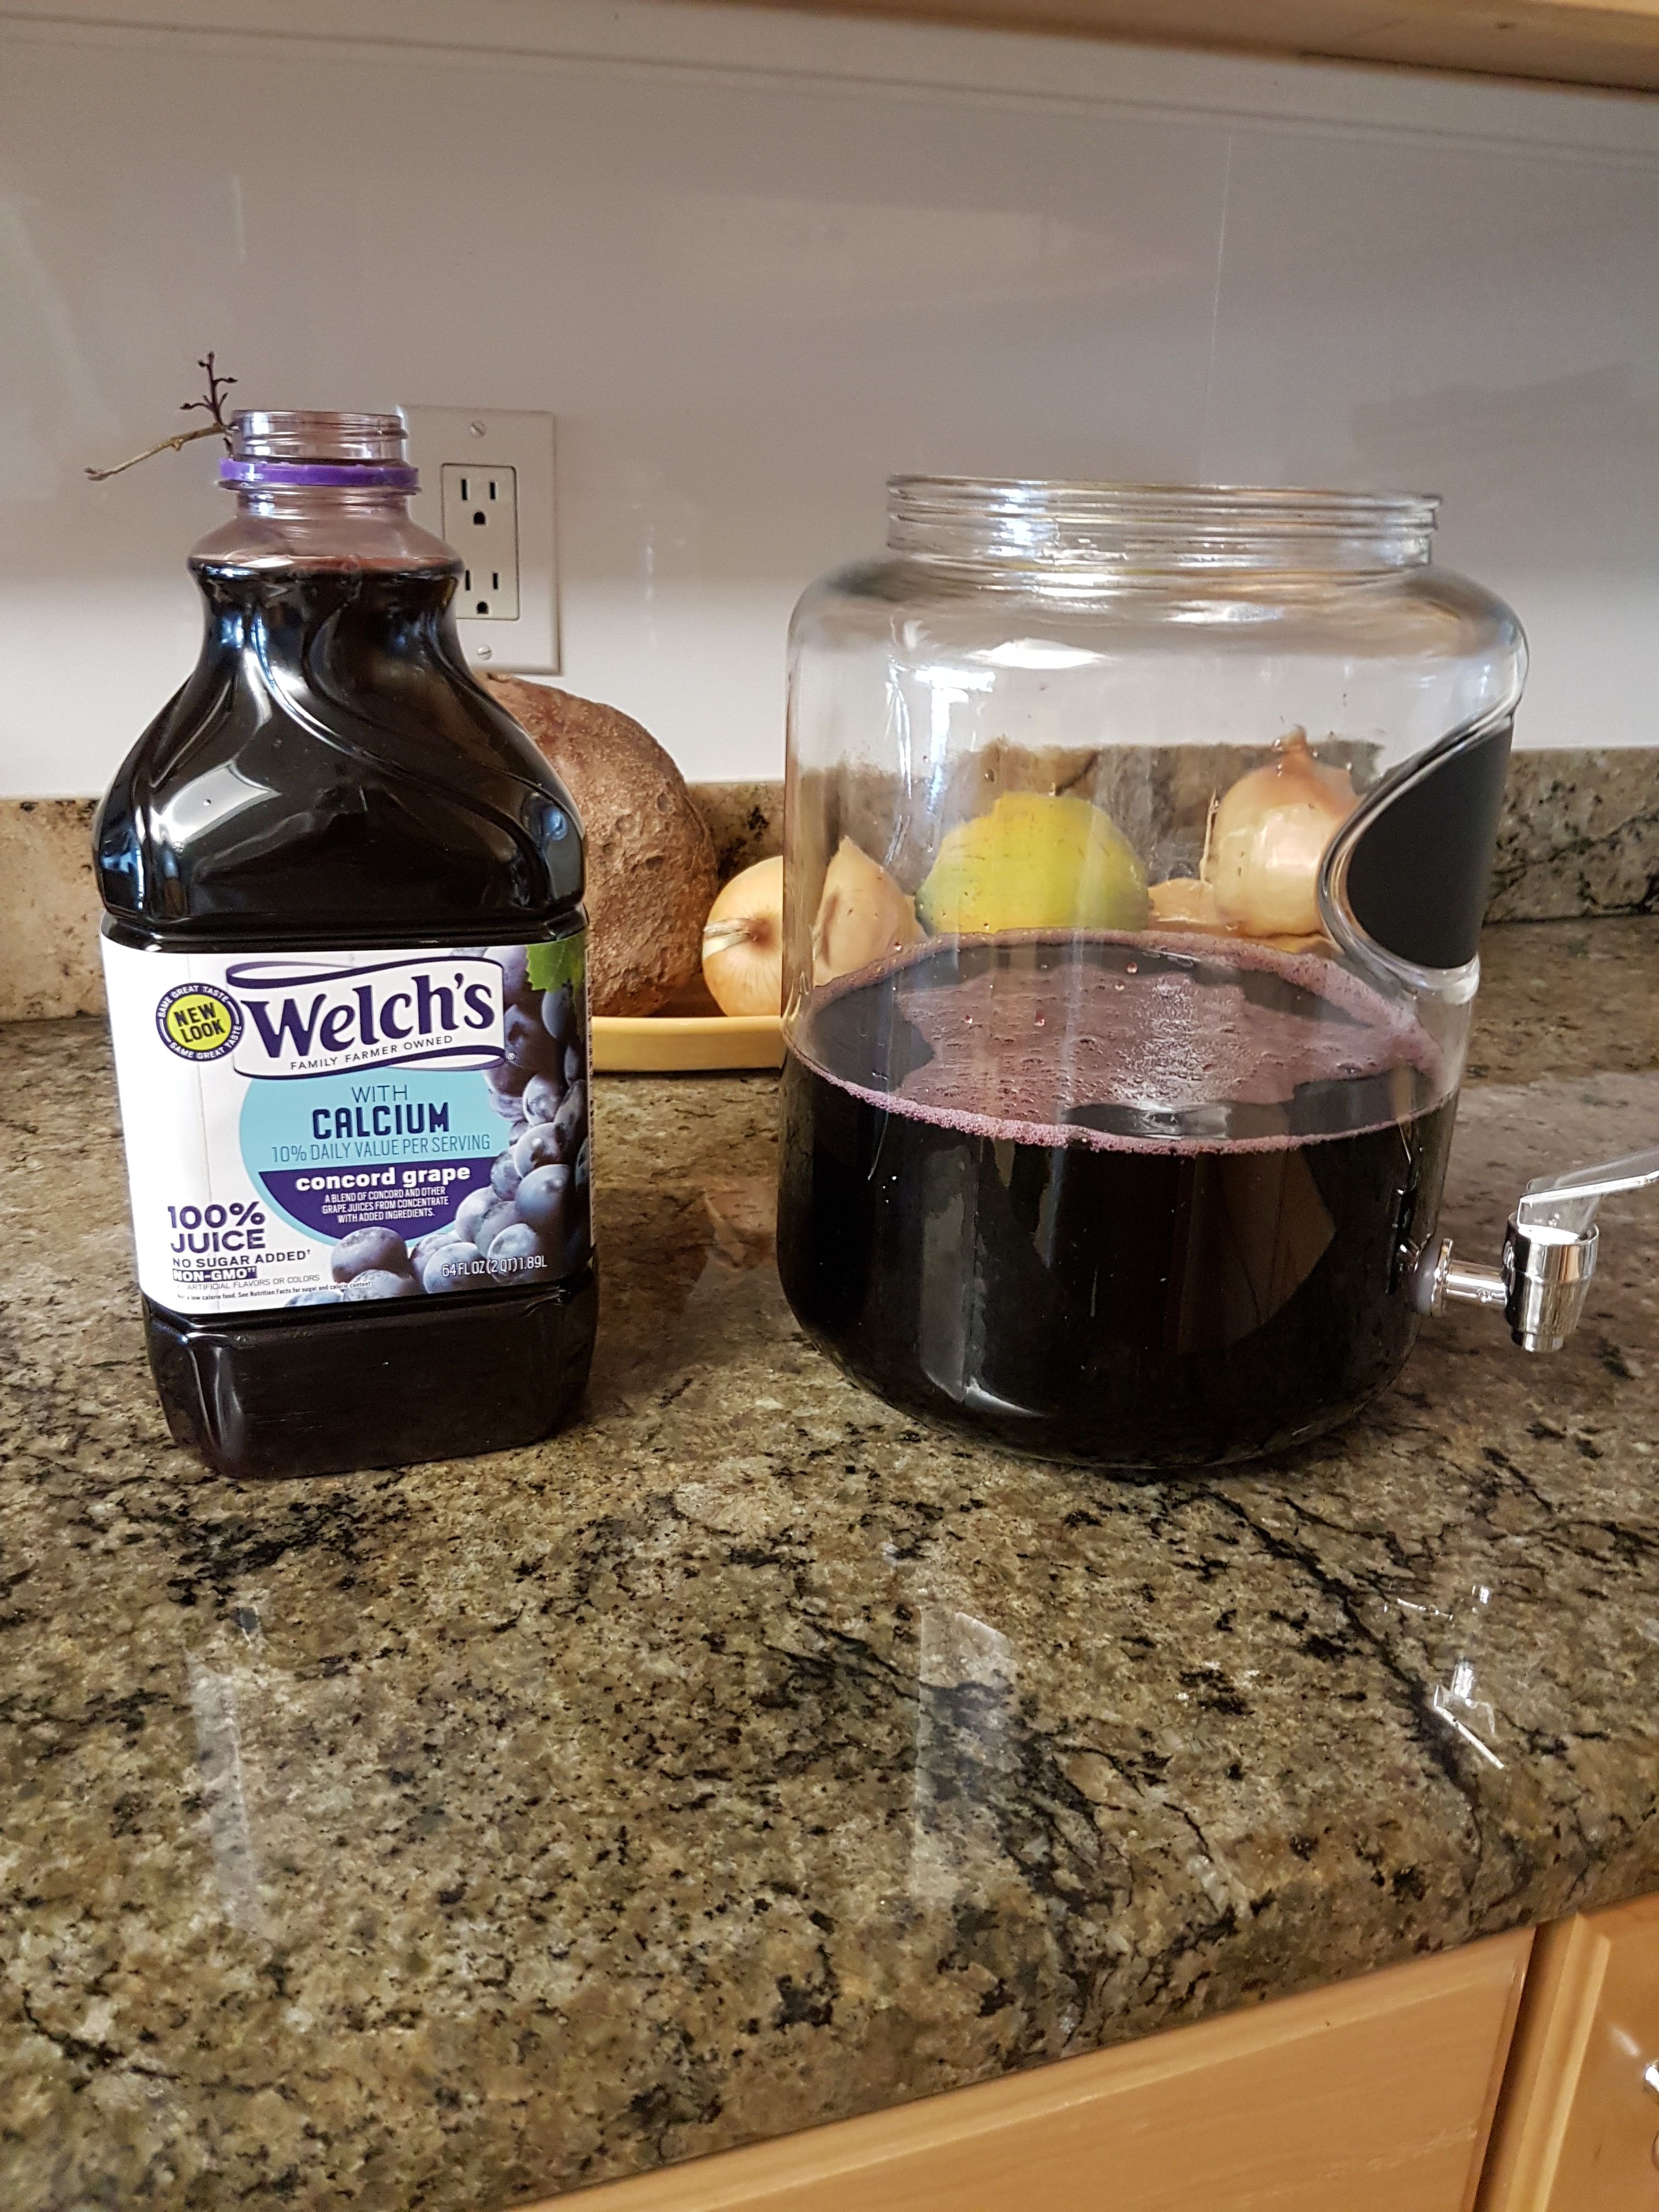
- 6 liters – Grape juice – I use Welch's Grape Juice from the grocery store. (Long pause while waiting for the laughter to subside…) It is convenient, relatively cheap (bought on sale), and 100% natural (whatever that means) with no additives that they admit to. It’s from Concord grapes and the sugar content is low. Just get over those last two facts.
- Sugar – I use 100% organic from Sam’s Club, which happens to come in 10 pound bags. That much is enough for many batches so relax.
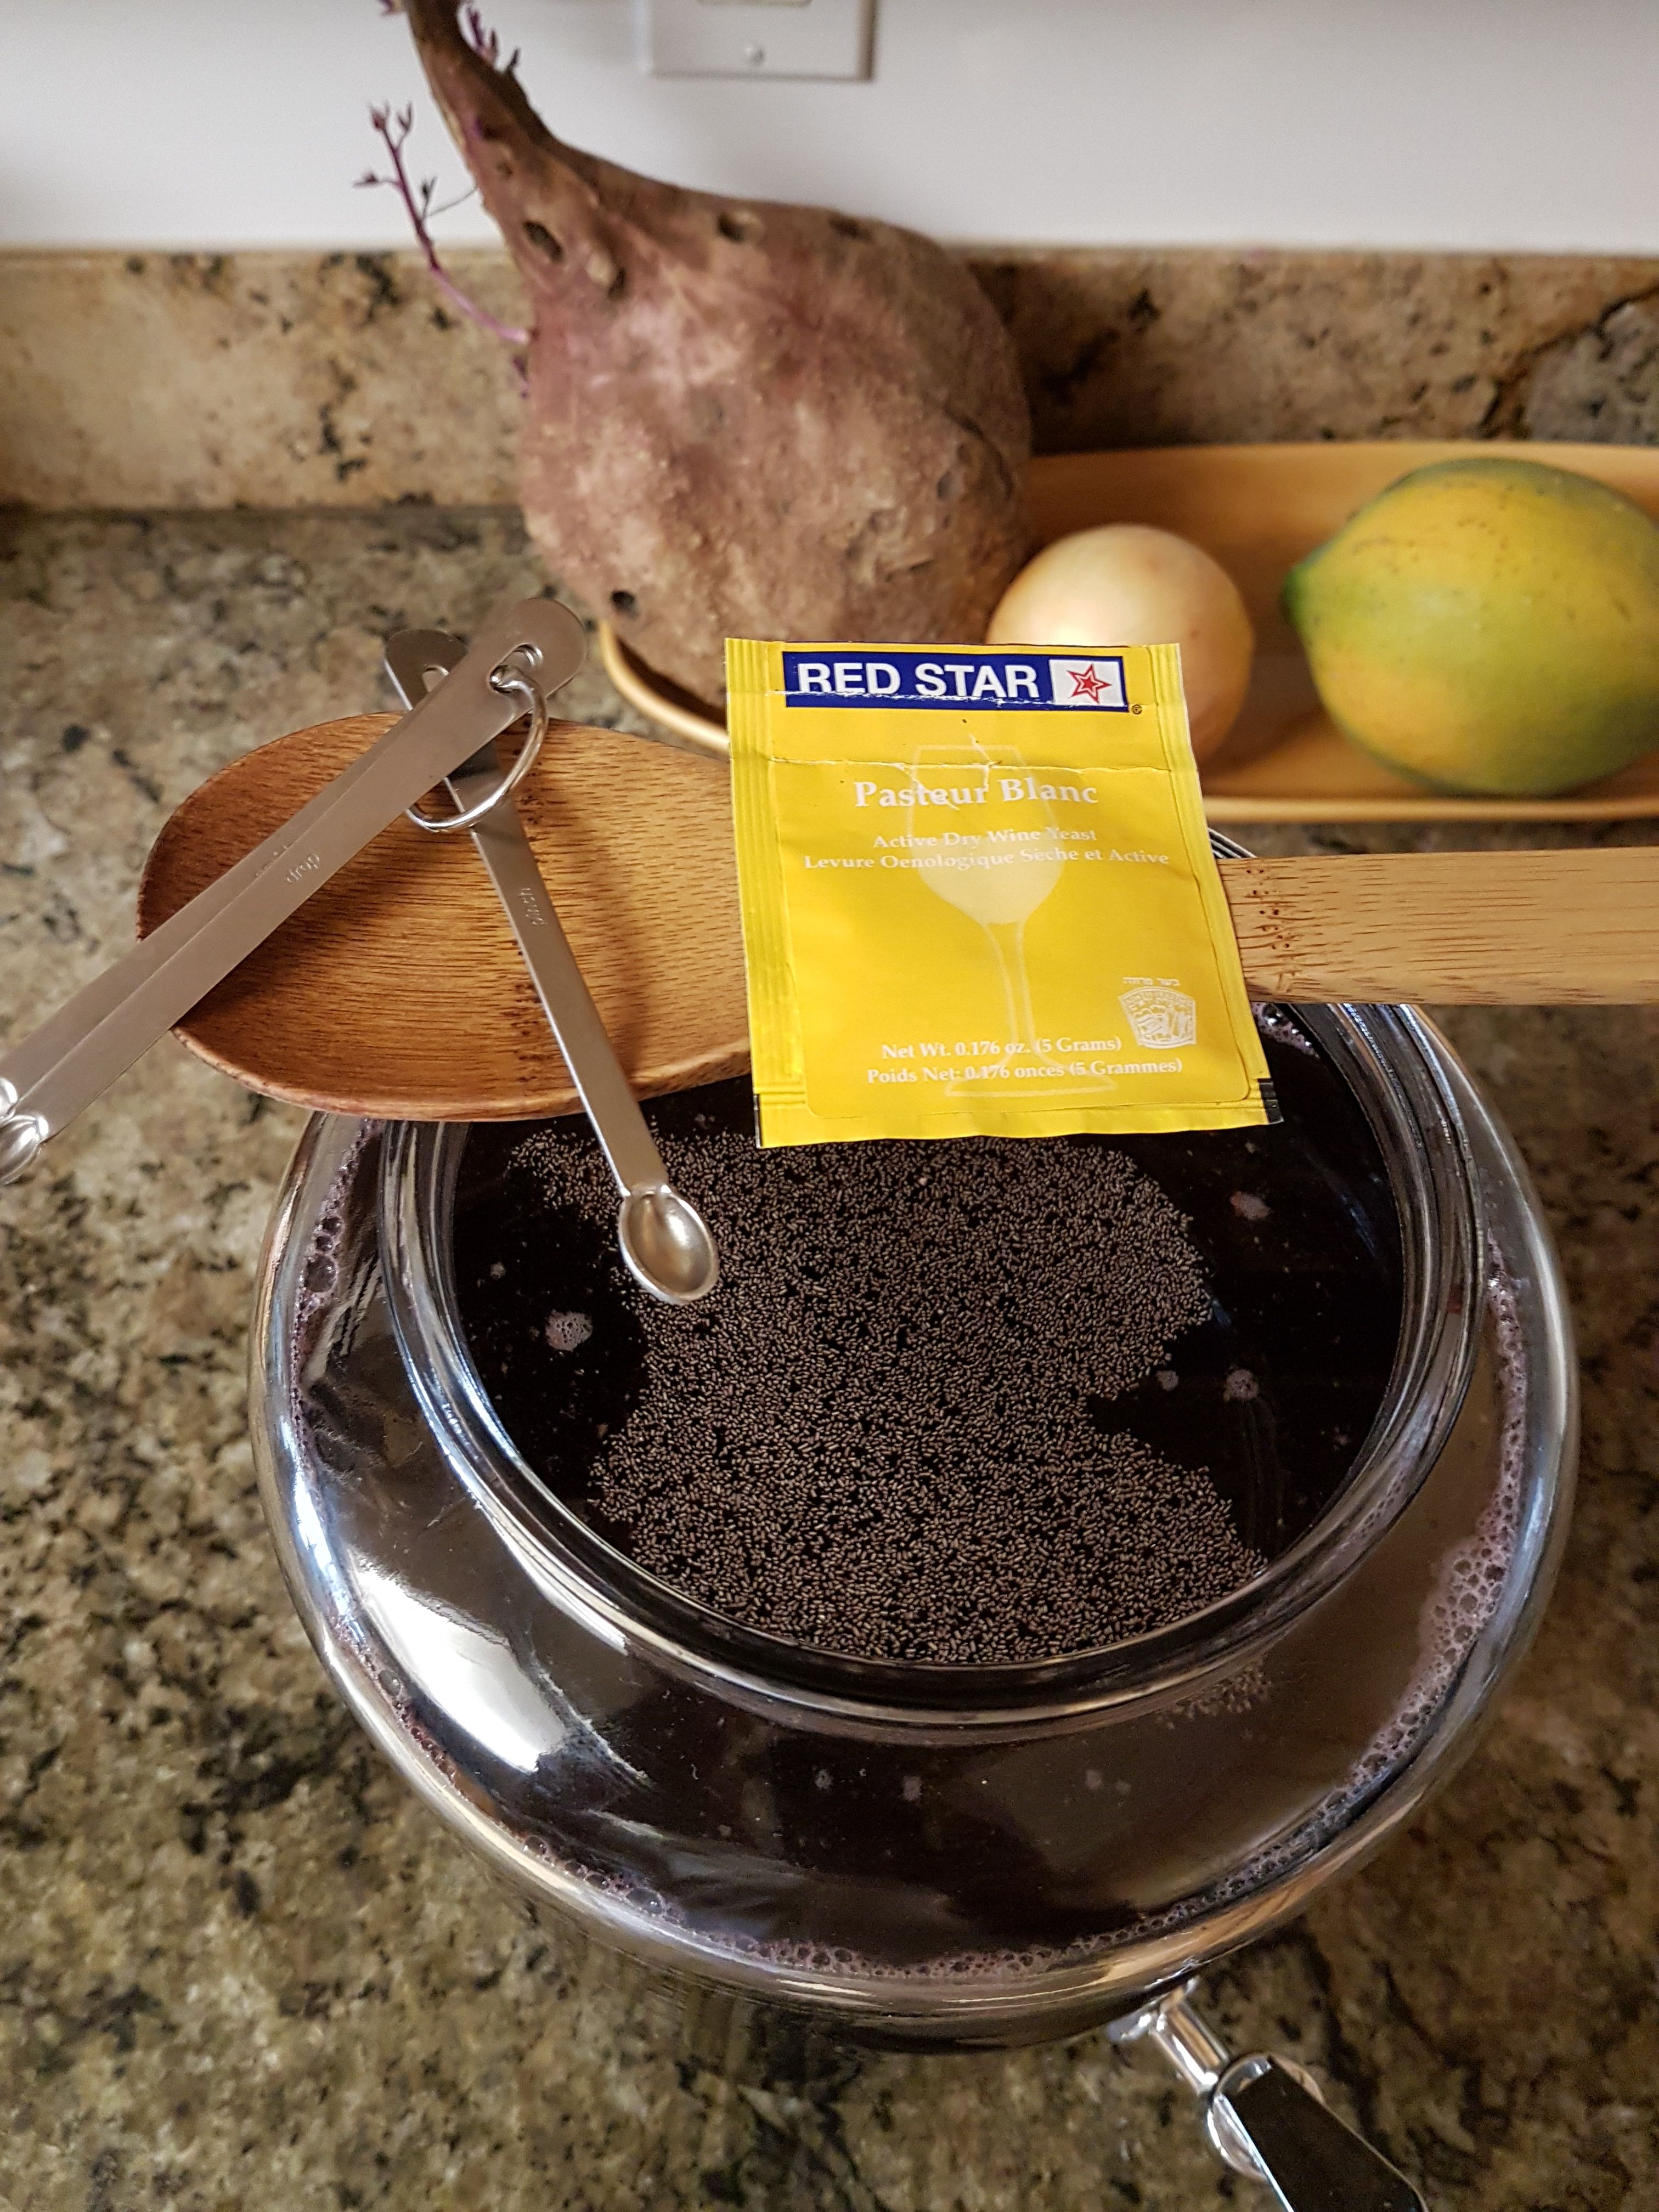
- Yeast – Wine yeast is best because it’s been developed for wine making. Alcohol kills yeasts so you need to use tough strains that can get you to 12-15% alcohol. Champaign yeasts can survive to 18% and above.
Step #2 – Mix your Stuff Together for Primary Fermentation
The fermentation process has two phases, Primary and Secondary. The primary phase is bubbly, stinks, and can over-flow your container if you fill it too full, so don’t. Depending on the temperature the primary phase will last for 3-7 days. The hotter it is the faster the process proceeds. In my 80 degree F kitchen it takes 4-5 days. Cooler kitchens will take longer.
Mixing
- Pour about 5 liters of grape juice in to your primary fermentation container
- If you bought a hydrometer you can measure the specific gravity of the juice and verify that it will only yield a final alcohol content of 3-4%.
- We solve that problem by adding extra sugar (said action of course causes the wine snobs to quake and quiver in utter disbelief)
- Add sugar to raise the alcohol potential to around 15%. (It’s just as easy to make it 15% as 11% so why not?)
- For the Welch's juice that I use this is 3 ½ cups for 6 liters of juice; you of course can make your wine any proof you want (up to the limit of your yeast) by controlling the amount of sugar.
- Your wine hydrometer will have a Potential Alcohol Scale so you can read it directly.
- Stir until ALL the sugar is dissolved

- Add yeast, about 2 pinches (1/8 teaspoon)
- I add a relatively small amount of yeast compared to the amounts recommended by some because I’m cheap and I want a slower primary fermentation for my warmer climate.
- If you live in a cooler climate you might want to add more yeast if it’s too slow in starting.
- Add more juice to fill your container to a reasonable level leaving about 2 inches for bubbles and froth.
- Cover the container with the piece of cloth and secure with the rubber band.
- Place the covered container in a quiet place where it will not have to be moved.
- Now is a good time to write down exactly what you have done to make this batch and date it. You will also record each date when you poured off the lees so leave some room.
Step #3 - Primary Fermentation and First Pouring Off the Lees
The primary fermentation is easy. Don’t do anything other than watch it.
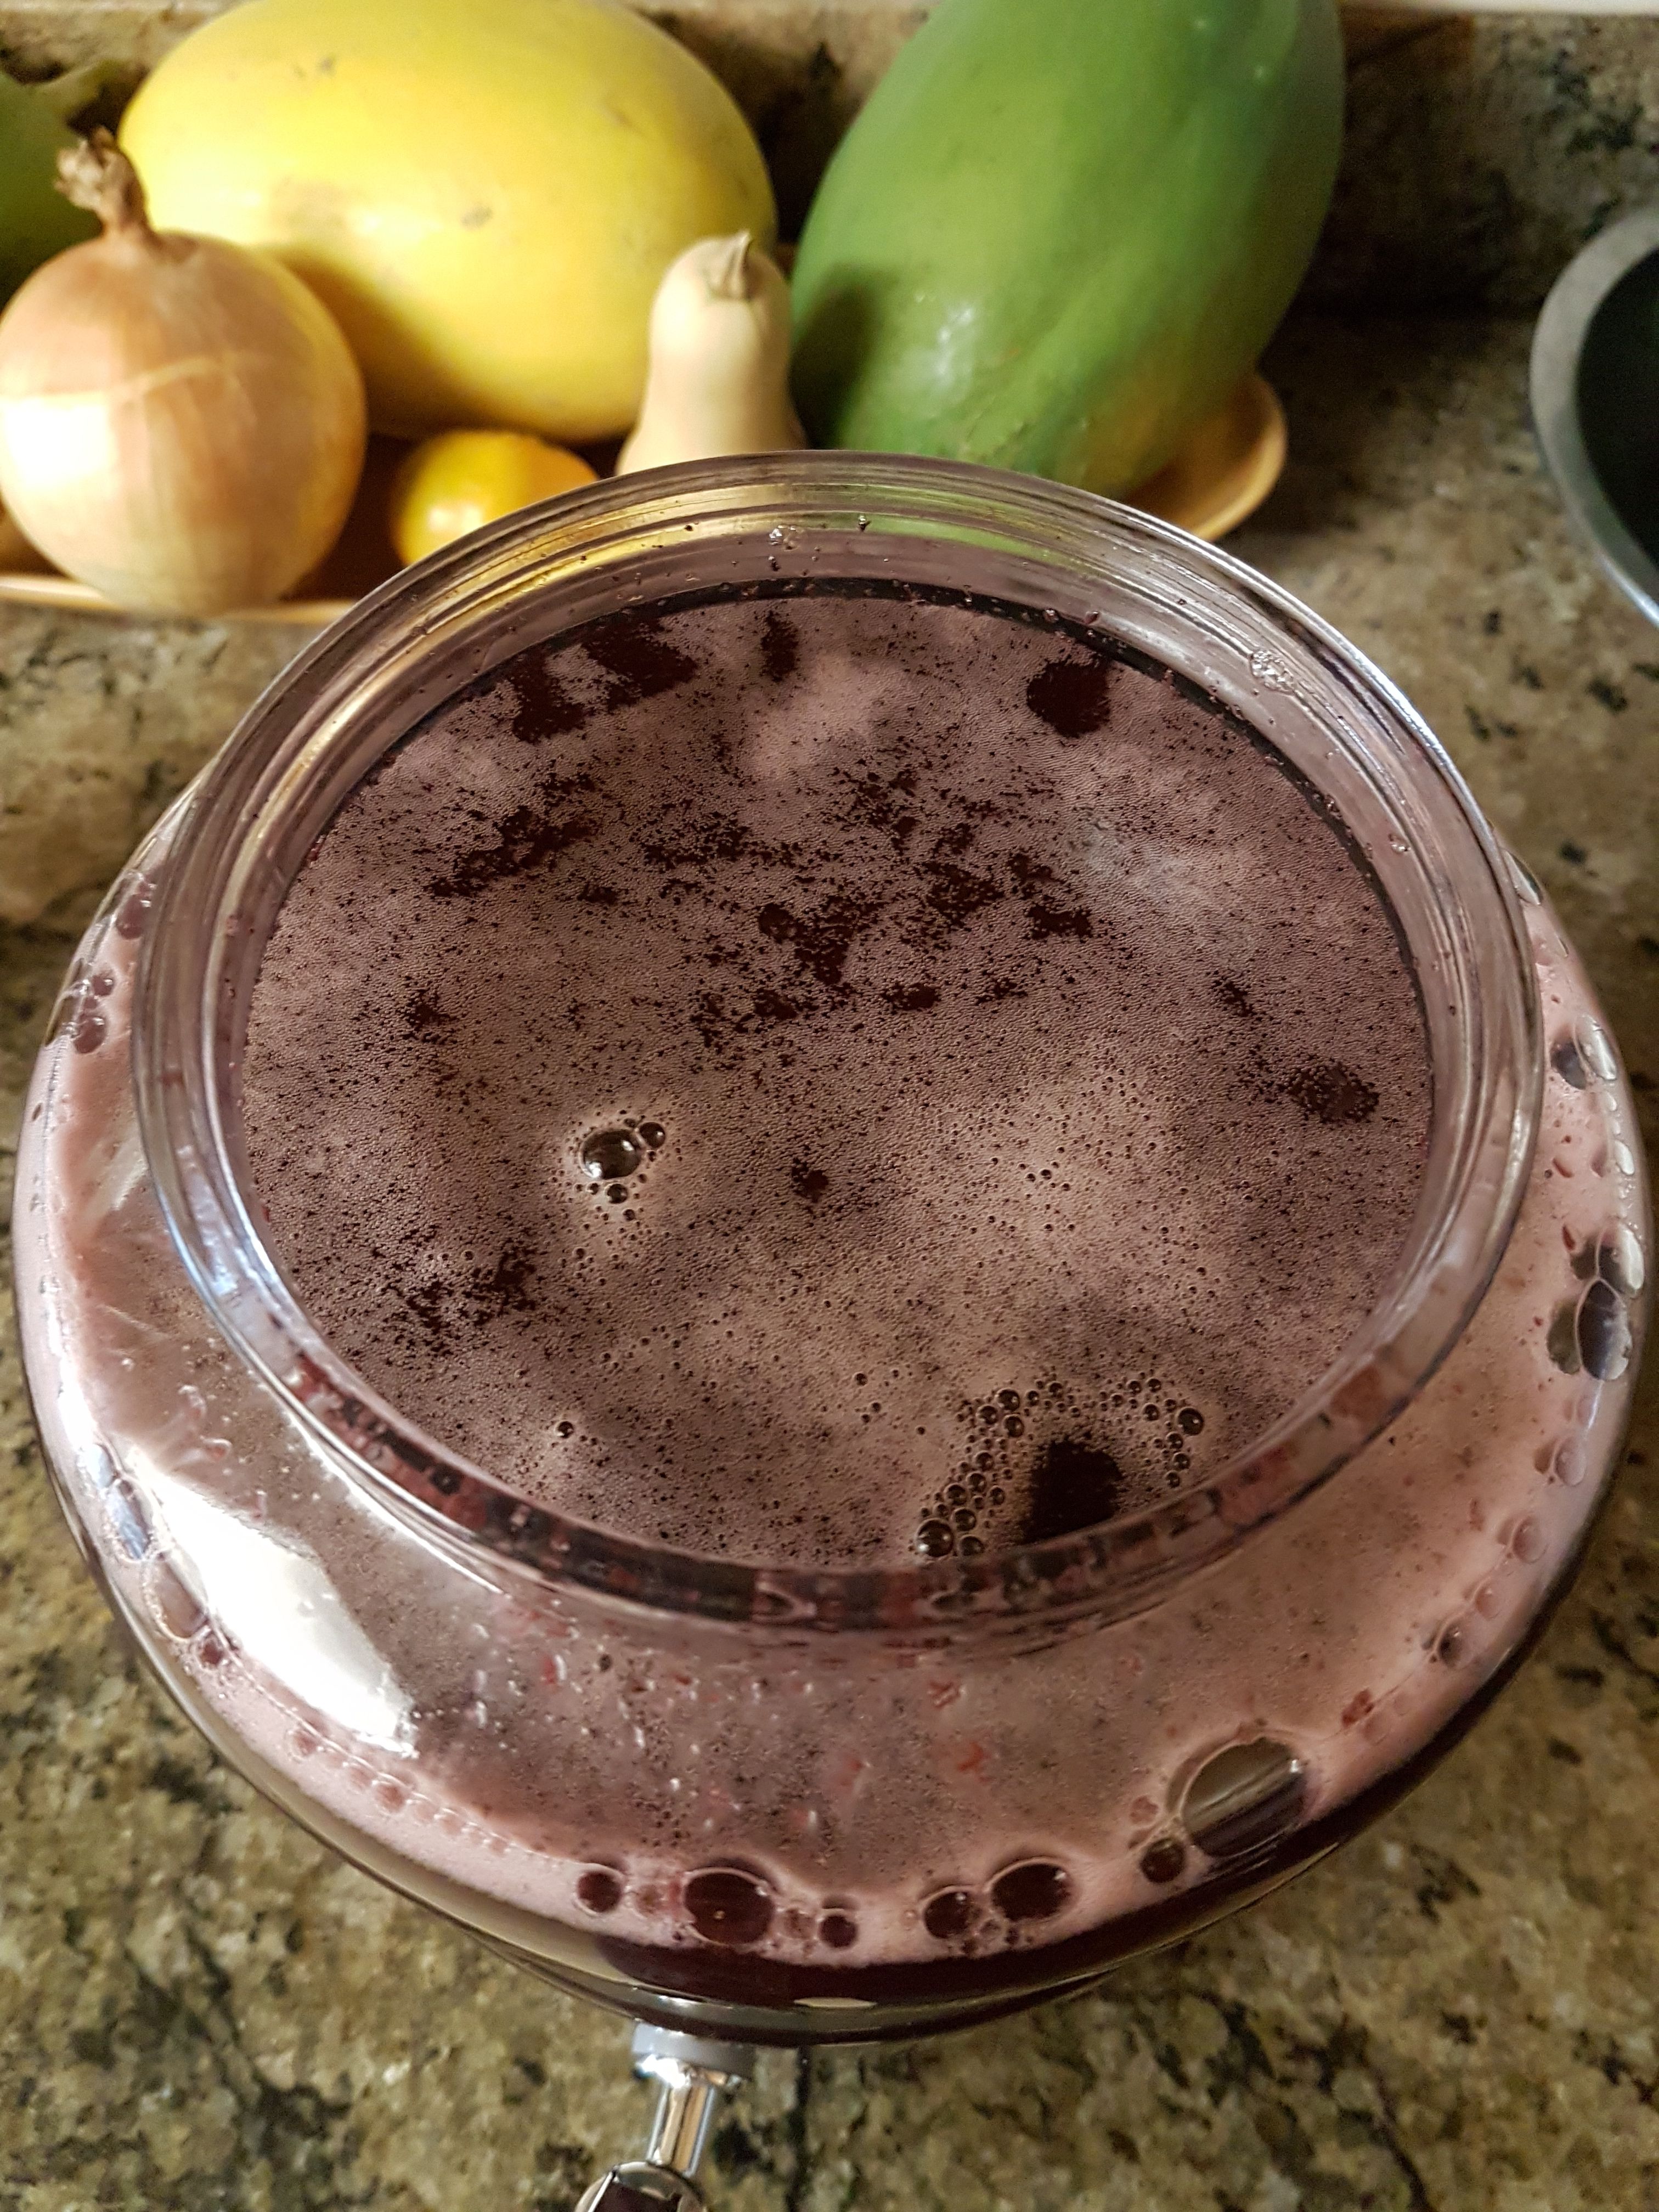
- After the first day, observe the abundance of CO2 bubbles rising in the liquid column. Take note of the quantity of bubbles as they will diminish as the process slows.
- A foamy froth will form on the surface. This is normal and desirable as it allows for a layer of CO2 to protect the ferment from oxygen and bacteria. Don’t disturb it.
- After a few days (4-8) the quantity of rising bubbles will nearly stop, or at least slow considerably, but not entirely. The froth on the top may partially disappear. At this point the primary fermentation is mostly finished.
- IMPORTANT – Watch the primary fermentation closely as it will affect the quality of your wine. If the wine is left too long after the primary fermentation stops an off flavor can be imparted. If you pour too soon your jugs might overflow.
It is now time to “pour off the lees”
- As the yeast grows and dies it settles to the bottom of the container forming the “lees.” These will impart a not so pleasant taste to the wine if they are allowed to remain too long.
- Since the lees are nicely settled on the bottom do everything to allow them to remain there. When transferring the wine into new containers DO NOT DISTURB the lees. Some people use siphons but I find that to be an extra, unnecessary step. I simply pour carefully.
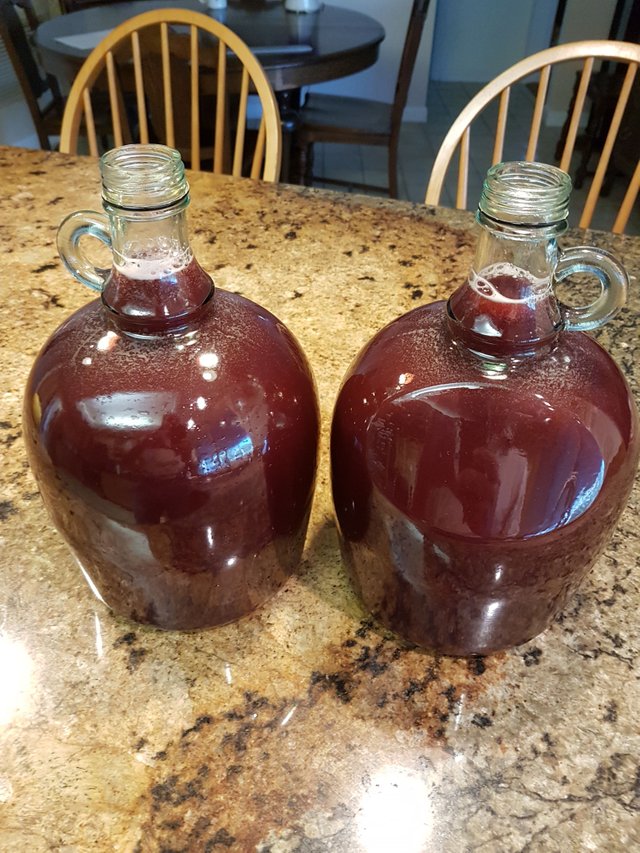
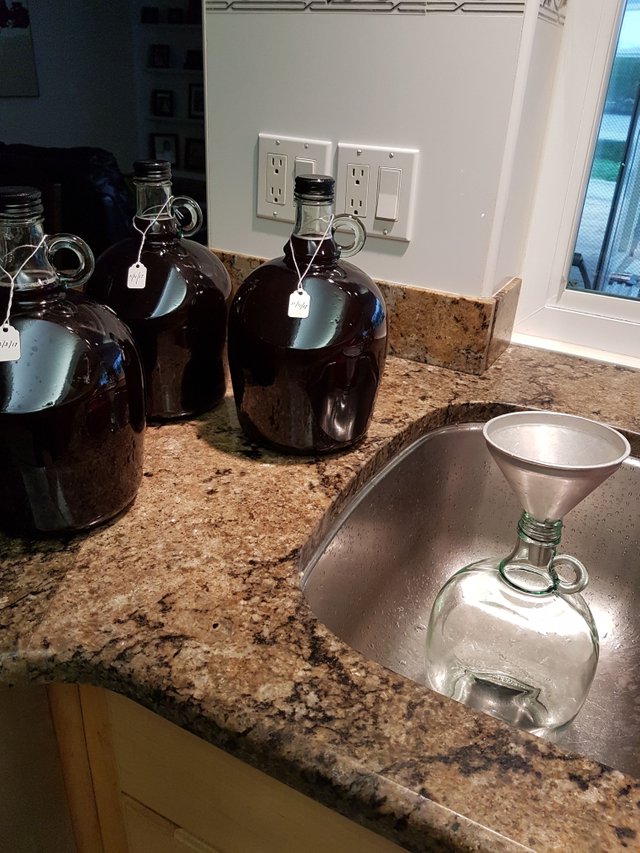
- I place my primary fermentation container on my counter and then position my secondary fermentation containers in the sink below it with a funnel in the narrower opening. I then open the spigot and transfer approx 2 ½ liters into one jug and 2 ½ into the second jug. If there is any wine left I VERY carefully pour it into the jugs making sure no lees follow into the new jugs.
Discard the lees unless you want to feed it to your worms. I don’t have worms.
You now have two, 3 liter jugs nearly full of wine. You want to minimize any air in these jugs so simply take Welch's grape juice and top off both jugs to within about an inch and a half from the top.
Replace the screw caps LOOSELY and place the jugs in a convenient place, out of the sun.
It is VERY important that the caps allow excess CO2 to escape. If not, the 3 liter jugs could explode. That would be very messy and highly undesirable. The secondary fermentation will continue and you will again see bubbles rising to the surface. This is a good thing. This will continue for several more weeks.
Notice that the “wine” is reddish, cloudy, and smells badly. As the secondary phase progresses all three of these undesirable characteristics will go away.
Step #4 – Secondary Fermentation and Pouring Off the Lees, AGAIN
With the new wine now safely in its secondary fermentation jugs somewhere out of the sun where you will not have to move them simply relax and be patient. There are a few simple things to be done.
- Misc things to do while you wait
- Make labels for each batch. Wine in identical jugs tends to all look alike. I simply write the date I made the batch and hang it around the neck of the jug.
- Confirm that the screw caps are snug, but loose. They should be just loose enough to allow any build up in pressure to escape. If you come back a day later and loosen the cap a bit and hear gas escaping it’s too tight.
- You need to watch the bubbles that should continue a week or so. Be patient.
- Also, watch for lees settling to the bottom. The new wine will gradually darken, clear and a layer of lees will form at the bottom of the jug.
- When the bubbles stop it is time to pour off the lees again.
- Watch the bottom of the jugs. When you see a buildup of sediment CAREFULLY pour into new jugs, leaving the sediment behind. This may be done several times until there is little to no sediment dropping to the bottom.
- Lees (sediment) left in the bottom will impart an off flavor to your wine.
- Lees (sediment) left in the bottom will impart an off flavor to your wine.
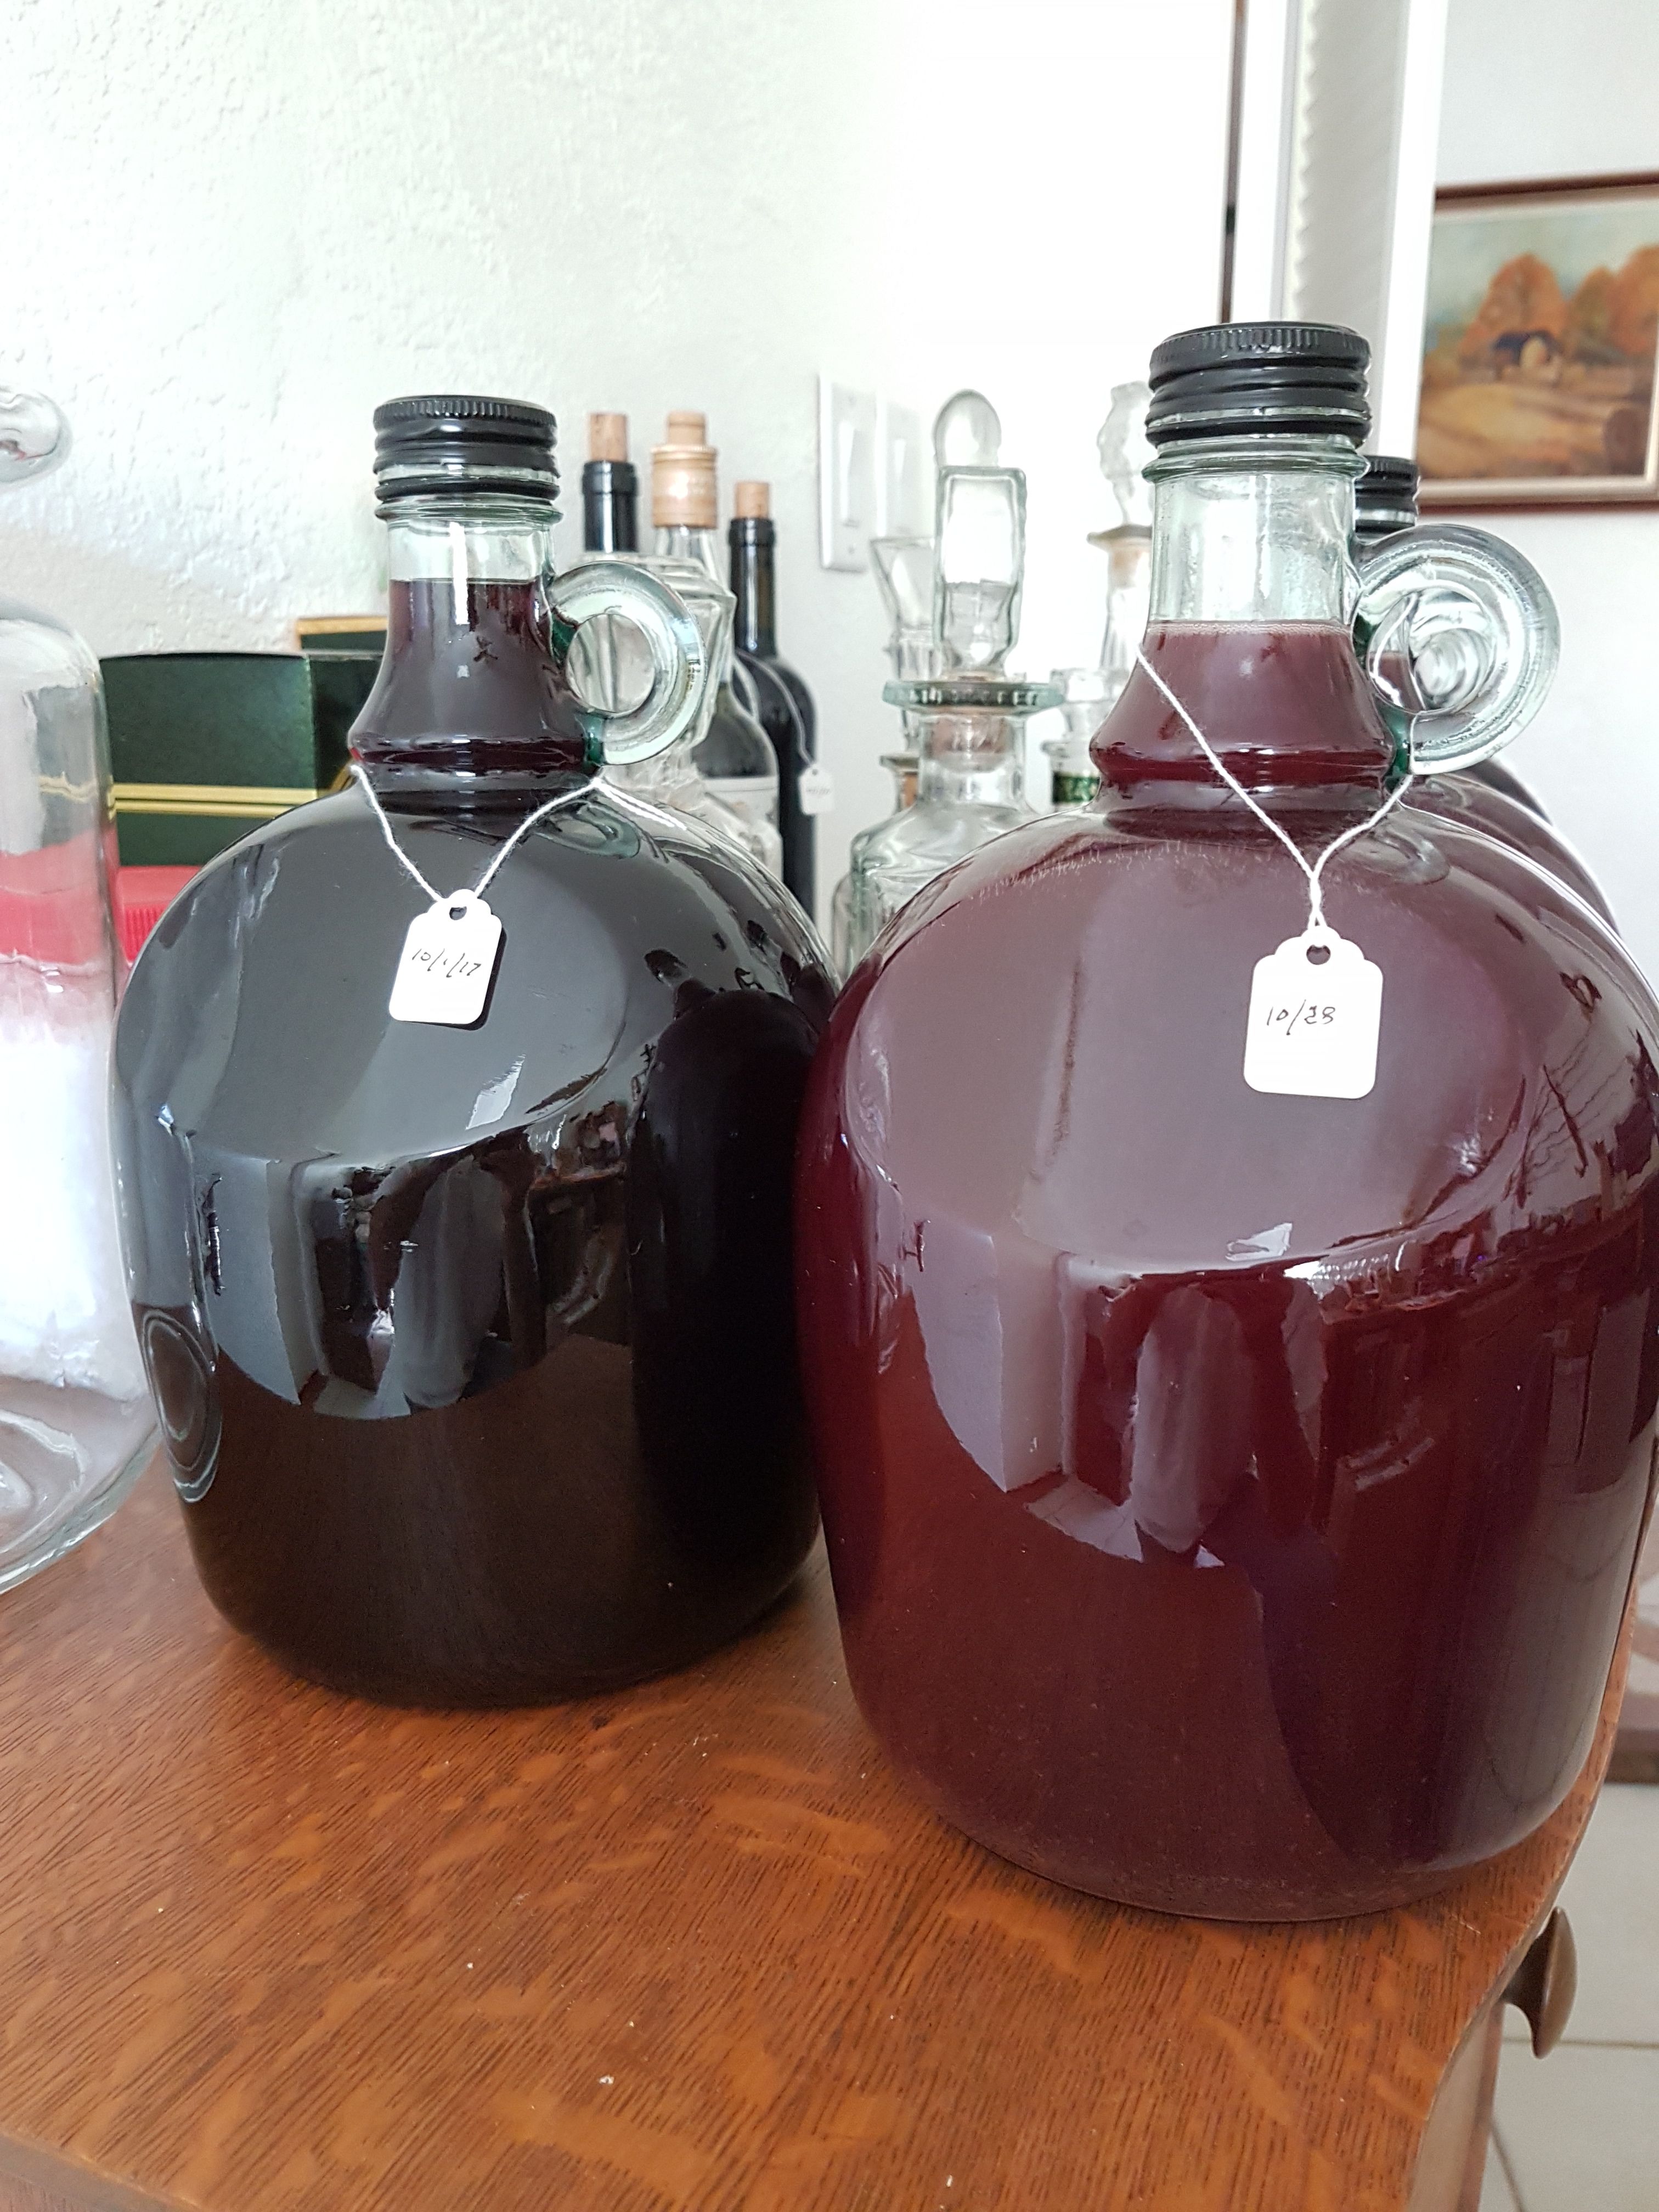
Note the darker "Young" wine on the left and the "New" wine on the right.
Step #4 – Aging Your Wine
New wine (< a month old) typically has an unpleasant taste which should improve with aging. Since this wine has absolutely NO preservatives it will oxidize or “go bad.” How quickly it goes bad is dependent on how much oxygen is present. The oxygen is present in two ways:
- Oxygen is entrained into the new wine when you pour it off the lees
- Oxygen is also present in the air that is above your wine but under the cap in the jugs.
There are techniques to minimize this oxygen if you want to age your wine for a longer period of time. In the name of keeping it simple I have not (yet) employed any of these techniques. In principle just minimize any contact that your wine has with the air.
Currently I start drinking the wine after it is at least two months old. Since I drink at a constant rate the only way to increase the aging time is to increase the number of jugs that I have available to store it in. That means that I have to buy more commercial wine to get the jugs. That means I have WAY TOO MUCH wine to drink, but I’m working on it! I’ll continue just as soon as I get the results back from liver enzyme test (just kidding).
Jugs of wine ready to be poured from off their lees into a new jug
The overall results so far are very promising. I can make a drinkable dinner wine for about half of what I can buy it for; about US $6 per 3 liter jug. I haven’t had any batch oxidize yet. There is still a lack of consistency in the taste. This is most likely related to the time it spends on the lees and/or how long it has aged. It tastes like a dry Concord grape wine. I find it pairs well with whatever I happen to be eating for supper, but then I’m not real picky.
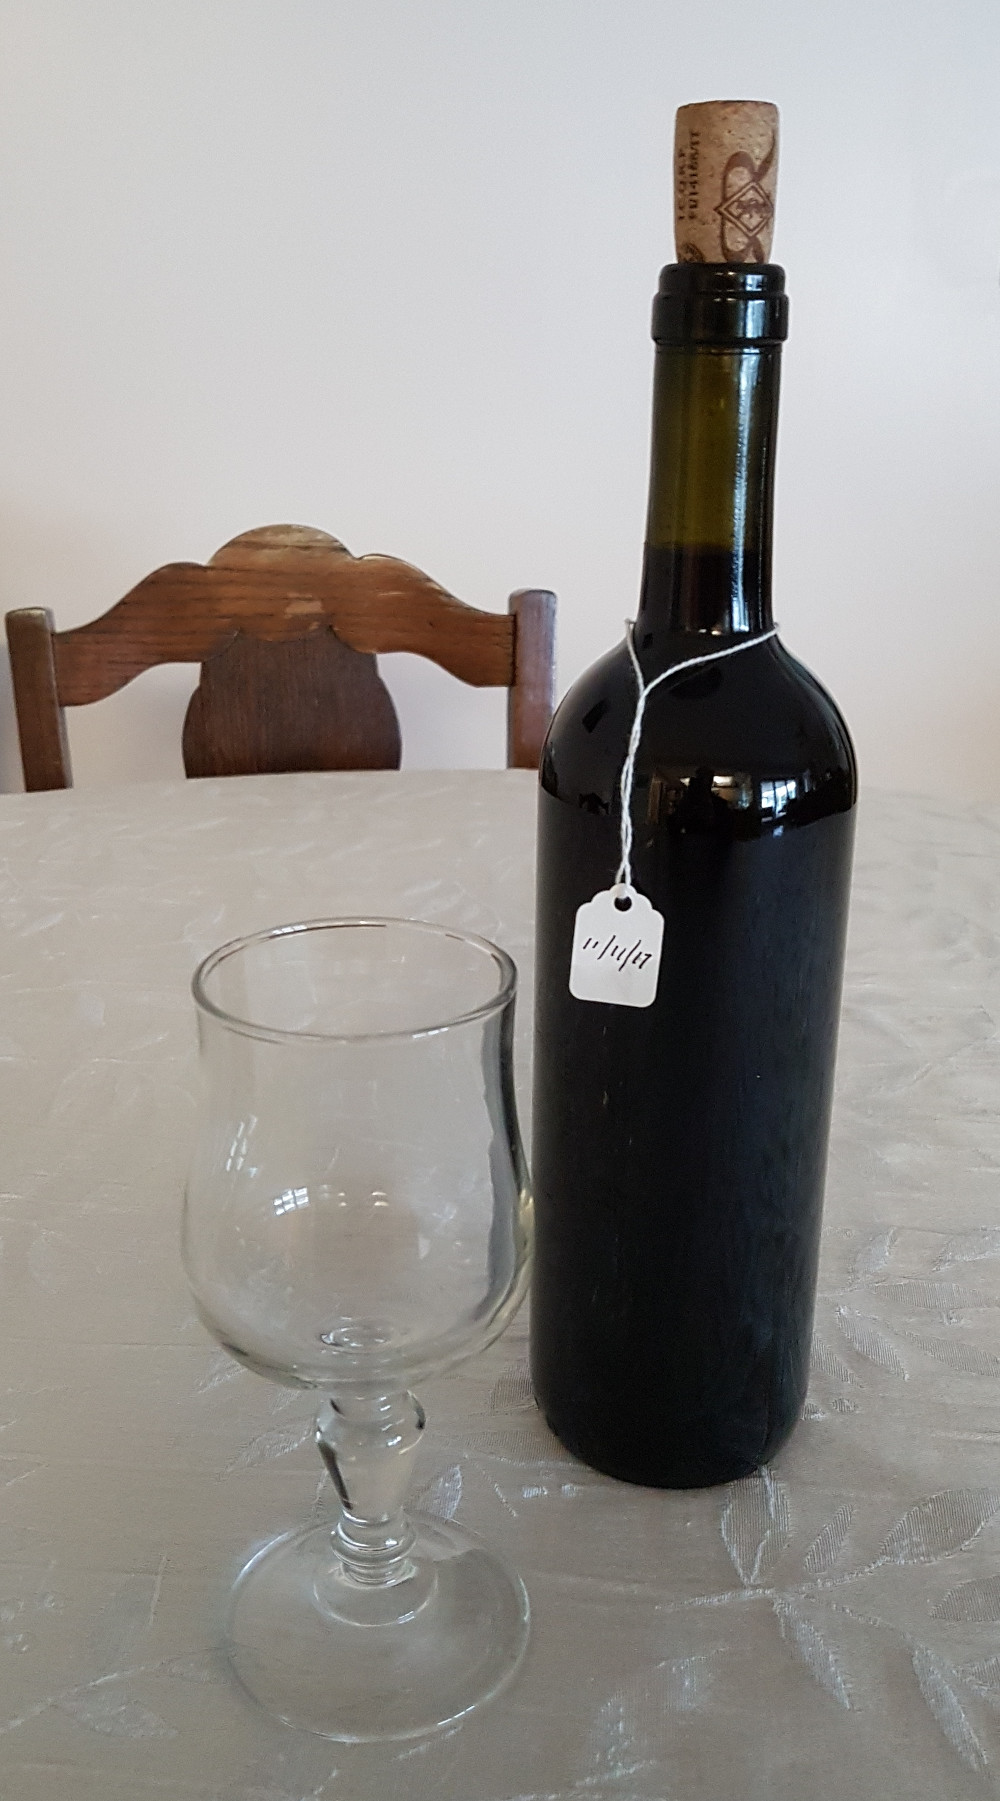
Another test that I’m running is long term aging in 750ML wine bottles. I put aside one bottle from each batch. My oldest so far is 13 JUL 17. I’ll probably try it at six months, which is coming up soon. I let the next oldest age for seven months. Hopefully I can see a significant improvement in taste the older it becomes.
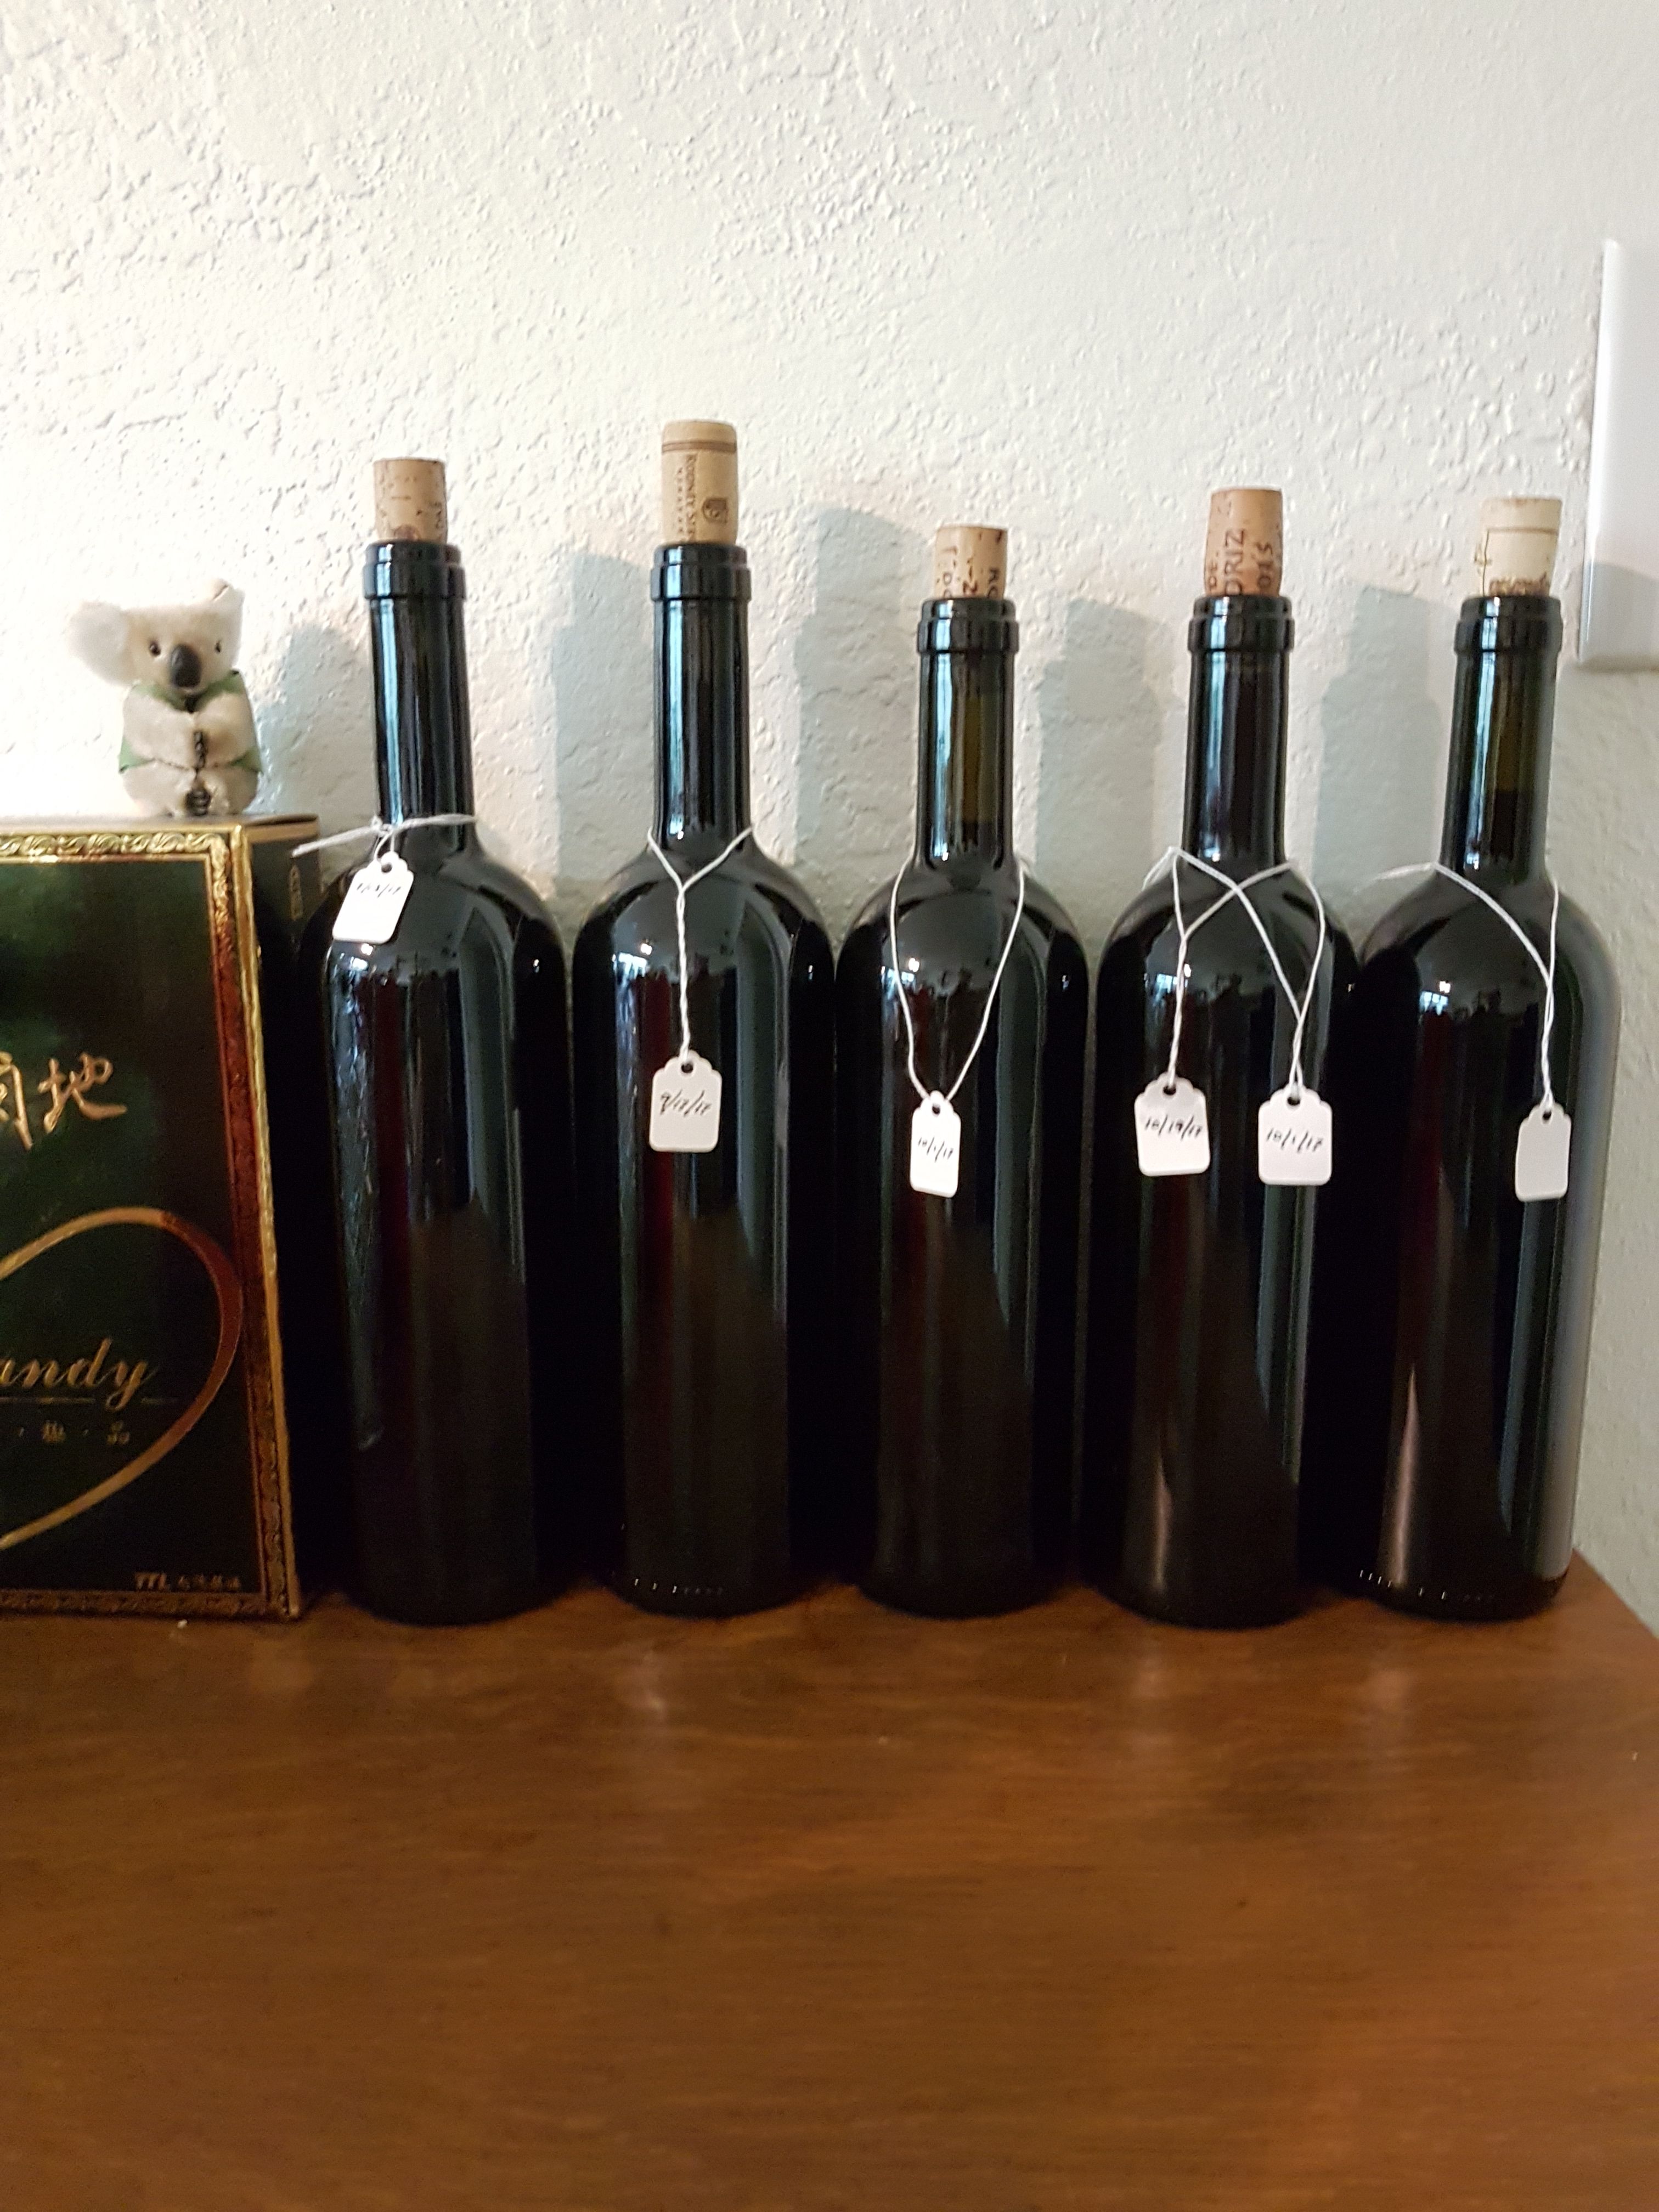
Bottles of wine from each batch to test longer aging.
This is a work in progress so as I learn more I’ll report back.
@mangosinspace - this is for you!
Great tutorial! Super into making home brews. Planted a vineyard out this year so wait a few years and make wine :D! My main reasons too are the nasty sulphites and whatever else they put in there! Oh yeah and cheaper :)!Homemade can be good- unless the phenols take over. Have had that happen a lot. Need to work on sanitization lol
My limited understanding of phenols is that there's a LOT of them and they mostly come from HOW the grapes are processed into juice. Since Welches takes care of that for me I don't know if it's a problem. The wine tastes pretty good but it's a table wine so I'm not too demanding of it!
If you press your own grapes it would be something you'd want to experiment with I'm sure.
What variety of grapes did you plant?
Not too demanding is a good trait to have! Our phenols were present perhaps on equipment the we brew with. We've used sugar and/or malt with various Herbs to create unique brews, but still end up with strange off taste. I think we'll go get some commercial sanitizer. Hydrogen peroxide and even bleach don't cut it.
We planted Norton and Chamborcin from a clean grape program offered through a local university.
I'll be interested in how things progress. Keep me posted plz.
I almost bought the bottled grape juice myself!! I think next time I will; as right now grapes are premium priced at $3 a pop
Make sure you like Concord grape juice flavour ;-)
My wine is quite dry so that helps a lot. Too sweet and it becomes an acquired taste!
GREAT advice! While not much a drinker here, I believe I would prefer a sweeter (smoother) taste versus the dry. Thank you!
Resteemed! Thanks so much for the tutorial it answered alot of my questions. Do wine bottle use cork tops to allow co2 to escape?
I made a pineapple bomb a few days ago. I was experimenting with a yeast ferment of a pineapple with a culture someone gave me from chicha (Columbian alcohol ferment of sugar cane) I put a cap on it for two hours while we moved locations. When I tried to remove the cap it started to overflow like a soda. Eventually the cap exploded out of my hand from co2 pressure. The pineapple hit the ceiling and across the room and we were covered in our fermented pineapple bomb
You might be a redneck if...
...you make cheap wine