Building the Butchershop Part 1

In 2008 when we decided to raise as much of our own food as possible, we started checking into getting the animals butchered. One of the very first things we heard over and over was how various farmers were sure they had not gotten either all their meat back or had not gotten their OWN meat back, or both.
As we were going to be raising as clean food as we could, and it was going to take every ounce of energy we had to do it, either one of these scenarios was very worrying.

Half finished layer coop
Then we checked into the cost of having it done. WHOA! It was at that point we decided to do it all ourselves. The first year we ran out of time and money, mostly because we had a (sort of) unplanned chicken coop to build in October, when we were supposed to be building the butchershop.
Once the coop and run was done and the layers installed, we started on the butchershop. It was to be built in what had been the tackroom back when we were a retirement boarding stable. It had a large bay window built with a very old copper clad window my husband had saved from the scrappers.

We had found 2 remnants at a flooring store pretty cheap. One was for the coop floor, the other for the butchershop floor.

For the walls and ceiling we decided to try whiteboard as it was washable. We hoped it would fit tightly enough to be able to keep the room clean. But we had temporarily forgotten that the 150 year old tobacco shed was anything but square.
We ran the flooring up the walls about 8” all the way around, except where the door was. The whiteboard was installed over it. (Note ladder on cardboard to prevent puncturing the flooring.)
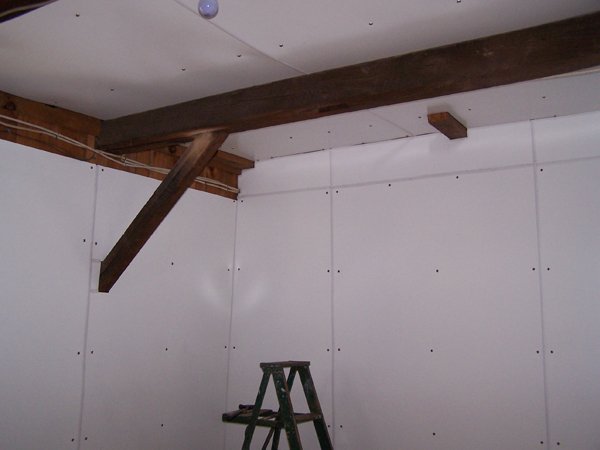
We had to fit the whiteboard around the beams for the ceiling, the wiring, and the barrel supports for the walls.


In 2008 we had enough money to do the immediate area we would be working in and the floor.

I insisted that the portable island I would work at was built higher than the standard counter. As I am tall, bending over a counter to work for hours kills my back. I covered the front of the shelving and island with vinyl shower curtains as they would be very washable and were cheap.
As this room would only be used a few times a year, I tried to utilize the dead space in such a way it could be cleaned or kept clean.

We purchased a cheap meatsaw. It came with a #32 meat grinder that could be hooked to a motor.

The countertops were from our kitchen renovations over the decades.

The hooks in the beam are where we hung to meat to dry age the first 2 years.

We found the sink at the curb at a tagsale for free. We grabbed it and took it to a nearby friend’s until we could come back with the truck for it.

I also had him raise the sink where I would be spending hours washing chicken carcasses.
These Civil Defense water storage cans have been in steady use for decades. My husband rescued them from the scrappers also. We would move them when we used the sink and put 5 gallon buckets under the drain.
Hot water was heated outside in the scalder for cleaning. I brought it into the shop in huge bowls. A hose from the frost proof hydrant by the layer coop provided cold water.
So that was the finished part of the butchershop the first year. The following photos show the rest of it.

The bay window with the barn cat Debbie, our steer for 2009 Red Sox Wave scratching her neck on the tub, and on the right the new layer pen.


Above 2 photos: The chick brooder and a storage cabinet overhead.

The area by the door and the chicken moving box storage overhead.
So this was what we had for the first 2 butchering seasons. Then money came in and we set about finishing the butchershop. That will be Part 2:
https://steemit.com/homesteading/@goldenoakfarm/building-the-butchershop-part-2
upvote for me please? https://steemit.com/news/@bible.com/2sysip
You did an awesome job on your butcher shop! We don't see any reason for using a custom butchering either. It is extremely expensive here if you can find someone who won't cheat you! We have been fortunate and have been able to do our own, but your set up makes me drool...Nice job!
Just remember it's not finished in that post. Tomorrow I'll post the finishing part...
I am pretty impressed already. I can't wait to see the finished room!
Ooo that a fun to read, eventually i'd like to have the space to have livestock but that is currently in the distant future. Thanks for sharing and I'm looking forward to part two.
CONGRATULATIONS!!
Your post is featured in my Preppers' Curation Day- Weekly Edition 18 post!!
ALL PROCEEDS from this post are EQUALLY divided between the three featured authors' posts.
Thanks for featuring me! Hopefully there will be part 2 tomorrow...
Looks like you're living the dream, great post!