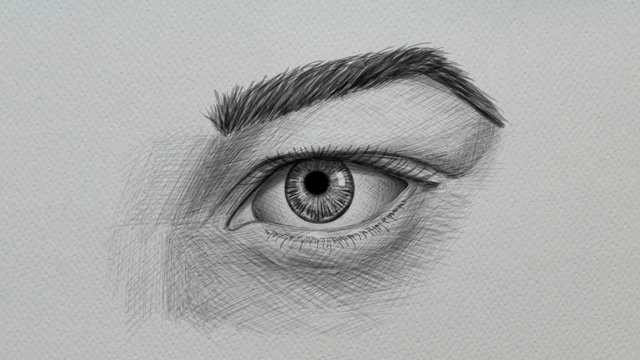
The human head - eye study, front view / La cabeza humana - estudio del ojo, vista frontal (#club100)
Hi friends!
So this time we will take care of studying the main components and general features that an eye has and which we must keep in mind to draw it correctly, regardless of the style that our drawing may have or the type of eye in question.
No hay una sola forma de dibujar los ojos, así como no hay un solo tipo de ojo. Si consideramos que los ojos son diferentes según el sexo, la raza o la edad, y además se ven diferentes en cada persona según el estado de ánimo, salud, cansancio o energía que tenga, etc. podemos concluir que las posibilidades son casi infinito.
Por lo que en esta ocasión nos ocuparemos de estudiar los principales componentes y rasgos generales que tiene un ojo y que debemos tener en cuenta para dibujarlo correctamente, sin importar el estilo que pueda tener nuestro dibujo o el tipo de ojo del que se trate.
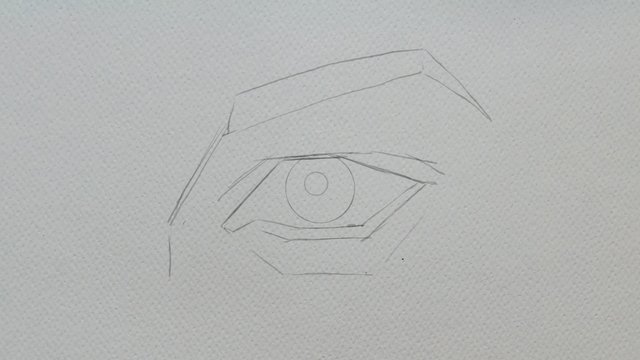
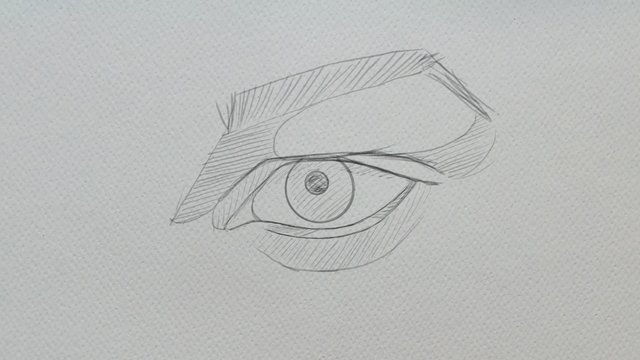
First, we will make a sketch of the eye, observing the separation of the eyelids, the height of the iris, and the direction of the gaze.
In this case, the iris is slightly above the centre and also slightly to the left, also note that the pupil of the eye is not in the geometric centre of the iris but also decentered, upwards and slightly to the left, that is, this eye is not "looking" at the viewer, this eye looks slightly upwards.
Notice that I have made the sketching of the components of the eye with straight lines. As I have explained before, this drawing technique facilitates the location and proportion of the elements of our drawing. Once our drawing is presented in this way, we will proceed to round the lines where necessary.
Primero haremos un boceto del ojo, observando la separación de los párpados, la altura del iris y la dirección de la mirada.
En este caso, el iris está ligeramente por encima del centro y también ligeramente hacia la izquierda, fíjate también que la pupila del ojo no está en el centro geométrico del iris sino también descentrada, hacia arriba y ligeramente hacia la izquierda, es decir, esta el ojo no está "mirando" al espectador, este ojo mira ligeramente hacia arriba.
Fíjate que he hecho el bosquejo de los componentes del ojo con líneas rectas. Como he explicado antes, esta técnica de dibujo facilita la ubicación y proporción de los elementos de nuestro dibujo. Una vez presentado nuestro dibujo de esta forma, procederemos a redondear las líneas donde sea necesario.
Think that the eye is a sphere covered by the eyelids as I show you in the image below.
Piensa que el ojo es una esfera cubierta por los párpados como te muestro en la imagen de abajo.

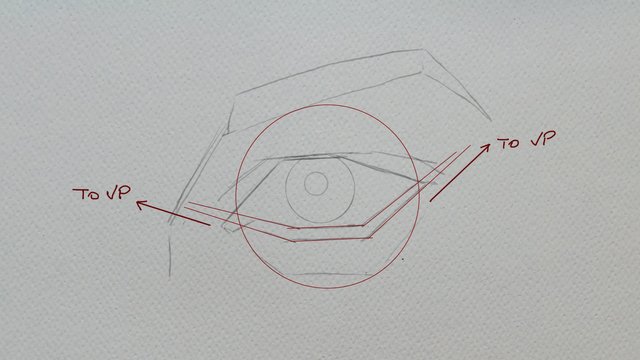
See the lower eyelid, the front part, it is wider than on the sides. Why?... because of perspective, once again... perspective is omnipresent.
Do not forget that the eyelids surround the eyeball.
Mira el párpado inferior, la parte frontal, es más ancho que en los lados. ¿Por qué?... por la perspectiva, una vez más... la perspectiva es omnipresente.
No olvides que los párpados rodean el globo ocular.
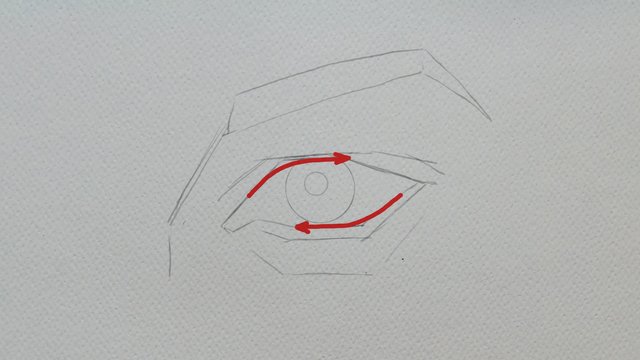
When proceeding to draw the curved lines, it is important to take into account the antagonism of the curvature of the eyelids. On the upper eyelid, there is a curvature on the inner side (the side of the nose) and the curvature on the lower eyelid is in the opposite direction.
Al proceder a dibujar las líneas curvas, es importante tener en cuenta el antagonismo de la curvatura de los párpados. En el párpado superior, hay una curvatura en el lado interno (el lado de la nariz) y la curvatura en el párpado inferior es en dirección opuesta.
We'll define now the dark areas of our eye as follow.
We'll define now the dark areas of our eye as follow.
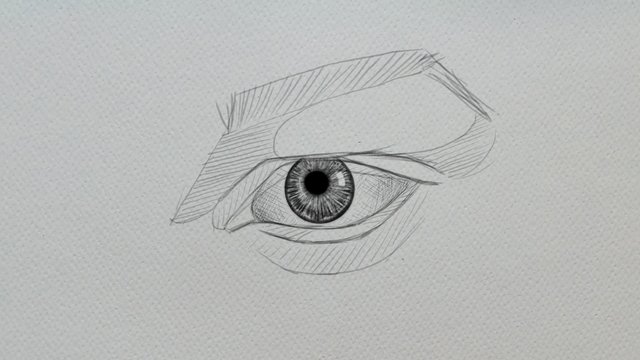
Beginning by drawing the iris we must consider that in this case a small part of it is covered by the upper eyelid, the pupil is round and black and its edge must be blurred, this is because the pupil is a hole.
We draw the features of the iris with radial concentric lines towards the pupil.
Leave a few small white circles or squares that indicate the presence of light and give volume to the iris. Remember that it is like a crystal that reflects the light source.
Comenzando por dibujar el iris debemos considerar que en este caso una pequeña parte del mismo está cubierta por el párpado superior, la pupila es redonda y negra y su borde debe estar difuminado, esto se debe a que la pupila es un agujero.
Dibujamos las facciones del iris con líneas concéntricas radiales hacia la pupila.
Deja unos pequeños círculos o cuadrados blancos que indiquen la presencia de luz y den volumen al iris. Recuerda que es como un cristal que refleja la fuente de luz.
Shadows, the upper eyelid projects shadow on the eyeball.
Sombras, el párpado superior proyecta sombra sobre el globo ocular.
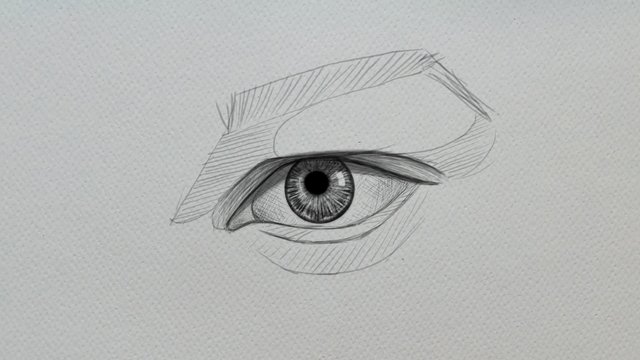
We continue with the shadows of our drawing of the eye, which will give it volume, we must consider that the eyeball is a sphere and that it is not white, so draw the shadows accordingly.
Seguimos con las sombras de nuestro dibujo del ojo, que le dará volumen, debemos considerar que el globo ocular es una esfera y que no es blanco, así que dibuja las sombras en consecuencia.

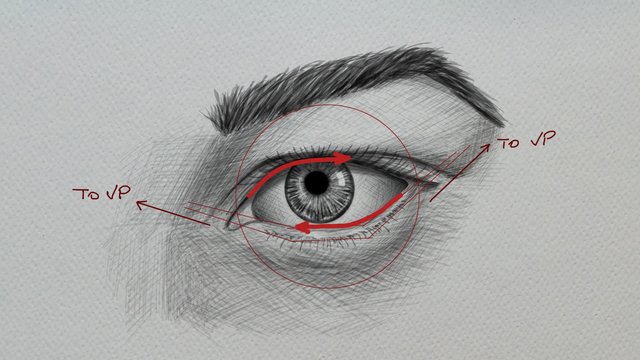
Here we end this study of the most important features that define an eye and that we must keep in mind when drawing it.
This will let you know what to pay attention to when you're drawing it and will help you capture what makes people's eyes and gazes unique.
Aquí finalizamos este estudio de las características más importantes que definen un ojo y que debemos tener en cuenta a la hora de dibujarlo.
Esto te permitirá saber a qué prestar atención cuando lo estés dibujando y te ayudará a capturar lo que hace que los ojos y las miradas de las personas sean únicos.
I suggest you to read:
Te sugiero que leas:
https://steemit.com/hive-185836/@jorgevandeperre/the-canon-of-the-human-head-masterclass-club100

I wish you a very nice day and good exercise!
Te deseo un gran día y muy buenos ejercicios!
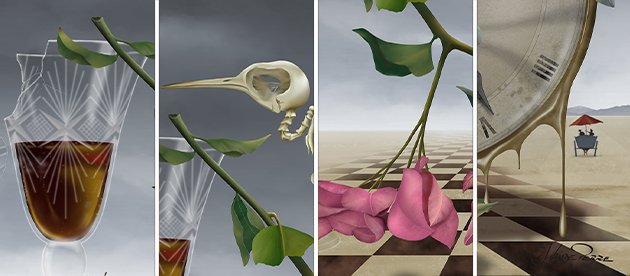
Time
by J.Van de Perre - video demo, painting process
Also, thanks to @xpilar for making these initiatives possible with their great support.

We support quality posts, and good comments anywhere, with any tags.
Thank you very much!!!
Wow, this is incredible cool...I really like this tutorial!
Thank you! I'm glad you liked it.