Painting a watercolor step by step (1) - Pintando una acuarela paso a paso (1)
Recently, @art-venture asked me to capture the different steps I follow when applying color in my watercolors. That's why I've decided to publish some posts where I'm going to show how I paint a watercolor from the beginning to the end, while I try to explain, step by step, everything I do. I hope it will help anyone who wants to get started in the practice of this exciting painting technique.
As I am not a native English speaker, I may make mistakes in writing, especially when using expressions and technical vocabulary. I hope you can excuse me.
Finally, I will be happy to resolve any doubt you may have or to answer any questions you may have. Just leave them for me below.
Hace poco, @art-venture me preguntó si podía capturar los distintos paso que sigo a la hora de aplicar el color en mis acuarelas. Por eso me he decidido a comenzar esta serie de entradas en las que voy a mostrar, paso a paso, cómo voy pintando una acuarela, mientras trato de explicar todo lo que voy haciendo. Espero que le pueda servir de ayuda a quien quiera iniciarse en la práctica de esta técnica de pintura tan apasionante.
Como no soy un hablante nativo de inglés, es posible que cometa errores a la hora de expresarme, especialmente al usar frases y vocabulario técnico. Espero que sepan perdonarme.
Por último, quedo a vuestra disposición para resolver cualquier duda o para responder a cualquier pregunta que queráis hacerme. Tan solo dejádmelas ahí abajo.
Well, let's get to work! This weekend took place the Jaen Virtual Watercolor Workshops, and I participated in them painting a landscape watercolor of Sierra Magina, a natural park.
Bueno, pues ¡manos a la obra! Este fin de semana tuvieron lugar las Jornadas Virtuales de Acuarelas de Jaén, y en ellas yo he participado pintando una acuarela del parque natural de Sierra Magina.
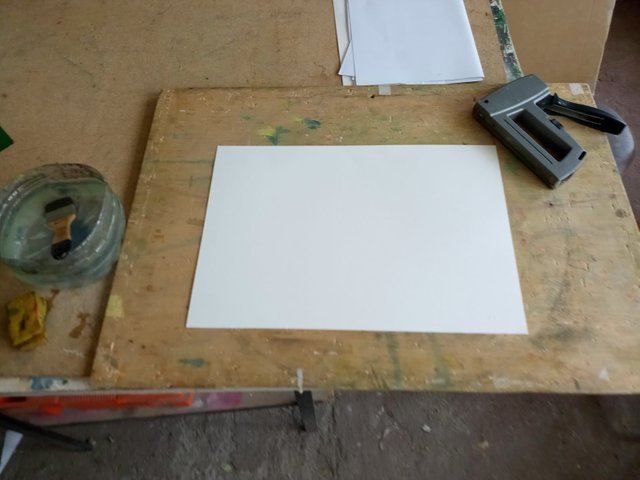
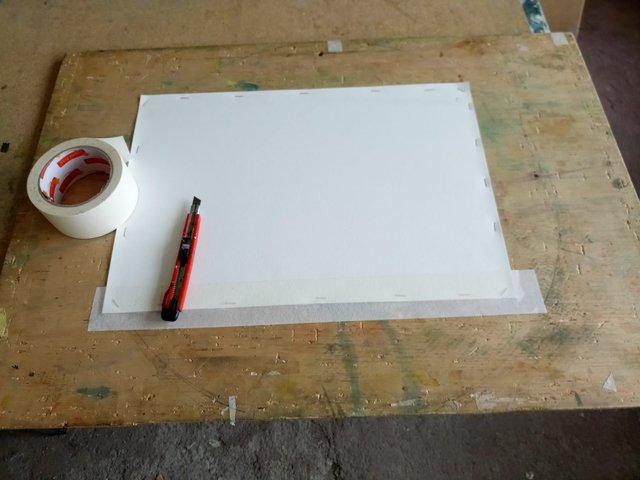
The first thing I did was to prepare the support. I used Guarro brand watercolor paper that I stapled to a thick plywood board. The paper needs to be stapled when it is wet, so that it will be taut when it dries. We do this to prevent the surface from buckling when the watercolor is applied. A margin is also kept with masking tape so that the brushstrokes do not go outside the border.
Lo primero que hice fue preparar el soporte. Usé un papel de acuarela de marca Guarro que grapé sobre un tablero de contrachapado grueso. Se grapa el papel, en húmedo, para que quede tenso cuando se seque. Esto se hace para evitar el abombamiento de la superficie cuando se aplica la acuarela. También se reserva un margen con cinta de carrocero para que no se salgan las pinceladas del recuadro.
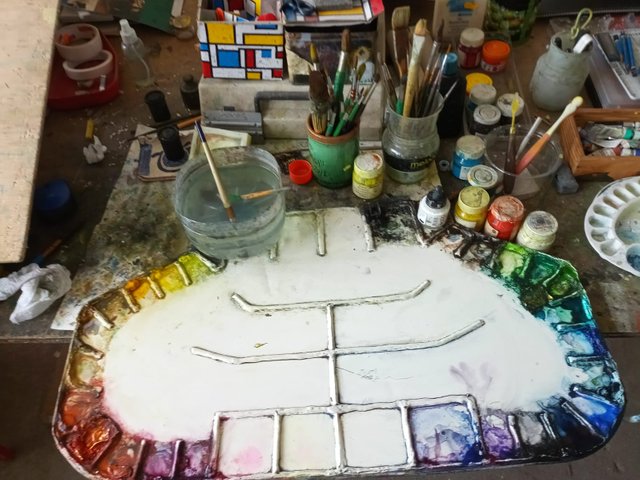
Next, I prepared my paint palette and dipped each color with a drop of water. It's is a handmade palette that I made myself to fit my easel, for painting outdoors. I also prepared a wide container of water of about one liter capacity. You don't forget to change the water as it gets dirty.
A continuación, preparé mi paleta de pintura y humedecí cada color con una gota de agua. Mi paleta está hecha a mano, me la hice yo mismo para ajustarla a mi caballete cuando pinto en exteriores. También preparé un recipiente ancho de un litro de capacidad, más o menos, que rellené de agua clara. El agua hay que ir cambiándola conforme se ensucia.
I used the following brushes:
·Petit Gris thick brush with a large water loading capacity.
·Escoda kolinski brushes, no. 8 and no. 4. They allow to paint fine and long strokes.
Usé los siguientes pinceles:
·Pincel grueso Petit Gris con gran capacidad de carga de agua.
·Pinceles kolinski de marca Escoda, del nª 8 y del nº 4. Permiten pintal trazos finos y largos.
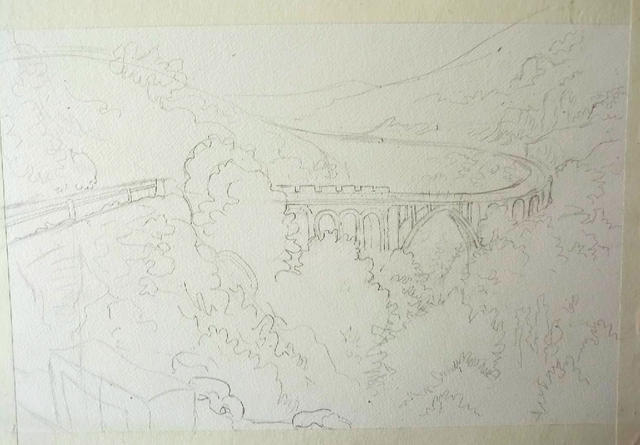
I began the painting itself with a precise line drawing of the subject, from a photograph I have on my tablet. I took it in the beauteful place of the Atascaderos, in the province of Jaén. I used a hard lead pencil HB to avoid smudging too much of the drawing.
Comencé el cuadro en sí con un dibujo lineal y preciso del tema, a partir de una fotografía que tengo en la tablet. La tomé en el paraje de los Atascaderos, en la provincia de Jaén. Utilicé un lápiz de plomo duro HB para no manchar demasiado del dibujo.
Wow, that is awesome! I really enjoy it, I feel myself like a student and having my Art Class. It is interesting that you staple your paper, I can imagine that it helps paper to stay flat. The palette is really huge , I am very curious how you mix the colours.
Really appreciate you for doing this tutorial!
You post is nominated for „@art-venture“ Support Program, @booming account upvote. Only the posts that are not cross posted, original and posted from Xpilar community page and using tag #art-venturehave priority. If your post gets approval, then you get upvote within few days. Good luck!
@art-venture, I don't know if you mean the color mixtures I do inside the palette, or the ones I do in the painting itself, by washes on the paper, wet on wet. I explain it throughout the process of creating this watercolor, but I'm thinking of recording a little video where you can see how I do the color mixtures both ways.
That would be great if you would be able to do little video. By the way, there is another watercolor Artist who does videos of his painting @raah:
https://steemit.com/hive-185836/@raah/the-world-of-xpilar-portrait-event-i-will-draw-and-give-your-portrait
I just saw it. Amazing artist!
interesting process) How you delete stepler after drawing?
Well, the staples are placed outside the drawing box, in the margins. The area outside the painting is masked with tape. When framing the watercolor, it is hidden by the passe-partout.
Interesting... and now I understand. Thanks for tip)