Continued Improvements
Bagel Hole...no, a hole from a pin, of course.
The simplest camera that can only be designed. You take a can / coffee can, pierced a hole ... In principle, the camera is ready. Insert a film or photo paper and catch your happiness. I will not describe in detail the features of everything. Just show how I did it.
When I started this process ... I didn’t have a can of coffee, but a macro ring and an M39 / NEX adapter. But something went wrong.
A friend of mine shared a link with me. Here the text is in Russian and it is quite a lot. I studied this article and realized my mistake (maybe only one of many who know). You can read this article through google translator. There is a lot of useful information. I will highlight some of the necessary ones in this post and show my results. So let's go.
*** Я опять возвращаюсь к теме пинхола, чтобы завершить описание технической части. В дальнейшем я начну полевое тестирование и буду иногда выкладывать в этом блоге его результаты. так что, кому интересно, следите за обновлениями.
Пинхол. Самая простая камера, которая только может быть по конструкции.
Взял консервную/кофейную банку, проколол /проковырял отверстие/дырку...
В принципе, камера готова.
Вставил плёнку или фотобумагу и лови своё счастье
Подробно особенности всего расписывать не буду.***
Когда я начинал этот процесс...у меня была не банка из-под кофе, а макрокольца и переходник М39/NEX. Но что-то пошло не так.
Один мой друг поделился со мной ссылкой. Здесь текст на русском языке и его довольно много. Я изучил эту статью и понял свою ошибку (может быть только одну из многих, кто знает). Вы можете прочесть эту статью через гугл-переводчик. Там много полезной информации. Некоторые необходимые моменты я выделю в этом посте и покажу свои результаты. Итак, поехали.
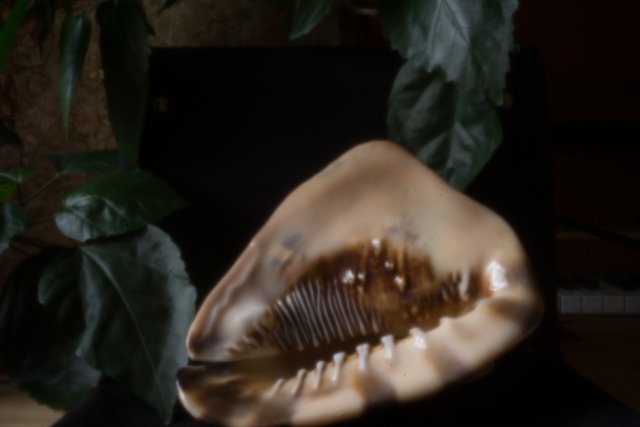
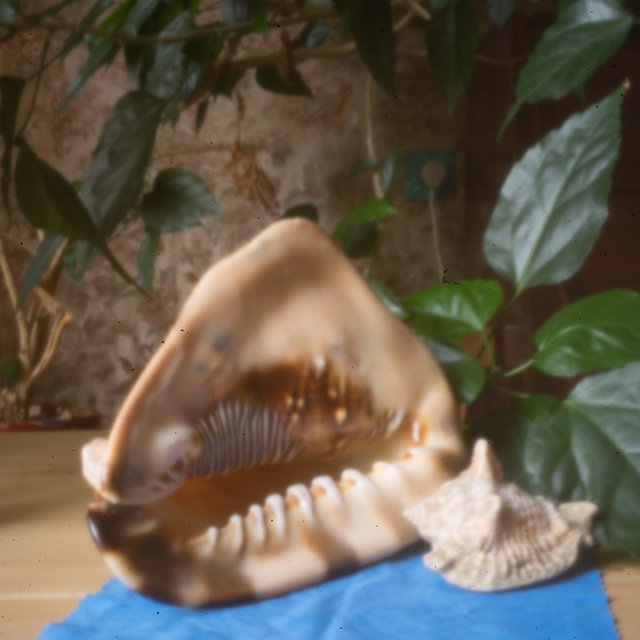
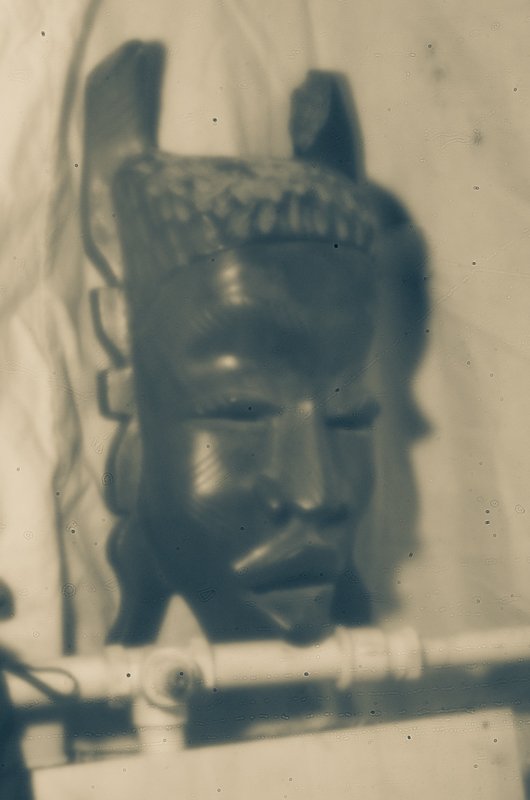
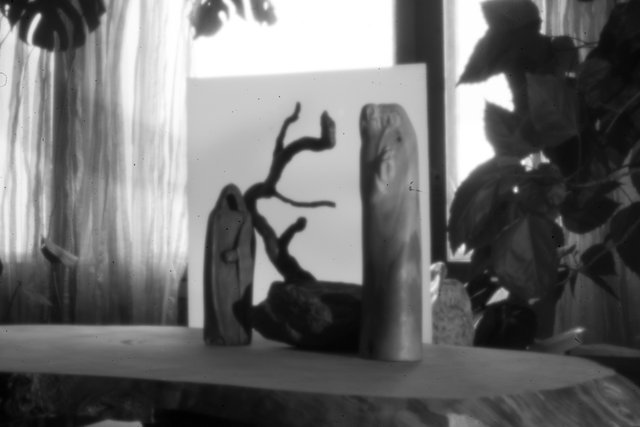
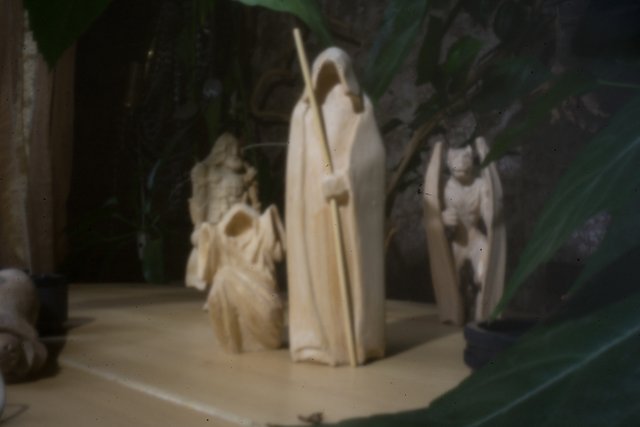
In the first 2 photos I showed in comparison two shooting results. The sharpness of the picture has improved. Remained soft, but it is less like a blurry result. Pinhole and should not be razor sharp. He does not have a complex optical system for this. But due to simplicity and natural transmission without distorting the proportions, the picture is obtained live.
На первых 2-х фото я показал в сравнении два результата съёмки. Резкость снимка улучшилась. Осталась мягкость, но она меньше похожа на размытый нерезкий результат. Пинхол и не должен быть бритвенно резким. У него нет для этого сложной оптической системы. Но за счёт простоты и естественной передачи без искажения пропорций снимок получается живой.
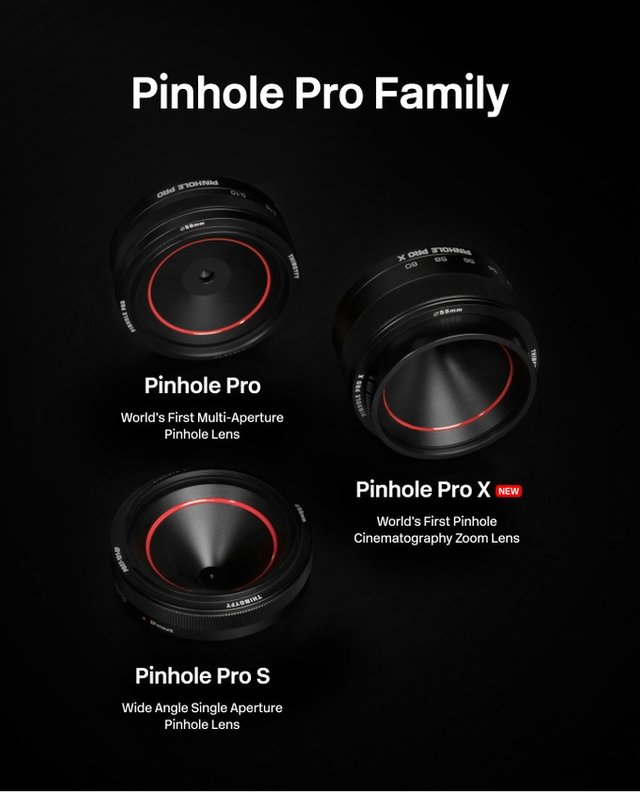
This is the hard way of pinhole to the present day. I thank @ wulff-media for the tip about Thingyfy Pinhole Pro.
Looking at the finished lenses, I realized that the hole should be close to the camera’s matrix (in order to get a wide angle of capture) and it’s advisable to have a lens hood. But the most important condition for a high-quality image is the quality and size of the hole. Its diameter ranges from 0.2 to 1.0 mm. There are calculation formulas. There are even several of them. But I think that you need to select the diameter for your specific case. I got a diameter of about 0.4 mm.
As for the quality. The main thing here is the thickness of the plate in which you make the hole. The thinner it is, the better quality you get as a result.
I used the aperture plate of the video camera. It is very thin, aluminum and coated with matte black paint. How I made the right hole.
For this, I used a dividers needle, it is strong enough. If you paint it with a felt-tip pen in black or smoke with smoke, you can get a mark from the caliper, which will correspond to the desired diameter. You simply expose this diameter on the caliper, insert the needle into the gap between the lips until it rests and twist the needle until the desired mark appears on a black background. At this depth, you need to immerse the needle in your plate. After this, it is necessary to clean both sides of the hole with fine sandpaper. All this is faster to do than to describe. But I wanted it to be clear.
Таков нелёгкий путь пинхола до наших дней. Я благодарю @wulff-media за подсказку про "Thingyfy Pinhole Pro.
Глядя на готовые объективы, я понял, что отверстие должно быть близко от матрицы камеры (чтобы получить широкий угол захвата) и желательно наличие бленды. Но самым важным условием качественного снимка является качество и величина отверстия. Его диаметр колеблется от 0,2 до 1,0 мм. Есть формулы расчёта. Их даже несколько. Но я думаю, что подбирать диаметр надо для своего конкретного случая. У меня получился диаметр равным примерно 0,4 мм.
Что касается качества. Здесь главным является толщина пластины, в которой вы делаете отверстие. Чем она тоньше, тем качественнее снимок вы получите в результате.
Я использовал лепесток от диафрагмы видео камеры. Он очень тонкий, алюминиевый и покрыт матовой чёрной краской. Как я проделал нужное отверстие.
Для этого я использовал иглу от циркуля, она достаточно прочная. Если её закрасить фломастером в чёрный цвет или закоптить дымом, то можно получить отметку от штангенциркуля, которая будет соответствовать нужному диаметру. Вы просто выставляете на штангенциркуле этот диаметр, в зазор меду губками вставляете иглу, пока она не упрётся и крутите иголку, пока не появится нужная отметка на чёрном фоне. На эту глубину надо погрузить иглу в вашу пластину. После этого надо мелкой наждачкой зачистить обе стороны отверстия. Всё это быстрее сделать, чем описать. Но мне хотелось, чтобы было понятно.
Sorry for the abundance of words, but it may be useful to someone. I hope.
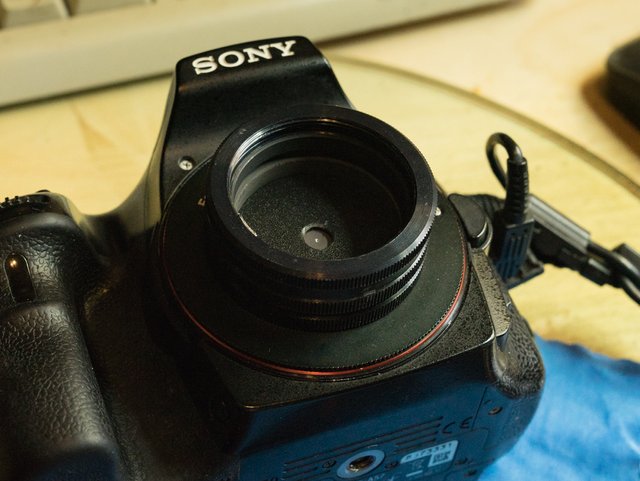
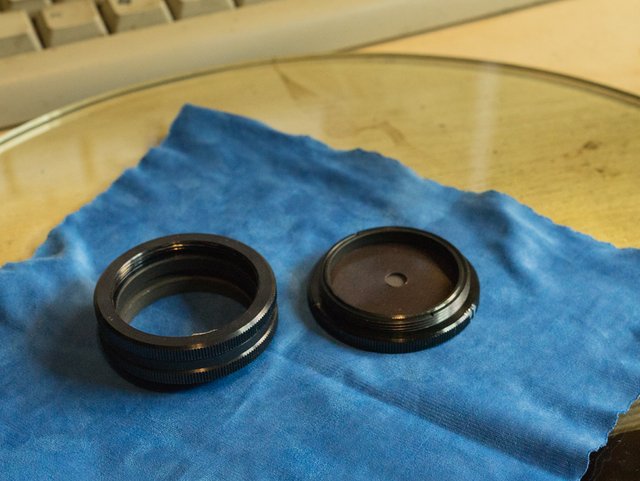
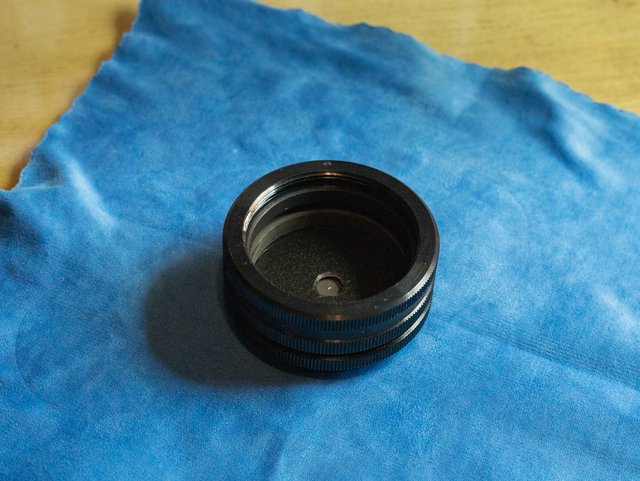
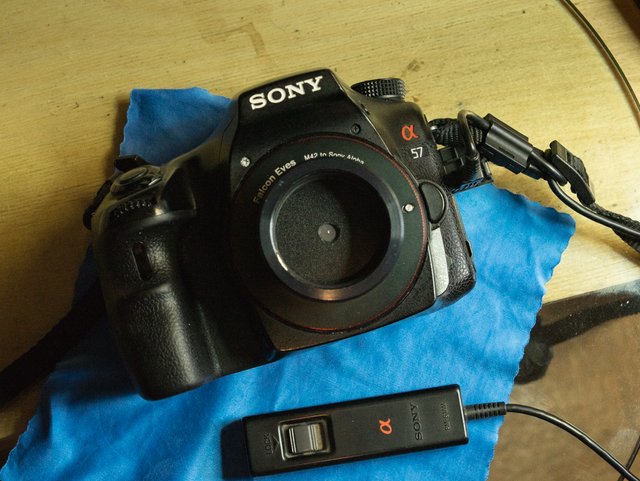
As you can see in the pictures, I placed a plate with a hole between two other plates, to which holes of a larger diameter (5-6 mm) were drilled. The diameter of these plates is such that they are placed inside the macro rings. I put them on one ring and clamped on the other. The upper ring additionally serves as a hood. The macro rings are connected to the adapter M39 / M42 and all this is attached to the camera. Your pinhole is ready to go.
Извините за обилие слов, но может быть кому-то будет полезно. Я надеюсь.
Как видите на картинках, я поместил пластину с отверстием между двумя другими пластинами, к которых просверлены отверстия большего диаметра (5-6 мм). Диаметр этих пластин таков, что они помещаются внутри макроколец. Я поместил их на одно кольцо и зажал другим. Верхнее кольцо дополнительно служит в качестве бленды. Макрокольца соединяются с переходником М39/М42 и всё это крепится к камере. ВАш пинхол готов к работе.
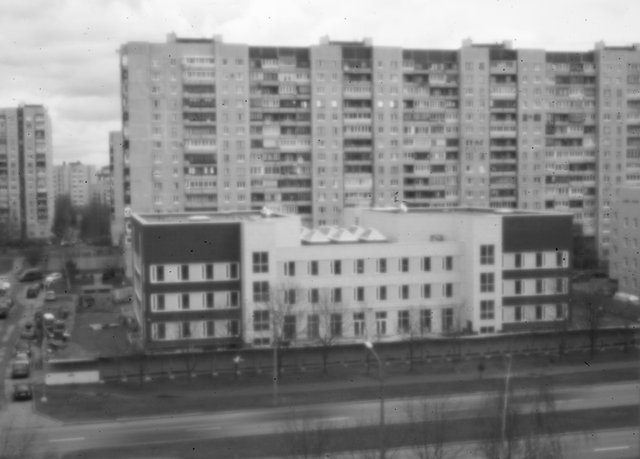
I have already gained some experience using pinhole photography. But so far it is not enough to draw conclusions and give any recommendations. I think that this will be the topic of the following posts. But not the fact that it will be soon. Or maybe tomorrow. Who knows? Therefore, anyone interested, stay tuned.
Я уже приобрёл некоторый опыт съёмки с использованием пинхола. Но он пока недостаточен, чтобы делать выводы и давать какие-то рекомендации. Думаю, что это будет тема следующих постов. Но не факт, что это будет скоро. А может быть и завтра. Кто знает? Поэтому кому интересно, следите за новостями.
I invite the initiators of the pinhole movement @wwwiebe and @johannpiber


From Russia with Love
My last posts

Du wurdest als Member von @investinthefutur gevotet! ---> Wer ist investinthefutur ?
Eine kleine Dividende a little bit !BEER
Cheers! And !BEER
View or trade
BEER.Hey @investinthefutur, here is a little bit of
BEERfrom @bambuka for you. Enjoy it!Learn how to earn FREE BEER each day by staking.
View or trade
BEER.Hey @bambuka, here is a little bit of
BEERfrom @investinthefutur for you. Enjoy it!Learn how to earn FREE BEER each day by staking.
Cheers!
$trdo
Cheers! And !BEER
oh, !BEER! у меня для тебя тоже немножко есть. и еще $trdo, не помешает. курочка по зёрнышку клюет.
My Pleasure!
Cheers and !BEER
!COFFEEA
View or trade
BEER.Hey @bambuka, here is a little bit of
BEERfrom @qwerrie for you. Enjoy it!Learn how to earn FREE BEER each day by staking.
Congratulations @qwerrie, you successfuly trended the post shared by @bambuka!
@bambuka will receive 1.02858863 TRDO & @qwerrie will get 0.68572575 TRDO curation in 3 Days from Post Created Date!
"Call TRDO, Your Comment Worth Something!"
To view or trade TRDO go to steem-engine.com
Join TRDO Discord Channel or Join TRDO Web Site
!trdo
Congratulations @jjprac, you successfuly trended the post shared by @bambuka!
@bambuka will receive 4.70378138 TRDO & @jjprac will get 3.13585425 TRDO curation in 3 Days from Post Created Date!
"Call TRDO, Your Comment Worth Something!"
To view or trade TRDO go to steem-engine.com
Join TRDO Discord Channel or Join TRDO Web Site
Congratulations @bambuka, your post successfully recieved 5.73237001 TRDO from below listed TRENDO callers:
To view or trade TRDO go to steem-engine.com
Join TRDO Discord Channel or Join TRDO Web Site