How to create your own image using pixelab app|| A step to avoid using copywright images|| Content exclusively for kids|| 10% payout to steemkids

It's important to learn how to make our own images so as to avoid using copywrite images
Today I'm going to show in steps how to create an image using the pixelab application.
There are so many apps which can be used to design pictures of our own using your smartphones.
But for today we're going to focus on the use of pixelab app.
The pixelab app is an amazing app that allows you to:
Create your own designs of images, text on pictures, and many more.
The pixelab app can do the work a computer does when it comes to image designs, and the good thing is that this app allows you to design image with absolutely no internet connection.
It's only up to there user to be creative and make good use of this app. It also contains many features, it can allow you to import images from gallery, access different fonts, and do more.
First I'll start by explaining the features of the app.
The first thing you need to do now is to hop into your playstore and download the pixelab application.
The screenshot below shows the homepage of the app.
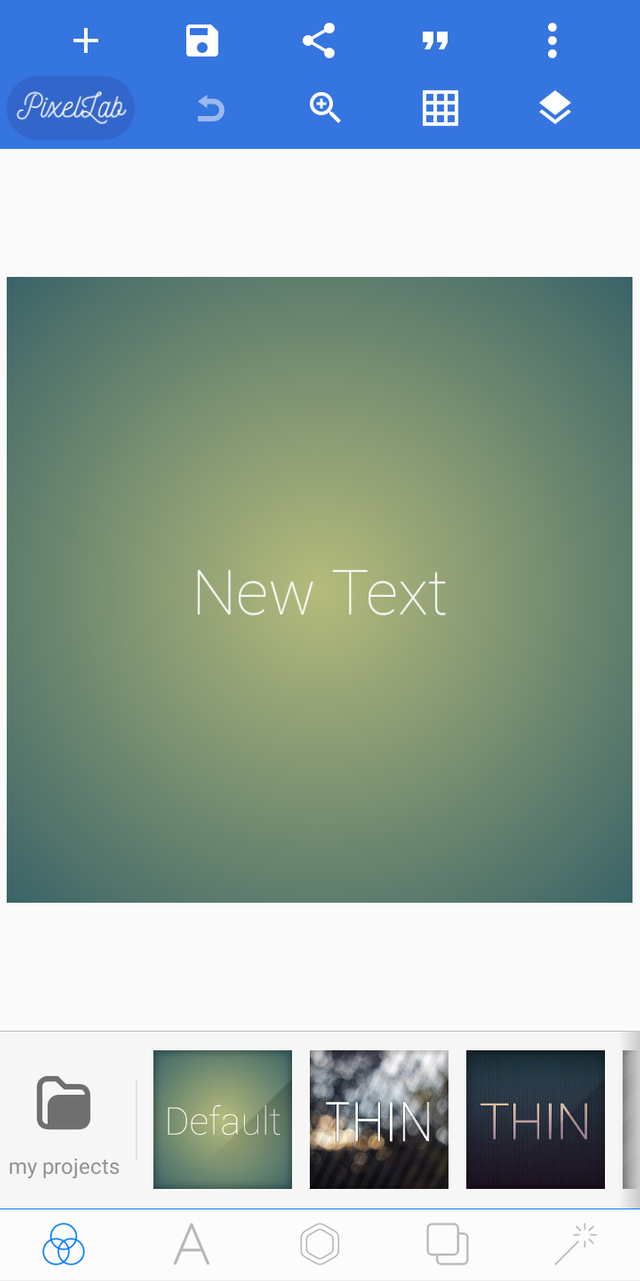
There are several features in this app, the ones seen below and the ones seen above.
Here, let me explain:
The features below
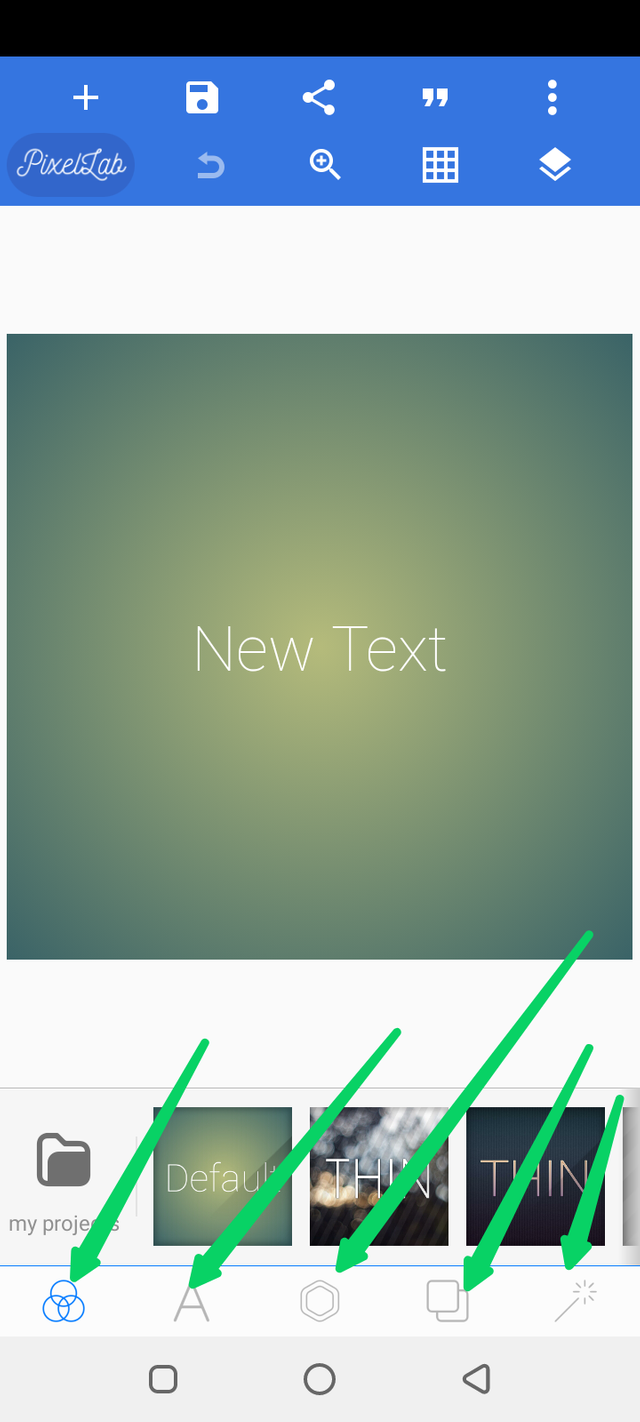
THe first arrow points to the project icon where you can see the images you saved as project since the app allows you to do so.
The second arrow points to theFont icon. This icon allows to include texts in your design and also to style the texts as you wish to.
You will see several options in this text icon; option for editing text, delete, copy, to add colors, shadows, etc.The third arrow points to the image icon where you can add any effect you want to for you image. You can aslo find shapes in this icon
The fourth arrow is pointing at the background icon which allows you to use any background you want from the list of background images or you can simply use normal color for your design.
The fifth arrow points to the effect icon where you can add such effects as Saturation, contrast, brightness and more to your design.
The features above
The screenshot below shows arrows pointing to the upper part of the features above the pixelab homepage.
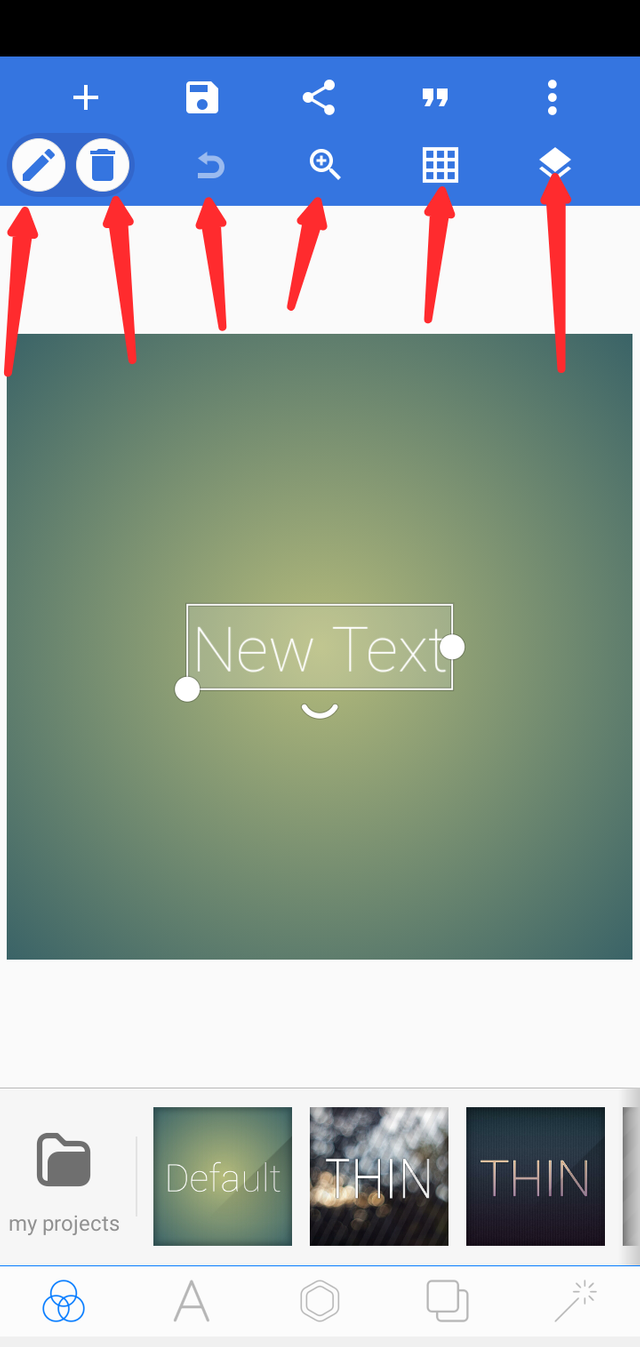
The first arrow points to the edit icon where you can edit your texts. In this icon you can copy, Send texts to either front or back, add color to fonts and more.
Second arrow points to the delete icon where you can delete any elements you do not need again.
Third arrow points to the undo icon where you can reverse the step you have taken while making the design.
Fourth arrow points to the zoom icon where you can get a clearer view of your work you are already doing.
The fifth arrow points to Ruler or Grid line icon which is used to make an measurements of your ongoing work.
The sixth arrow is pointing to the Layer icon where You can check your ongoing projects. You can merge, hide and lock your texts and images using this icon.
The screenshot below shows arrows pointing to the upper part of the features above the pixelab
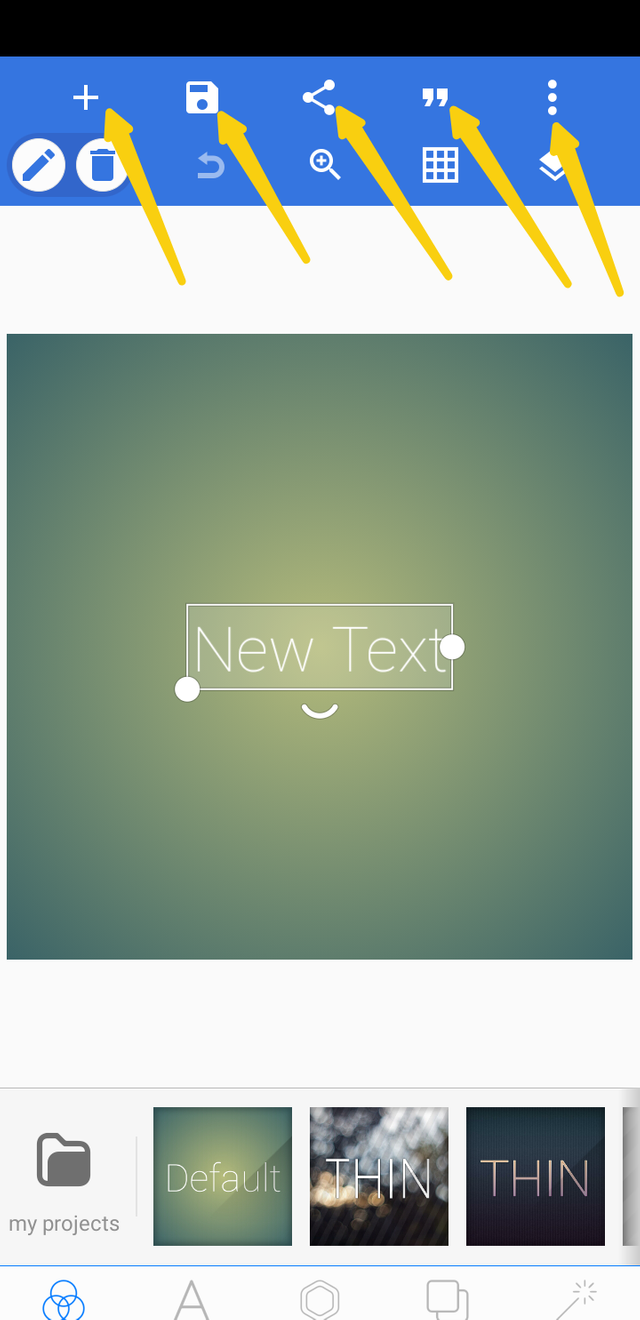
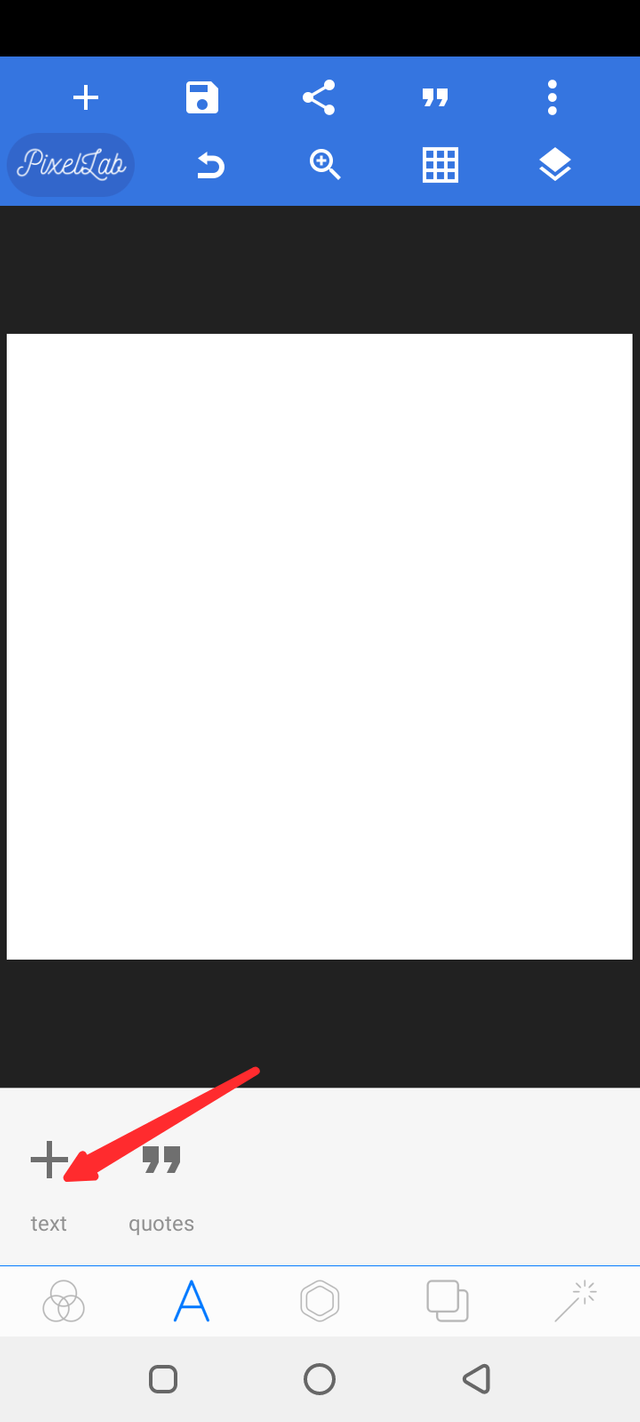
First arrow points to the Add (+) icon for adding texts, sticker, shapes ,images, etc, to your designs.
Second arrow points to the save icon where you can save your finished designs either as projects to be edited later or as image to your gallery.
Third arrow points to the share icon where you can share your designs to another person or to another app.
The fourth arrow points at the quote icon where you can find positive quotes to add to your design if you wish to.
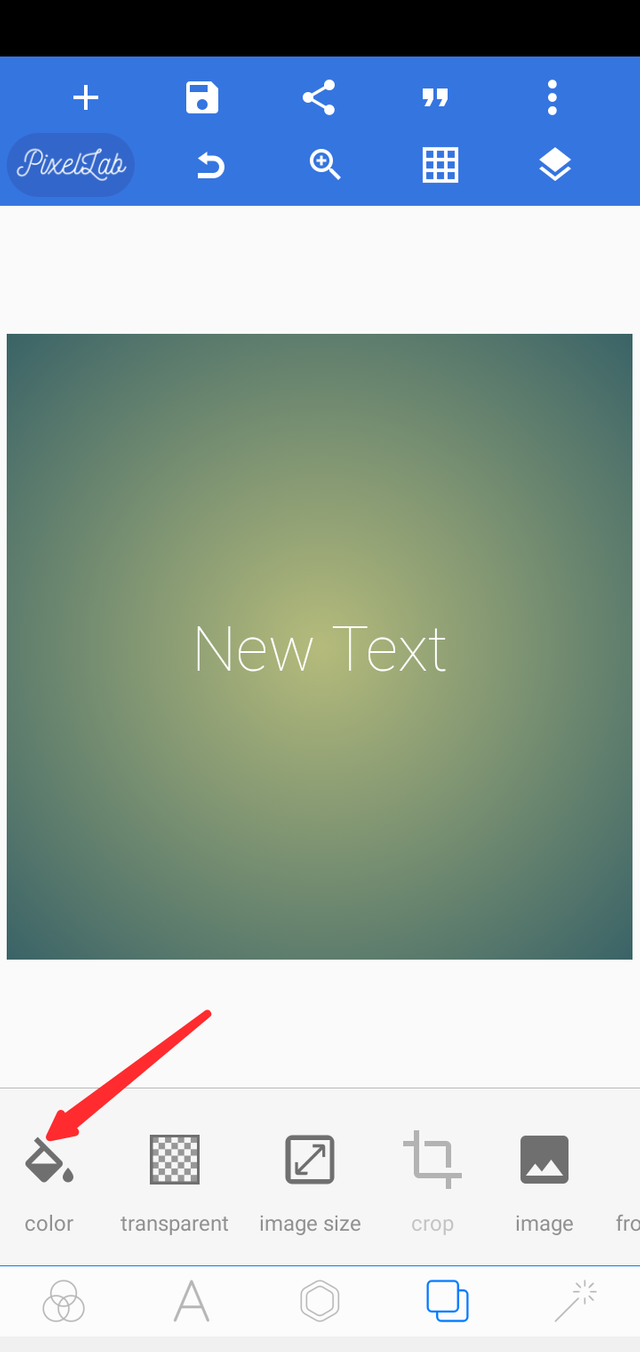
The last arrow show the three dots for adjusting image size, getting a background image from gallery, and performing other functions.
Let's Practice now
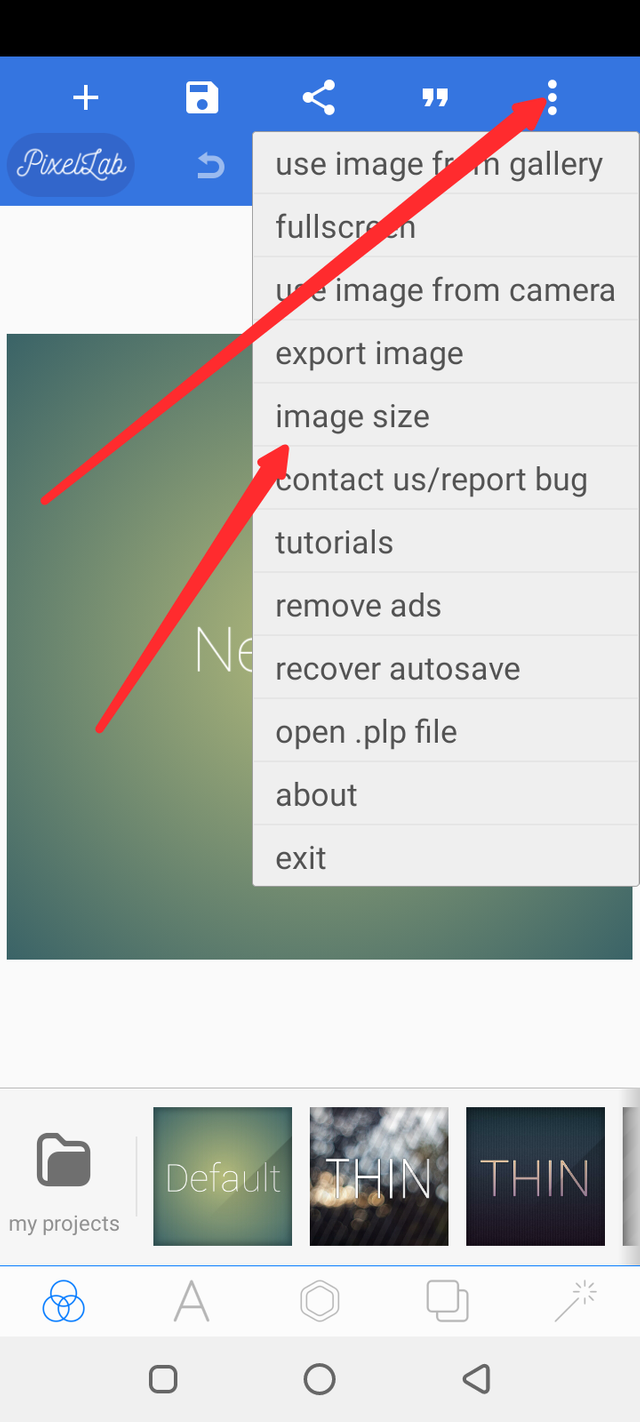
First choose your image size by clicking on the three dots at the top right corner.
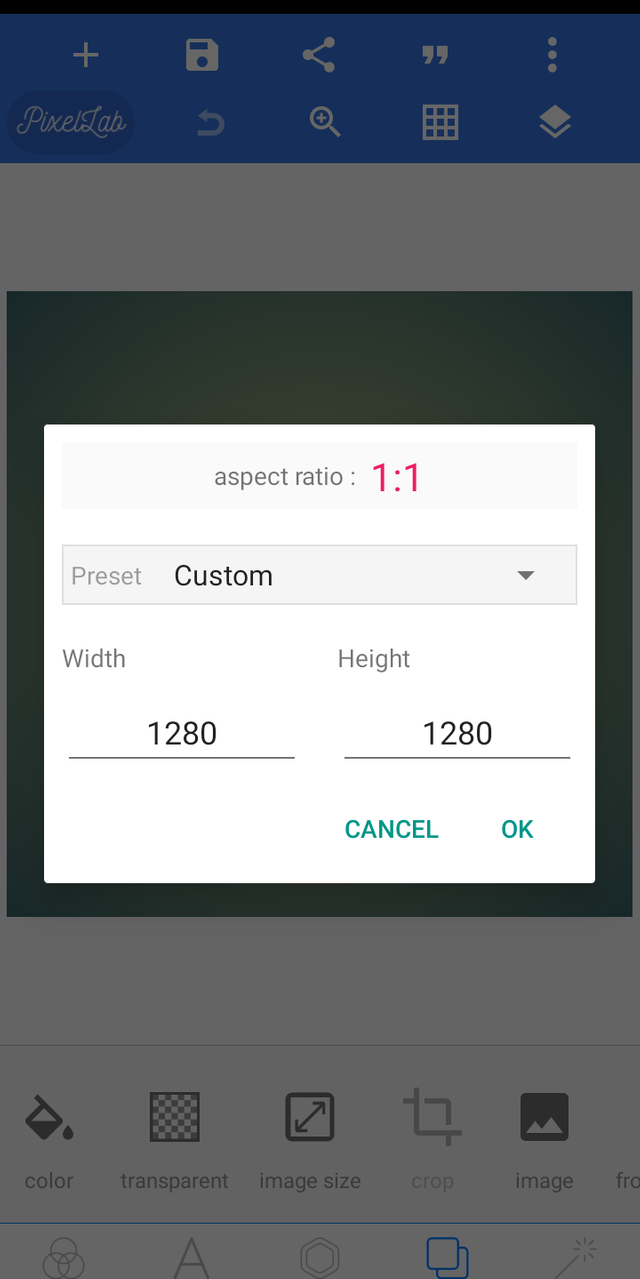
After clicking on the three dots you click on image size to reset.the size.
 |  |
|---|
You can choose to use the custom size of the app which is what we will be using for this practical.
STEP 2
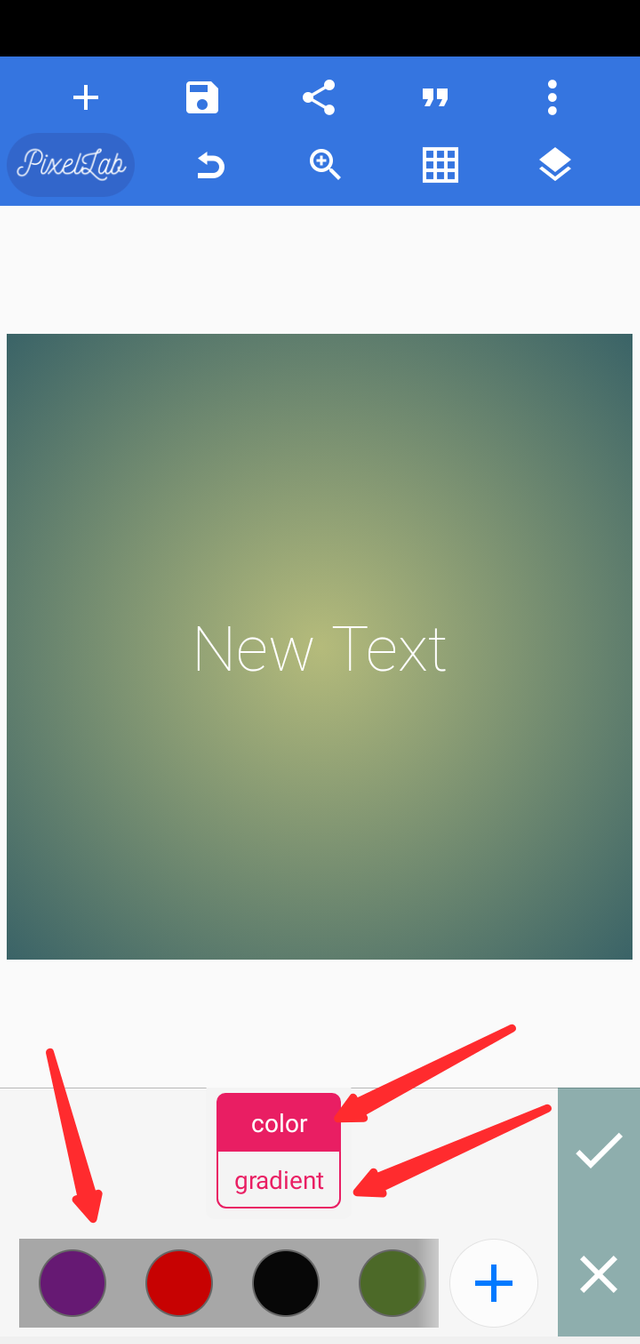
Choose a background color for your design
To do this we click on the background icon and select color, then choose the color we want.
 |  |
|---|---|
 | select any color |
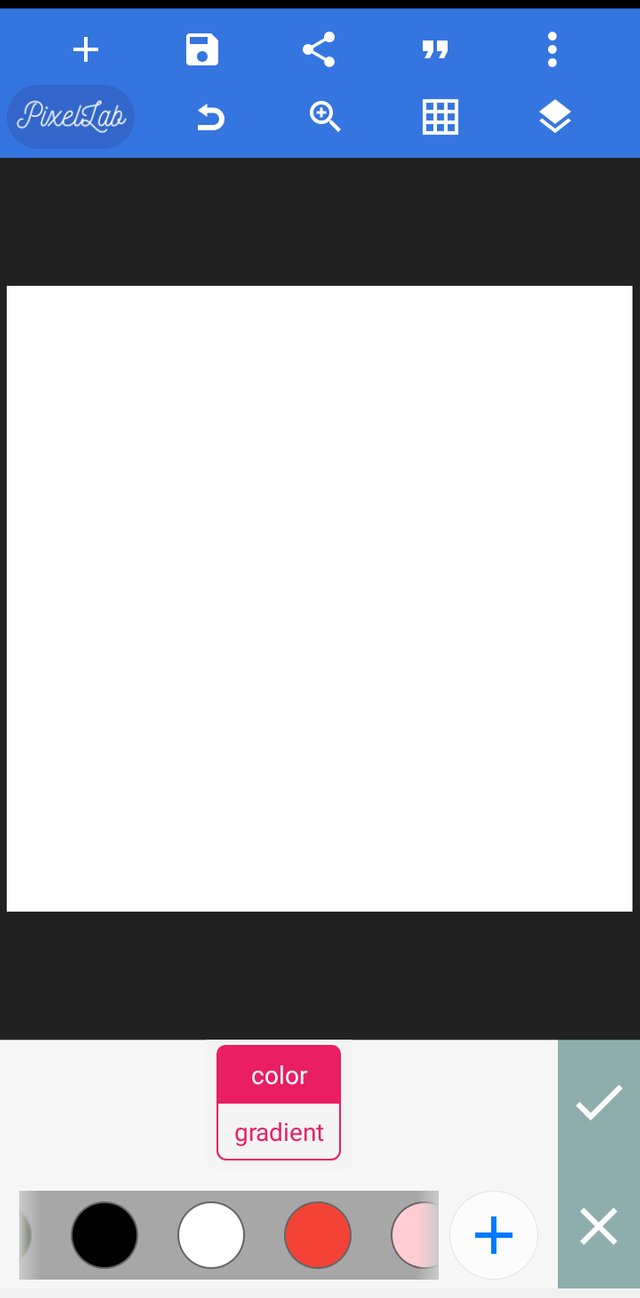
In this practical we will be using the white color. So we select white from the color samples there.
Now our design's background is now white.
Next step
ADD THE TEXTS
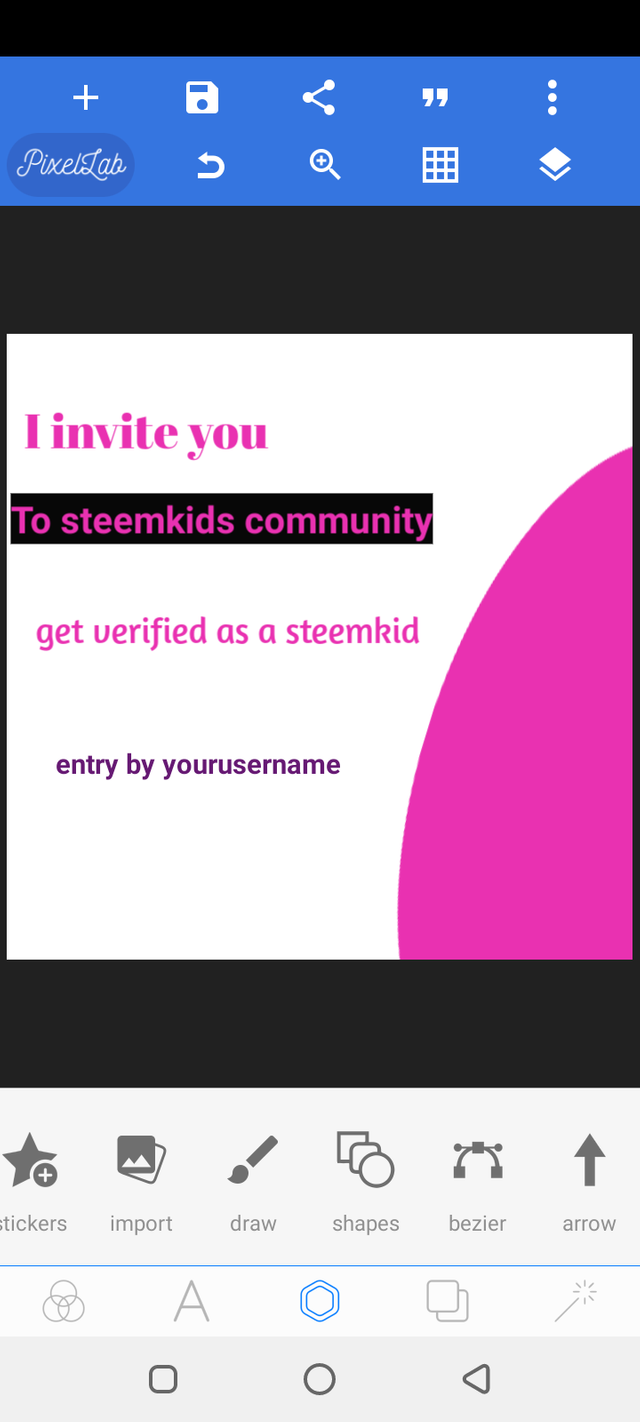
we are going to write the texts that we want on the image. For this practical we are going to write a text about inviting people to steemkids community, assuming there's a contest that says invite people to the community..
Now we are going to write the text I invite you to steemkids community. Get verified as a steemkids
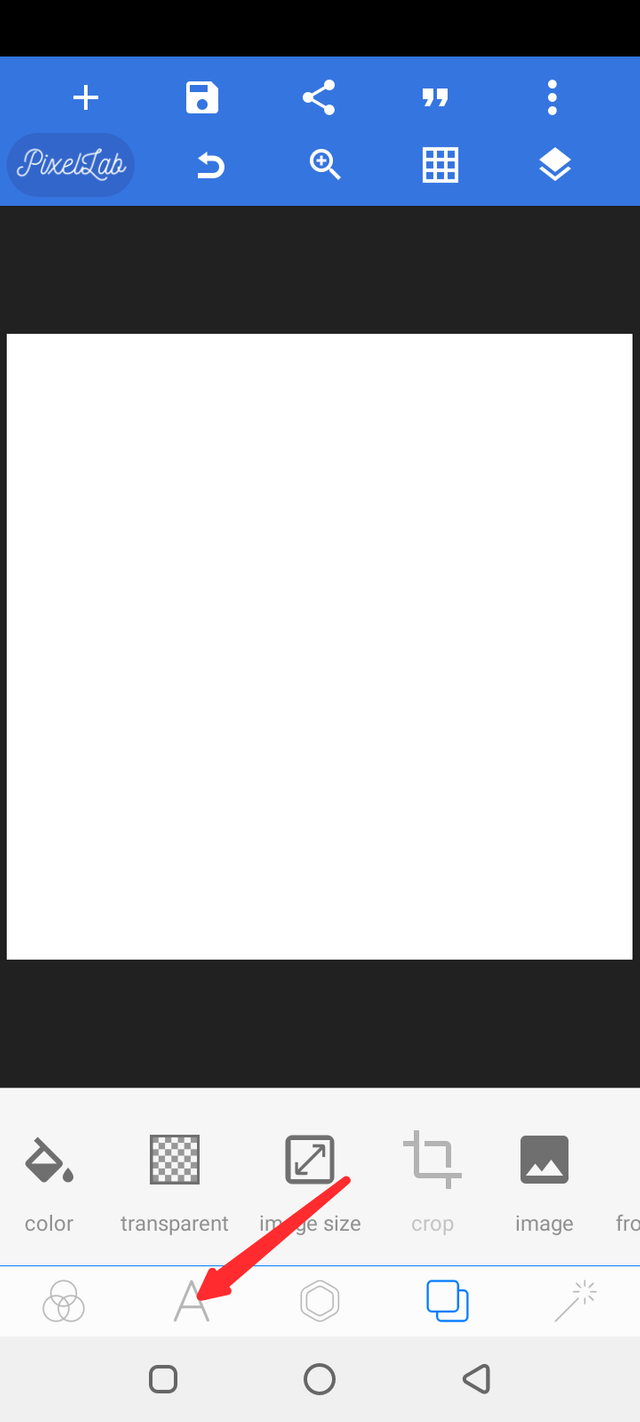
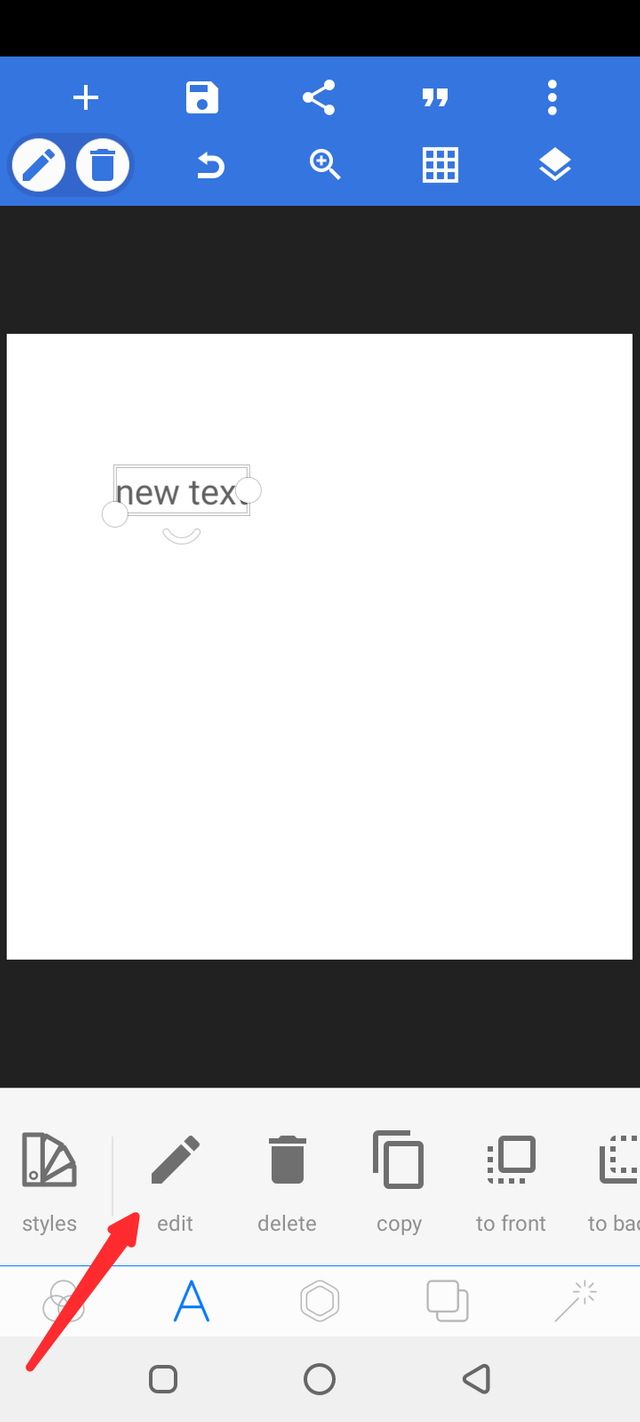
To add the text we click on the font icon and select the + icon. Then click edit to write our own texts
 |  |
|---|---|
 | 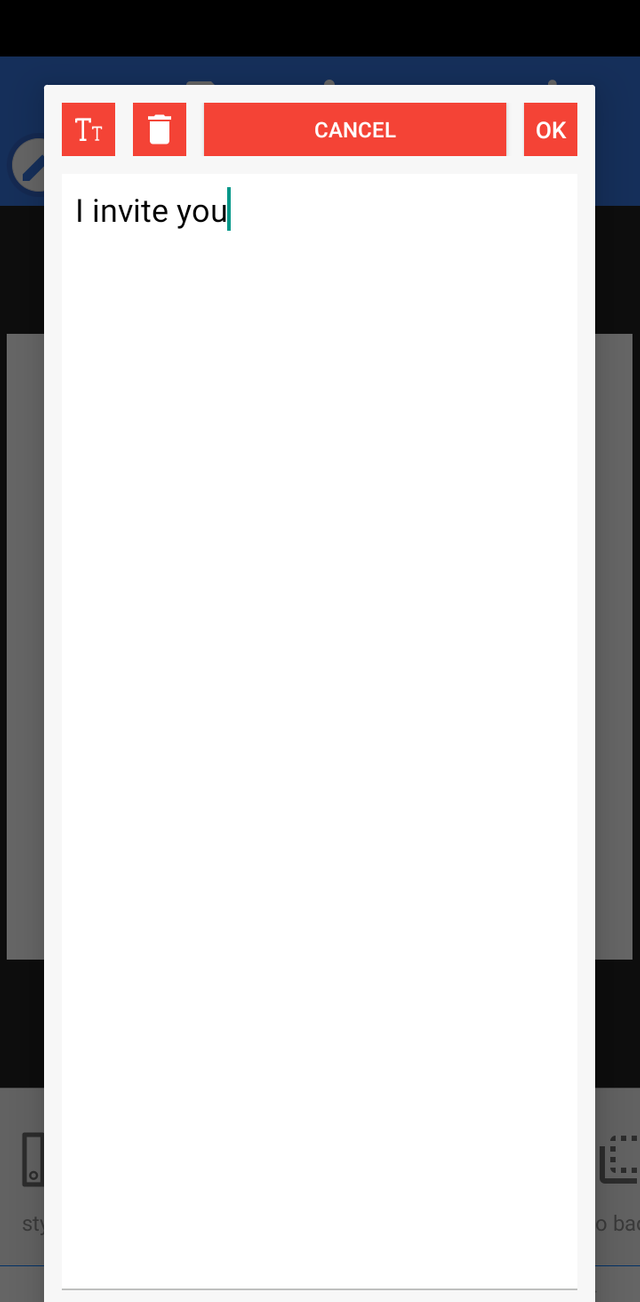 |
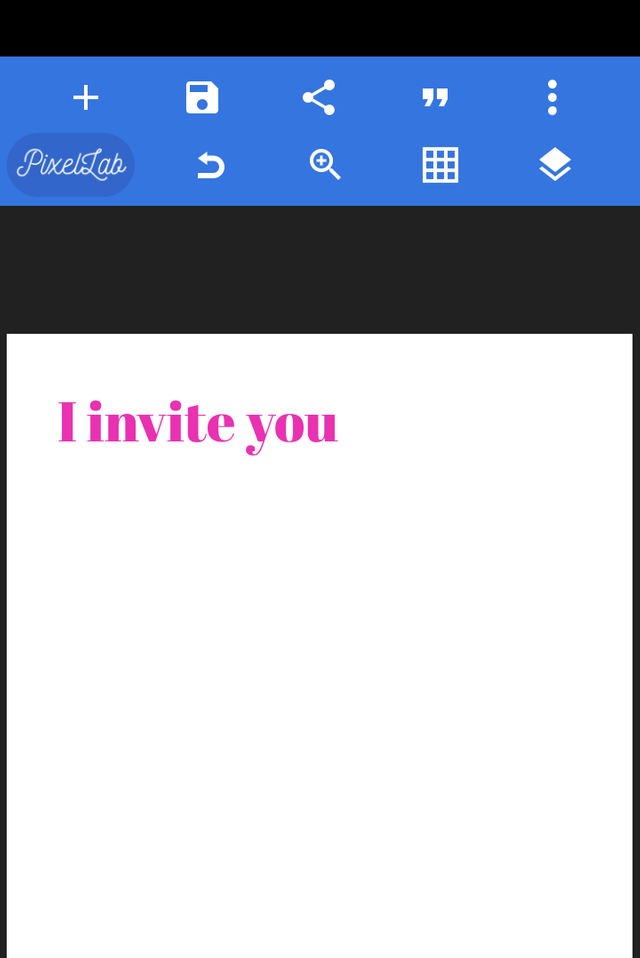
So far I've written the text I invite you. Why don't we write everything at once?
Because we want our fonts to be different sizes so they can be easily read.
Yes so let's move on...
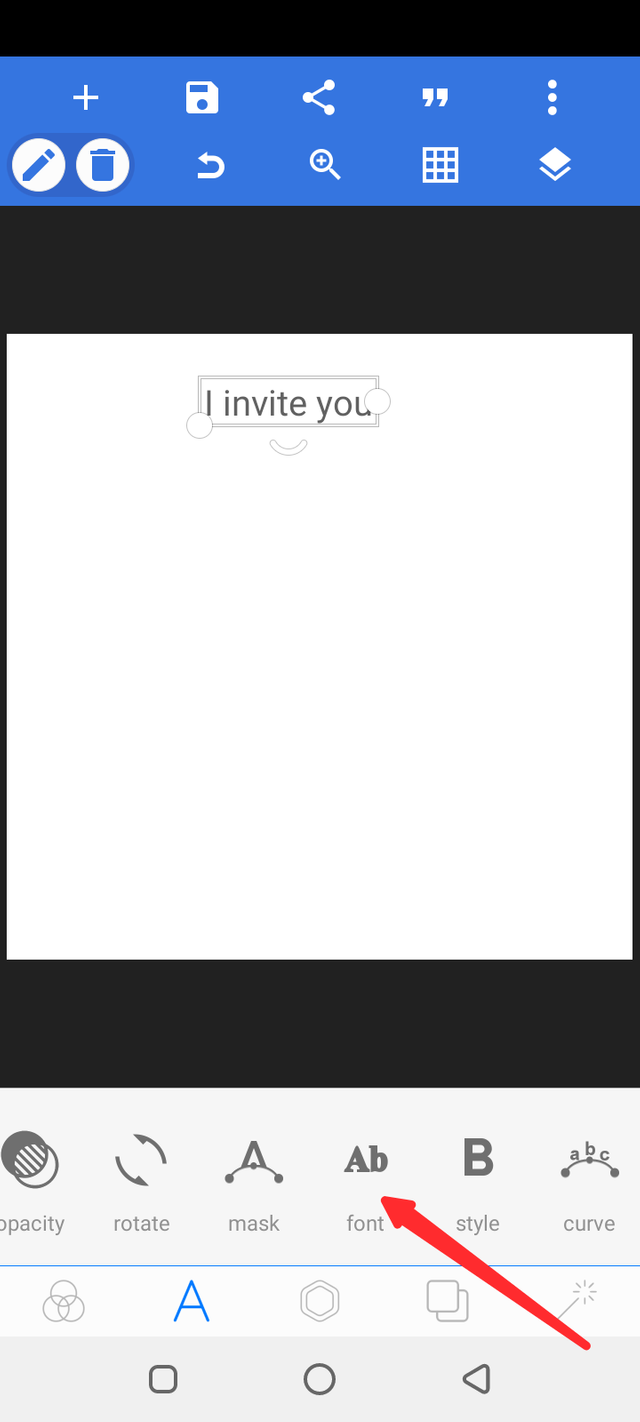
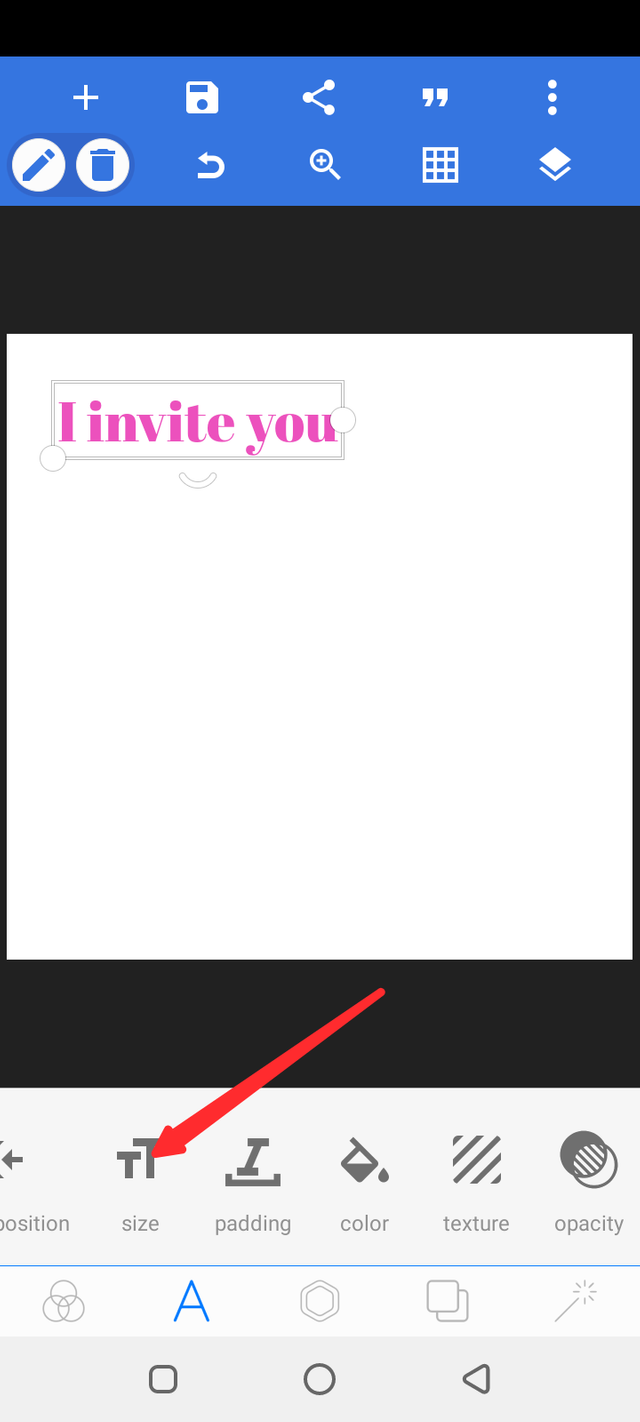
Click Ok after writing nthe text. Now we will start choosing the style, size and color for our don't.
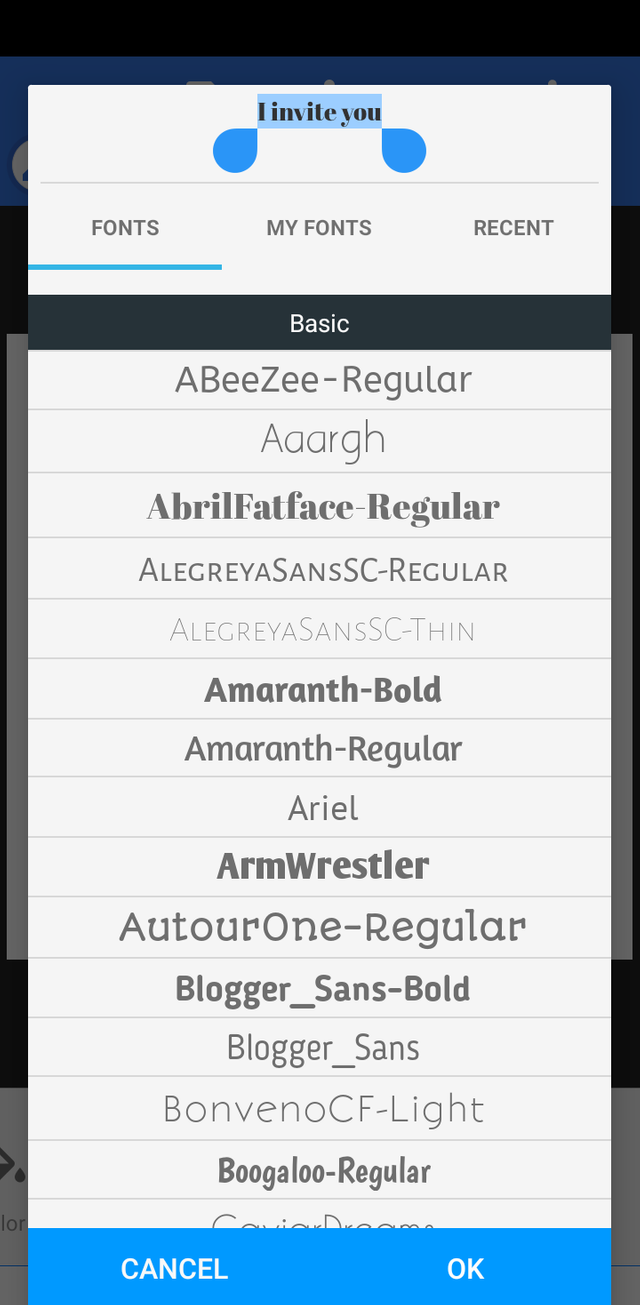
First we highlight the text so as to be able to edit it. Then I select Font to change the font style
 |  |
|---|
You can choose any style you want. Just make sure it's appealing to the eyes and that the size is big enough to be seen.
I chose the font we want and also changed the color to be pink.
 |  |
|---|
We selected the size icon there to resize the font and then wrote the other texts and style them as well.
 |  |
|---|
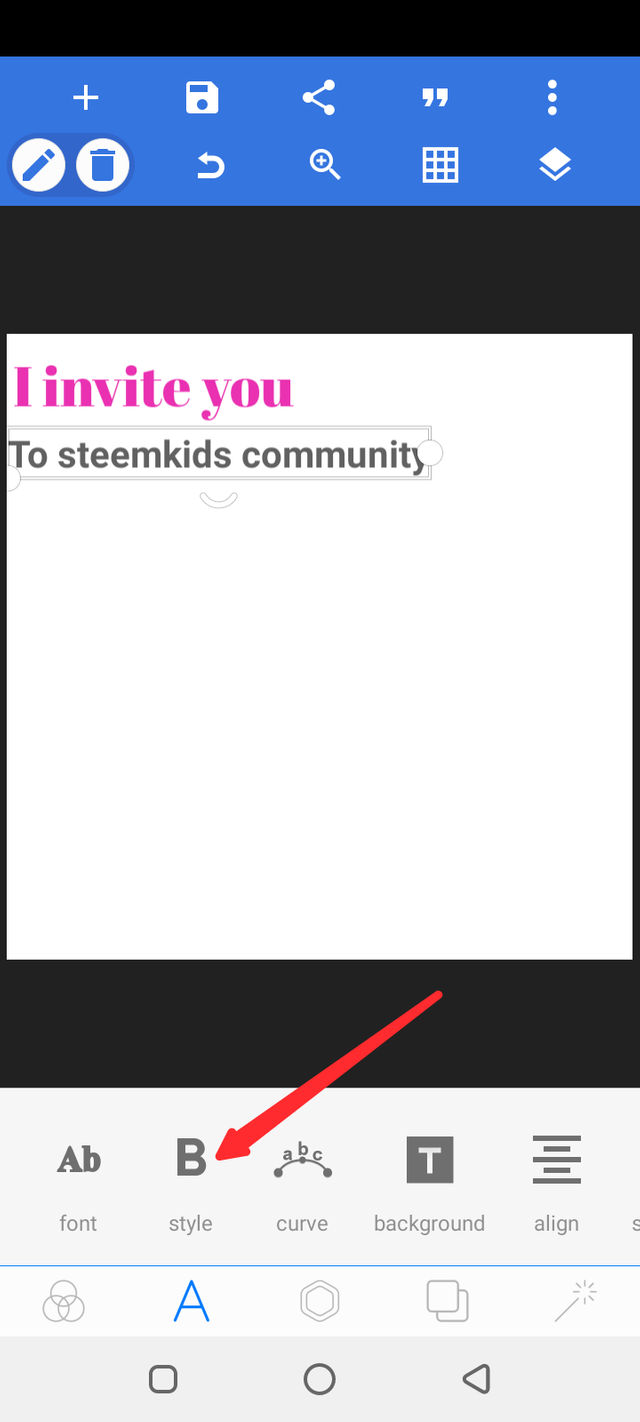
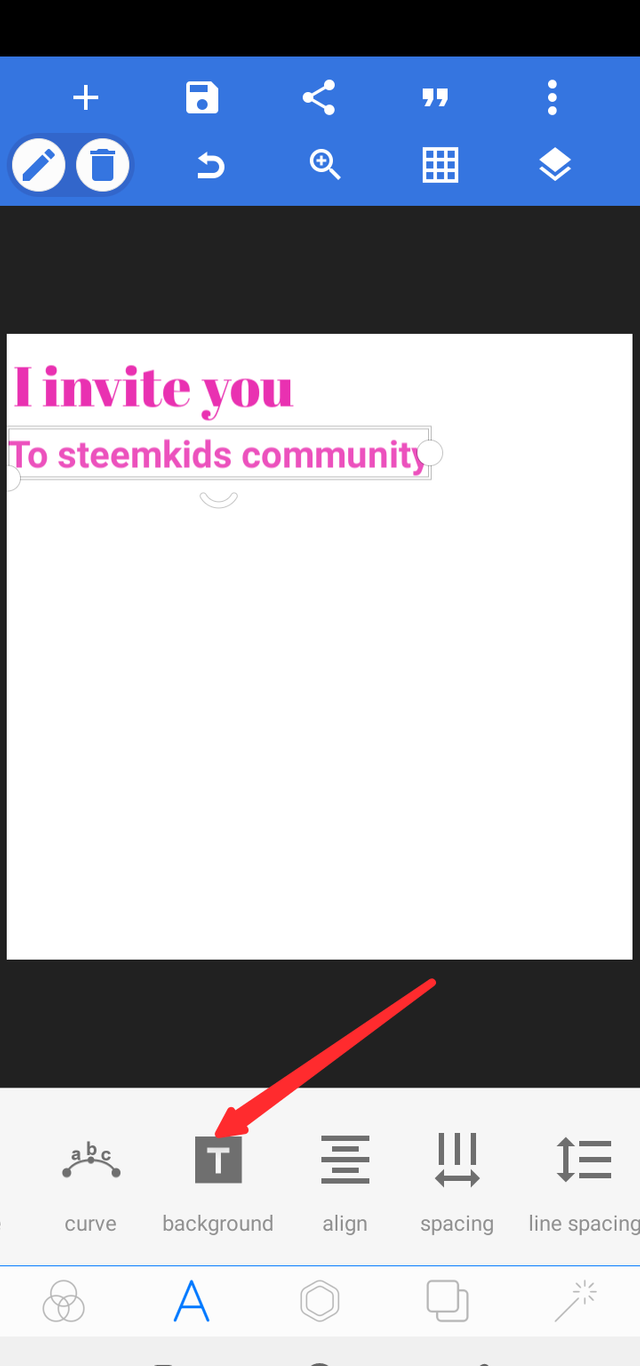
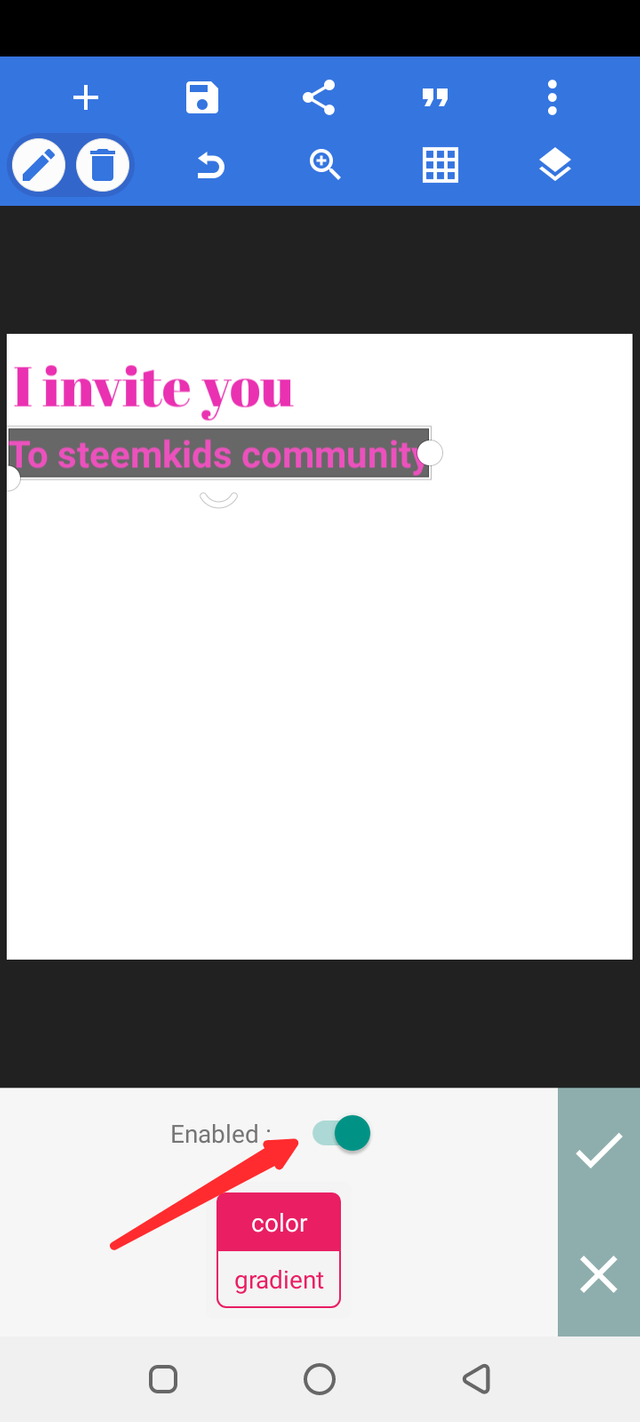
For the font Steemkids community I made it bold and then added color to it.
I also added a background to it by clicking on the background icon and turning it on.
 |  |
|---|
Next we write down all the fonts and arrange them in a very good order.
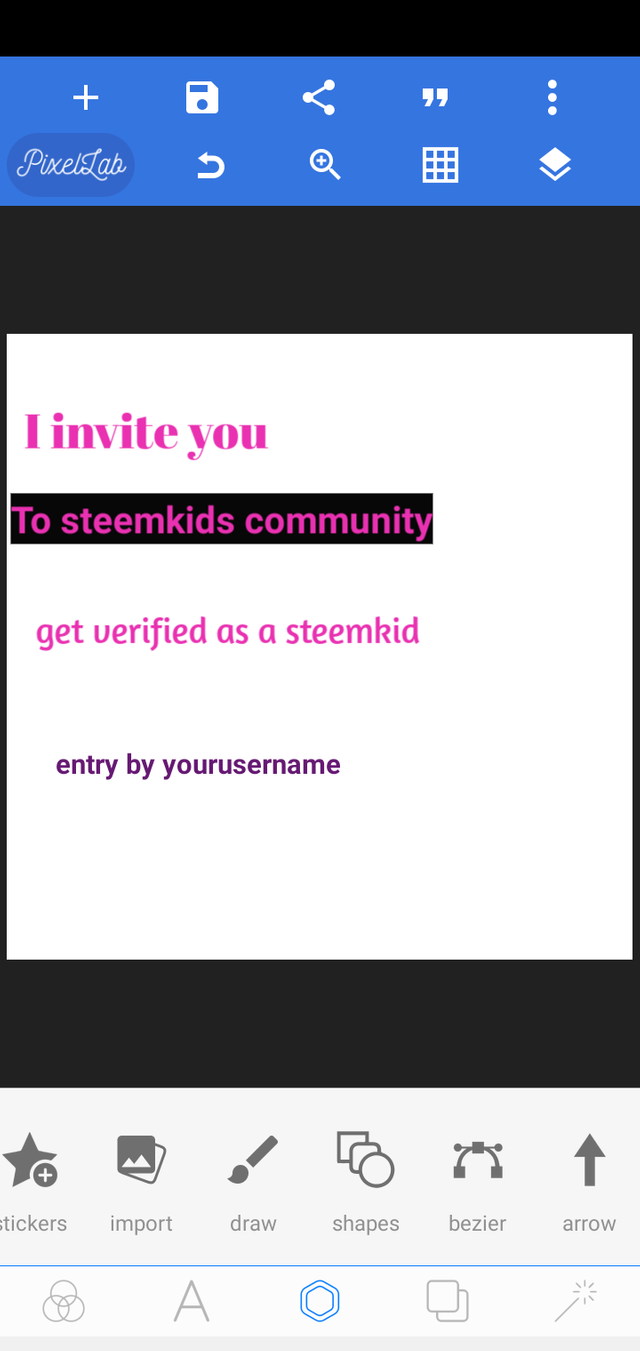 | This is how we choose to arrange it for this practical. |
|---|
Next step
We include the images
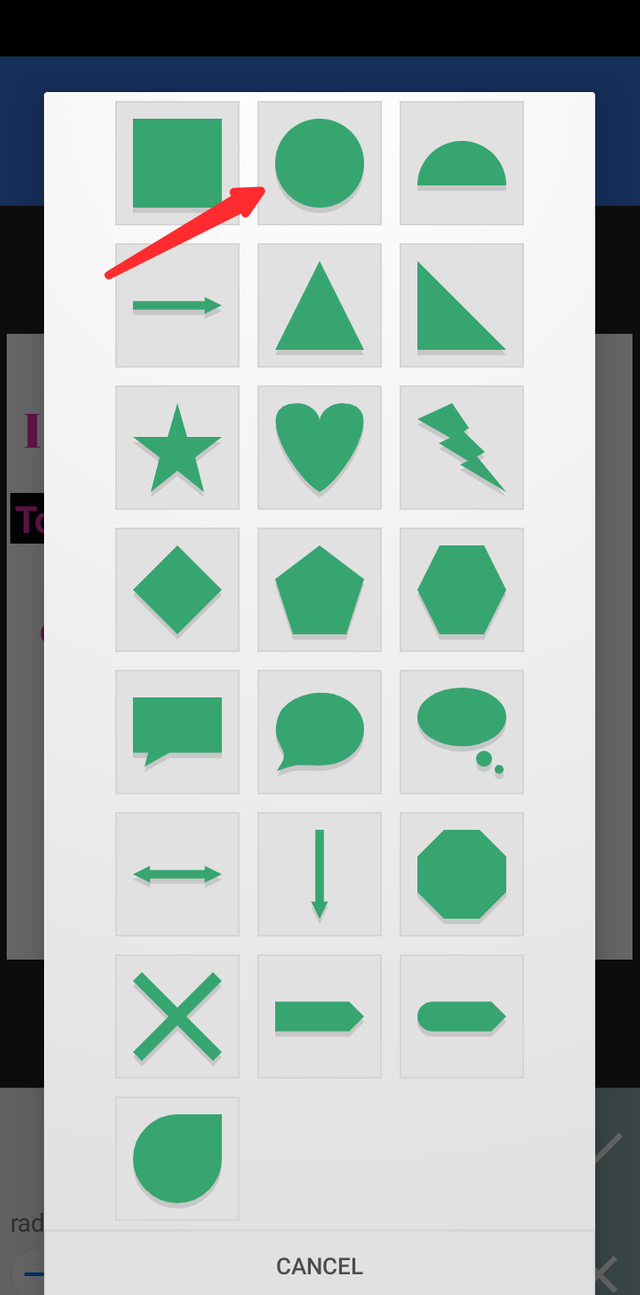
Our images can include shapes like circles, rectangle, etc. So first we are going to use a circle shape for our design.
To do this I clicked on the add + icon above and selected shapes
 | The shape it brings out is usually the square but we can change it to the shape we want. |
|---|---|
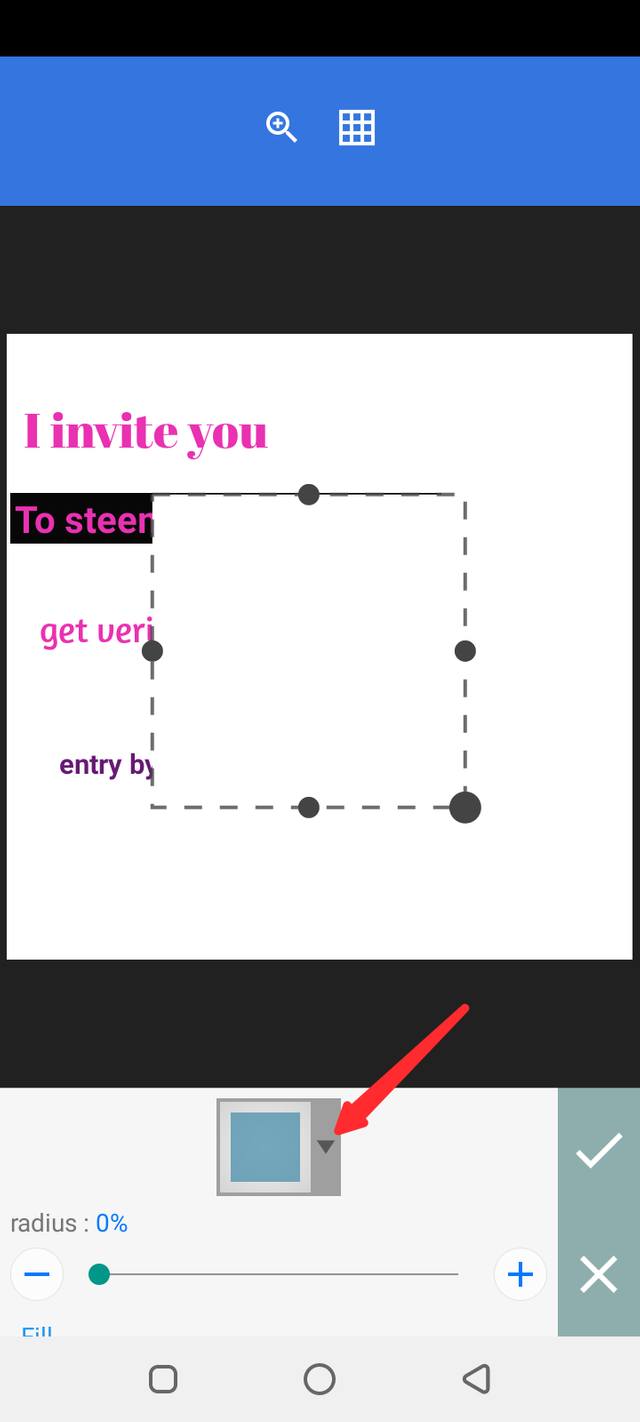 | To change the shape I clicked on the dropdown arrow below. |
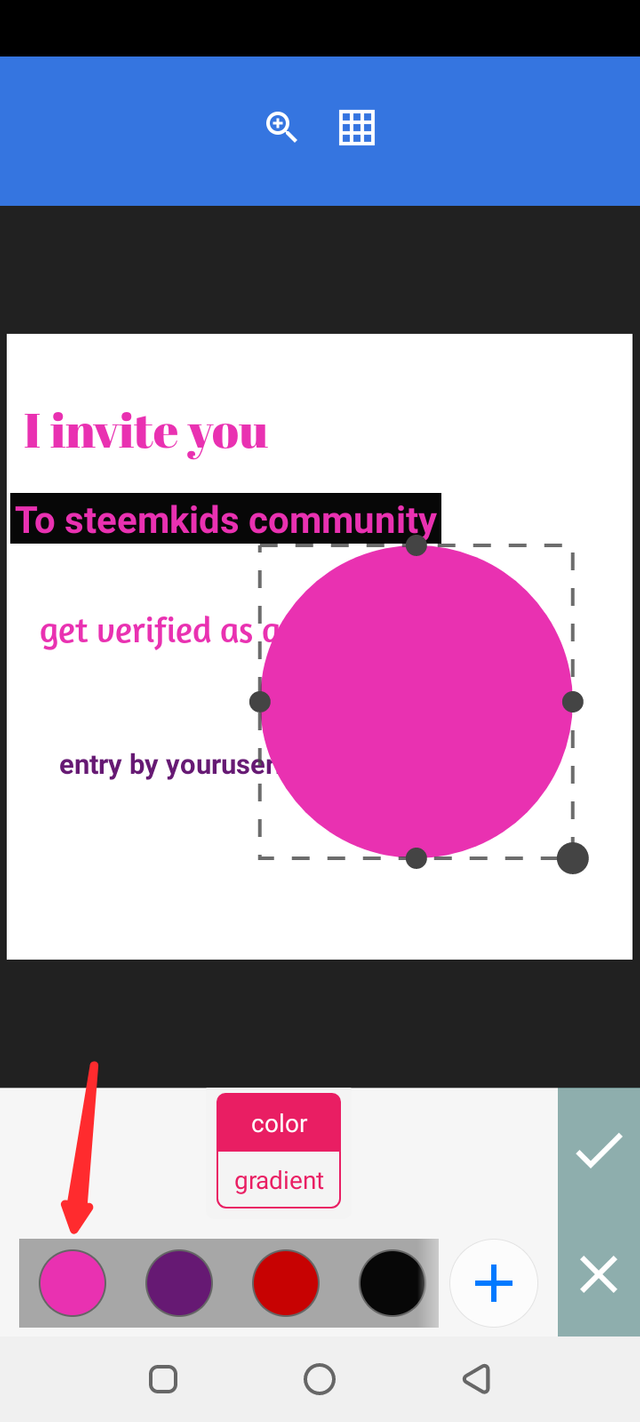
I changed to circle shape and changed the color to pink from that same shape icon box.
 |  |
|---|
Then click ✓ to comfirm.
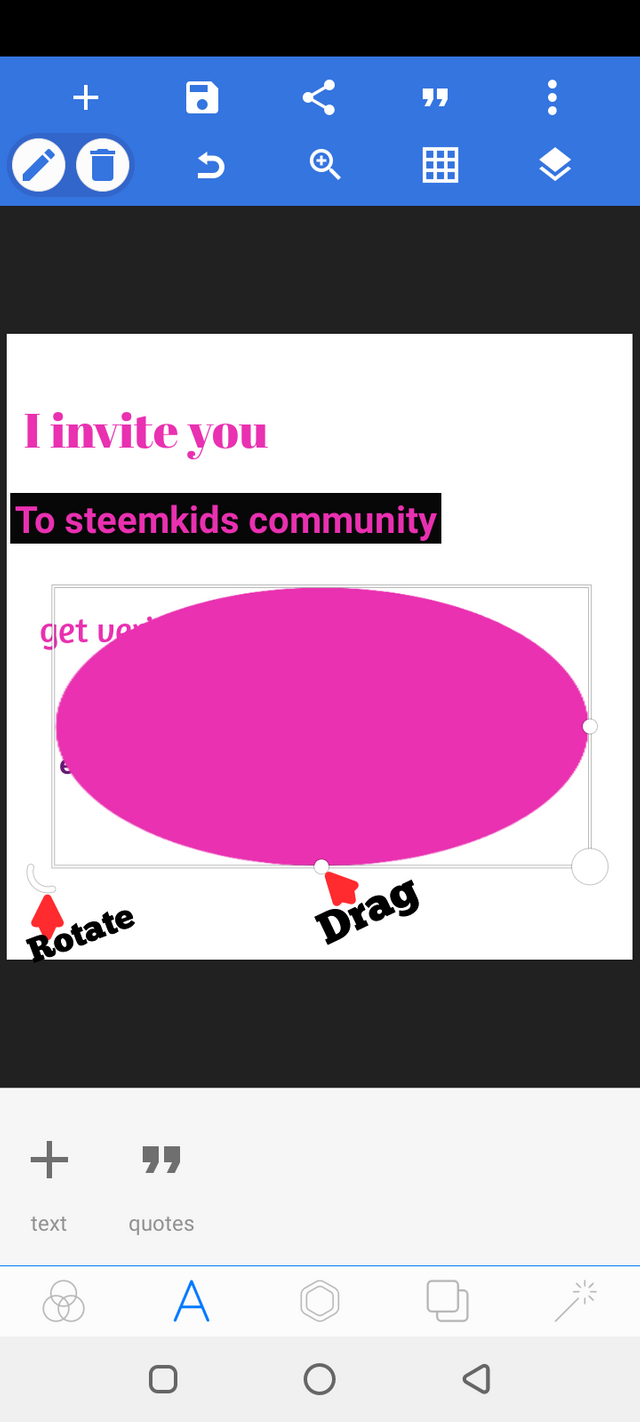
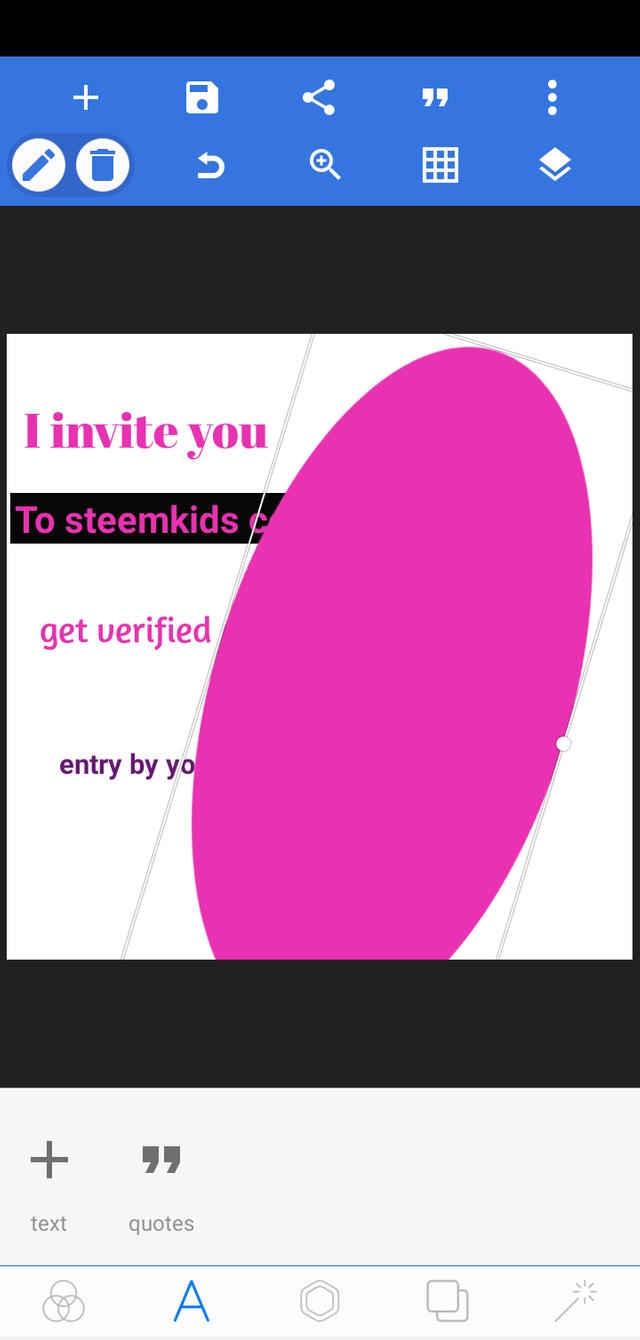
Next we'll resize the circle shape by dragging it from the edge and also we will rotate the image to our desired style.
 |  |
|---|
We'll then position it well in our design to look more beautiful.
Next we put a picture that suits our intended design. You can download an image from the internet that matches with your theme.
For this practical we downloaded an image of a kid.
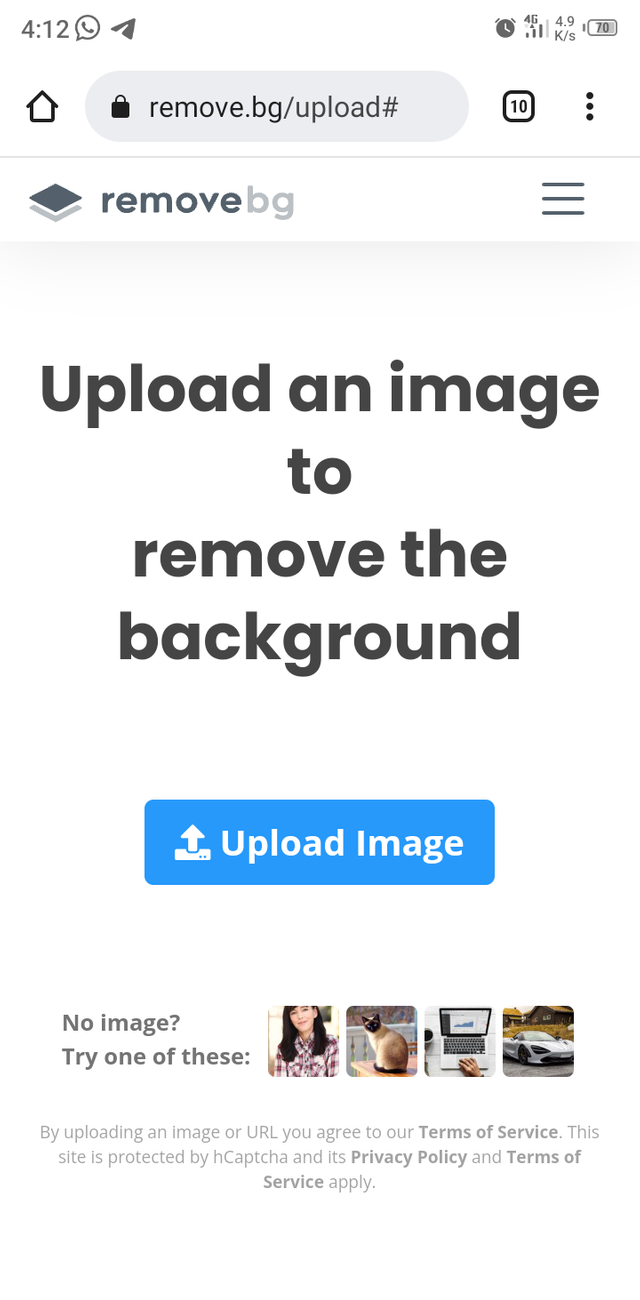
Note: most times adding the image with the background to your design can make it look a bit messy so we are recommended to remove the background of the picture before using it. We can remove the background using the site remove.bg. Just type in remove.bg in your browser and the below page will appear after you have clicked on it.
Next click on upload image and select the image you want to remove the background. Once you've selected the image, the site will automatically remove it's background and then you click on download to get the image with the removed background which is what you will use for the design
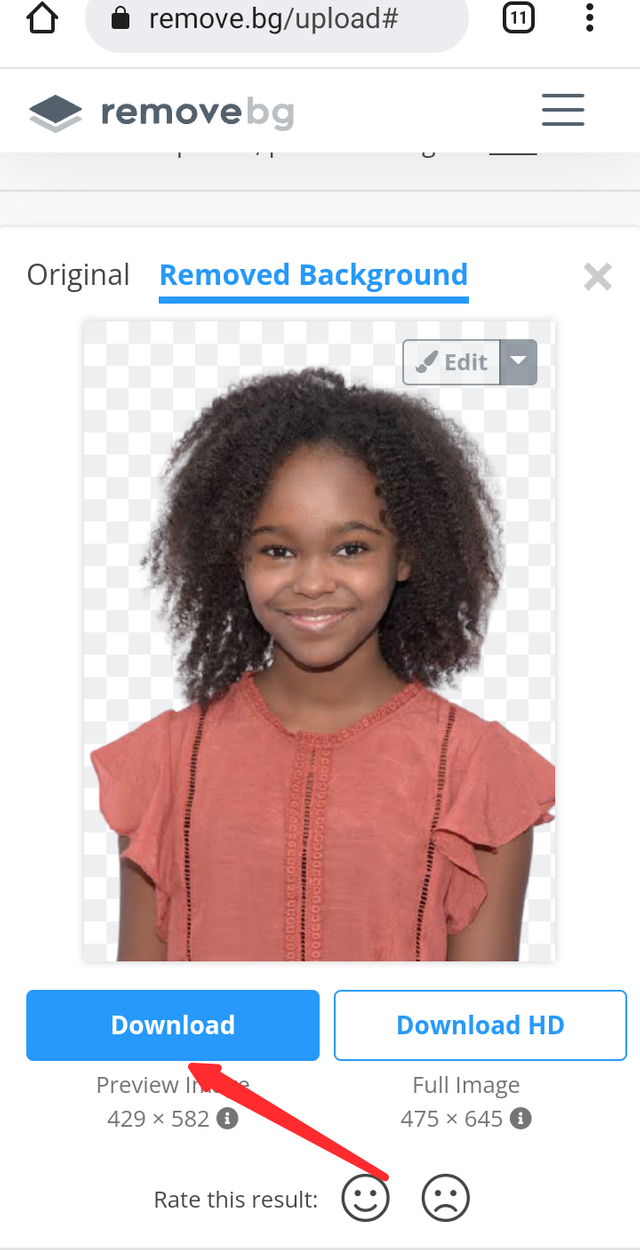 removed background
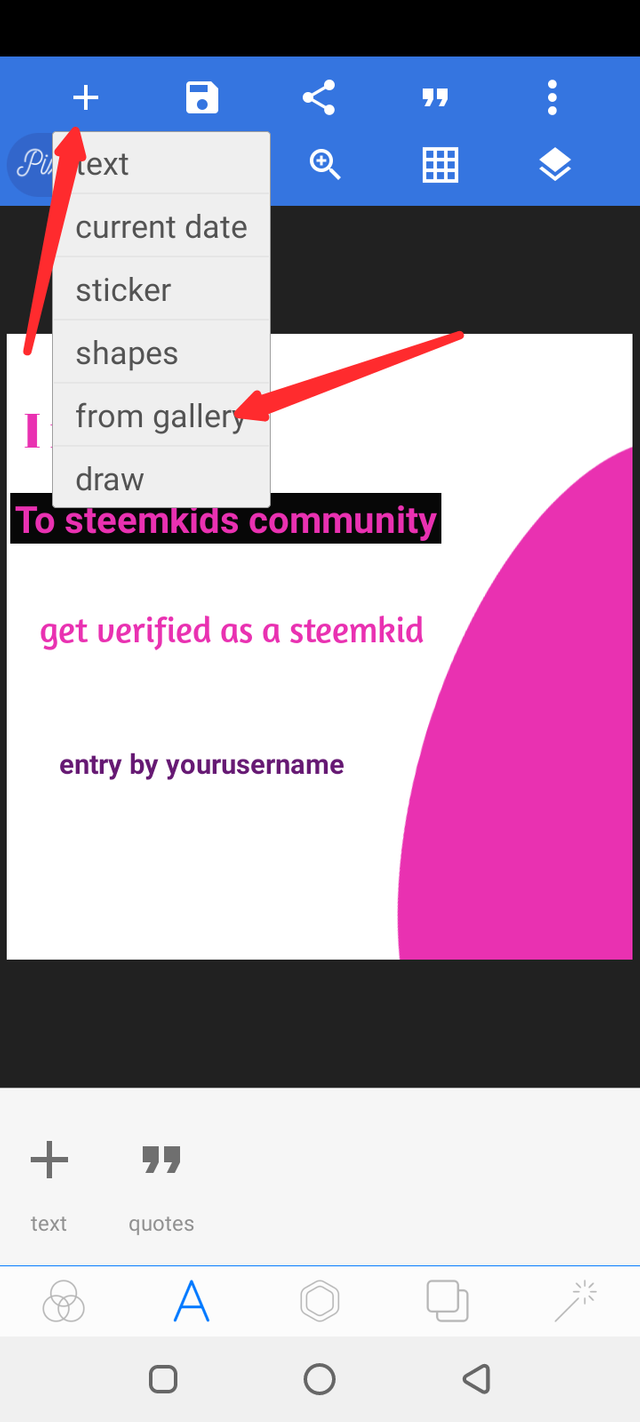
Next we import the image to pixelab by clicking on the + icon and the From gallery option.
 |  |
|---|
I also increased the size of the image by dragging. I also placed it well on the design.
Next I brought another circle shape and made it smaller in size and then positioned it at the left hand corner to further bring out the design.
 |  |
|---|
I also put the steemkids community logo and made it as a badge in the girls cloth.
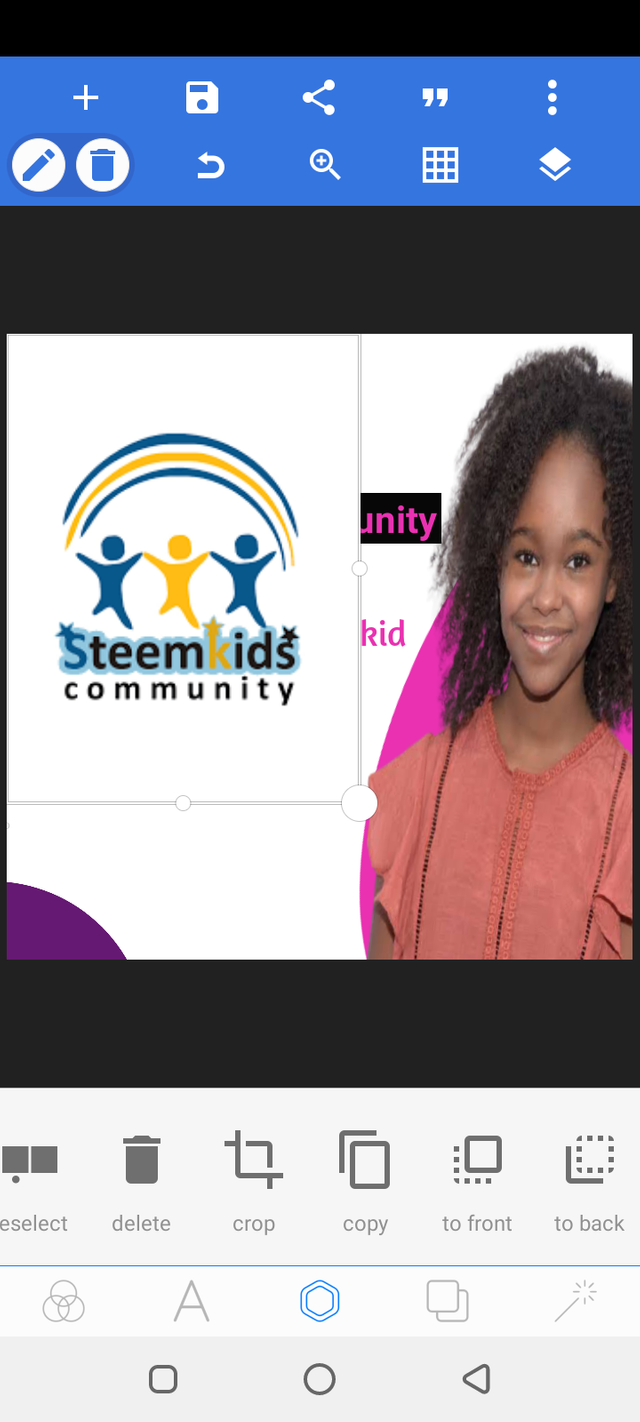 |  |
|---|
By now our design is almost ready.
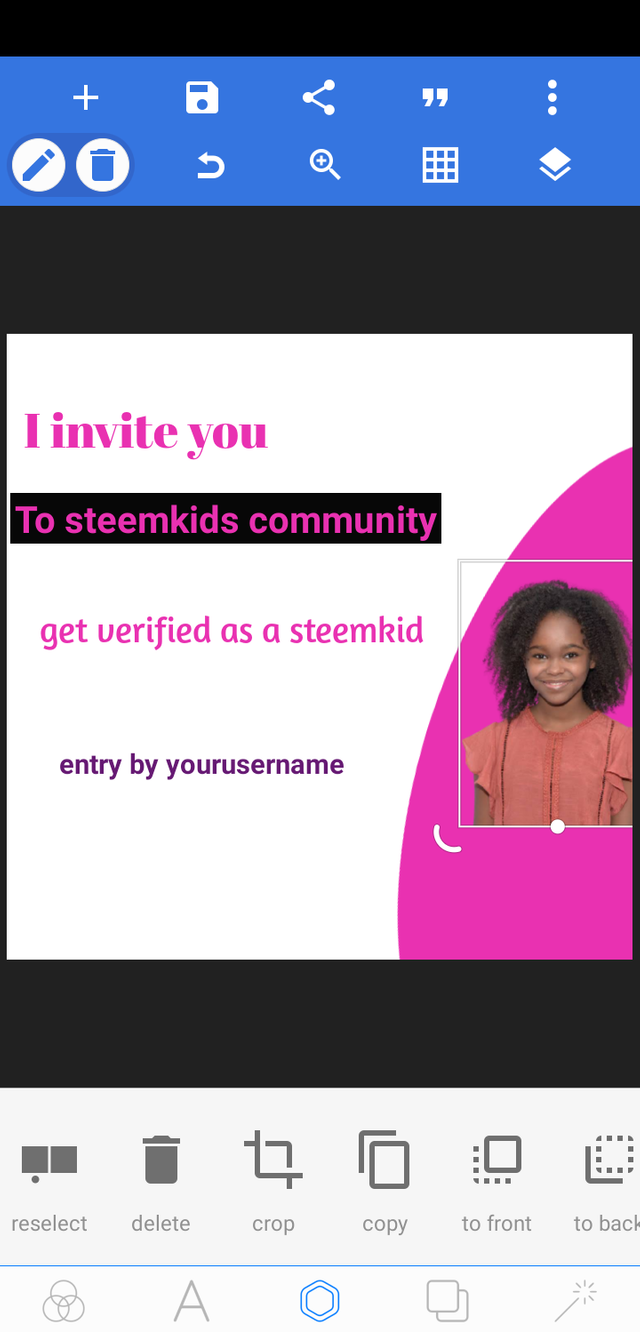
Next I brought another circle shape and dragged and turned it to the shape of a pin and used it as a line to underline the text get verified as a steemkid.
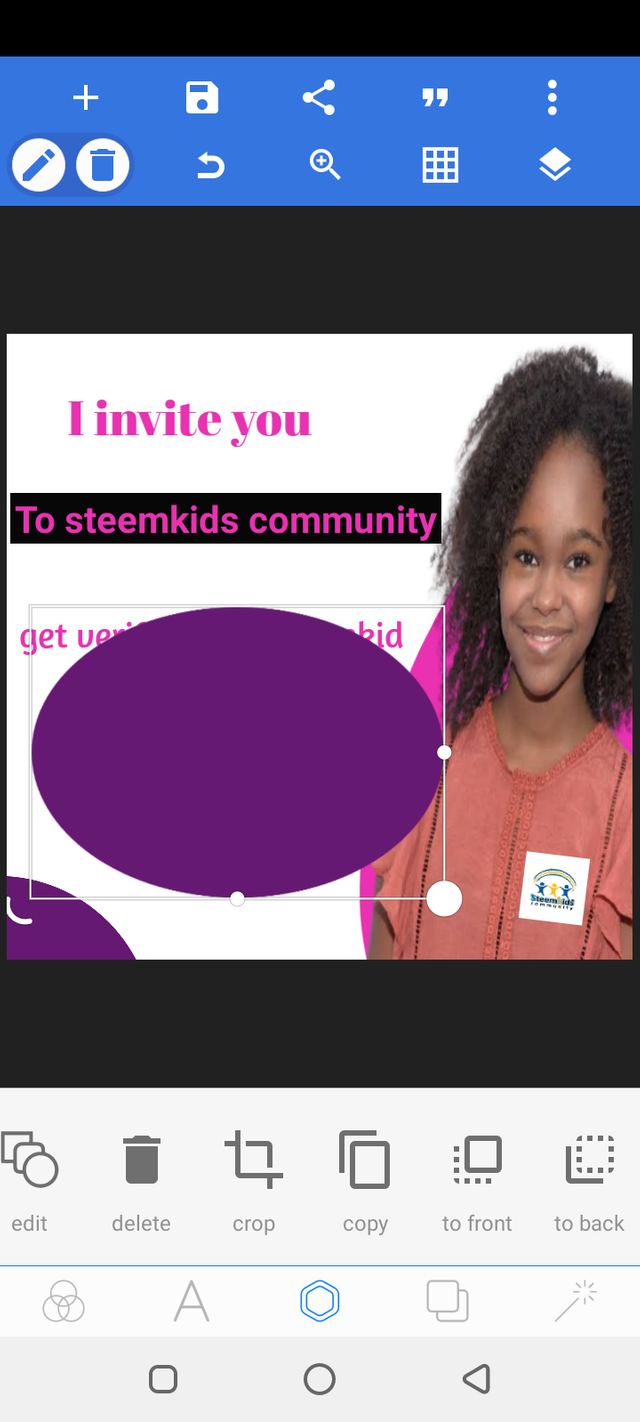 | 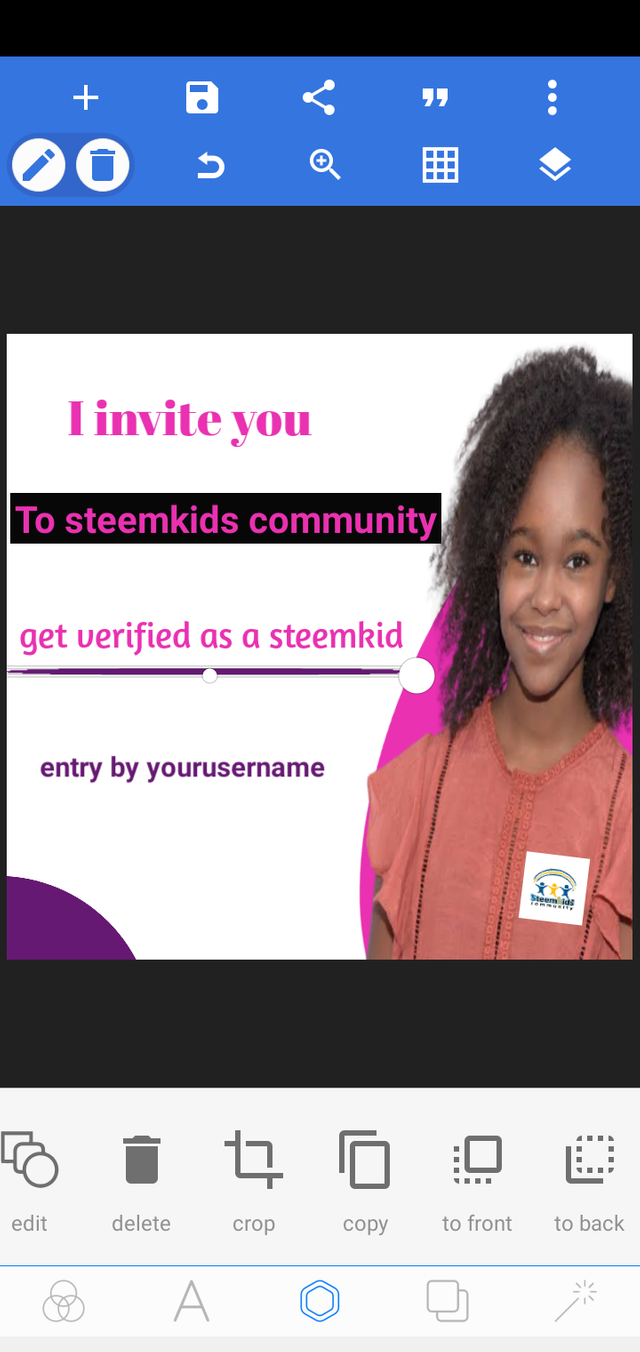 |
|---|
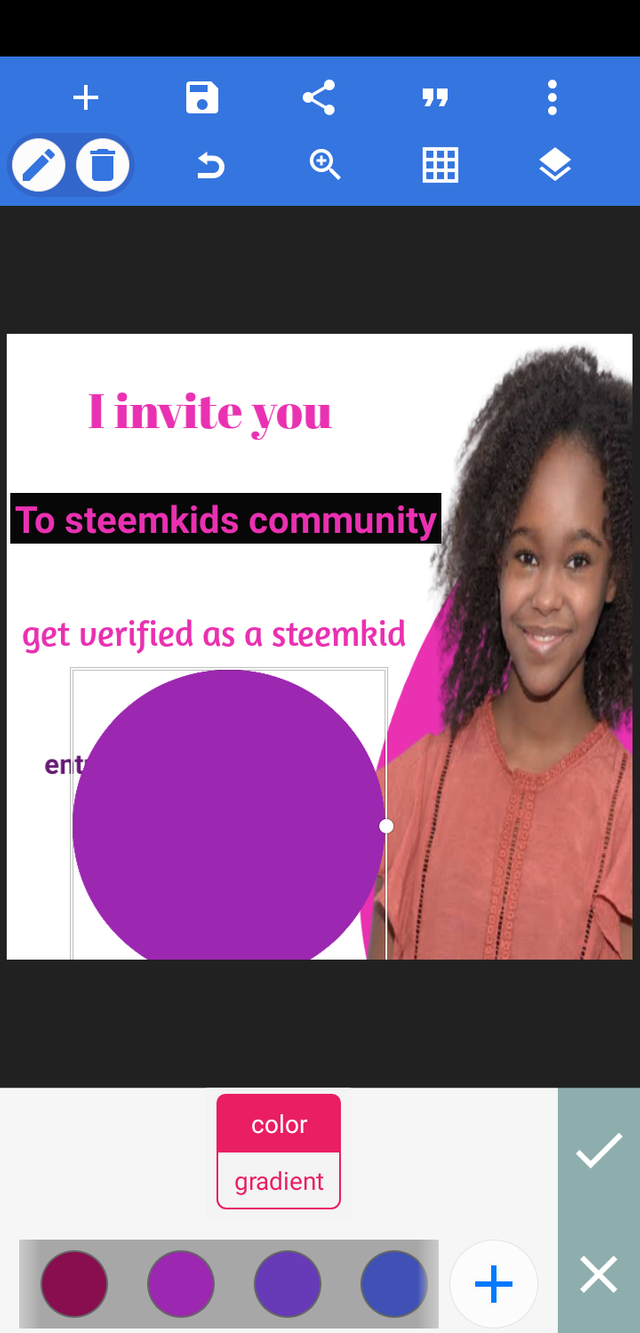
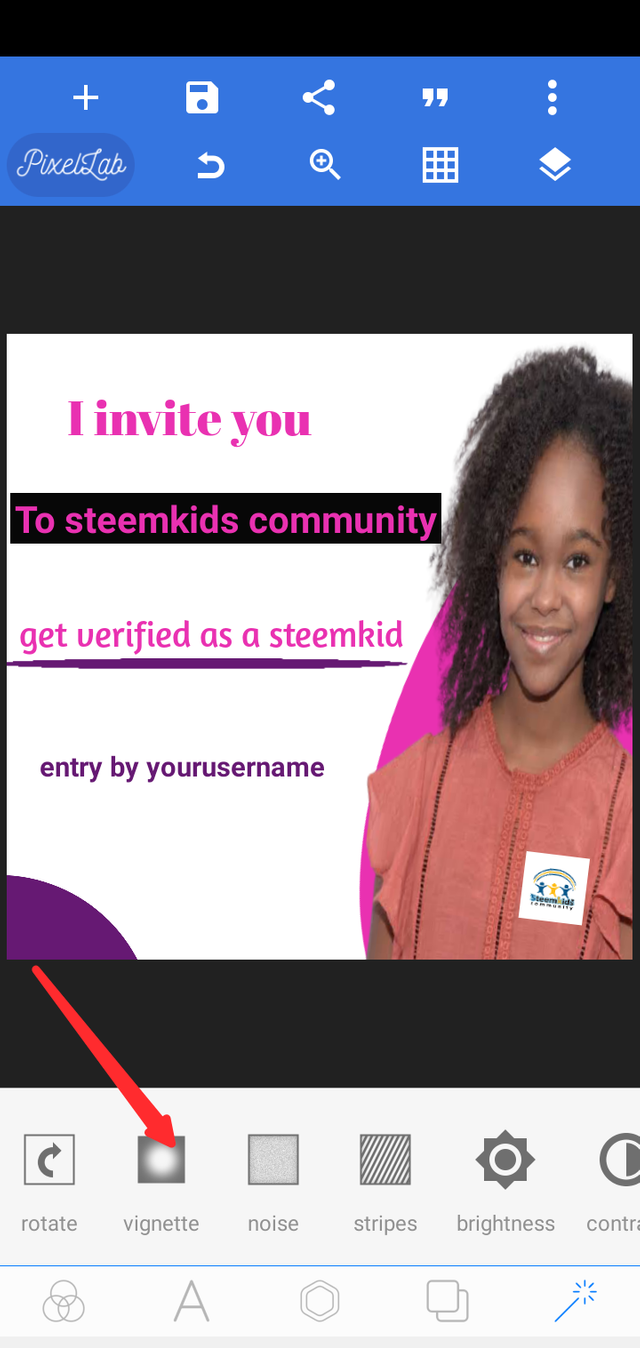
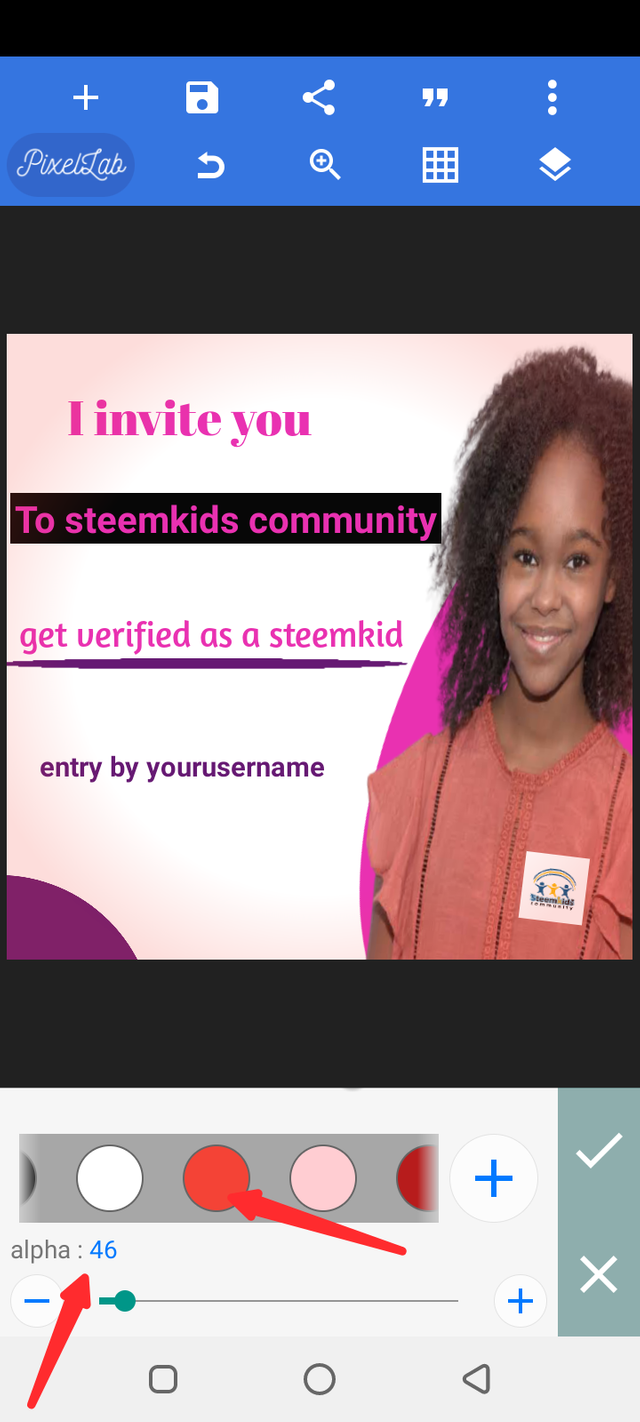
Inorder to adjust the background so it won't look too plain, I selected the background icon and clicked the effect icon** vignet, I also selected my preferred color and adjusted the output.
 |  |
|---|
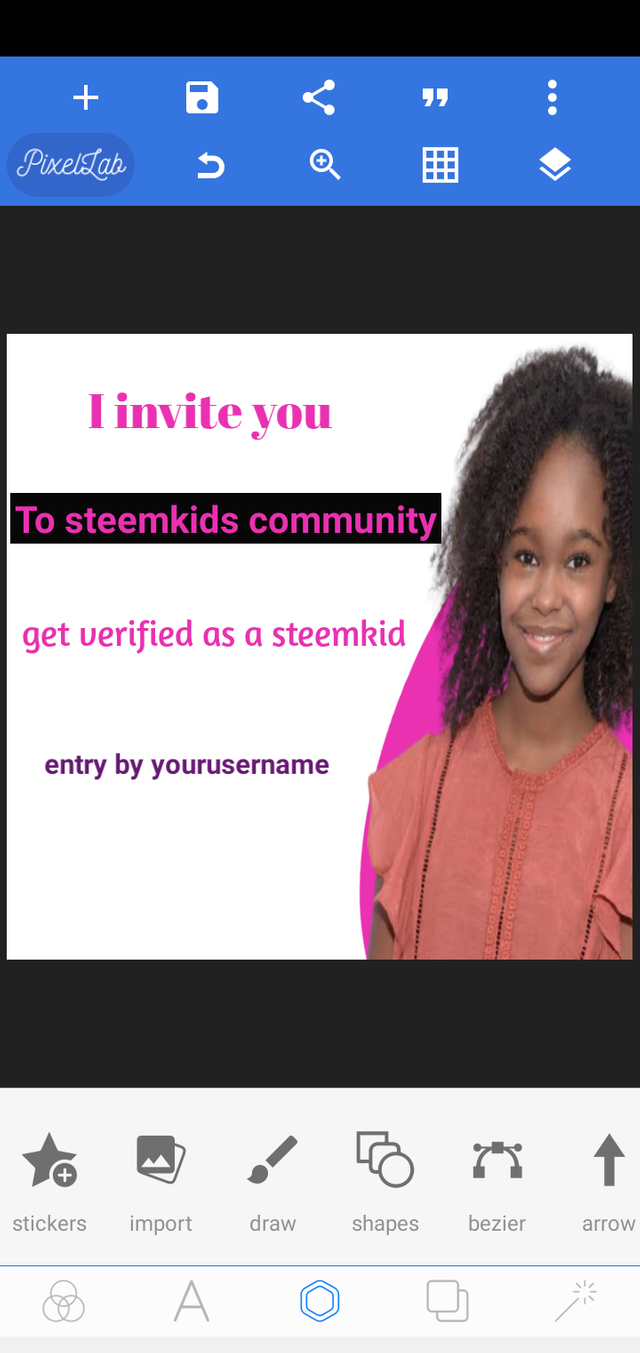
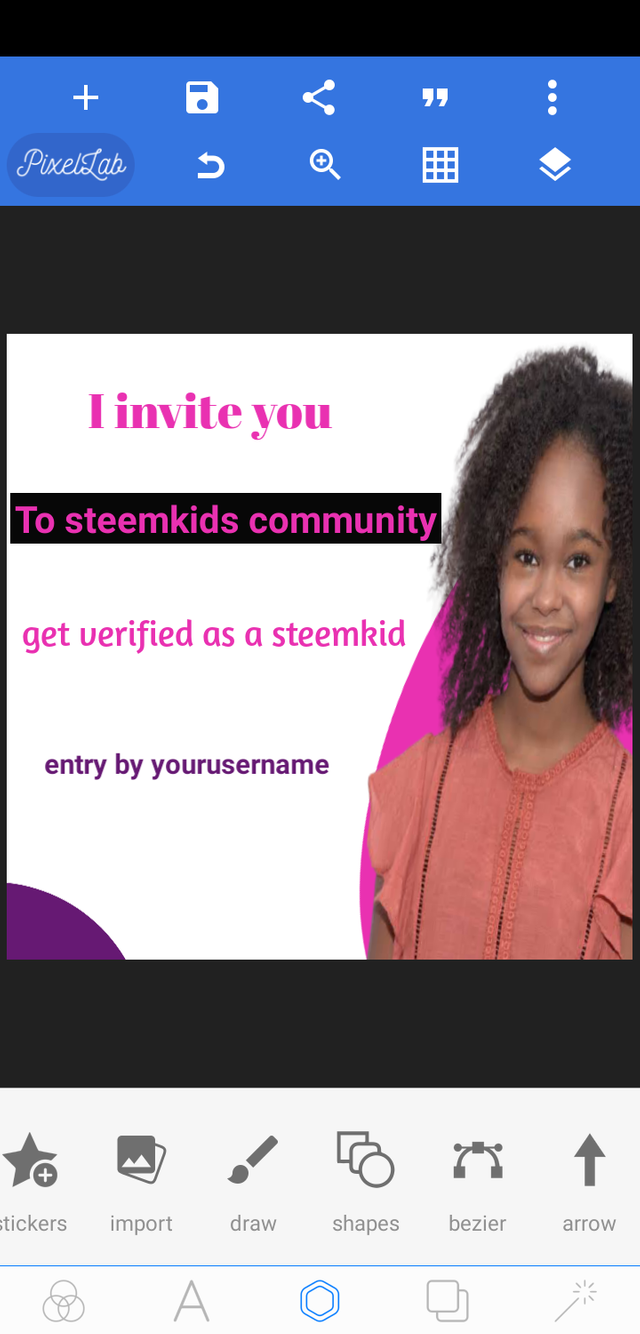
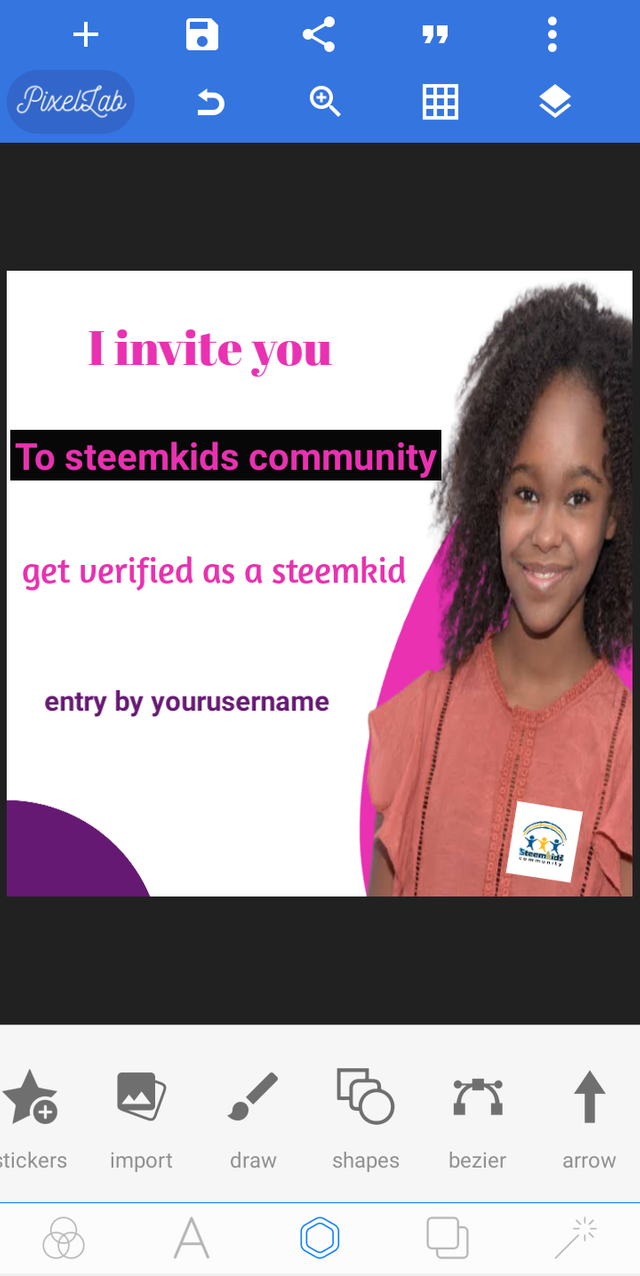
We will stop here so far in our design. View the end product below:
Remember, this is just a guide for you to have the knowledge of how to create yours. You can explore other areas of designs using this app. Just play with the features and you'd be surprised at how much more you'll learn.
I'm sorry that the process of this design took so long. But it's necessary to explain it bit by bit for the understanding of the little one.
Please practice this on your own. It's very important you learn it.
Next I'll show you how to design a 3d shape using this app and how to apply it in our image designs.
Best wishes
Special greetings to:
@steemkidss
@ngoenyi
@benton3
@graceleon
@goodybest
@mariajruizb
Hello dear teacher, I really enjoyed, your lessons and they were so simple, please take a look at it and help me know if it's correct.
I invite @favour11, @chimeroselam and @dreamystar.
Cc:
@steemkidss
@ngoenyi
@goodybest
@eliany
@benton3
@madilyn02
@mariajruizb
Please kindly view my work.
You did noble dear. Keep practicing you will perfect it on day
I thank you so much ma for your encouragement
This is a good effort from you. Keep it up.
Thanks sir
Amazing work dear, you have done well in practicing the lesson. keep exploring the app you'll see that there are a lot of things to learn from it.
Wow, thanks a lot teacher, I expect your next lessons
Your work is really great you get it well dear, keep it up
Thanks a lot ma
This post is educative. I had taught @ahbaz how to use this app some time ago and I'm proud of her improvement. Other kids will benefit a great deal too.
Great lesson!
I had always wanted to know how to create a line with PixelLab. I am glad that I know how to do it now with a circle.
I tried out some other features too.
Cc:
@madilyn02
@steemkidss
@ngoenyi
@benton3
@mariajruizb
Please help me rate this. I will like to know what you think about the colour combination, arrangement and how well I used the features.
I am inviting @smartangel @whakee @bossj23 to learn too.
Excelente mi amor, te felicito, si te recomendaría que logres colocar el logo de la comunidad un poquito más grande 🤗. Besitos.
Ok. I didn't think of that earlier, but I have taken corrections.
Muy bien. Un abrazo.
Great work dear! It's good that you tried out the lesson and reached this beautiful results. The color combination is nice and you have not limited yourself to what is taught in the lessons. I would still recommend that you put the texts in a better order next time.
Keep practicing and exploring the app!
Thank you.
I have taken note of your suggestion.
Wow!! am so happy with my work
I could never have done it without your clear and accurate steps
I am extremely happy with the end result,I am also invitng
@benson60
@ijebest
@dividiamond to join and start designing
Special thanks too
@madilyn02
@steemkidss
@ngoenyi
@focusnow
@samuel20
@ijebest
It's nice to see that you tried out the steps. You really got a nice result. I would like to recommend you give more attention to how you arrange the elements of the design so they won't be confusing. Your logo is not very well placed as well.
It's good that you tried your best anyway and I advice you keep practicing and exploring other features of the app.
By the way, I think you should get verified in the community.
Thank you
And also am working on getting verified,am new here
Thank you so much for sharing this valuable contents with us, thanks for being active in our community, we appreciate your effort 💕
Thank you ma'am. You are also doing a great job in the community. I appreciate you for that!
Very Informative post. You describe in an easy way 👍
Really, thanks for the compliment. I'm happy that you found the post informative and that you like it. Thank you for your feedback
This is really and interesting educative and quality post. Really appreciate the time taken to put this together, so many things to learn from the post. Amazing publication.
Thank you so much @steemkidss.
Excellent work my girl, thank you for sharing this so useful for everyone. A hug and blessings.
Thank you for your beautiful words as always, I always feel happy seeing your comments
Great post and i guess am gonna try something new now
Wow! I've learned some skills reading through.
Best of luck to all participants.