Club100 |Lecture 4| Using Object Selection Tool | How to Remove Background using Object Selection Tool?
Hello and Greetings Everyone. This is your very own Haidermehdi, Country Representative of Pakistan and Admin Steemit Pakistan. I am sure most of you are aware of the Graphic Designing and Adobe Illustrator sessions that I used to conduct. This time I am out here to share the work that I have done on Adobe Photoshop. It's not much and I am still in the learning phase ( Beginners). But I won't shy from sharing some of my work here on Steemit with you all :)
This is the fourthpost. If you have missed the first three posts, Don't worry. I am sharing the links below so that you can catch up with us :)
Lecture 2: Fill Color In Shapes | Group Layers | Merge Shapes
Lecture:3 : DROP SHADOW|STURCTURE AND QUALITY| SHADOW OF A SHAPE

Earlier, we studied Drop Shadow which is one of the options from Blending options. Today I wanted to discuss some more options for blending but to use them effectively, maybe first we should learn about the tools that are used widely and can prove to be extremely helpful while editing any image.
Today, we will discuss The Selection Tools. Selection tools are used to select a particular object from an image and do multiple operations over that(leaving no effect on the rest of the image).
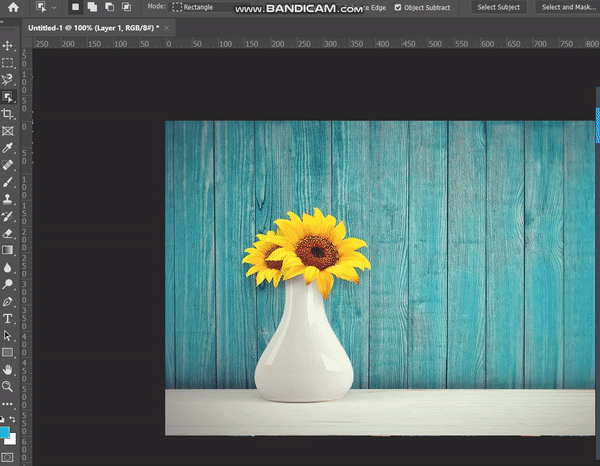
So first, Let's pick an image from the internet and try to make a design from those images.

Pixabay
Now let's open this image in Adobe Photoshop and see how we can use the selection tool over this.
On the left side of the screen, we have our tools.When we go from up to down, we find an option of Quick selection tool. Right click here and select Object Selection Tool. And below is how we will use the object selection tool!
.gif)
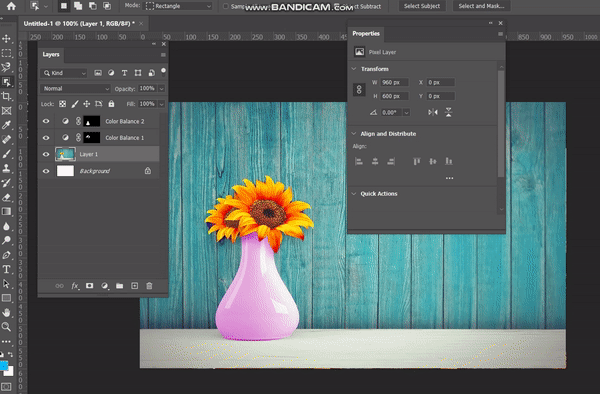
Once we select the Object selection tool, now we create an outline around the object that we select and Adobe Photoshop automatically detects the object and creates a selection for that. The above gif is a rough depiction of that. I am attaching an image below where I will be coloring the leaves and jars separately. There is one more thing that we can do and I will show you that right away.

Another amazing thing that we can do easily using the Quick Selection/Object Selection Tool is:
.gif)
How To Remove Background Using Object Selection Tool
In the above gif, we selected the object, (Did inverse selection), and changed the colors of the background. In the same way, if we select the object and then select inverse, after that we have to press the delete button and only the jar will come out as a separate layer.
.gif)
Tip: If the object selection tool selects some other part other than the object, right-click on the tool and select the quick selection tool. Then press alt and remove the selection from the part of the image which you don't want to be selected. Similarly, if it doesn't select some part of the object, use the quick selection tool without pressing ALT and it will add the selected part to the previous selection.
I hope you guys were able to understand the purpose of using these Selection Tools. For complicated images, we have other selection tools that we will discuss with time In shaa Allah. In the next post, we will be learning other selection tools too. TIll then, take good care of yours and remember me in your prayers.
Yours, Haidermehdi.
Country Representative Pakistan.
Steem On!
Thank you for contributing to #LearnWithSteem theme. This post has been upvoted by @Reminiscence01 using @steemcurator09 account. We encourage you to keep publishing quality and original content in the Steemit ecosystem to earn support for your content.
Regards,
Team #Sevengers
Thank you for the upvote.
Please recheck the club Status. You will find it #Club100.