Fill Color In Shapes | Group Layers | Merge Shapes
Hello and Greetings Everyone. This is your very own Haidermehdi, Country Representative of Pakistan and Admin Steemit Pakistan. I am sure most of you are aware of the Graphic Designing and Adobe Illustrator sessions that I used to conduct. This time I am out here to share the work that I have done on Adobe Photoshop. It's not much and I am still in the learning phase ( Beginners). But I won't shy from sharing some of my work here on Steemit with you all :)
This is the second Post. If you have missed the first one, Don't worry. I am sharing the link below so that you can catch up with us :)
- Lecture 1: GETTING STARTED WITH ADOBE PHOTOSHOP
Today's lecture again is going to be very simple. We will be learning how to color the images that we had made in the first lecture, How to merge two or more layers and then finally, we will learn to apply some effects.
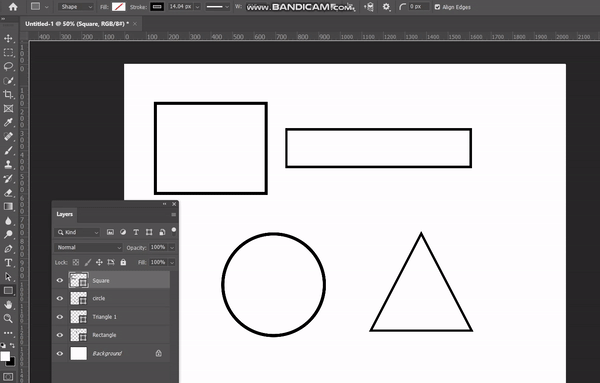
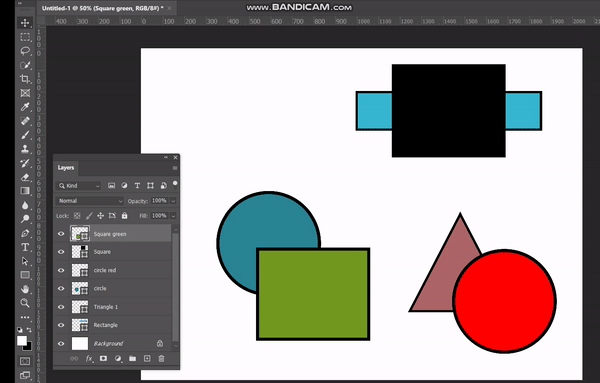
Following the Steps in Lecture No 1, we can easily draw the shapes that I have drawn in the image below and now we will look how we can fill the color in them.
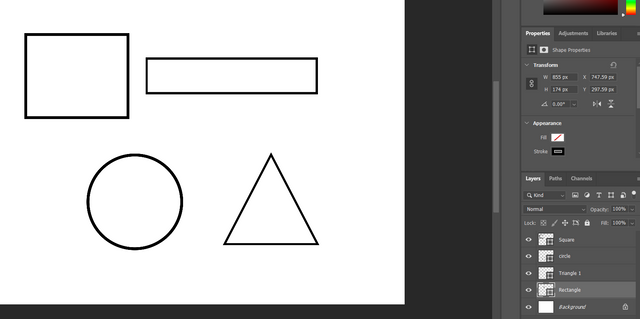
Since we can see clearly, that all these shapes are drawn in different layers. Thus for coloring these shapes, we would have to choose each layer first and then look for the fill option.
Let's chose the first layer which is a square and see how we can color that.
.gif)
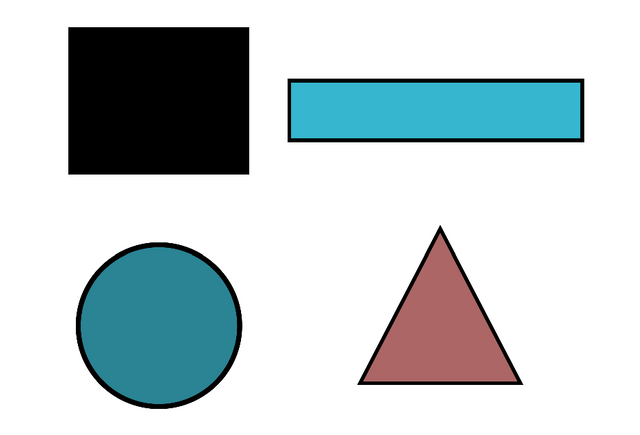
- Select the layer os shape you want to colorize.
- Now select the shape tool.
- Go to the Fill option on top which appears after you select the shape tool.
- Choose the color you want to fill.
- And you will see it's done :)
Grouping Two or More Layers To move Object together
Now suppose we are done with the colors and we have arranged the shapes the way we want. But now to move them, we have to do them one by one and it's taking a lot of time. This is where grouping the layers comes into place.
We select the layers we want to merge and then there are three ways to group them as one.
- Select the two or more layers that you want to group and:
- Right click and select Group from Layers, Name the group and it will become a group.
- Click on the group icon which is right there under the layers. And you will see the layers grouped as one.
- Third and the easiest is to press CTRL + G on the keyboard and grouping will take place.
Now let me arrange the shapes and ill show you how we can group them together by using all three methods.
Ps: Even groups can be grouped together and form a new group.
.gif)
This is how simply we have grouped the layers and now we can perform joint operations on them. Now to tell you why the square is coming up over the rectangle. It's because the layer of Square is above the layer of the rectangle as we can see in the Layers.
Merging Shapes || The Difference Between grouping and Merging
As per its name, the merge shapes option will merge the selected shapes or the layers just like the group does but not the way the Group does.
Merge shape is different and it does convert the shape as one but it joins them together and make them one shape. Just like the merge tool in the Adobe Illustrator.
Another thing to be noted is, when the shapes are merged, they take the color of the layer which is on top. Let's try to merge the current images that we have.
- There are two ways to merge the shapes together.
- Select the layers and right click. Choose the Merge Shapes option. The images will be merged and converted into one layer.
- Or the simple way, Press CTRL + E on the keyboard.
.gif)
I hope you guys were able to understand the purpose of why we use separate layers for each object in the Adobe Photoshop. In the next post, we will be learning about some quick tools that help us a lot while working on Adobe Photoshop. TIll then, take good care of yours and remember me in your prayers.
Yours, Haidermehdi.
Country Representative Pakistan.
Steem On!
Congratulations! This post has been upvoted through steemcurator07.
Curated By - @kiwiscanfly 🐔
Curation Team - The7up
Feel the BURN 🔥#burnsteem25 🔥
Thanks mate.
So good to see you guys rolling ❤️
This was my second lecture and after your post I go to my laptop and do all the steps that you described here.
I am learning Adob very easily.
Thank you again for another lecture.
Glad I could help you.
Being a medical student I lack knowledge about computer technologies like this. Because we dont come across with these softwares as much as a computer student does. So it was always a task for me to edit pictures using an Adobe Photoshop. But now that you have shared this master peice with us, I am sure I will not face any difficulty now. I will follow your steps and will try to better myself at this. Thankyou for always helping us through your very useful content. Stay blessed!