Off-Grid: Rebuilding the Rocket Stove Boiler and Connecting Outdoor Plumbing for Spring Showers
Last week was snow - this week feels like spring. Yesterday was a good day to rebuild the Outdoor Rocket Stove Boiler. We collect and boil rain water for cleaning dishes, cleaning clothes, and bathing. I've had this larger 68 quart Stainless Steel stock pot on hand for many months - looking forward to the outdoor hot showers. Durning the winter months we have a huge metal stock pot on the top of the wood stove for boiling cleaning water, but in the summer we have a rocket stove boiler dug into the side of the hill - up the hill from the cabin and shower pad, so it have water pressure from gravity. I had a chiminea converted to a boiler before, but the rocket stove boiler uses about a quarter of the wood for the same boil.
Every morning I fire up the outdoor boiler for dishes and laundry, then once more in the afternoon for outdoor showers, baths, and the remaining dishes. They do have in-line propane water heaters, but we have plenty of long juniper branches that are easily fed into the rocket stove. I do have a variety of pumps that could be ran off the solar panels for water pressure, but the gravity pressure has less moving parts and works well enough for my needs. We do have propane burners for the rare case that only a small amount of boiled water is needed. There are other alternatives for hot water heating. Solar hot water heating works very well - think of the hot water in a hose that has been left in the sun. I will eventually try a garden hose coiled coiled in the center of a hot compost pile.
What is a Rocket Stove ?
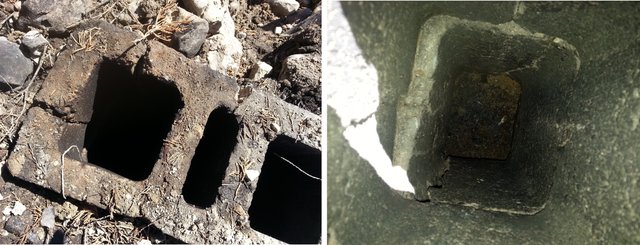
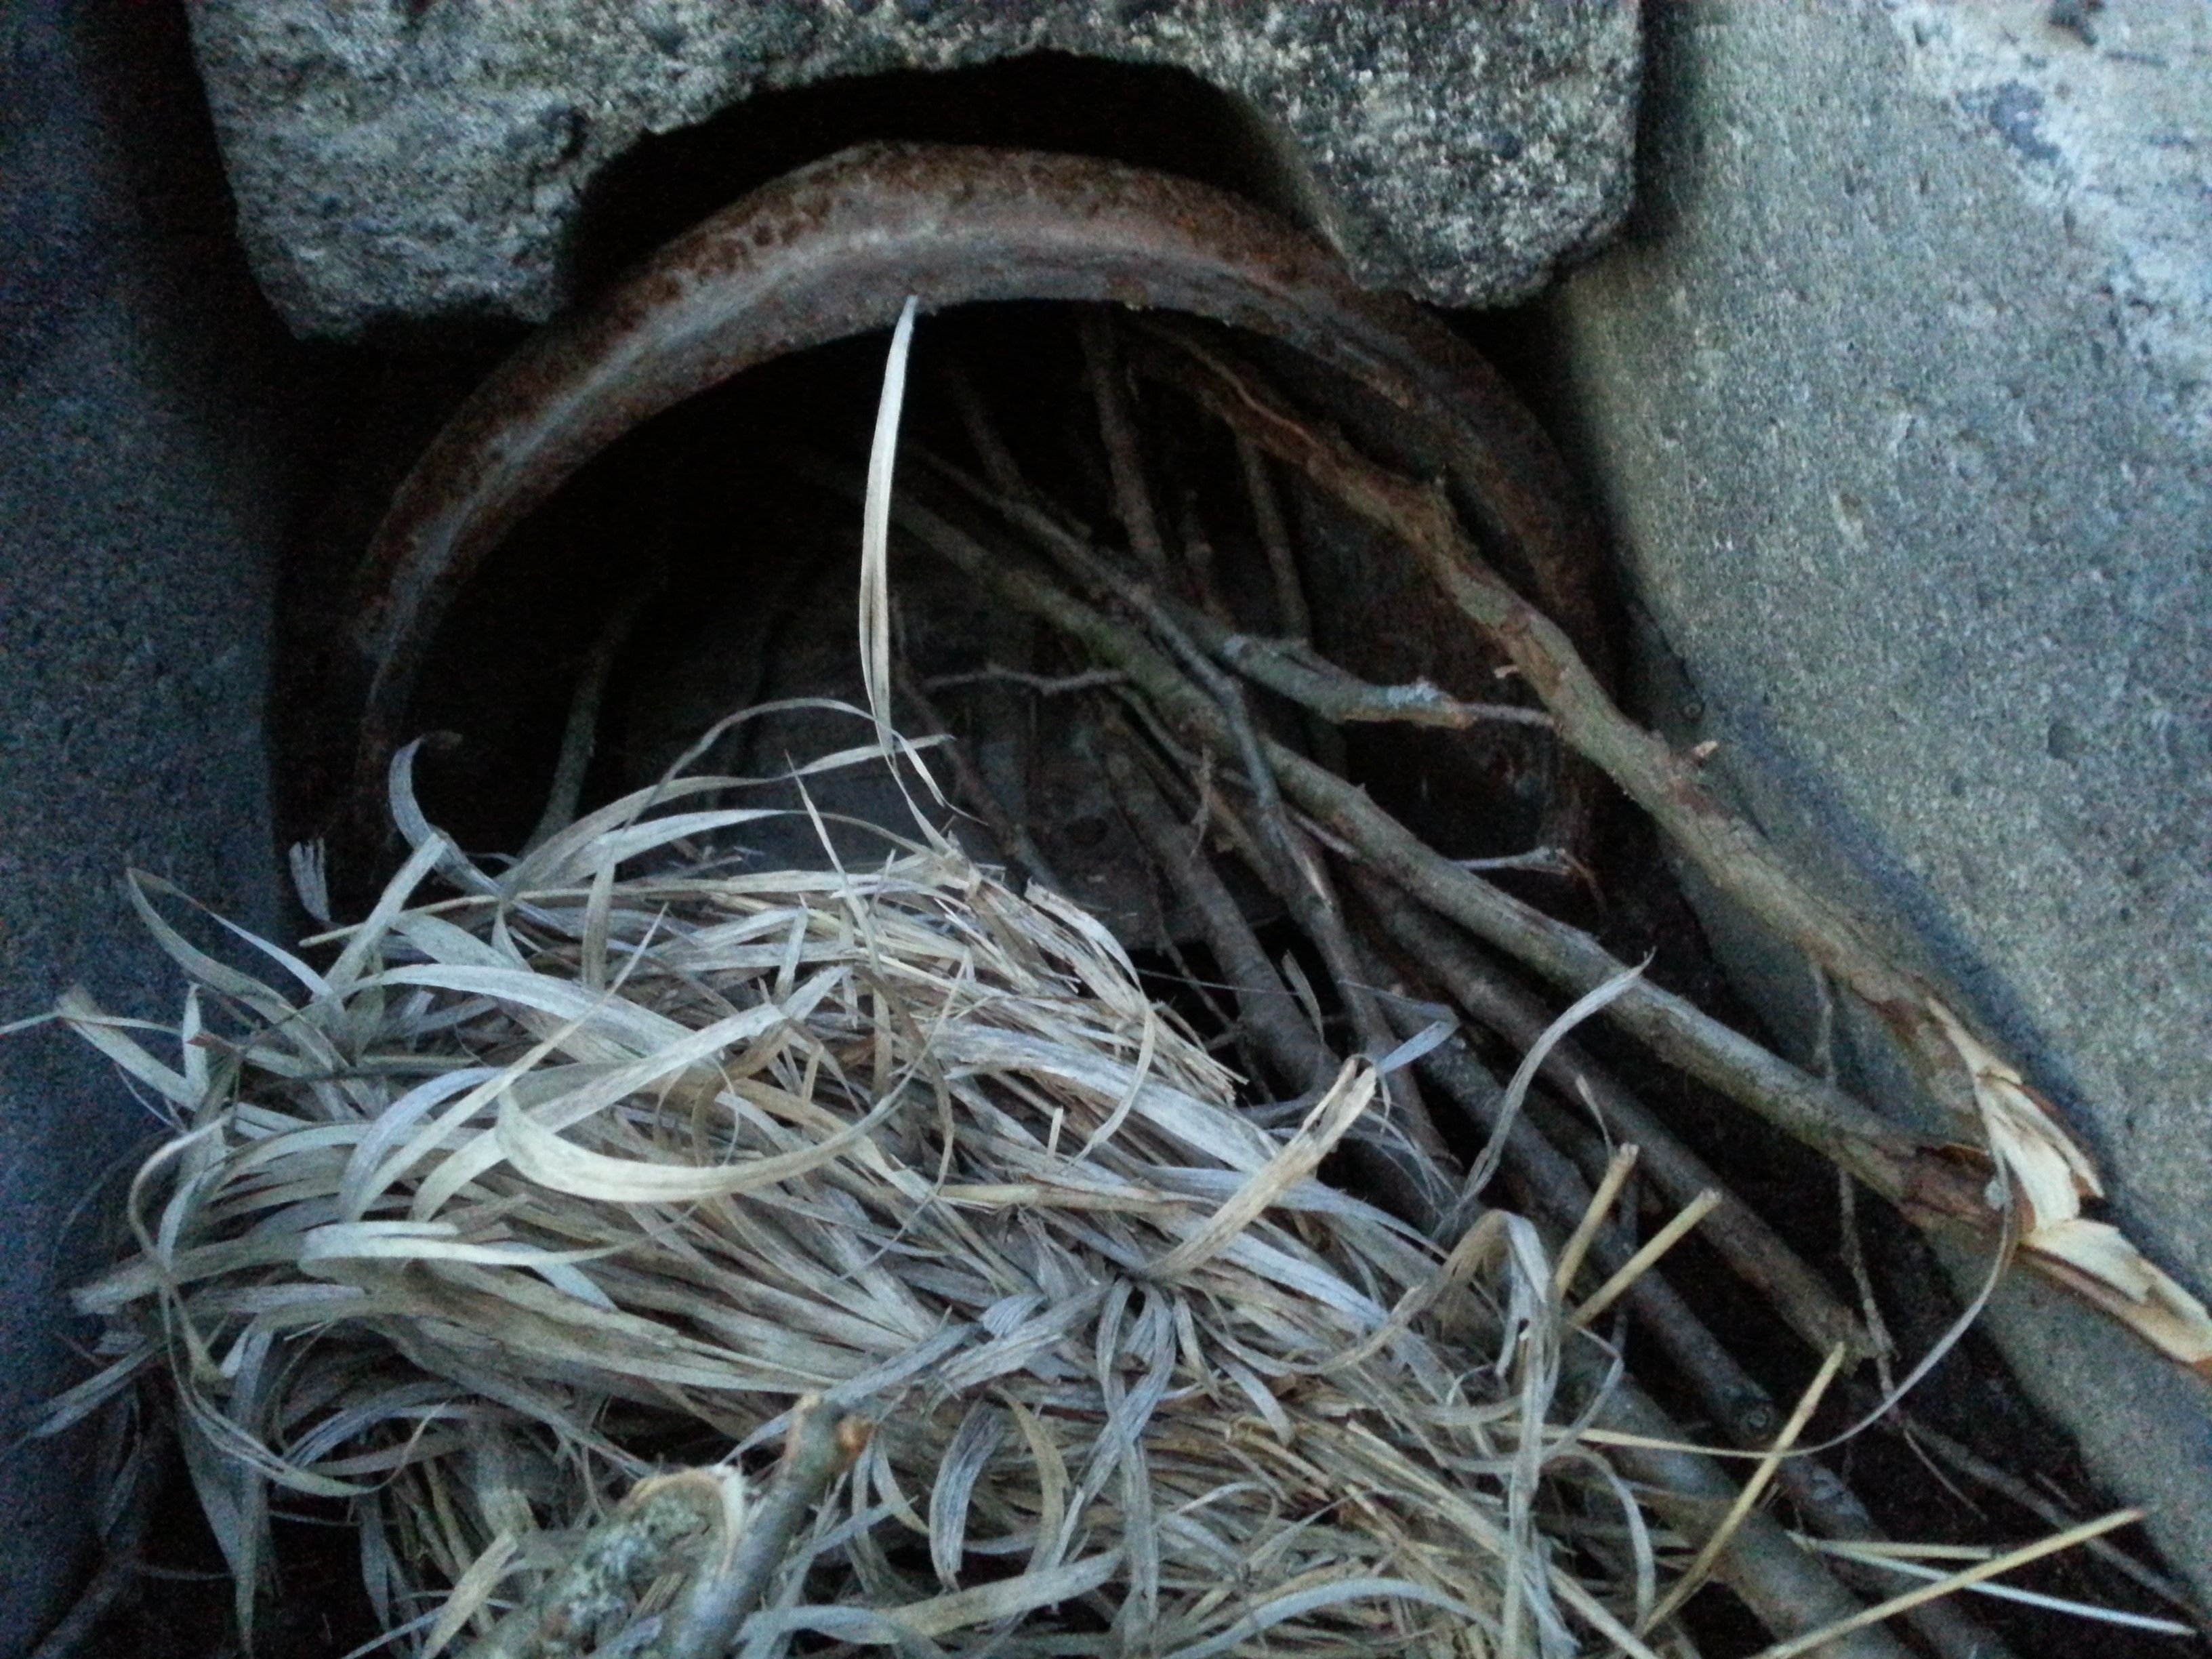
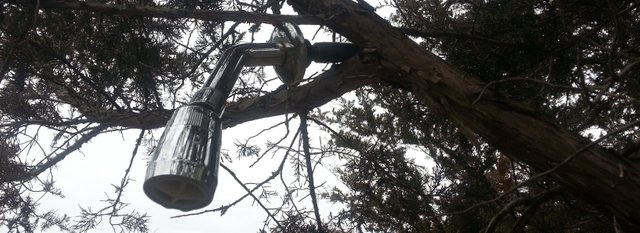
The basic 'L' shape of the rocket stove chimney, burning chamber, and fuel loading chute works well for creating and updraft of air for the chimney. The flow of air in from the bottom created by the fire heat rising causes the wood fuel to burn clean with less smoke. When rock, cement, clay, earth, or other mass is able to be heated by the fire, the combination of air flow and heat make the off gases of the heated wood burn up instead of out as smoke. In the picture below is a look down the rocket stove chimney burner.
Indoor rocket stove mass heaters are also very efficient. With a strong enough floor and proper venting - the heat absorbing and slow releasing mass of clay, cement, or other mixture surrounds the sideways burn chamber and chimney of the mass rocket stove make it much more efficient than a standard cast iron wood burning stove.
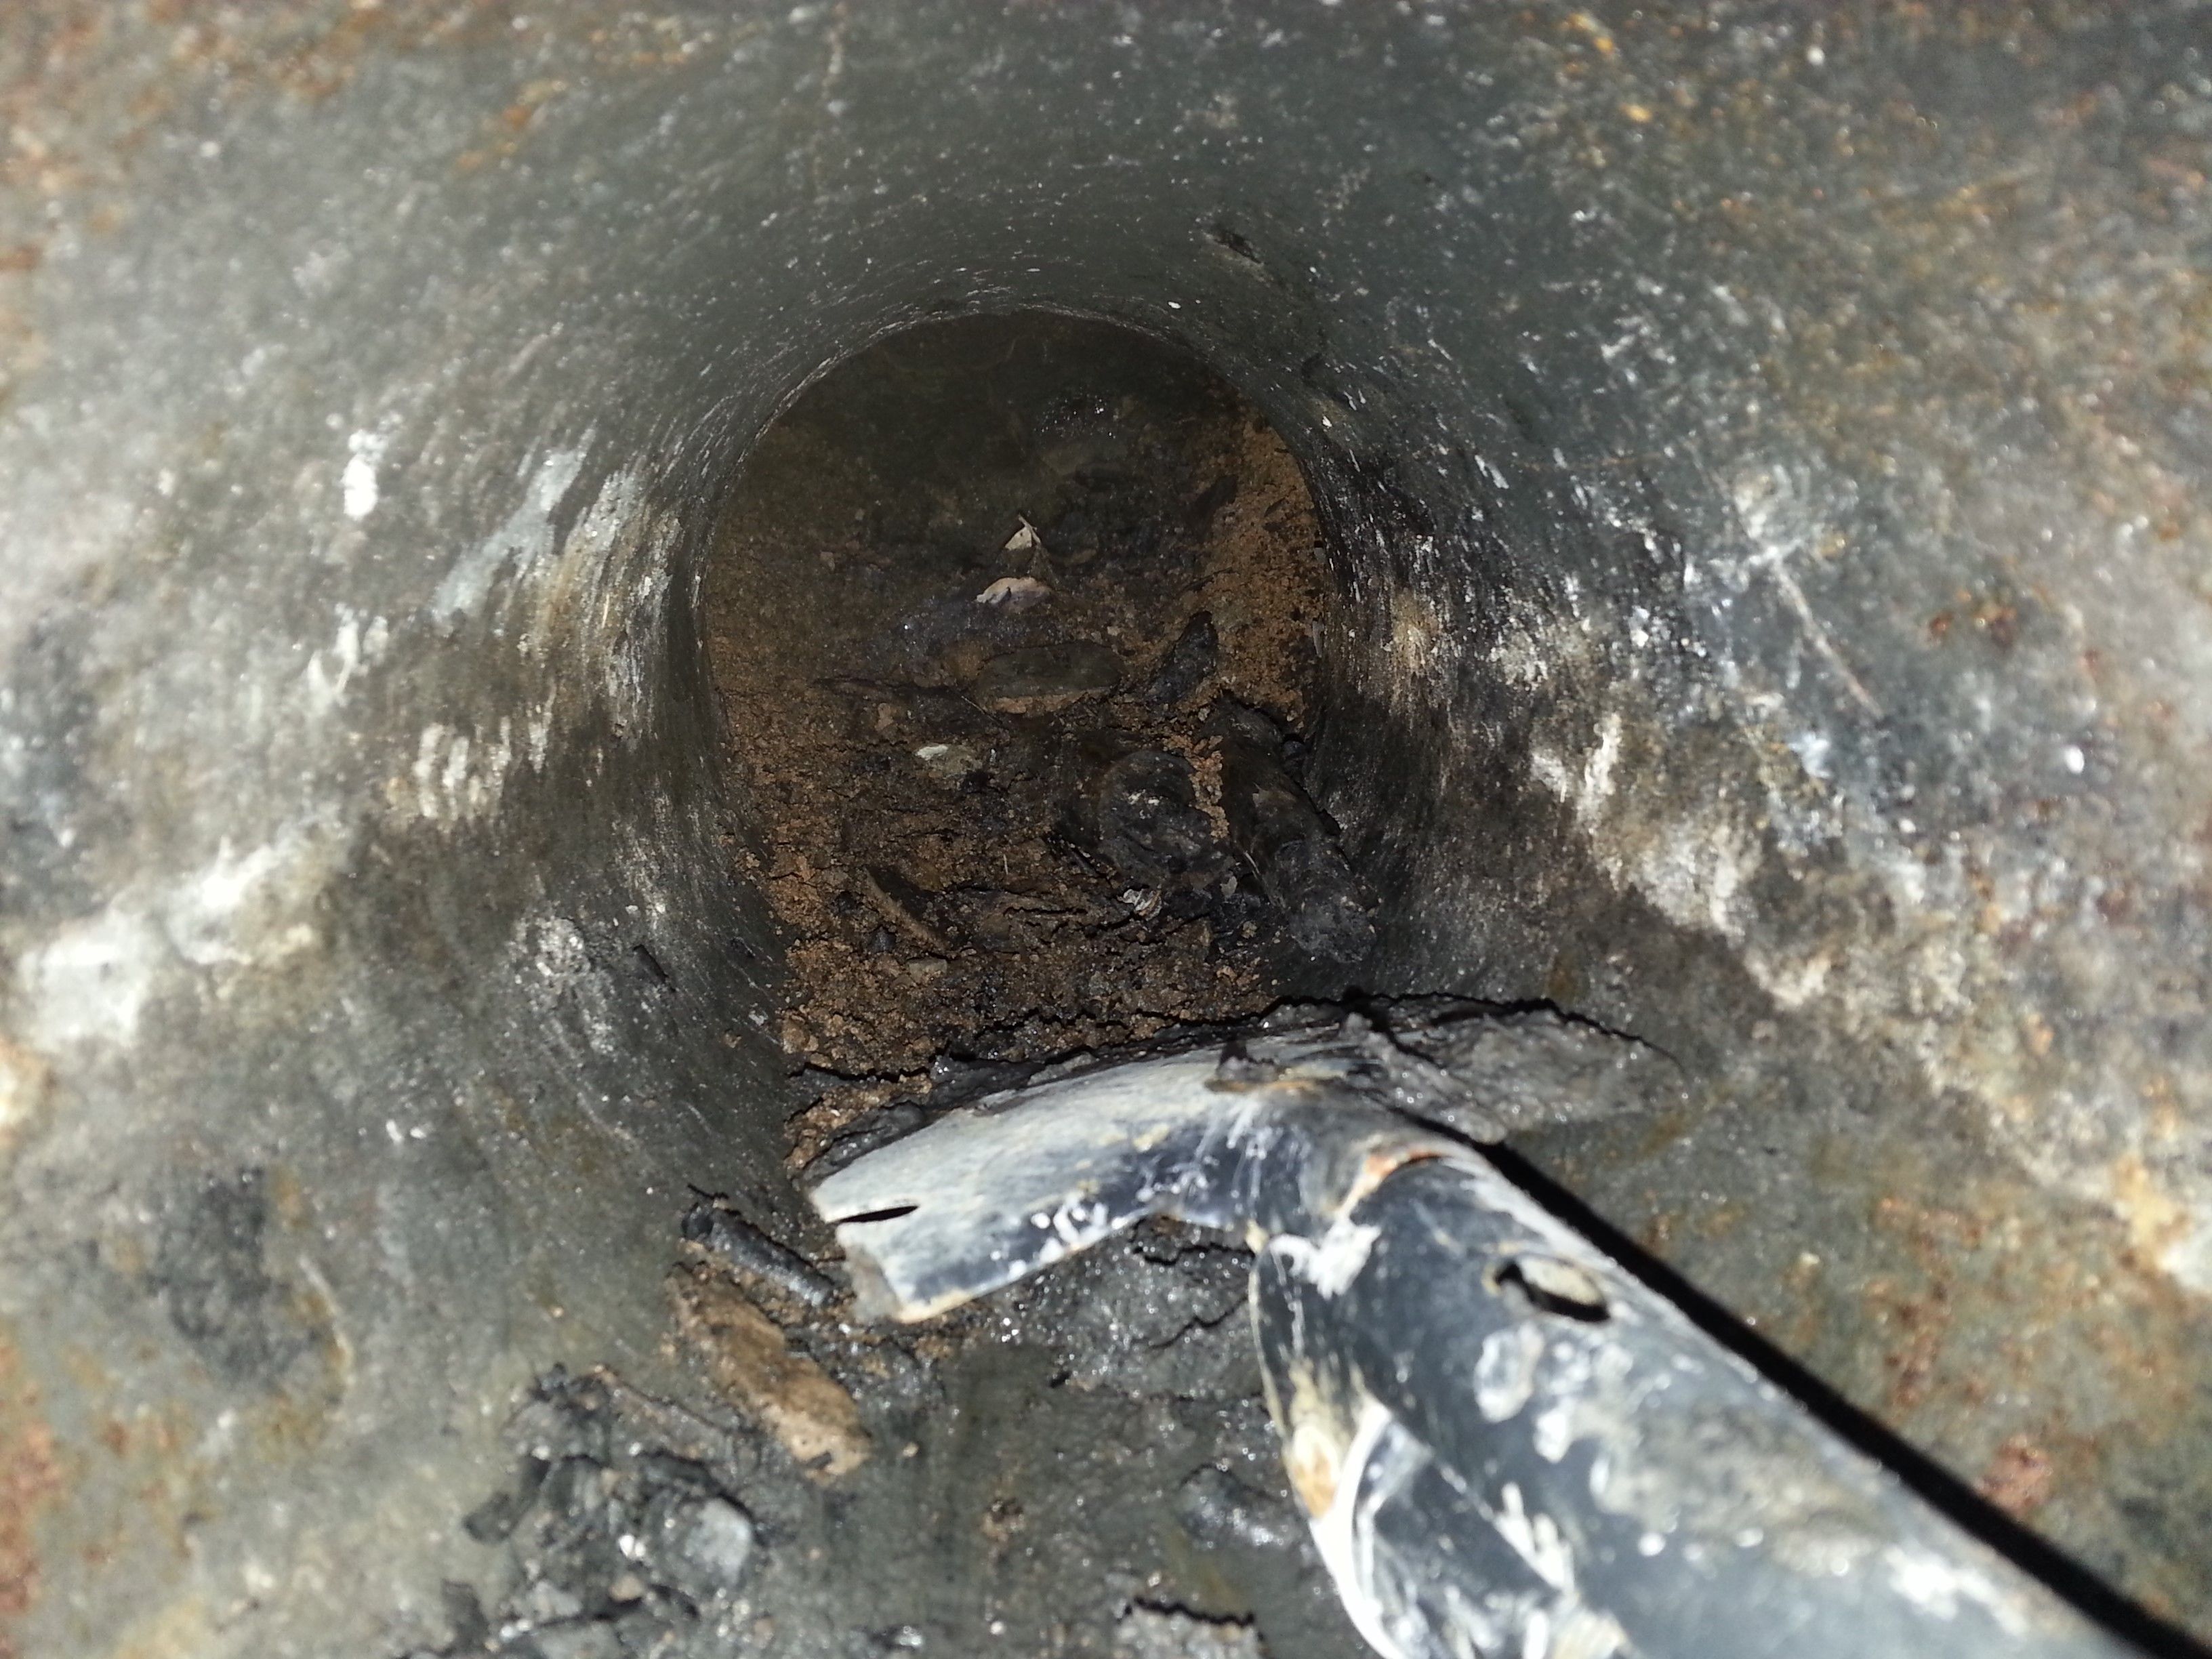
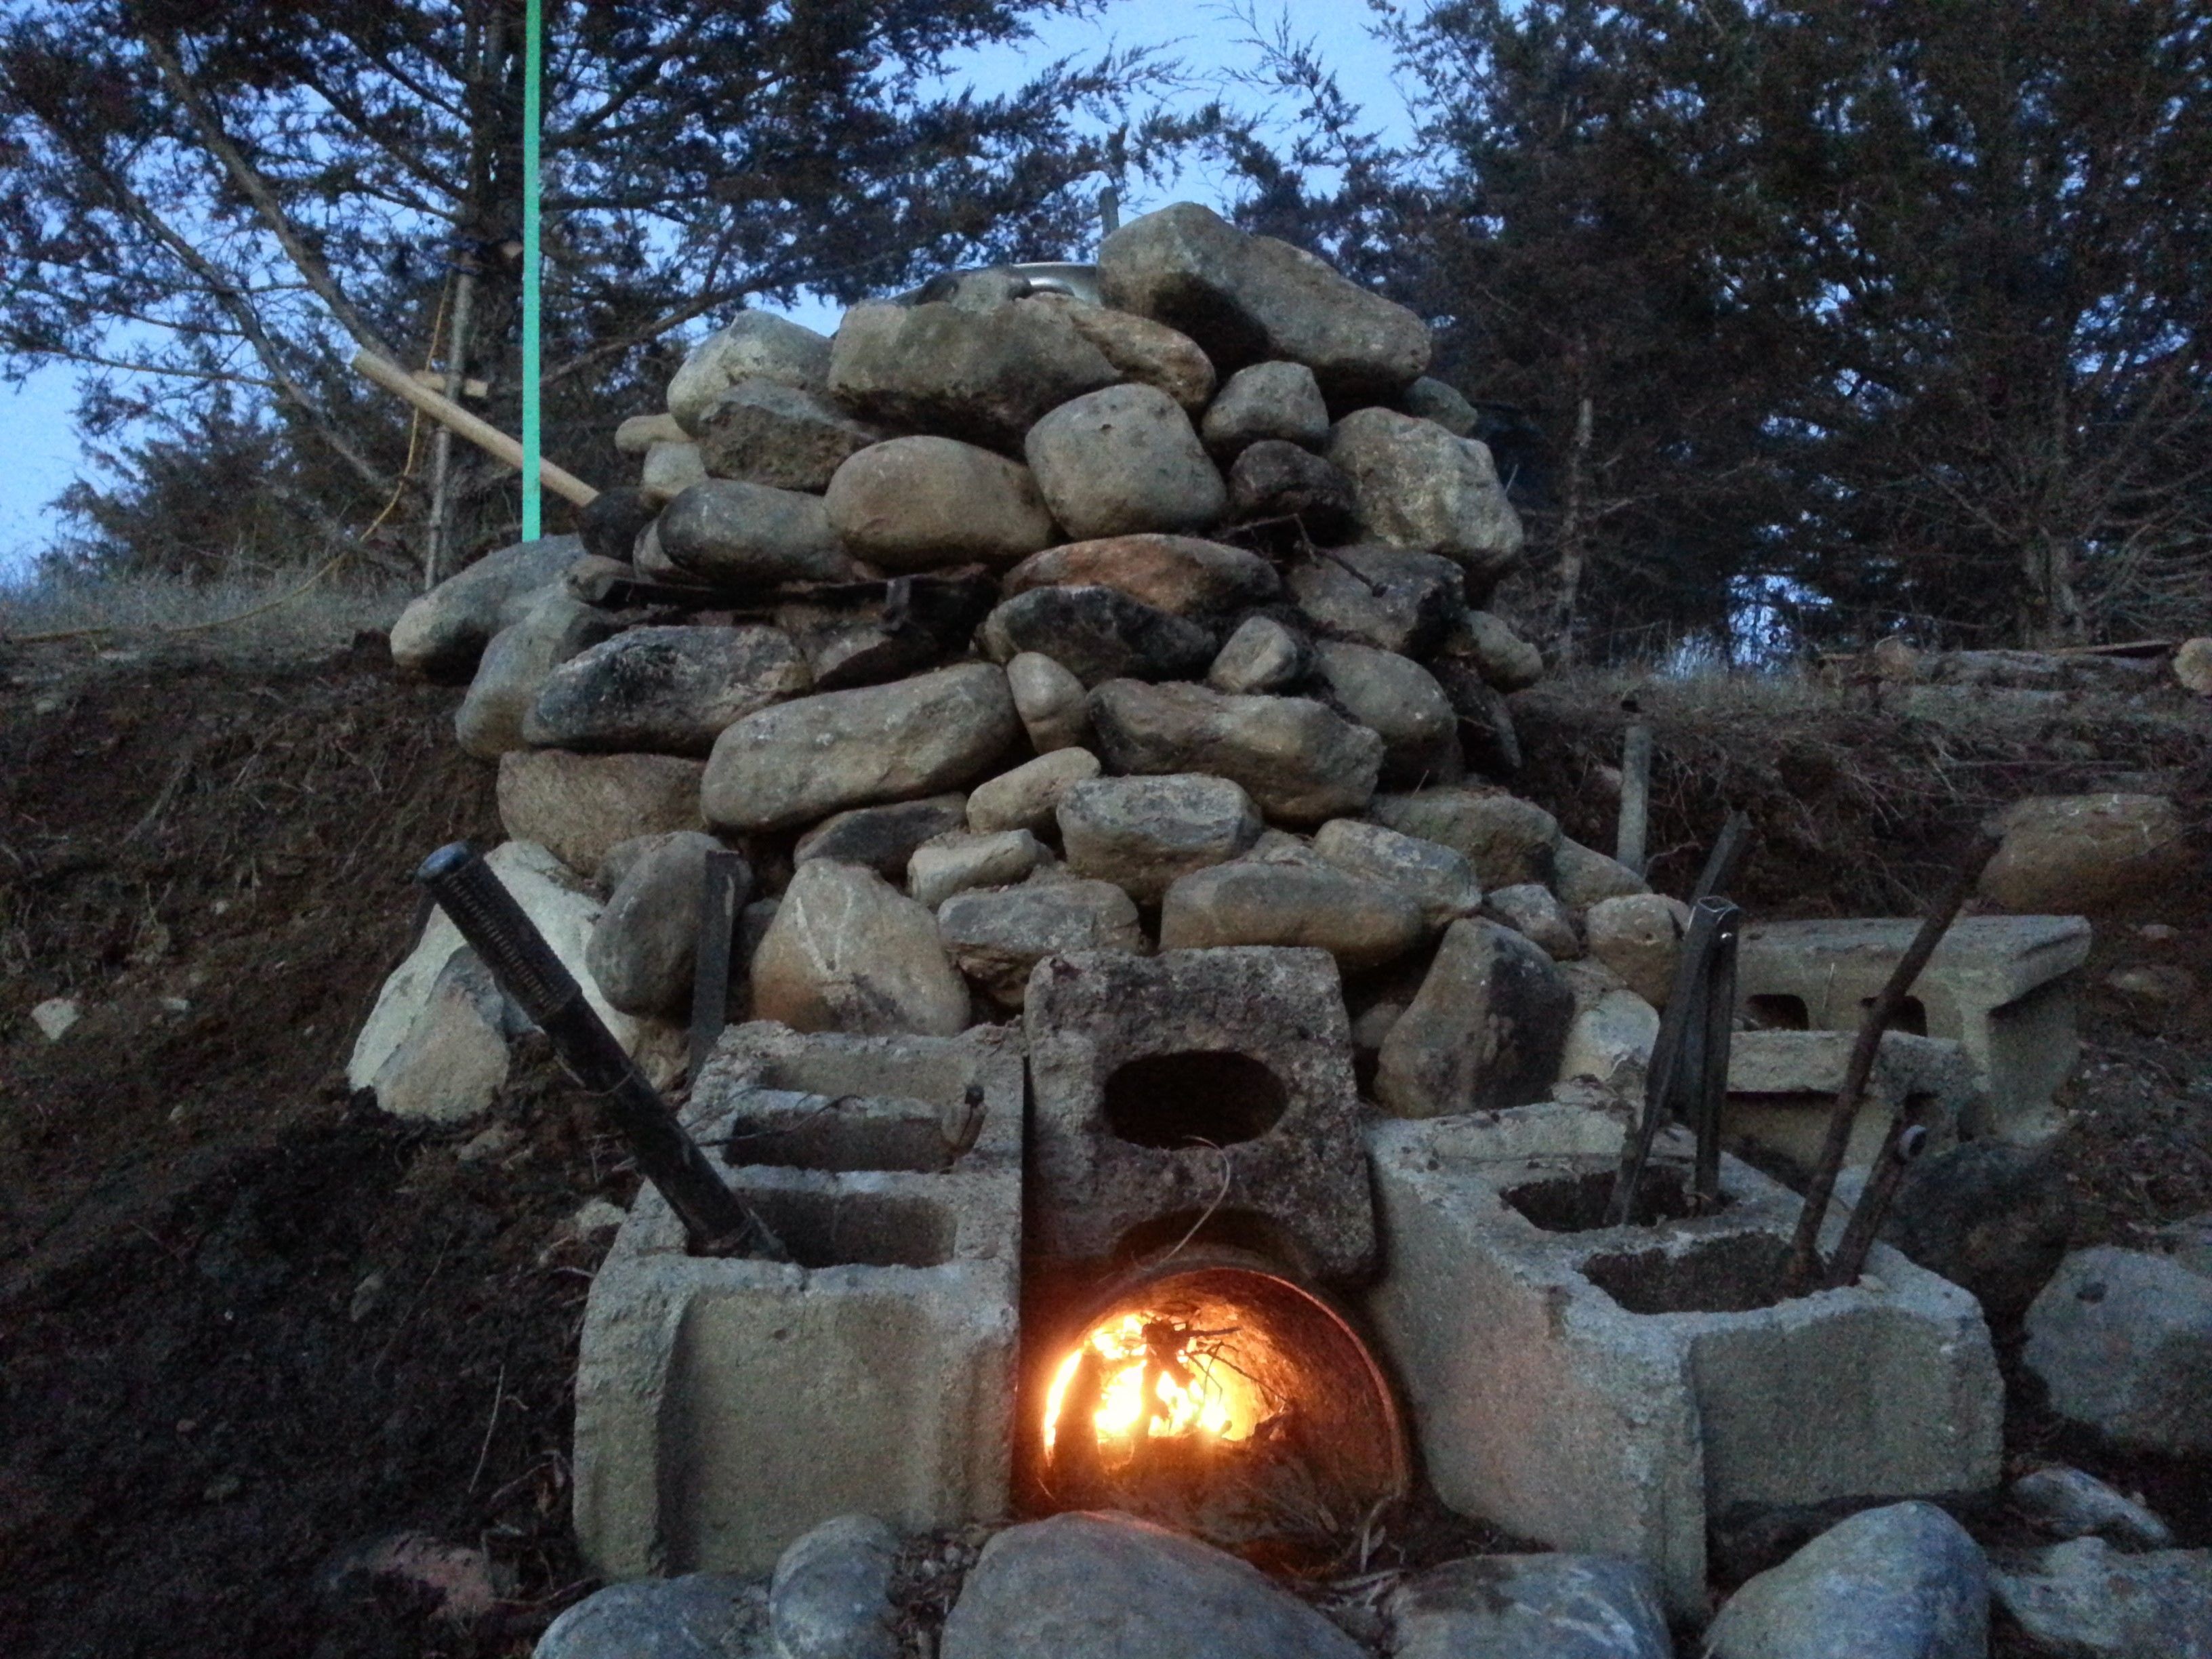
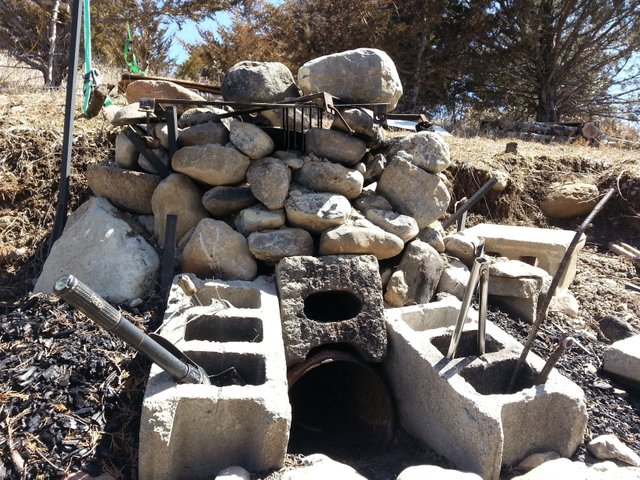
For the chute to feed the sticks down into the fire chamber I used a chiminea chimney pipe. A backpacking small shovel is useful for clearing the fire chamber and feed chute of ashes. The fire chamber and rocket stove chimney are made with cinder blocks. The chimney rocks are packed with clay and rocks to help keep it air tight. The large stones that surround the stock pot boiler chimney work well for heat retention and ensure that the heat is focused on the boiler - all the way up it's sides. The boiler chimney rocks prevent the heat from shooting out the sides as soon as it hits the bottom of the boiler. After boiling, the water stays very hot for many hours. There are plenty of rocks and clay on my property - not so great for gardening, but great for raw building materials.
Rebuilding the Rocket Stove Boiler
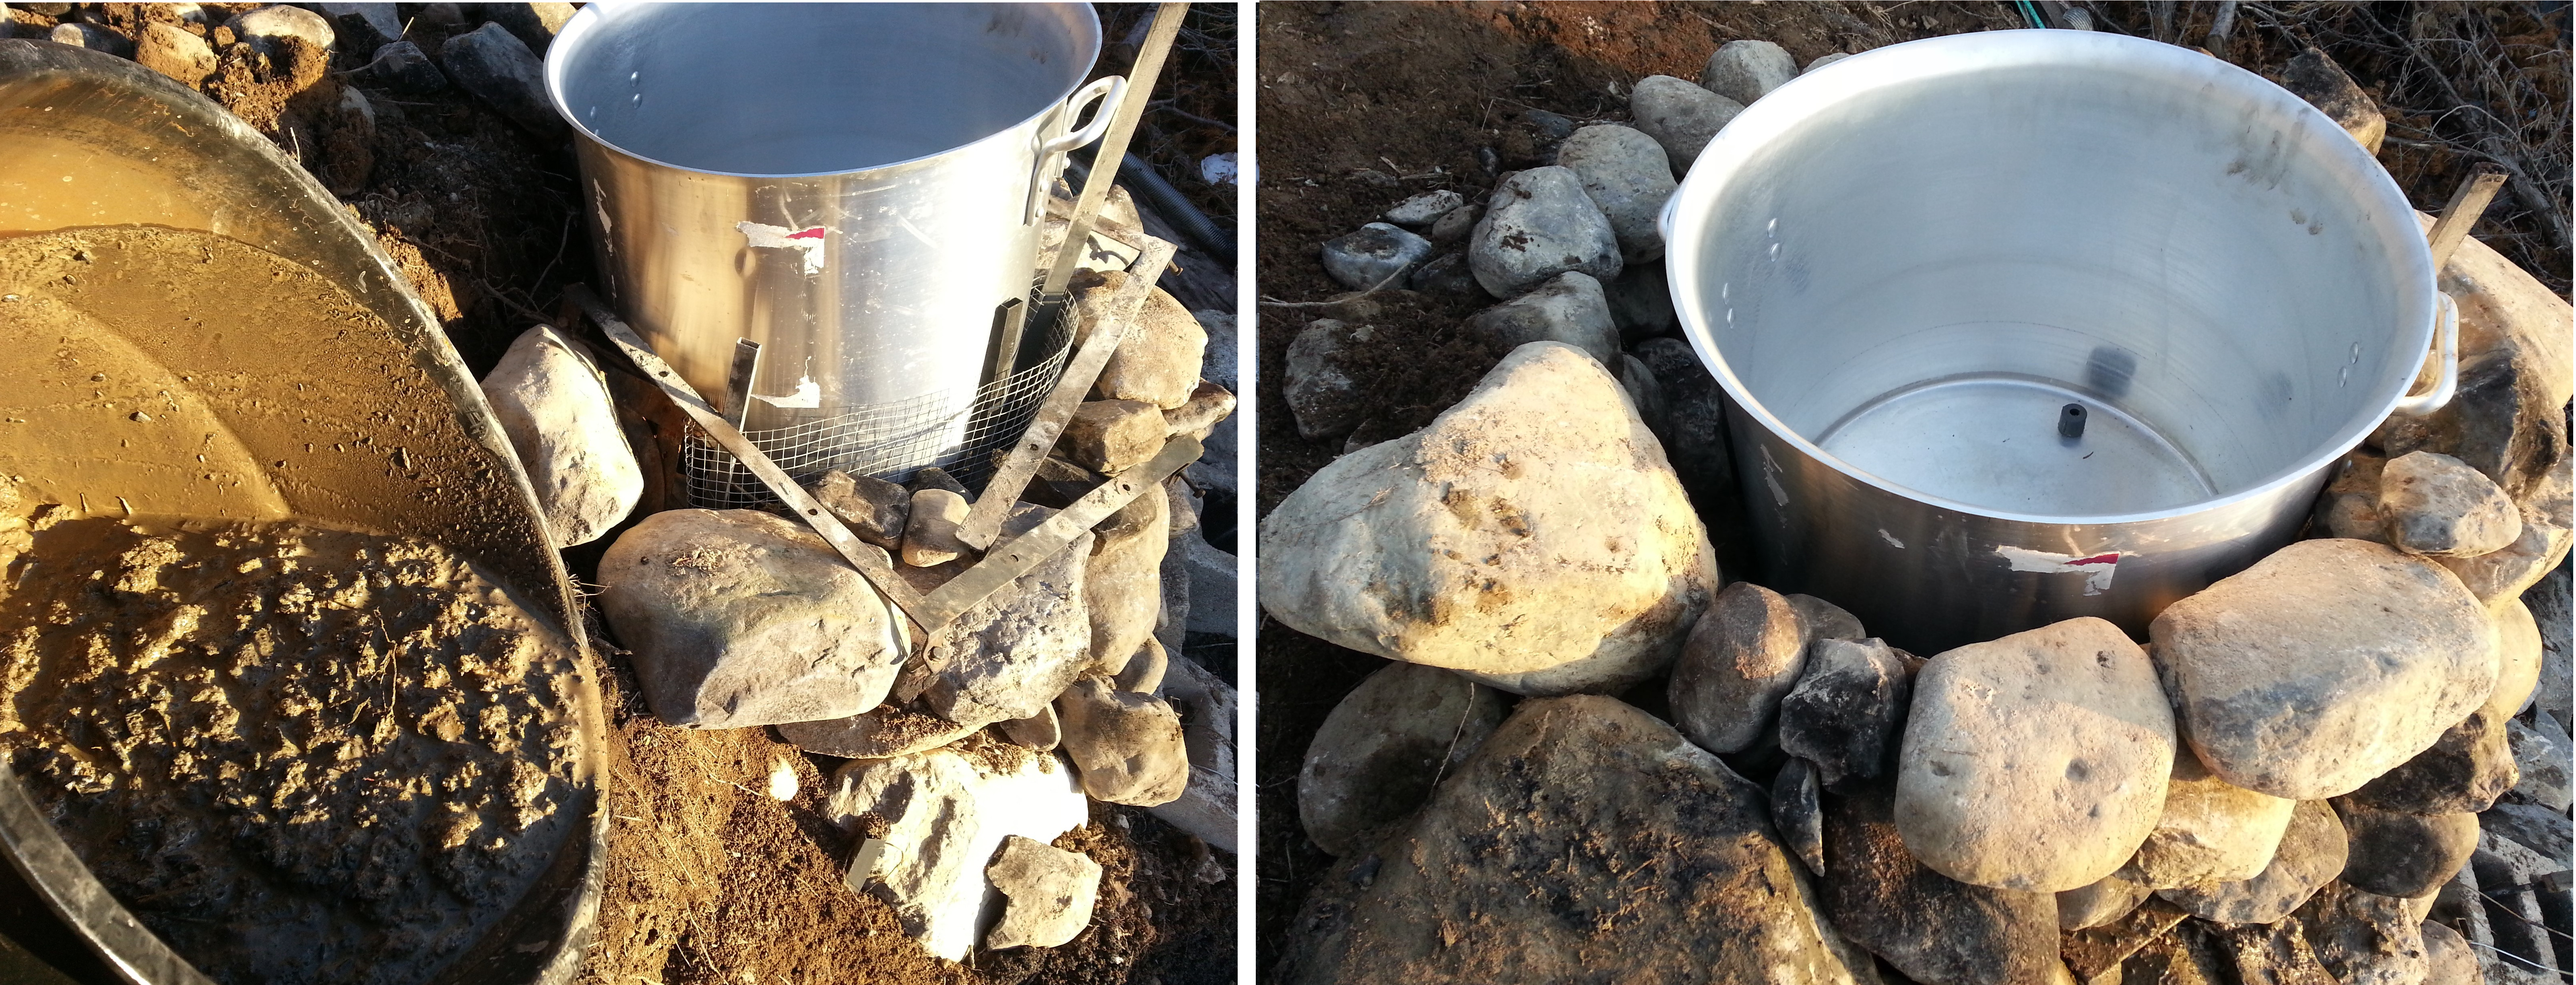
In the picture below you can see the remains of the old rocket stove that has been stripped of it's smaller boiler.
In the picture below you can see where the boiler used to sit on the metal grate on top of the rocket stove burner.
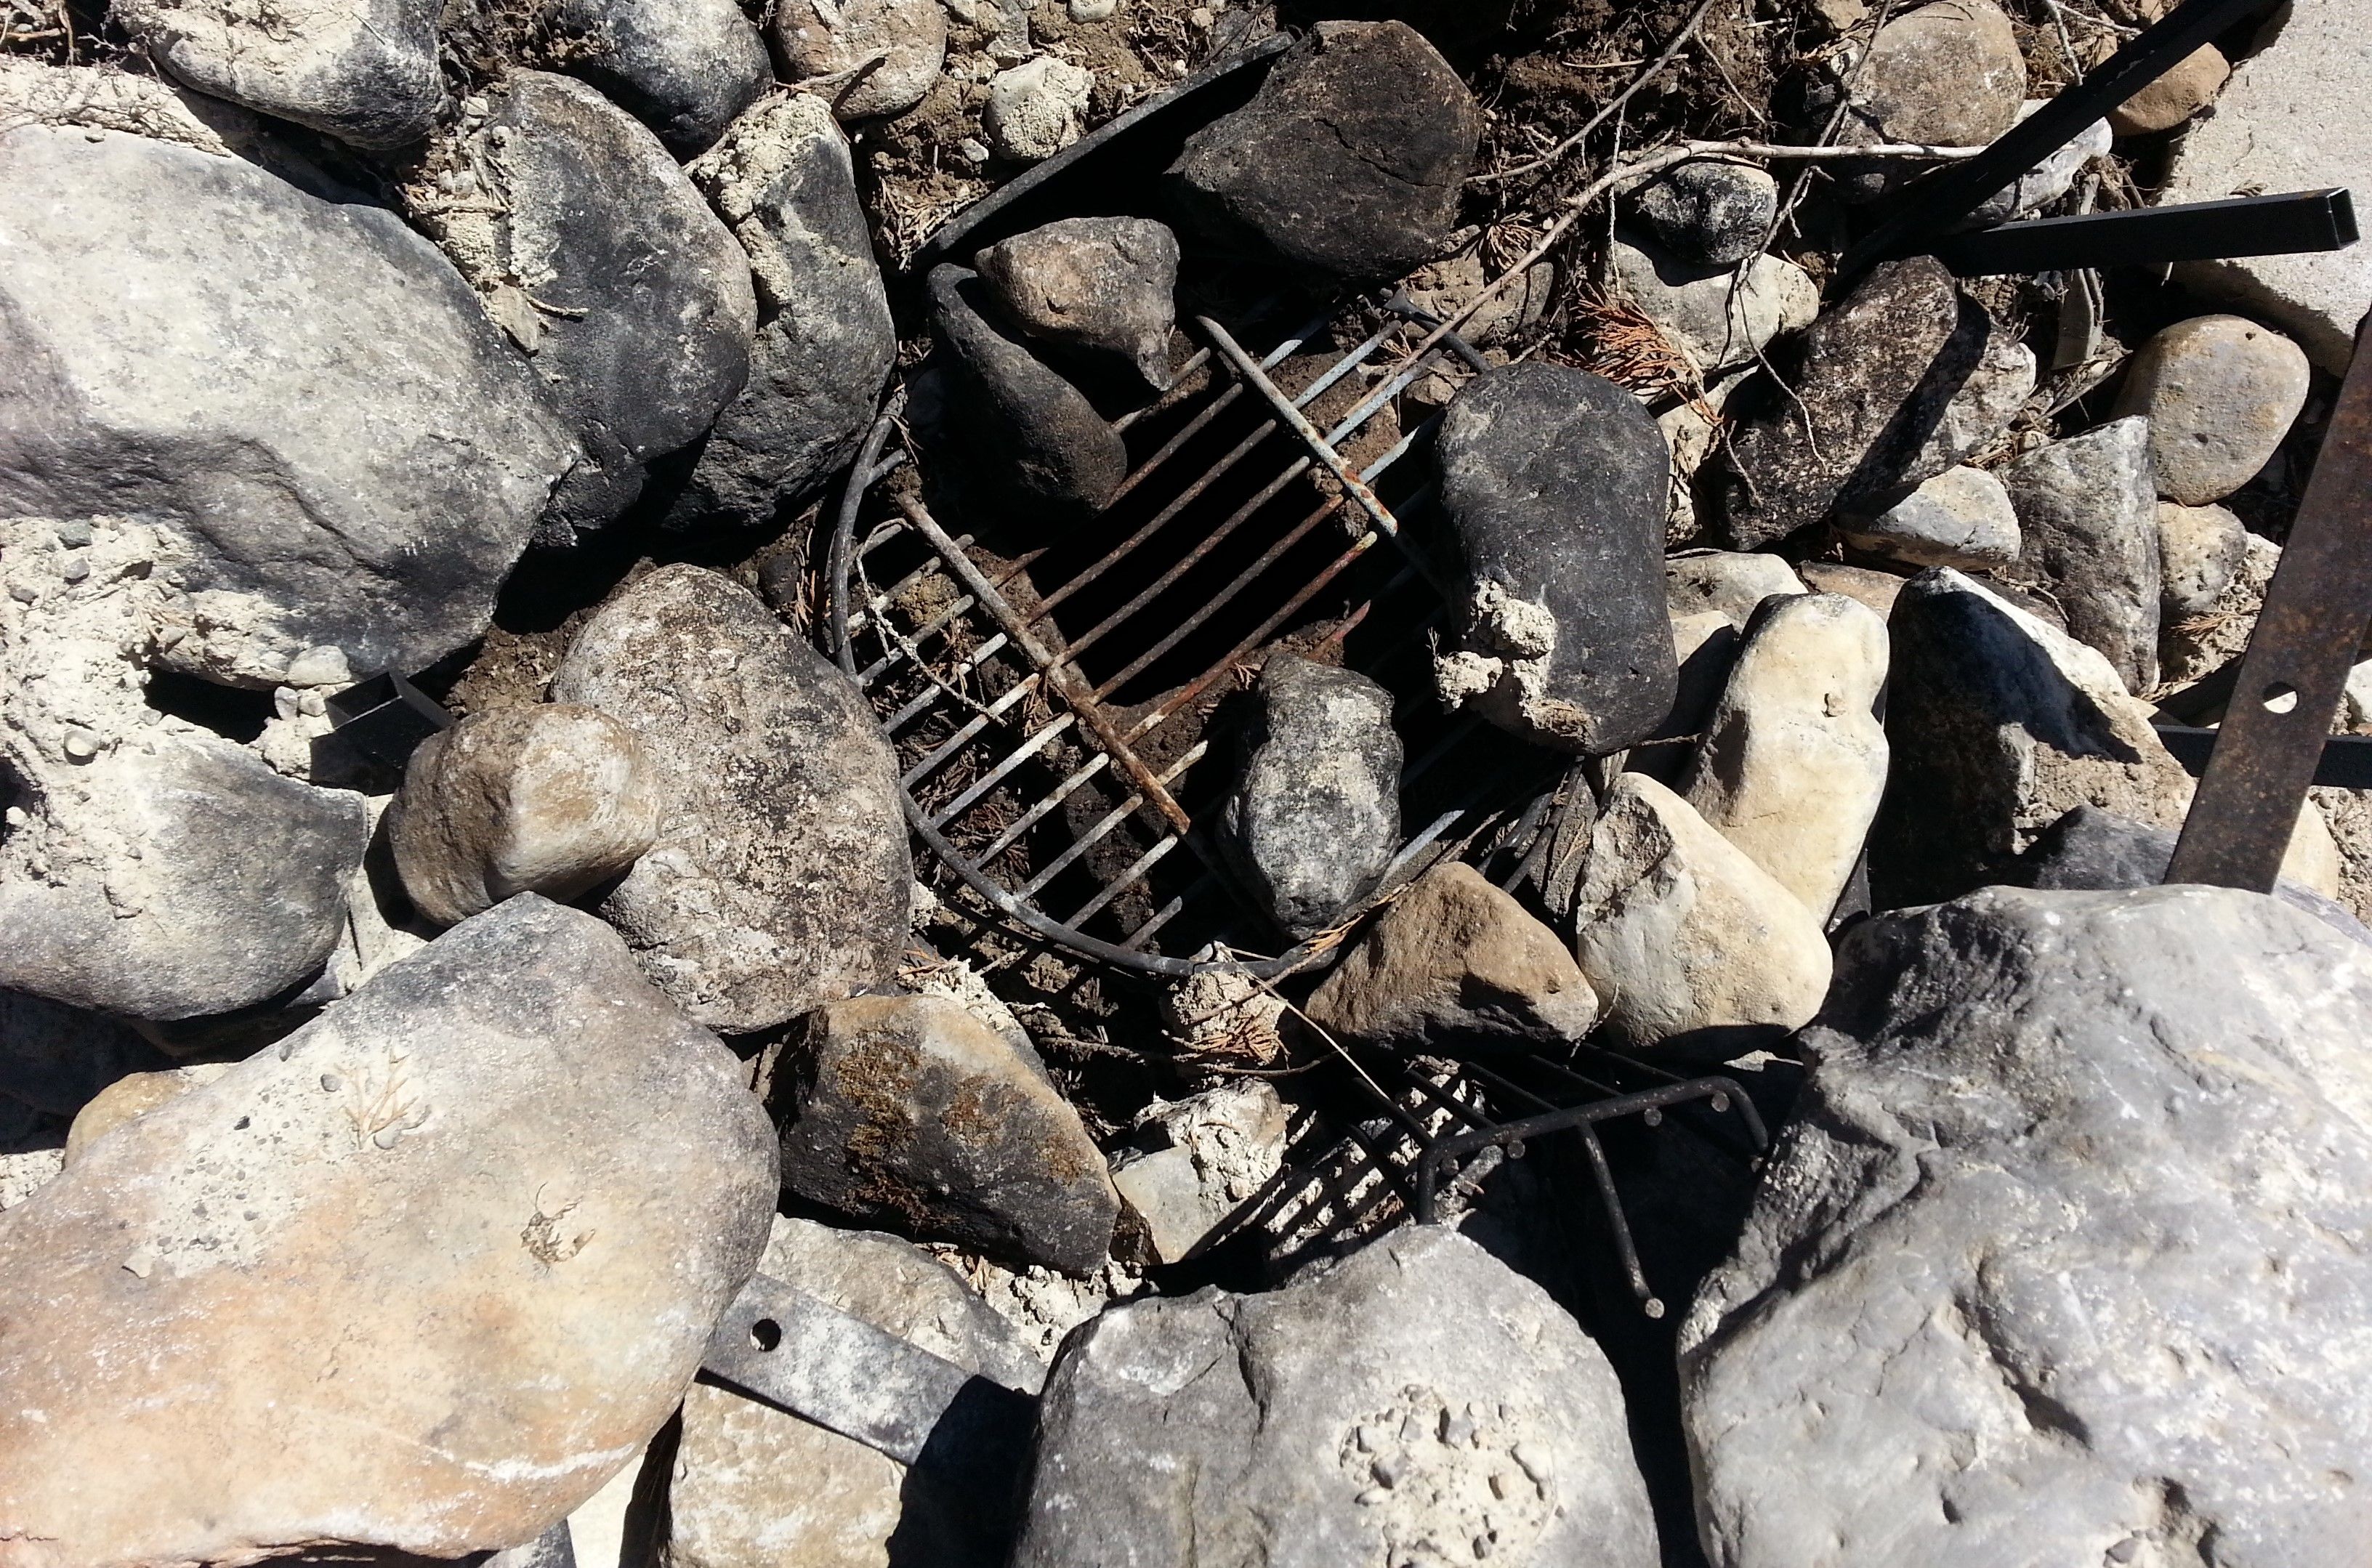
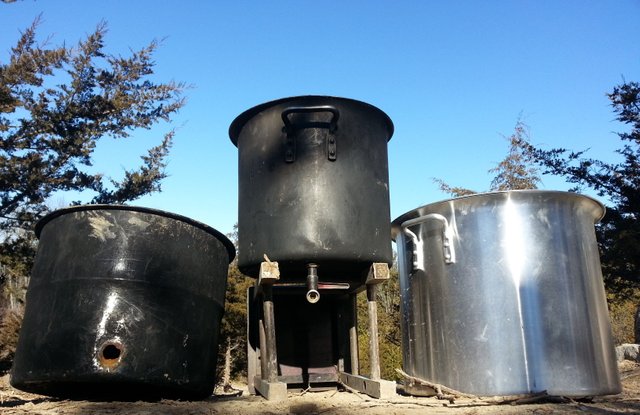
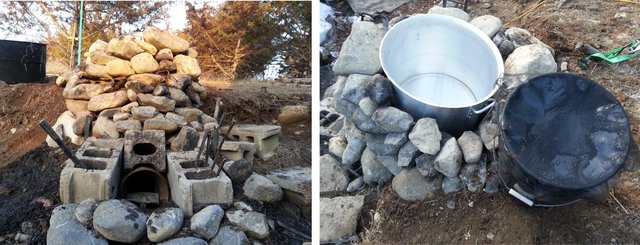
On the far left in the picture below you can see the original inferior metal stock pot we used for a boiler. We were sure to select Stainless Steel for the replacement stock pot boiler.
In the center of the picture above you can see the stainless steel stock pot tapped on the flat bottom - that was the previous boiler for the rocket stove.
The New Boiler - Adding a Tap
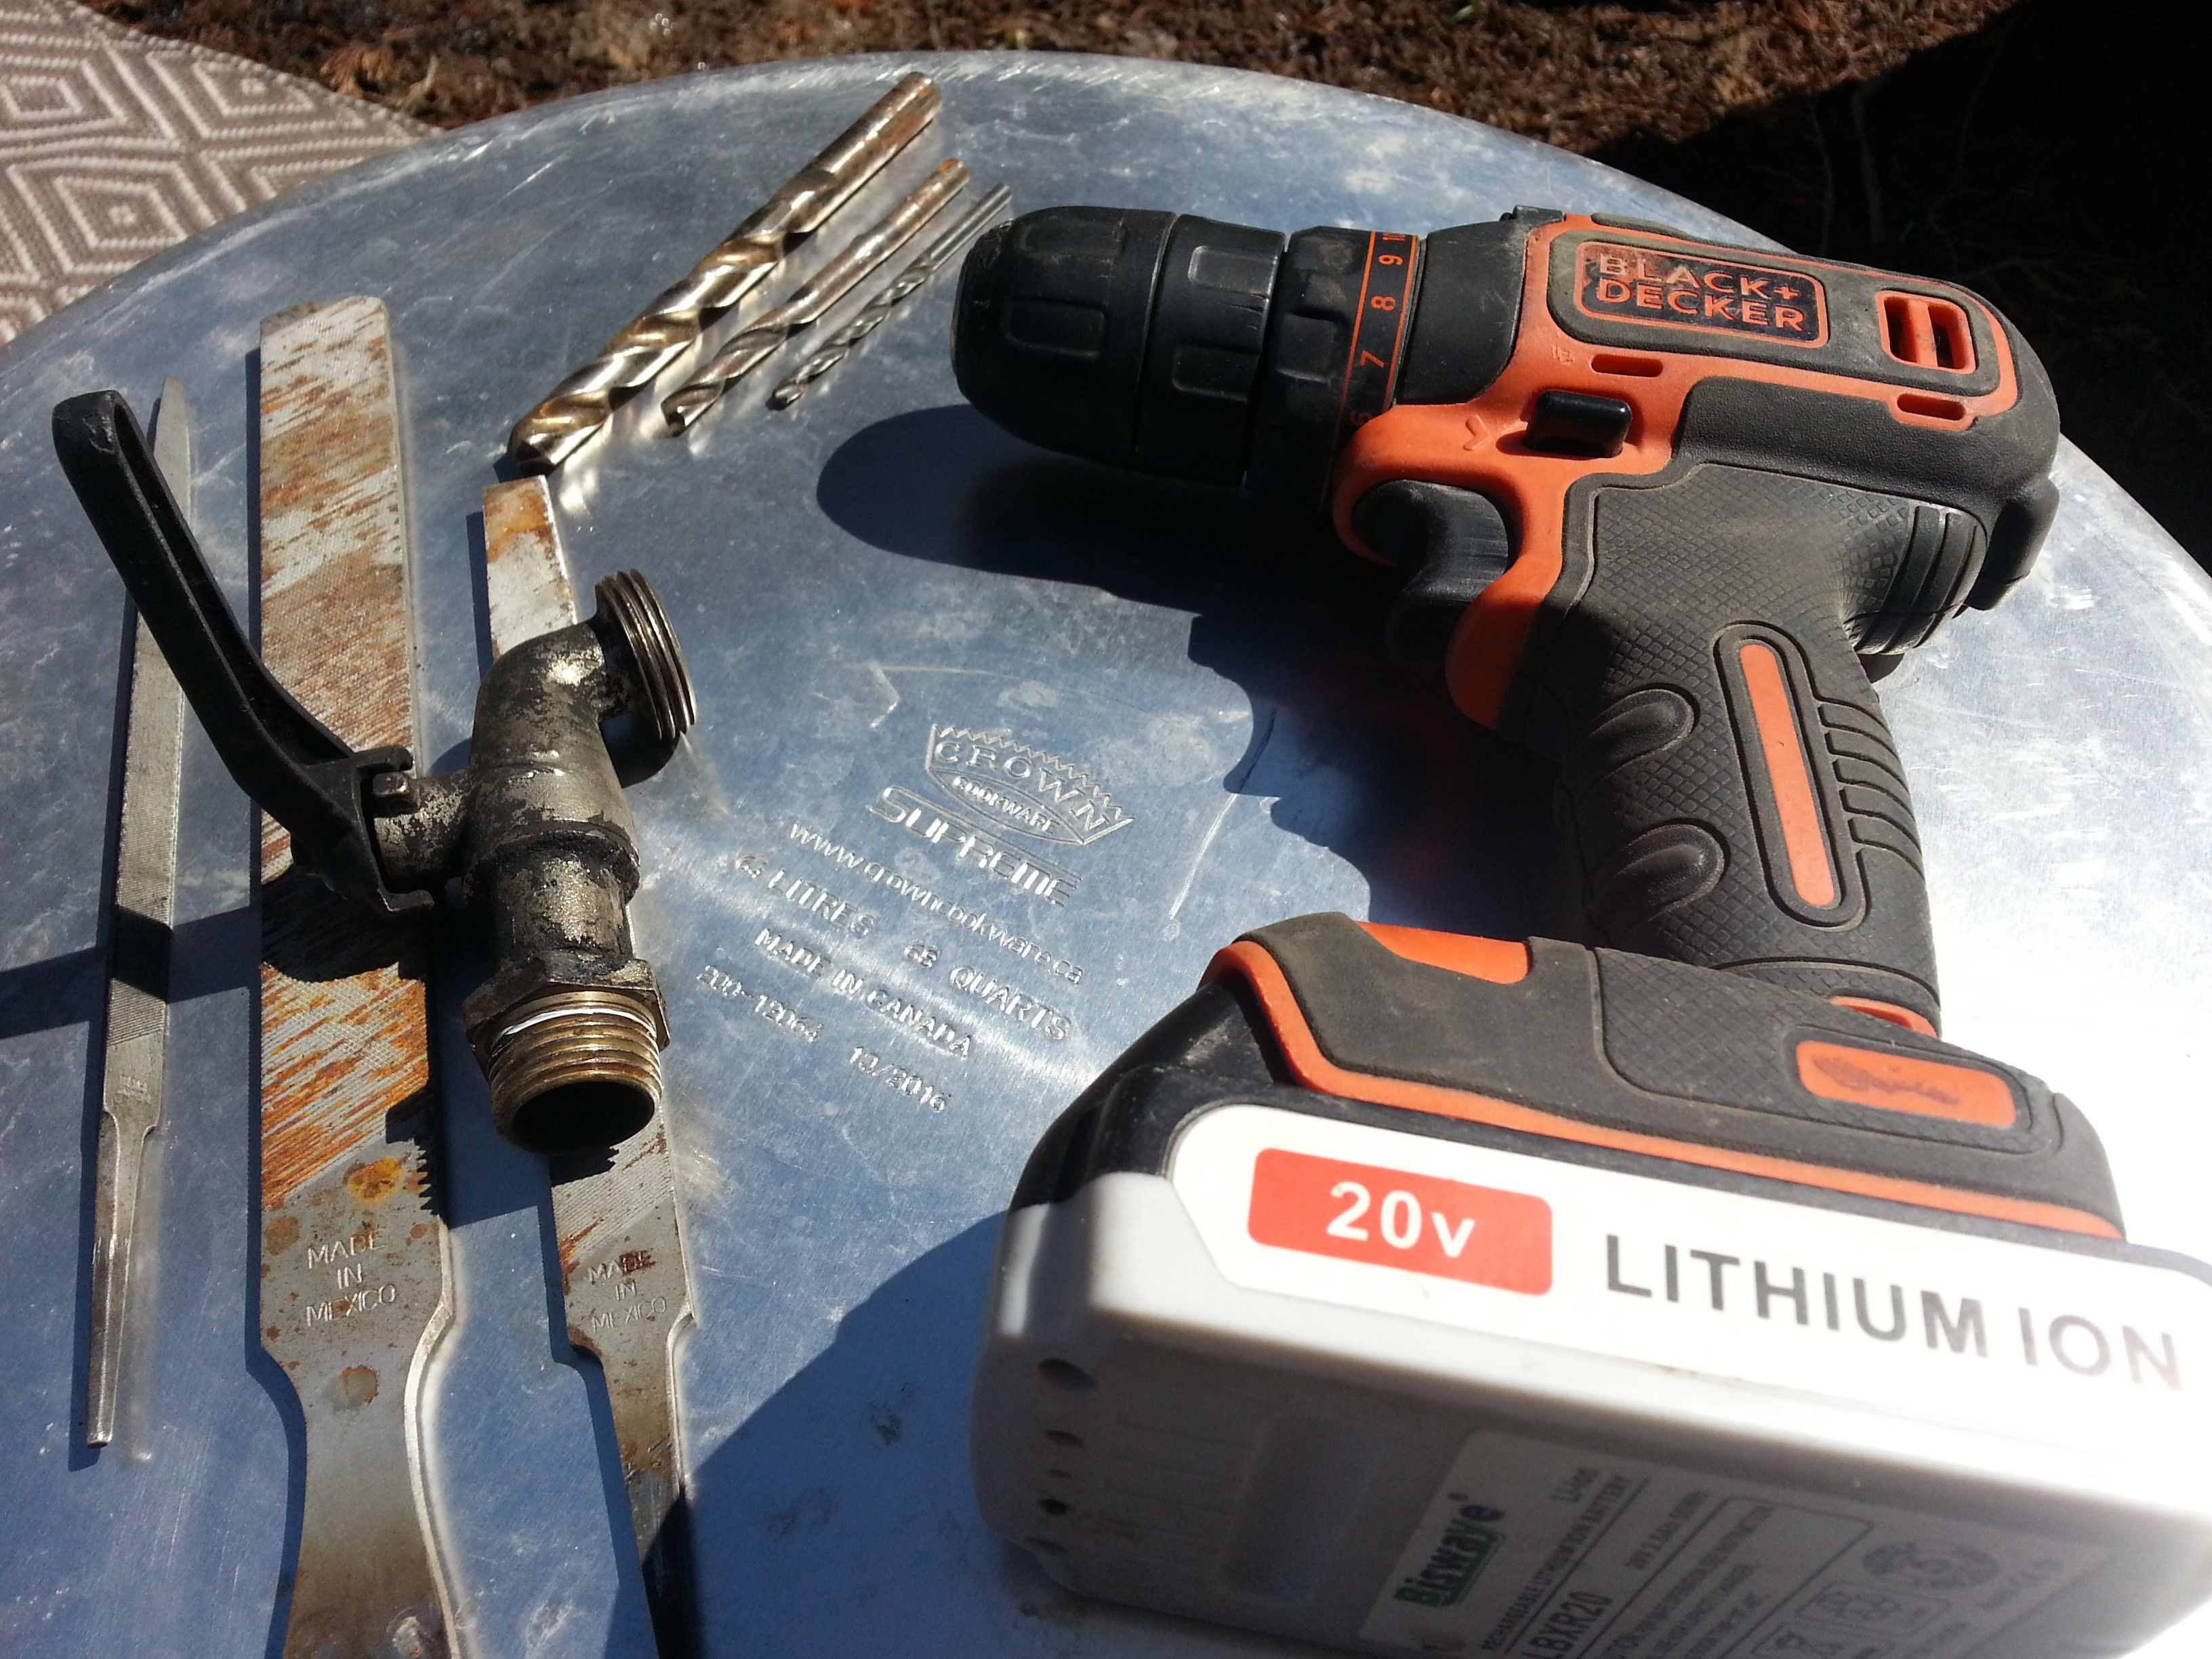
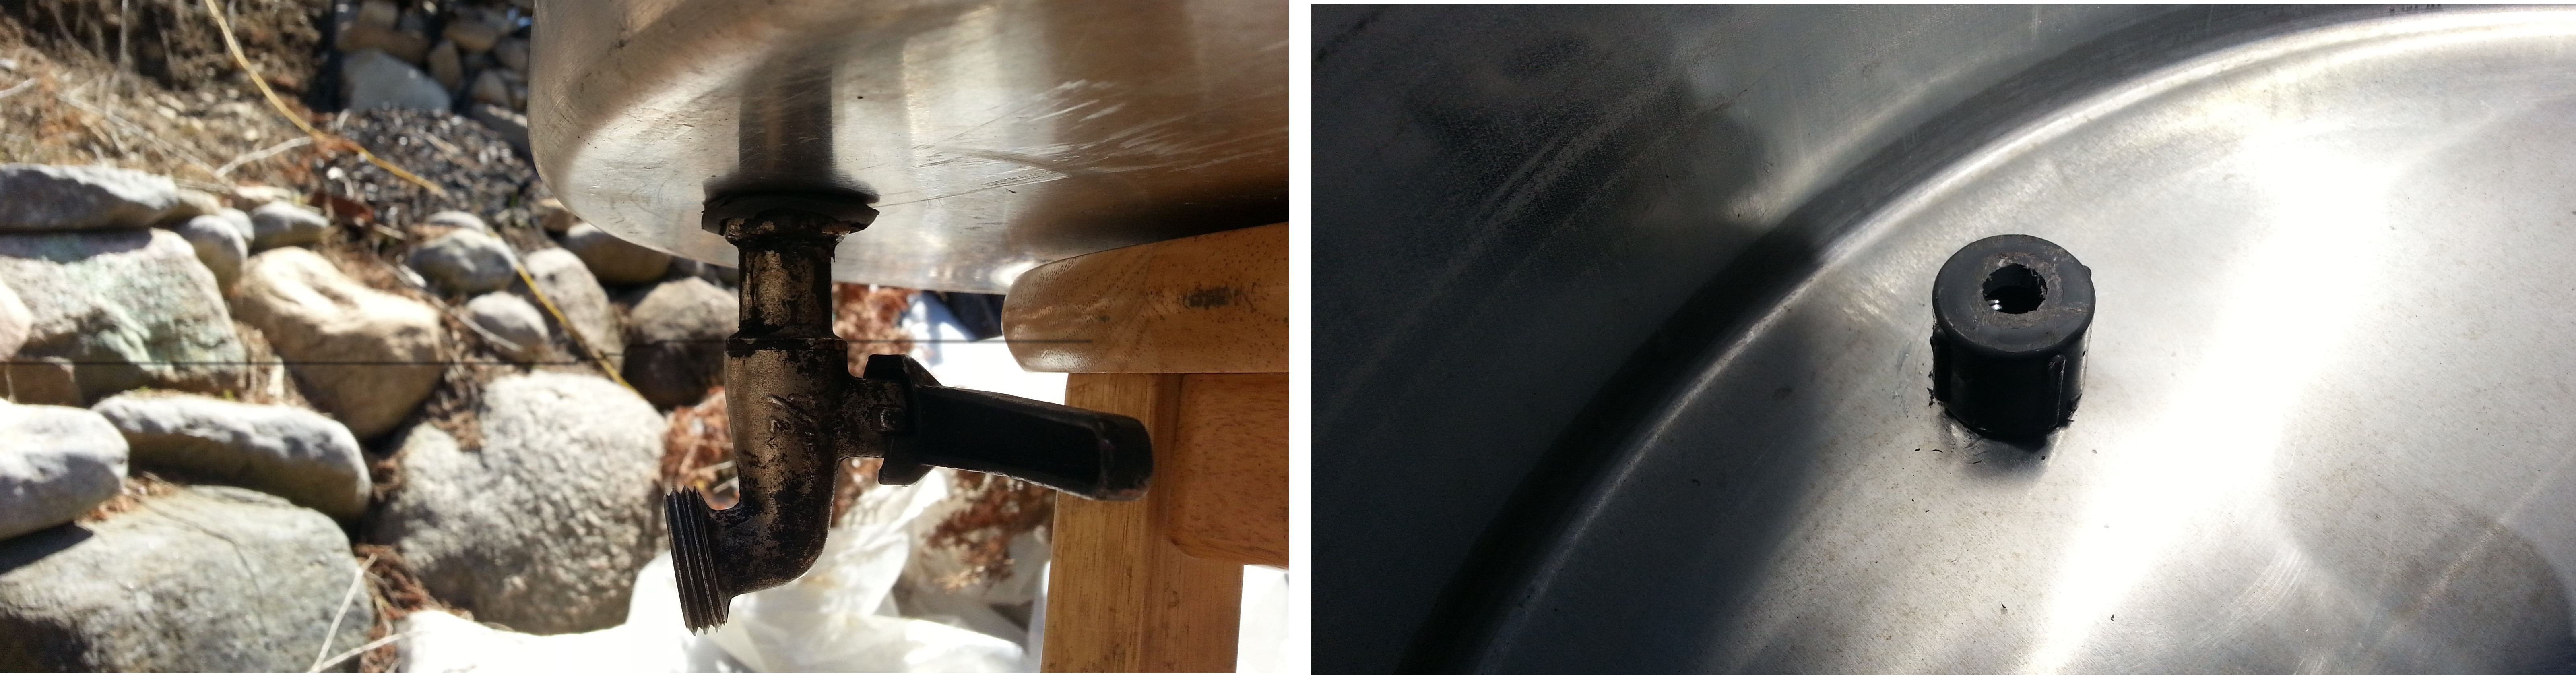
On the far right in the picture above you can see the new and larger stainless steel stock pot that we will be using as the new rocket stove boiler - first we need to add a hot water hose valve. In the picture below you can see the various tools that I will be using. First the smallest drill bit will be used to drill a small hole. Then the medium and then the larger size drill bit to make the hole larger.
Making a Hole for the Hot Water Valve
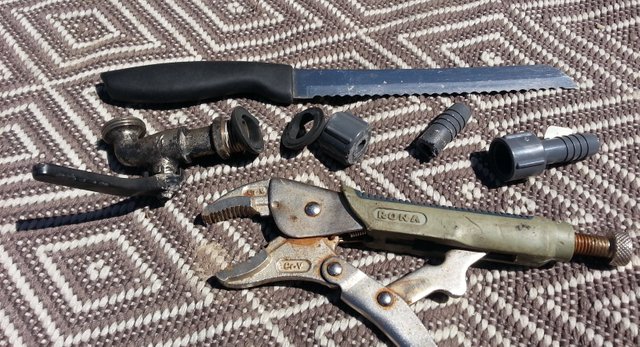
Unfortunately I don't have a large enough drill bit for the hole I needed, so I used various files in different ways to make the hole size I needed. Watch the video below.
Installing Boiler Tap
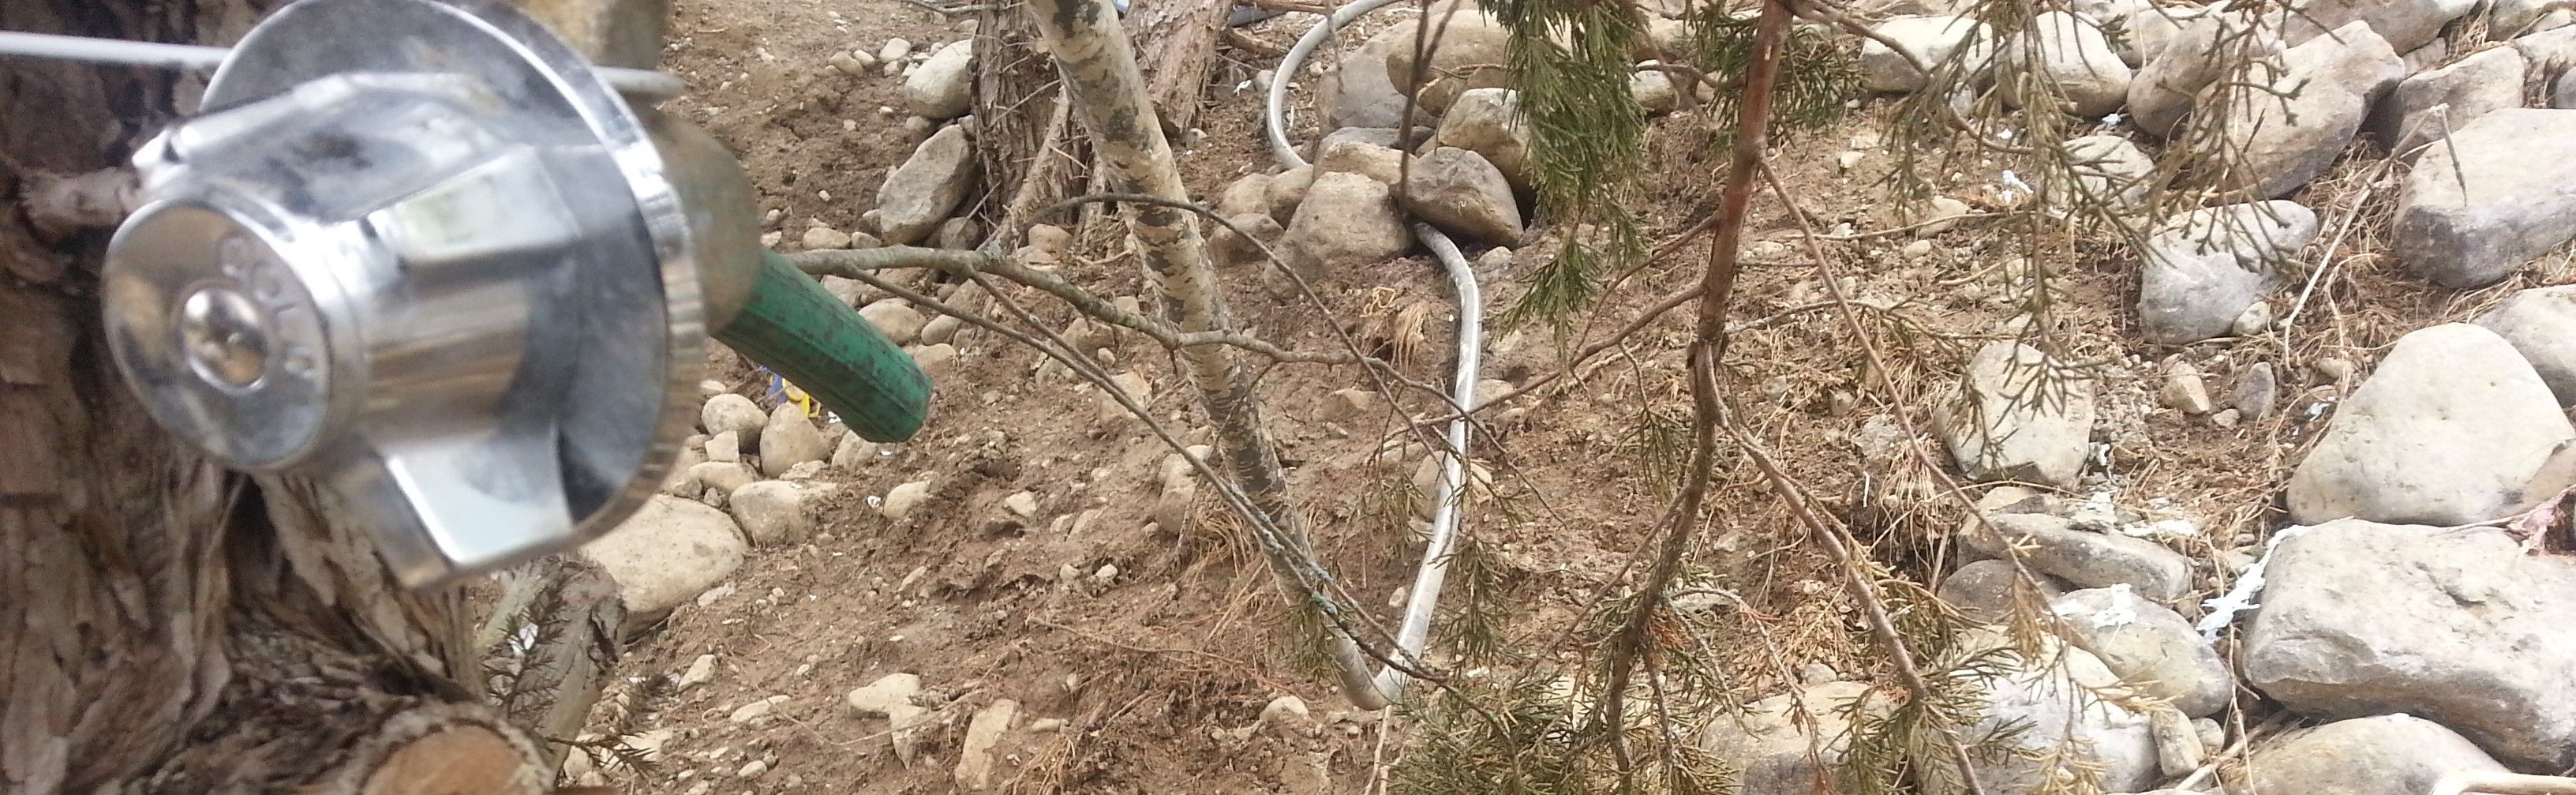
After the hole is made, next is adding the hot water hose valve. You can see the supplies in the picture that I will be using. The Hot Water Valve that will be connecting to a heat resistant braided metal dishwasher hose. A small rubber washer for in between the hot water tap and the outside bottom of the stainless steel stock pot. On the inside of the stock pot, screwed onto the valve threads is the sawed off threaded female 1/2 inch to push-on 1/2 inch hose connector.
Watch the video below of the hot water valve being installed onto the bottom of the stock pot.
On the bottom of the stock pot the water valve with get the most gravity water pressure. The raised off of the bottom of the boiler - sawed off threaded connector is useful. Dirt and debris sinks to the bottom and usually will not be drawn into the hose drain.
Rebuilding the Rocket Stove for the New Boiler
My old rocket stove boiler is inside on the wood stove now. I had already purchased this larger stainless steel crock pot for the outdoor rocket stove boiler, but there was only a few weeks left of fall weather, so I deceded to wait until this spring to install it.
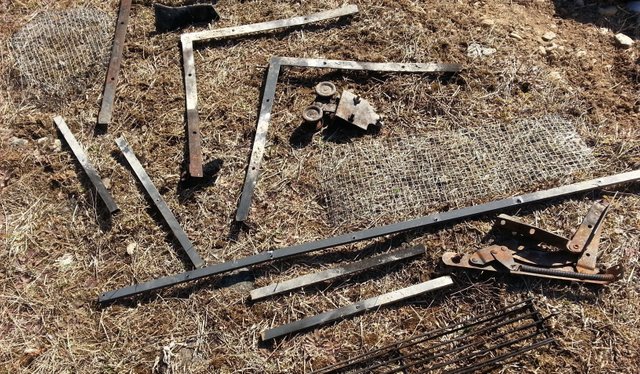
The Boiler Chimney Building Supplies
I will be using large rocks, wet clay, and scrap metal for this build.
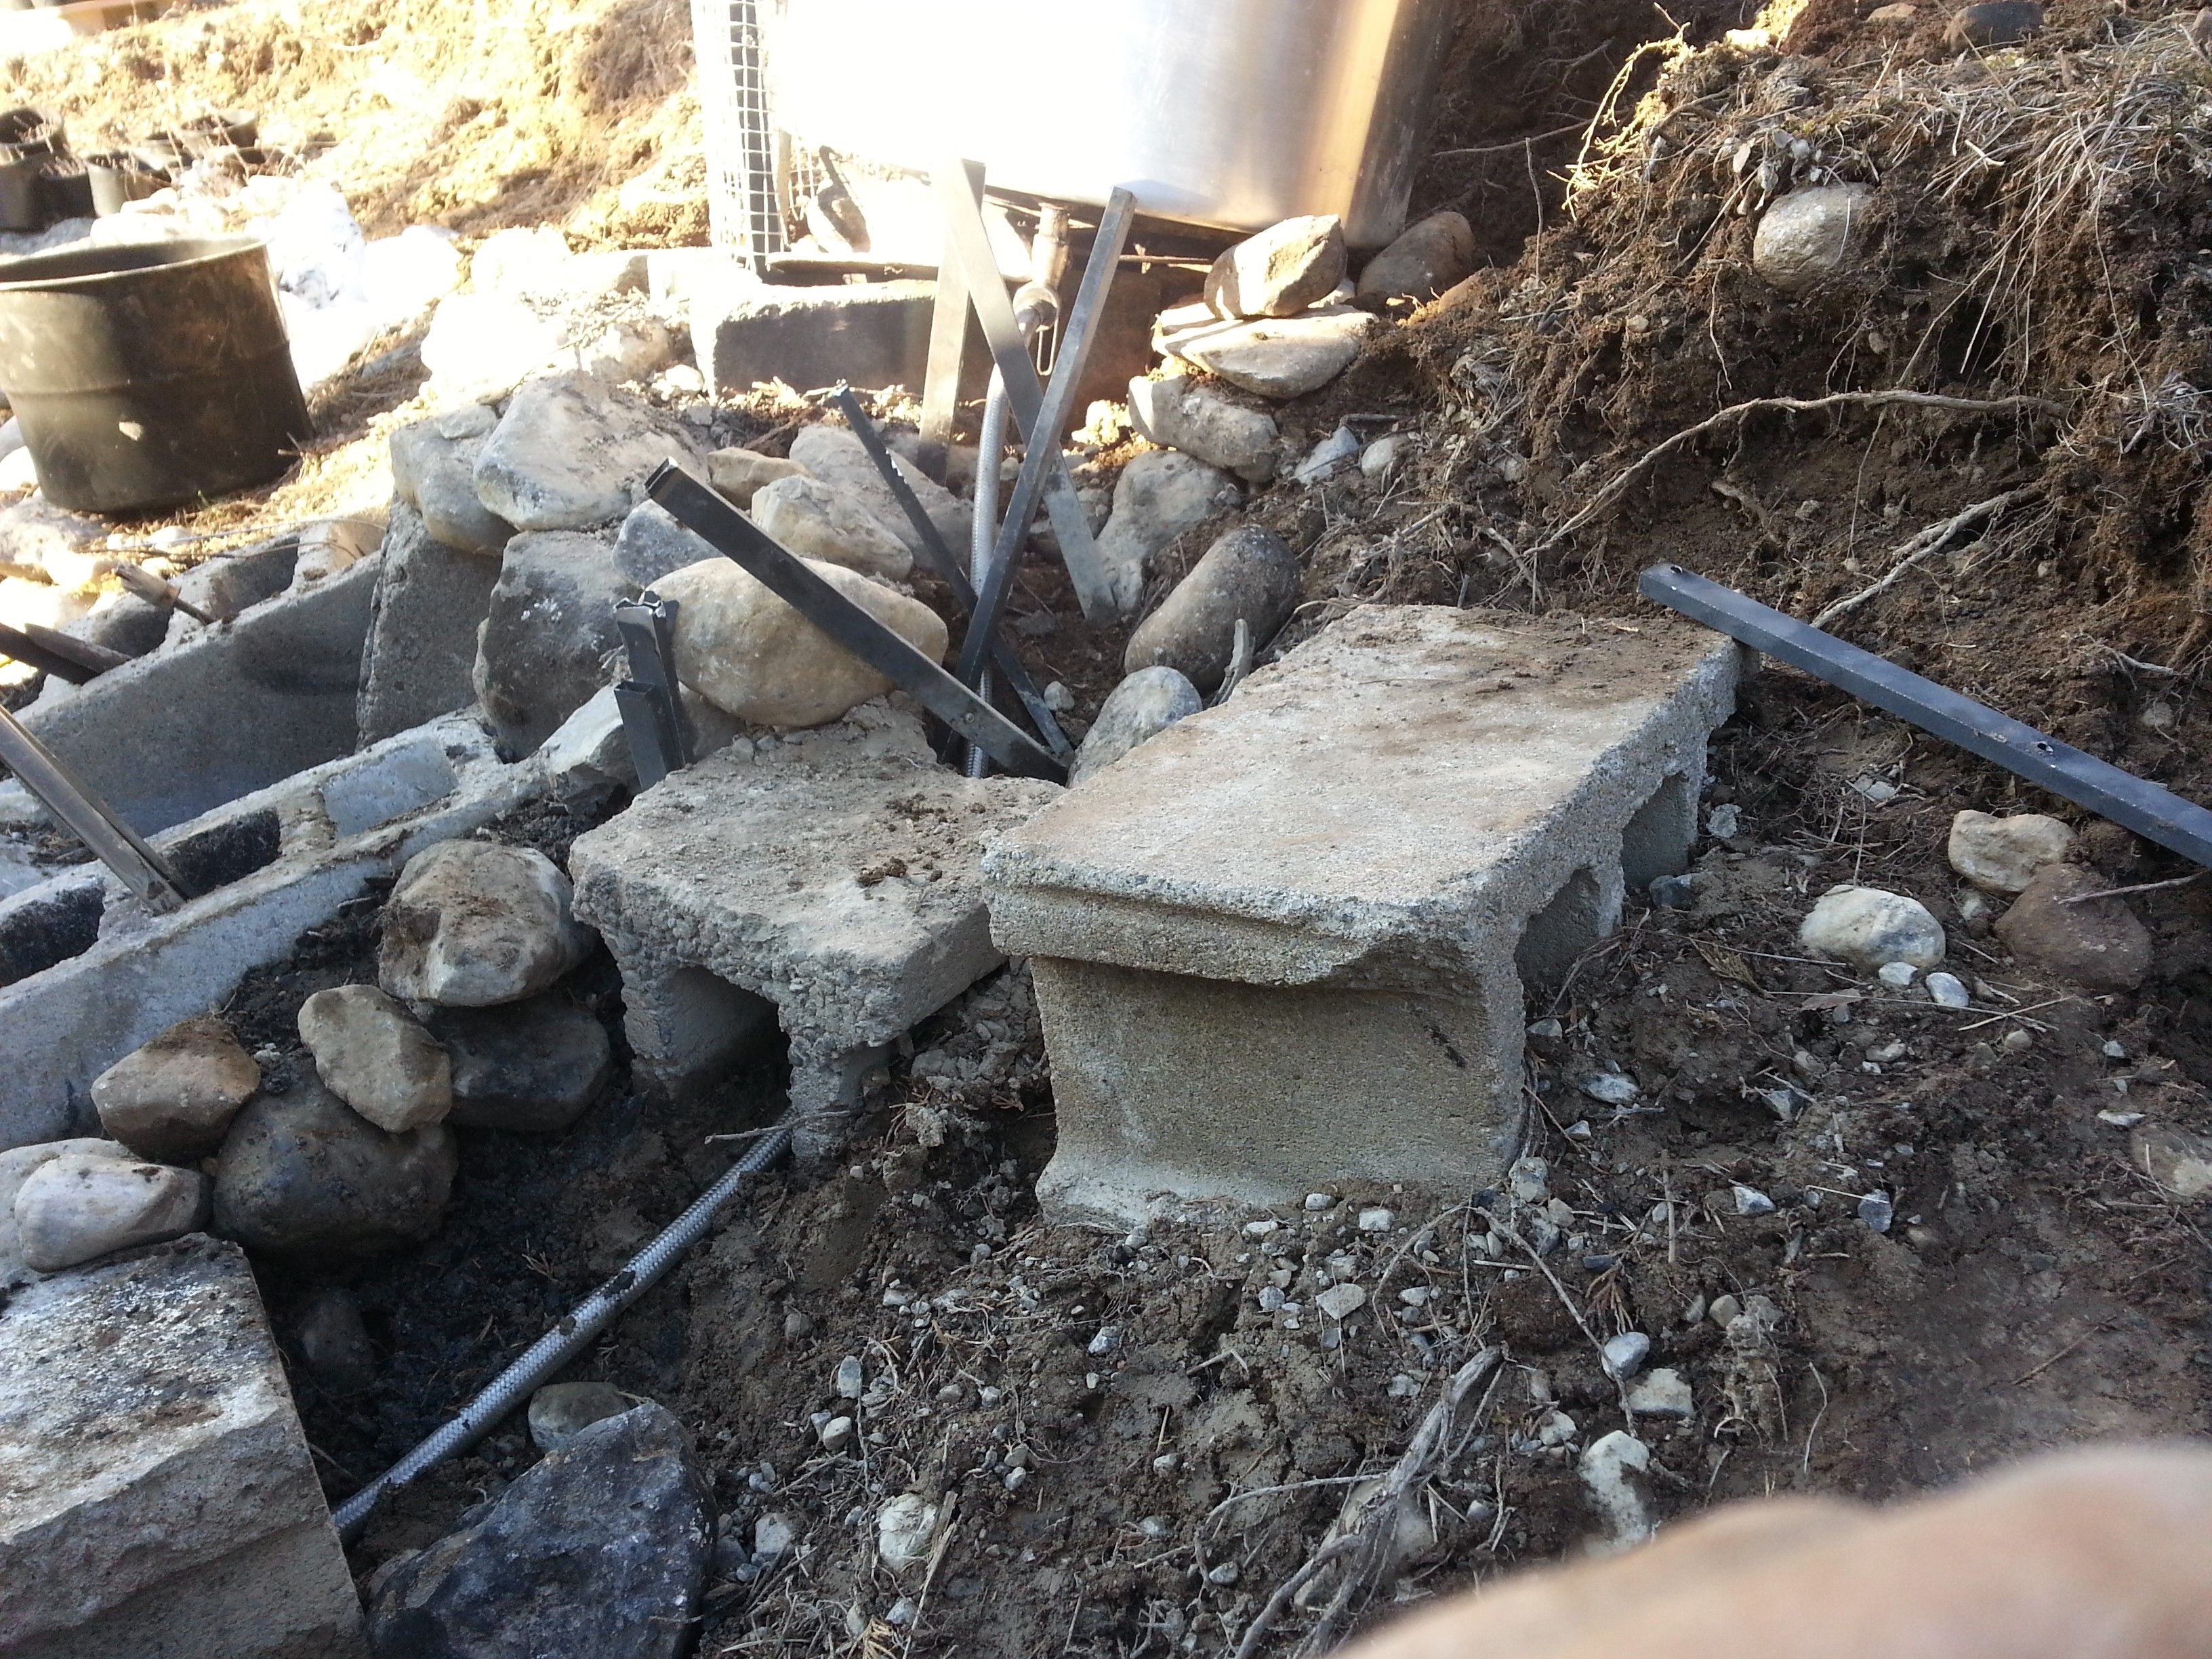
Leveling and Making the Platform Bigger
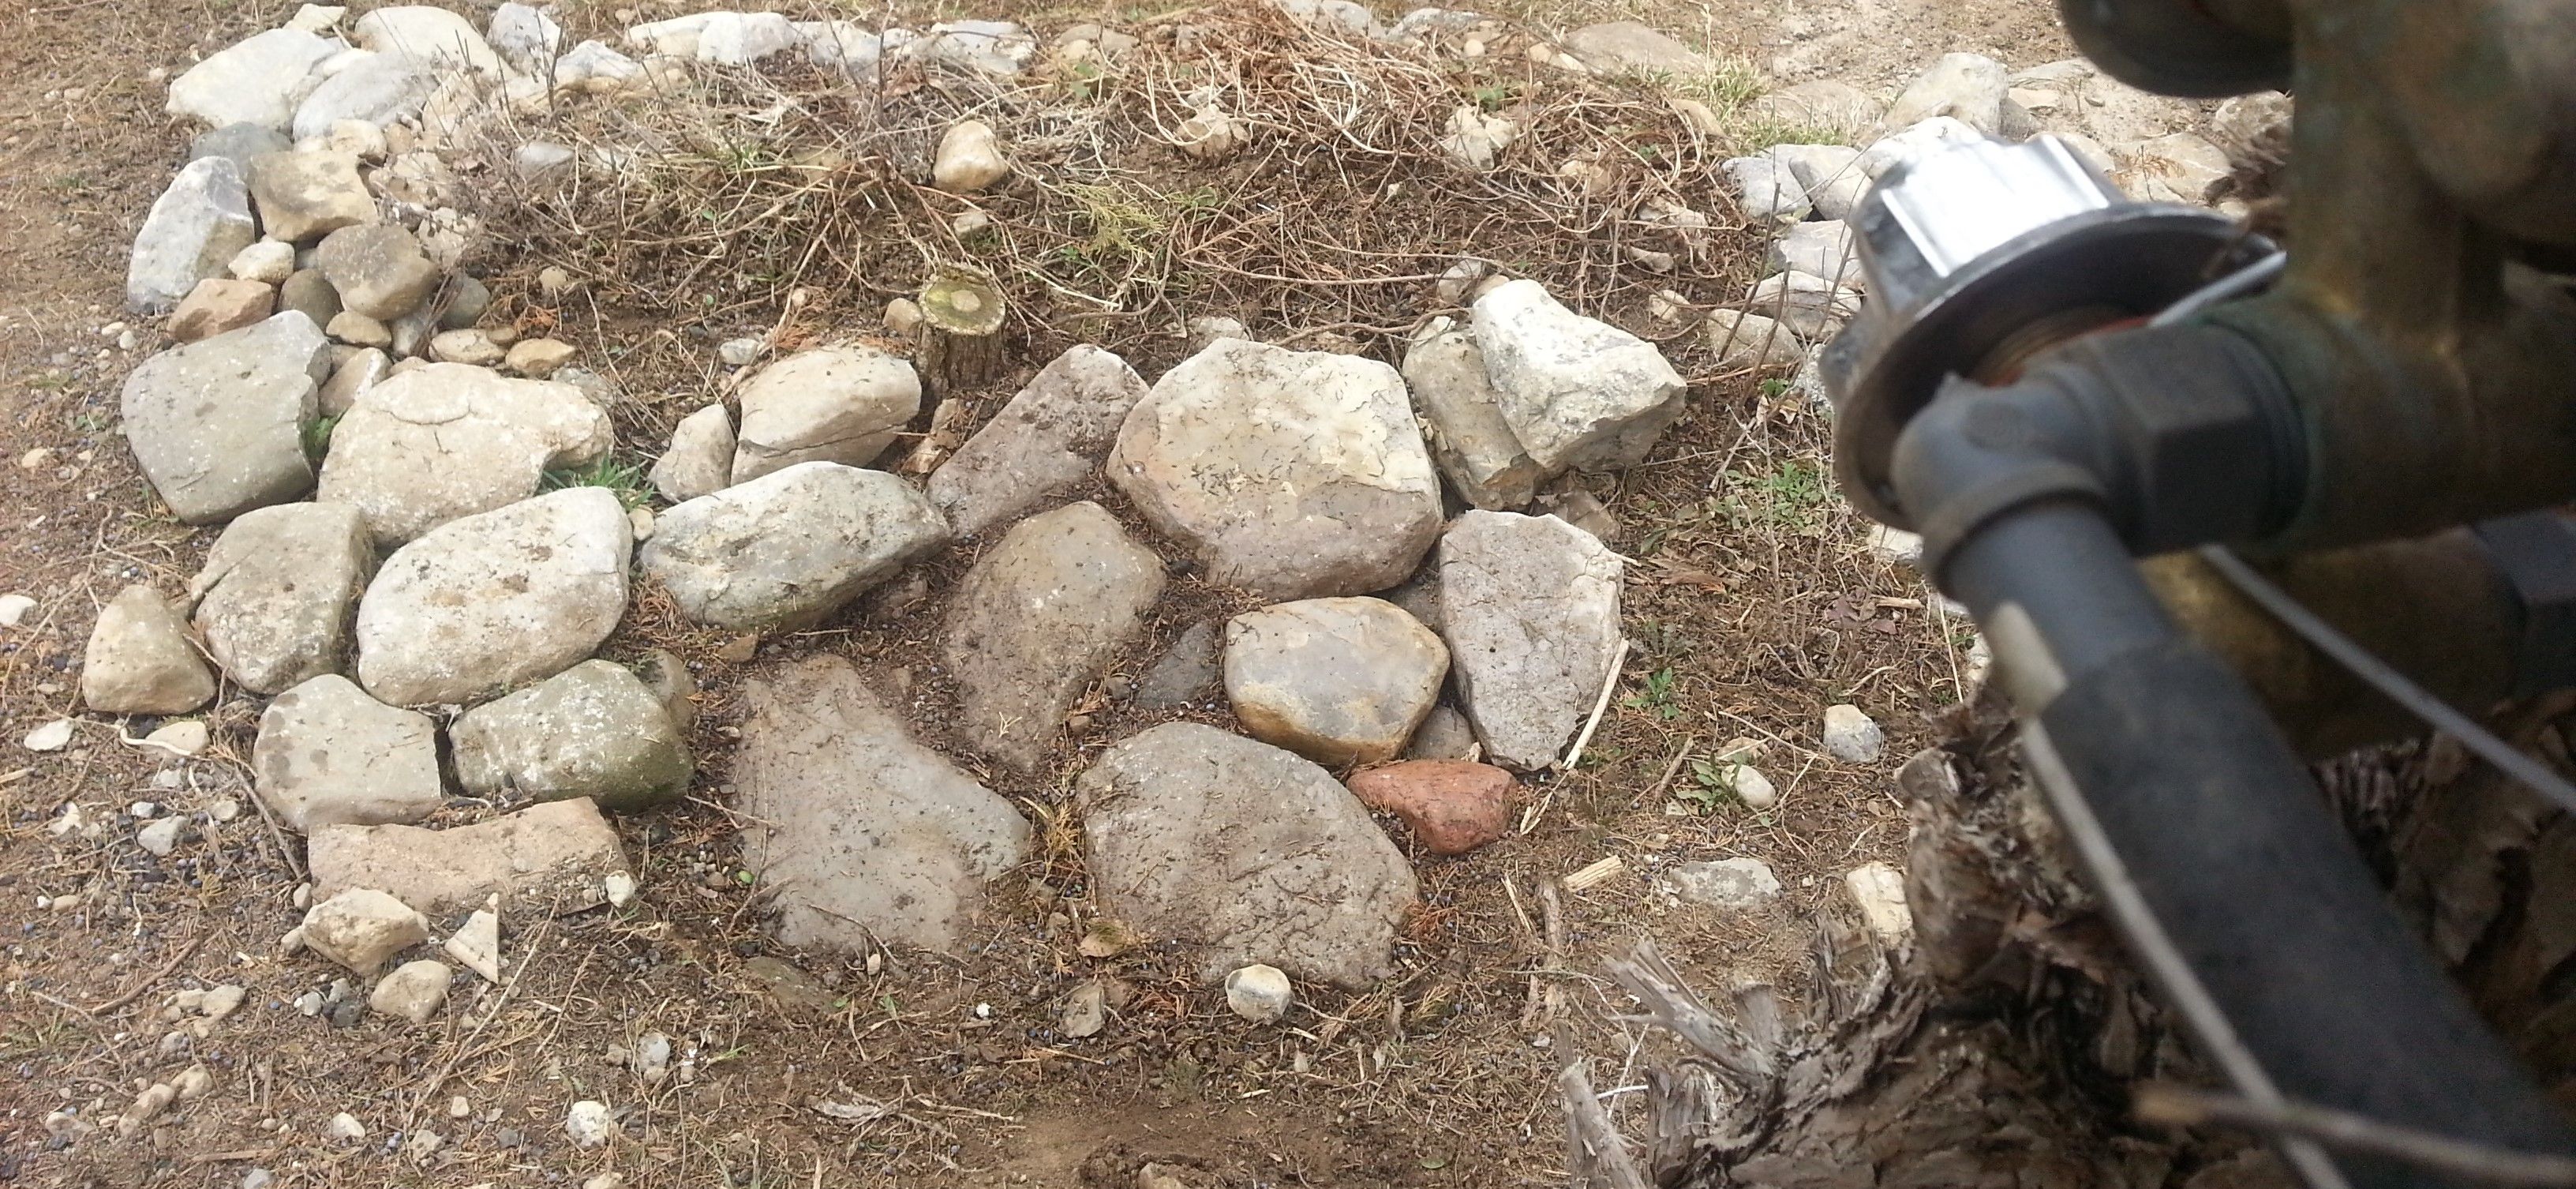
In the picture below you can see rocket stove boiler chimney leveled to the burner.
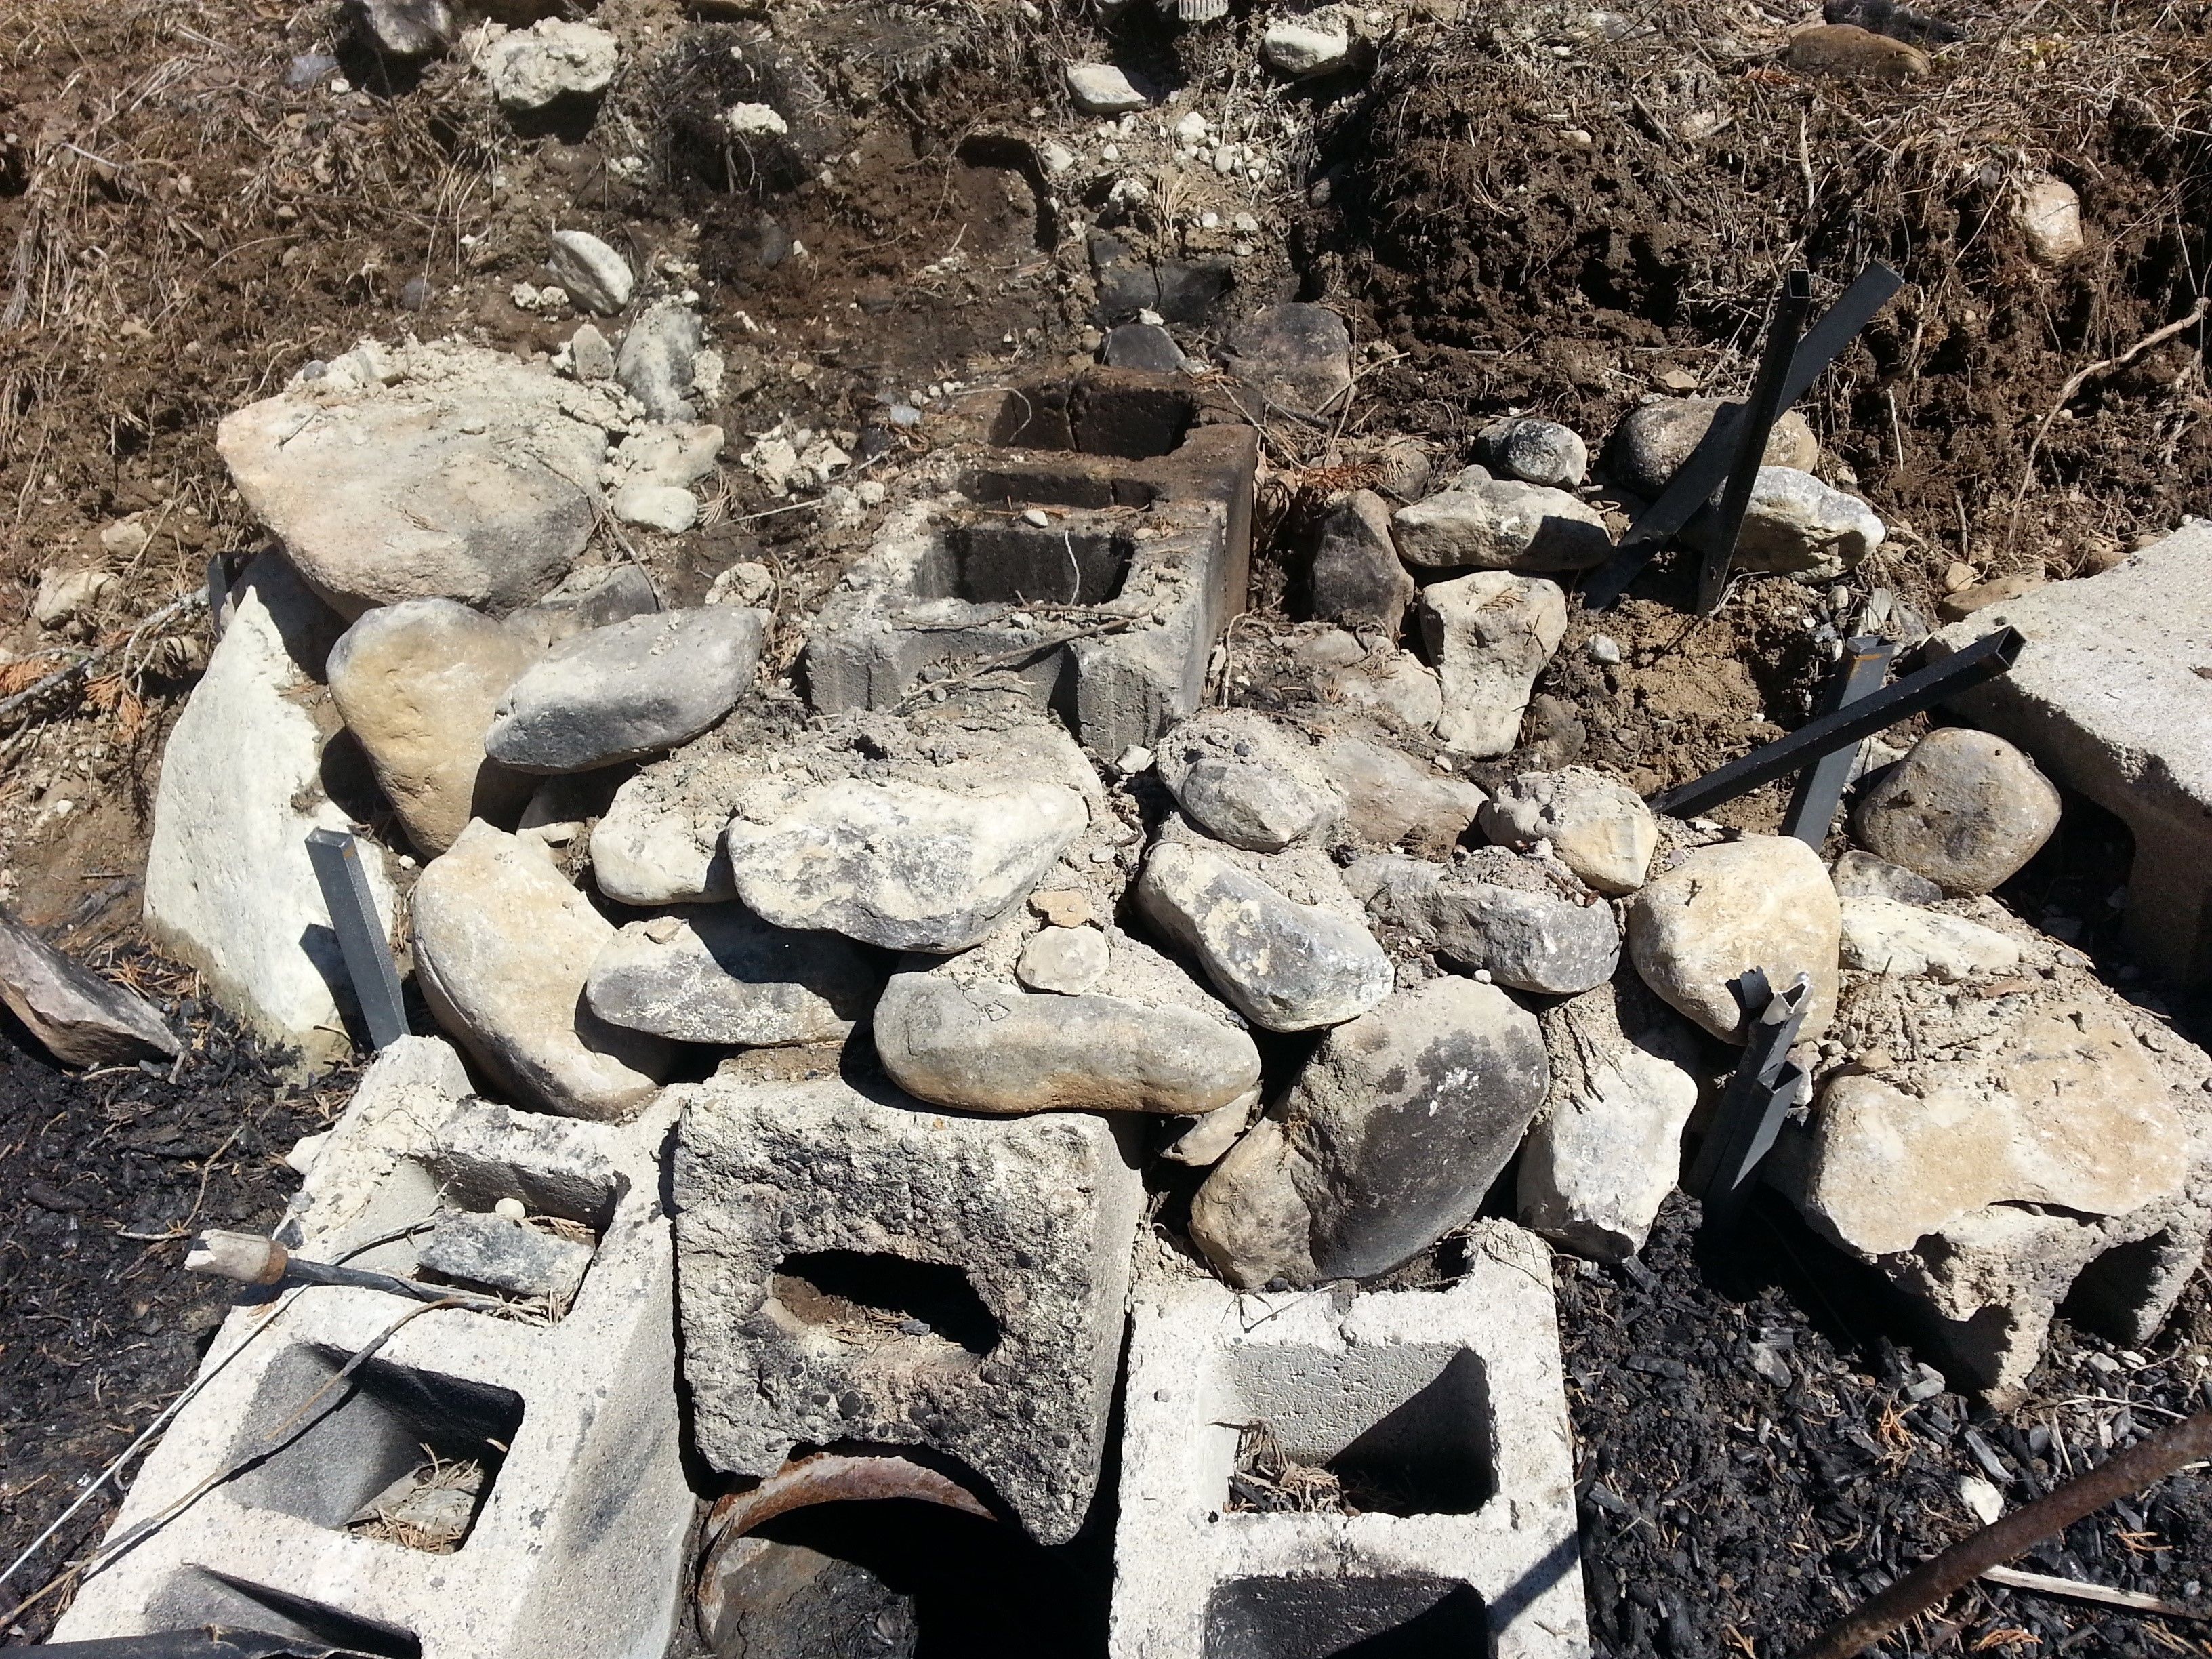
After making the boiler platform larger, I add the metal grill to the burner - and the new stock pot boiler. In the picture below you can see how the braided metal hose and valve is positioned before covering with the large rocks.
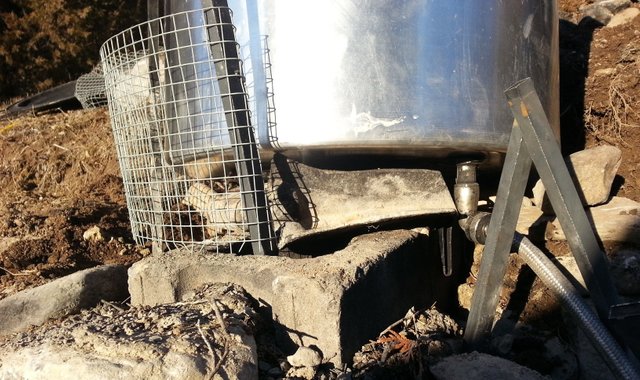
In the picture above you can see the scrap metal and chicken wire fencing that I added. The fencing does not hold weight, but when filling holes between the large chimney rocks with clay and smaller rocks it will help keep then from falling into the chimney boiler chamber.
In the picture above you can see the bucket of clay, water, and snow that my son loosely mixed for me. You can also see the scrap metal corner pieces I added to help make the chimney stay together as one unit. You can also see the additional rocks that I've added. It all comes down to having a solid foundation and having the rocks balance with the weight never to the outside of the circle.
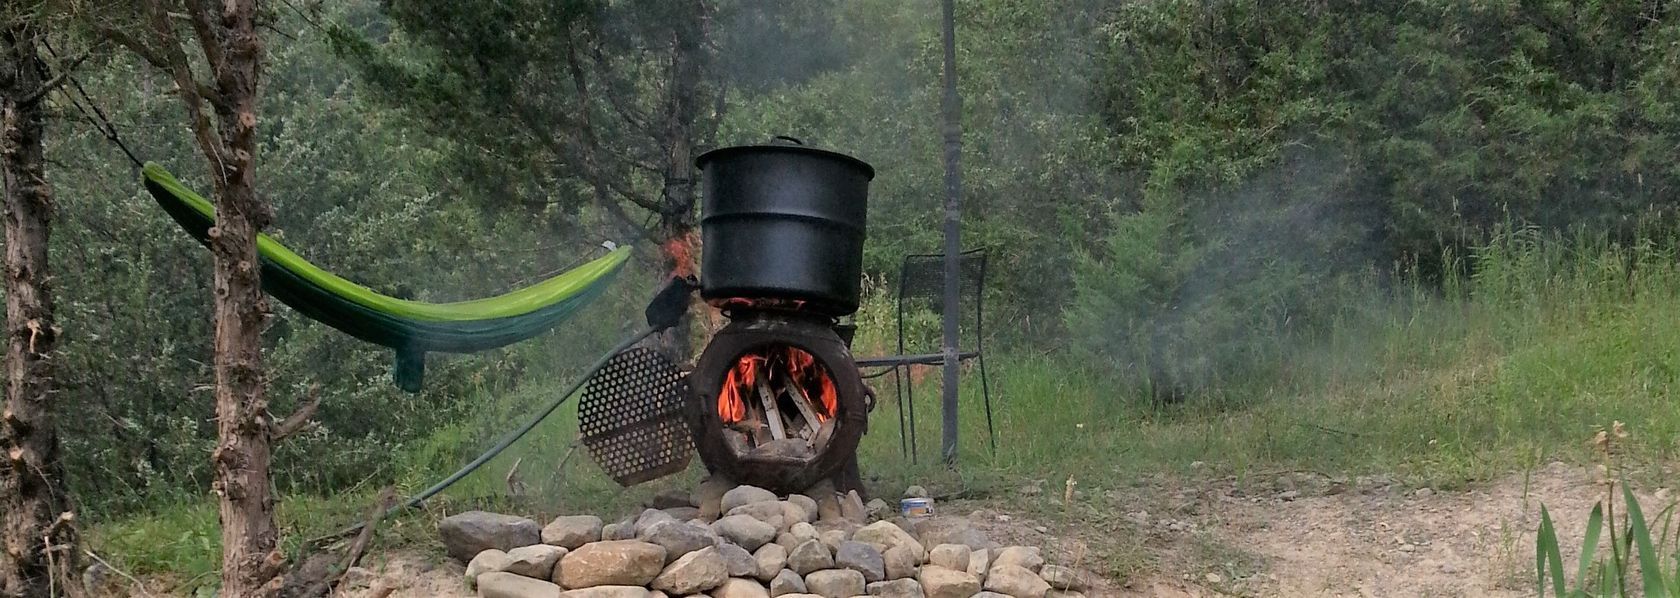
In the picture below you can see the finished Rocket Stove Boiler. The hardest part is filling the boiler with water. You can see the water bucket with the screen tied to the top to prevent larger particles from entering or leaving the bucket. I will be building water catchments up the hill from the boiler for easy gravity power boiler filling.
Starting up the Rocket Stove
Now that the rocket stove boiler is complete and the boiler is half full - let's start the fire. But first, too fuel this rocket, I'll be processing this bundle of landscaping pruned lower branches - mostly juniper and a cedar or two. They have been on the brush pile for almost a year, these branches should be nice and dry. They don't have to be dry, but they will smoke less until the fire is strong.
Branch Processing Area
This is where I break the branches down to smaller sticks - then sort the piles for easy branch grabbing. If the pile of brush is greener and the smaller branches are hard to snap off, I would usually keep trying or move on to the next branch. Handy tools my aunt gave me - a pair of branch pruners. The bolt cutter like pruners make quick work of tough branches. In the video below I show the branch pruners and demonstrate methods of breaking down small branches by hand - for the rocket stove.
Starting the fire
You can see the sorted pile of wood that will be used to boil the large tapped stainless steel stock pot that is half way filled with water. First I will use most of the smallest kindling sticks - adding a few medium sized sticks as I go.
Watch the video demonstration below of starting the rocket stove with dry grasses, sticks, and a Bic lighter.
30 Minute - 32 Quart Water Simmer - 1 Hour Boil
You can see a picture of the bottom side of the stainless steel crock pot that now serves as the rocket stove boiler.

The stock pot for this new boiler holds 68 quarts - this boiler is half full. I did fill the boiler with a lot more water, but they have filled up and primed the newly attached outdoor garden hose plumbing. I won't have to fill so much next time, but the first use of the hot water hose will be cool water until the boiled water reaches the tap. Thirty minutes after starting the rocket stove boiler, you can see from the video below that the water has come to a simmer.
A half hour later the water was at a rolling boil. It is also faster to boil when the rocket stove boiler mass is already warm from the previous burn.
Don't Choke the Rocket
The Rocket Stove Stoking Dont's:
- Don't put larger branches on too soon, or it will smoke.
- Don't let the flame die or get smothered, or it will smoke.
- Don't put in too many leaves or pine needles, or it will smoke.
- Be sure to leave at least 1/8 of the loading pipe open for air flow, or the rocket stove will smoke.
Nighttime Rocket Stove Choke and Recovery Video
This outdoor rocket stove has a small combustion chamber. I start the fire with small sticks while leaving at least an 1/8th of the stick loading pipe open for air flow. the video below I add so much dry grass tinder that I choke the rocket stove fire. You can see that by moving the tinder around with a stick how it lets in air to rage the fire and disappear the smoke. The video continues with nighttime rocket stove fire stoking.
Be sure to never use gasoline or other accelerants that vaporize quickly to the start rocket stove, cast iron wood stove, or other enclosed space fires. If the accelerants are not ignited very quick then fumes build and combust when ignited - causing an explosion or at the least a fireball. Liquid accelerants can be especially dangerous because the can soak into clothing, wood flooring, and other easily burned items.
Outdoor Plumbing and Shower
Not so much for Winter, but Outdoor Plumbing works great for the other three seasons. Standard Garden hoses are used for the outdoor plumbing setup. Inexpensive push-on hose connectors make it much easier to setup and take down this outdoor plumbing.
Standard Garden Hoses and Simple Connectors
Pictured below you can see a variety of garden hoses and standard screw-on garden hose connectors. The heavy duty grey one is my favorite. The white medium duty hose taken from the RV holds second place. Lighter duty hoses tend to kink up and slow or stop the water flow too often.
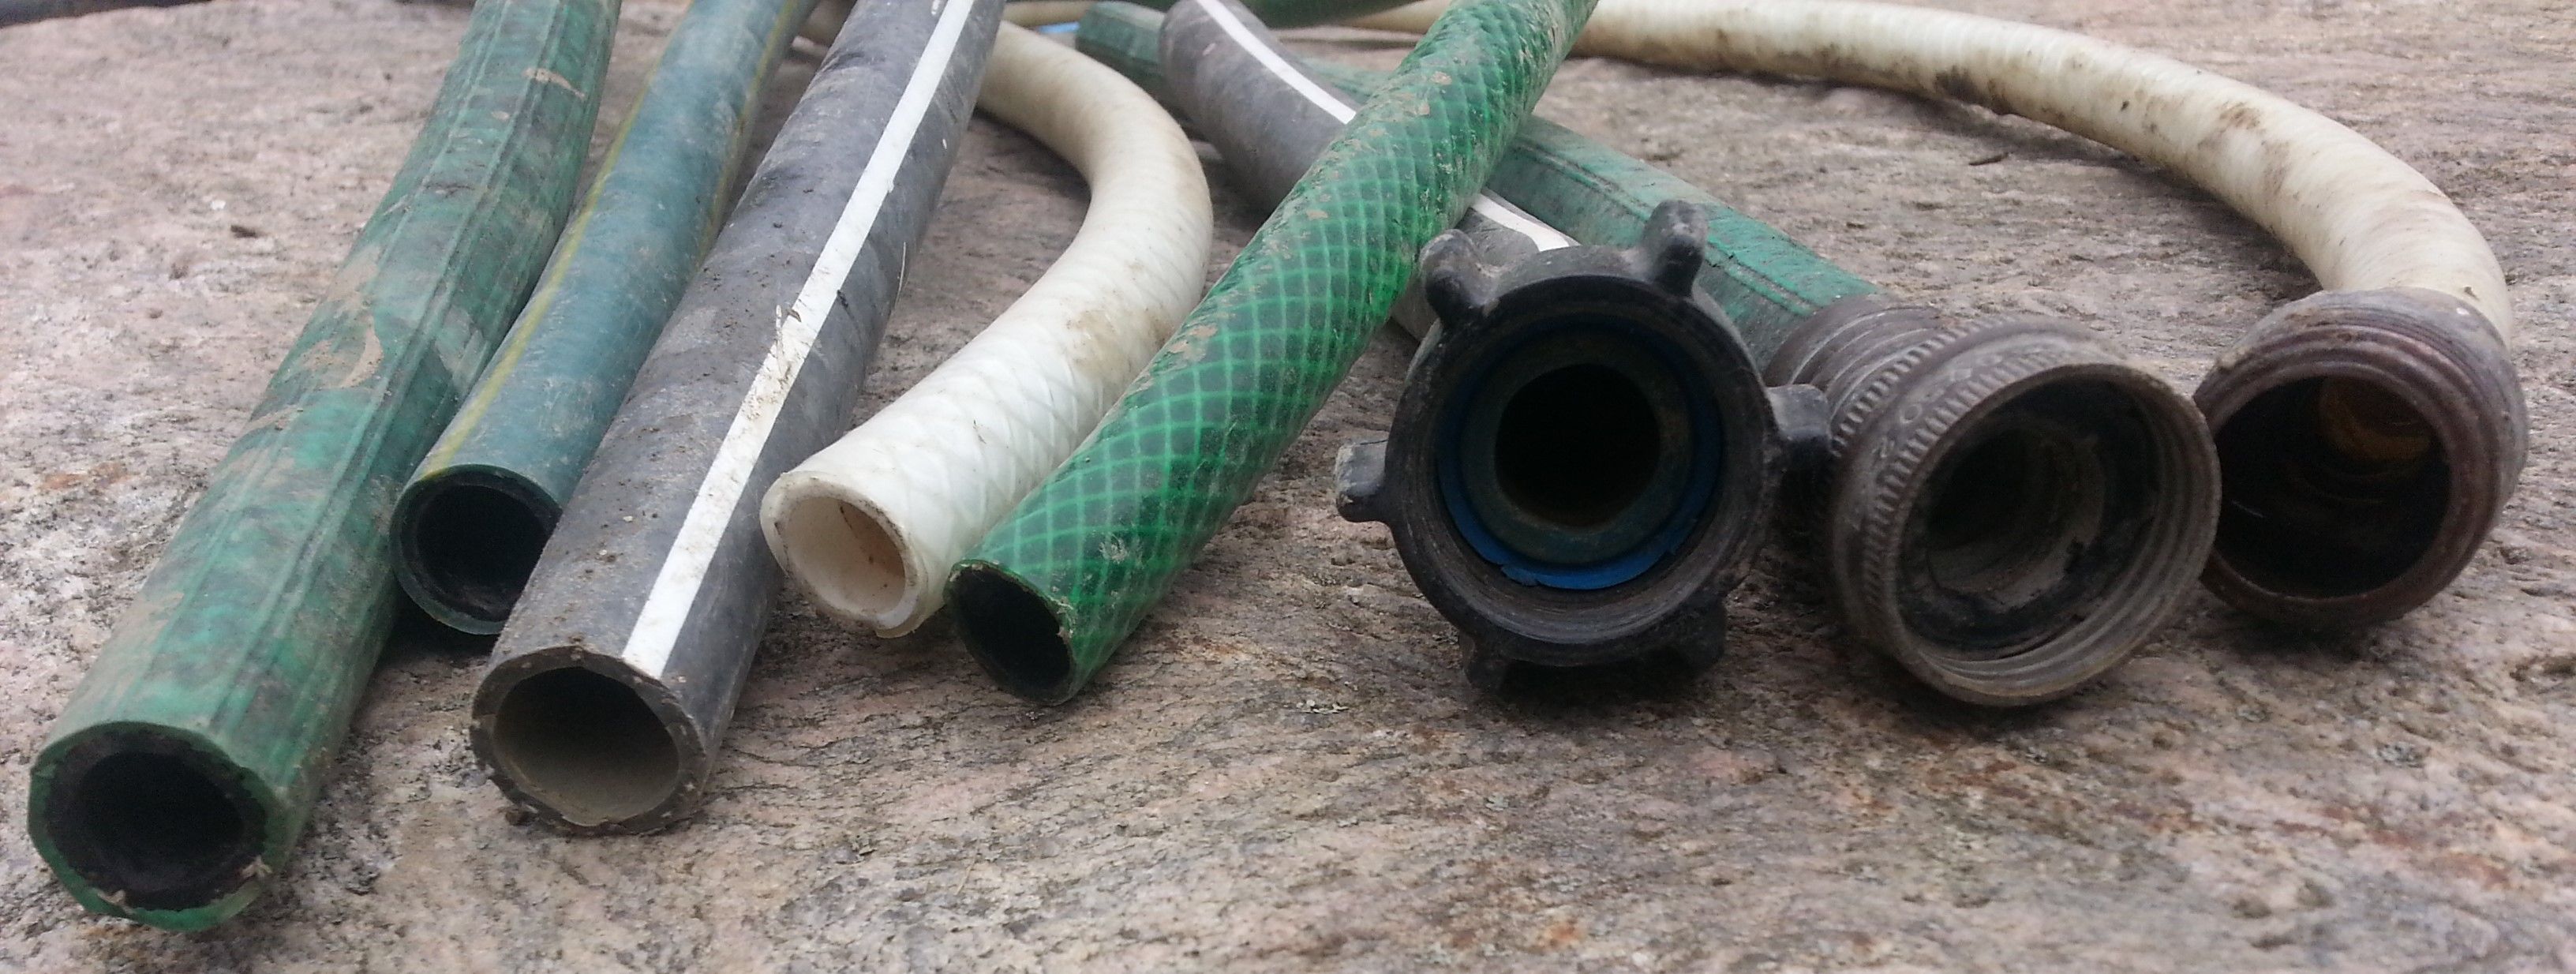
Simple push-on garden hose connectors. Straight line hose connectors, elbow connectors, and hose 'T' connectors.
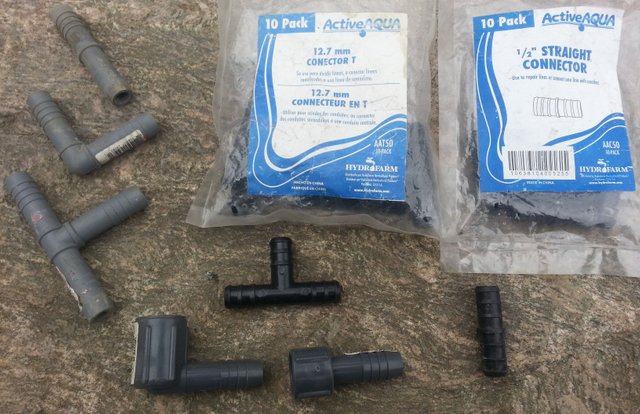
The black connectors were purchased in bulk, the grey ones were purchased for a buck or two at the local hardware store. The black connectors are a tiny bit smaller, the heavy duty hoses pushed on those can be leaky, so avoid the combination. The light duty hoses are more difficult to push onto the grey connectors, but the will go on with enough effort.
Running the Outdoor Plumbing
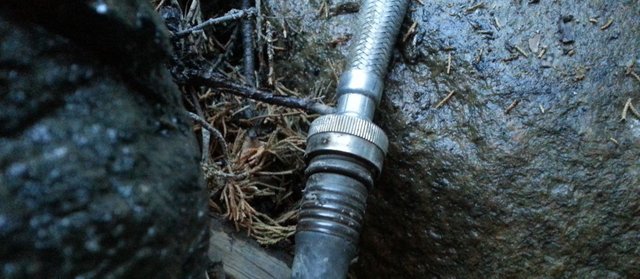
The boiler tap connects to a braided metal dishwasher hose, I found the beauty of these after melting and having to reattach melted garden hoses a couple times with the old chiminea boiler.
The metal braided hose is only 6 ft long, so it connects to another hose with a standard twist to tighten garden hose connector.
That hose has the basic in-line hose screen with a push on hose connector for the next hose in the line to attache to. We have screens for the rain water collection, so I clean the mesh out once a month at the most.

The next hose piece goes to the hose 'T' connector.
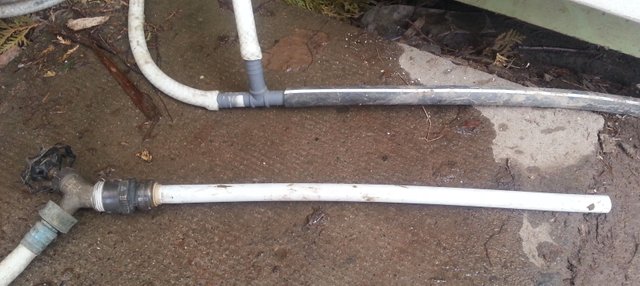
Out of the top of the 'T' connector is the hose for the auxiliary hot water fill - see picture above - it has a standard garden hose tap to turn on and off the auxiliary water. This is used for filling the Clothes Washing Machine and Dish Washing Tub.
Auxiliary Hot Water Tap Testing Video
The remaining 'T' connection has a hose attached to supply hot water to the shower's hot water tap.
For the tap test I only have the gravity fed hot water line connected, so I am sure to turn Cold water tap to the off position -or else hot water will come out of the cold water tap that is not connected. I will be adding the gravity pressured cold water line in a future post.
Hot Water Shower Tap test video
In the video below you can see the not connected cold water tap with the small green hose piece attached.
The Shower Head
A standard inexpensive shower head that came with the hot and cold water tap set for about $50 from the local hardware store. A plumbing adapter that goes from threaded female half inch to push on 1/2 inch hose connector was attached tightly after applying plumbers tape to the threads of the shower head.
The Shower Basin and Garden Bed
Orange Mint and Lemon Catnip fill the bed of the shower basin. The mint really enjoys the extra water, this spring I will be moving the lemon catnip and replacing it with more mint. The rock walled beds make it easy to contain the mint runners - mint can be evasive and spreads easily.
The Completed Gravity Pressured Hot Water Shower
Below is the video of the completed shower with the hot water tap gravity pressured water from the Rocket Stove Boiler using the standard garden hoses and connectors.
Just in time for spring showers - the Rocket Stove Boiler and Outdoor Garden Hose Plumbing is complete.
The Winter Cabin Cast Iron Stove Top Boiler:
Off-Grid: Wood Stove Top Boiler and Standard Garden Hose Connectors
Have a great day!
Great post but that's why I could never go off the grid, to much work..
There are an ton of homesteaders here on steemit and you guys are a bloody creative and crafty lot, I've seen awesome "earthships", forges, permaculture the works.
What do you do for power and net connection when your off the the grid?
I enjoy the work - it gives me time to think about how to do the work easier :) we could use propane and a pump for the hot water, do do cook with propane, but we wanted to find an alternative way. Eventually we may heat water with other more passive methods. We have 1000 watts of solar panels, 800 amp hours of main batteries, and a gas generator and charger as a backup. We'll add more solar panels and batteries soon, as it is we only spend about $80 per year in backup generator gas, mostly in the dark 2 months of winter. We have a wifi router that gets internet from cell phone towers - we're in cottage country - 100 gigs of data per month :)
wow, this is a FULL on detailed post.. Amazing job.. ive never seen a rocket stove made with stones before.. so that is GREAT to see as that makes things much easier than using cob and getting the mixes right.. I might just have to try this one out when i reach holland!
Thanks - It makes it a lot easier being built into the side of the hill - half of the mass and stove is already there. With the large rocks it was quick to build the stove. I slept well and was feeling good the next day after moving all those rocks around - a quick reminder of the hard work to come this summer :)
Great post @jackdub. How hot do you think your compost gets? I usually just throw my vegetable scraps under the pine tree in the park next door. I really should build a little compost bin though.
The higher temperatures are usually reached closer to the center of a cubic meter heap. Field mowings and crops purposely planted for composting would also be composted for eventually being added to the garden rows. Not something I would rely on to heat a cabin with, but would work well for warming a coldframe greenhouse - or for warm fall showers. The cubic meter composting bin that I have is 1/4 full - waiting for it to thaw so i can turn it over and heap it - just looking to get dirt from the compost at the moment :)
"A hot compost pile can reach temperatures of 49-77 degrees Celsius (120-170 degrees Fahrenheit)" -
https://www.permaculture.co.uk/readers-solutions/how-make-hot-compost
Back to basics! Wow this was fun to follow and way outside my city or suburb bubble knowledge. Managing water generation and use sounds like a tough problem. Is it all from rain collectors or would you also pump water from ground wells or flowing water sources?
We get more than enough rainfall throughout the year here in ontario canada. We do have 3 or so weeks a year or more were it can be very dry. To get through those mini droughts, two 250 (1000 litre) totes would be enough water for the three of us for laundry, cleaning dishes, and bathing. The property is in a valley so I'll soon be building water catchments up the hill for irrigation. The rain collection totes aren't quite equipt to handle the cold winters here so i'll be digging under ground cisterns for rain water collection. We bring in bottled water for drinking and cooking, We had an underground cistern installed before winter for clean truck delivered drinking water. That cistern holds 1000 gallons, $100 per fillup delivery - after doing the calculations we found that 2 deliveries a year would be plenty. If the trucks ever stooped running then we would fill it with rain water and treat it accordingly for drinking :)
Congratulations on such as thorough and informative post! Though I couldn't watch your videos, I'm sure they are also just (s)teeming with information.
What do you mean by "chimeanea"? In Mexico the word is simply used to mean a fireplace, one of the least efficient, though possibly romantic ways of burning wood.
In us and canada a chiminea is an outdoor fireplace with a chimney. Indoor fireplace we just call a fireplace. Chimineas are especially popular in residential areas where outdoor fires must be enclosed and not open pit.
The old chiminea boiler from last summer - I took the chimney off the put the boiler on top. The chimney is now used with the rocket stove, sideways, it's where i feed the wood into :)
Oh, okay! I think I remember seeing those types of fireplaces, made of clay (in the US, though I'm sure they have them in Mexico too). And I agree, placing it sideways to work as rocket stove was a sensible idea.
Great post JD.... I like the set up, looks great and a real good off-grid system... Nice n well thought out too...
With plenty of spares you could keep going for decades...
Have you considered also getting a shower saving head? I have one and it extends your water usage without too much of a compromise...
Thanks :) We will probably do that when we build the house and add electric pump water pressure. Currently our water use gets limited by the speed of flow of the gravity water pressure. If there was just a little less water pressure the shower would be just a dribble :)
Nice, thorough post, resteemed for future reference.
So much info in this post @Jackdub. There is a lot to learn here and very detailed, thanks.
I was wondering a little about the shower bed. Are you standing on the mint when you take a shower? Sounds like it would also smell very good as you're taking a shower there. Is boiling Rainwater more effective than filtering it or using a solar still perhaps? Maybe I meant in terms of material and time.
Thank you for sharing
We're standing on the large rocks for the shower. When It gets a little warmer I'll be raising them so the water level doesn't get above the top of the rocks before the end of the shower. The mint garden bed is to trap, soak up, and hold the water do it doesn't go down the hill onto the walkway. Standing in the mint would be a very muddy experience - it would smell nice though :) We don't bother with a curtain so we usually wear our bathing suits, flip flops are optional. We boil the rain water mainly because hot water is easier and more comfortable to clean with. Rain water has already been distilled with the sun - any contaminants it would have picked up would be from the air and clouds. After collecting rainwater into larger storage tanks we treat it with the appropriate amount of chlorine - iodine could be used as well. This treatment isn't so much to purify the water, but to prevent bacteria or algae (if sun light can get to the water) from growing in it. If I was planning on drinking the water or treating it further, then I would go with an under sink 3 phase water filter - they are about $180 or so from amazon. Boiling purification is more for viruses and bacteria and would not remove any heavy metals, pesticides, chemicals, or other industrial contaminants that might be in water - where ever it comes from.
Yea I guess it would get muddy standing in the mint! I have to get my wife to accept dronking filtered raon water. Well I have to also research it too. Of course rain water is already distilled, I must have forgotten for a second or something... maybe I was thinking about the water not touching any contaminants that the roof or "collector" can accumulate? You think the 3 phase filter system can remove metals, contaminants and other nasty stuff?
Like I said, I need to research this now.
I would trust the 3-phase with collected rain water considering where I live - if i was just downwind of an industrial area, I might be more worried. For now we only use the rain water for cleaning and eventually garden irrigation - not for drinking and cooking. To be extra safe you would want to test any water source you have, then purchase the correct filter system to deal with whatever might be contaminating it.
Thanks, for that info. It is an important issue, considering we will be stepping into an age of scarcity of clean water innour near future, on this globe.
I know it's close already, but it could get much worse for people of western worlds who habe no immunity for dirty water or knowledge to clean it up!
This is next thing I want to learn about in-depth. In Puerto Rico we drank rain water filtered through a Burkey gravity clay filter.
Congratulations! Your post has been selected as a daily Steemit truffle! It is listed on rank 5 of all contributions awarded today. You can find the TOP DAILY TRUFFLE PICKS HERE.
I upvoted your contribution because to my mind your post is at least 21 SBD worth and should receive 134 votes. It's now up to the lovely Steemit community to make this come true.
I am
TrufflePig, an Artificial Intelligence Bot that helps minnows and content curators using Machine Learning. If you are curious how I select content, you can find an explanation here!Have a nice day and sincerely yours,

TrufflePigThanks @trufflepig - That's very nice of you :)
Congratulations, your post received 2.92% up vote form @spydo courtesy of @jackdub! I hope, my gratitude will help you getting more visibility.
You can also earn by making delegation. Click here to delegate to @spydo and earn 95% daily reward payout! Follow this link to know more about delegation benefits.