Off-Grid: Wood Stove Top Boiler and Standard Garden Hose Connectors
We collect rain and snow water for washing dishes, clothes, and for showers and bathing. Cleaning is easier with warm water washing off dirt and oils. Even though rain water has already been distilled by the sun, we like to boil the contained rain water before using it for cleaning.
Wood Stove Top Water Boiler
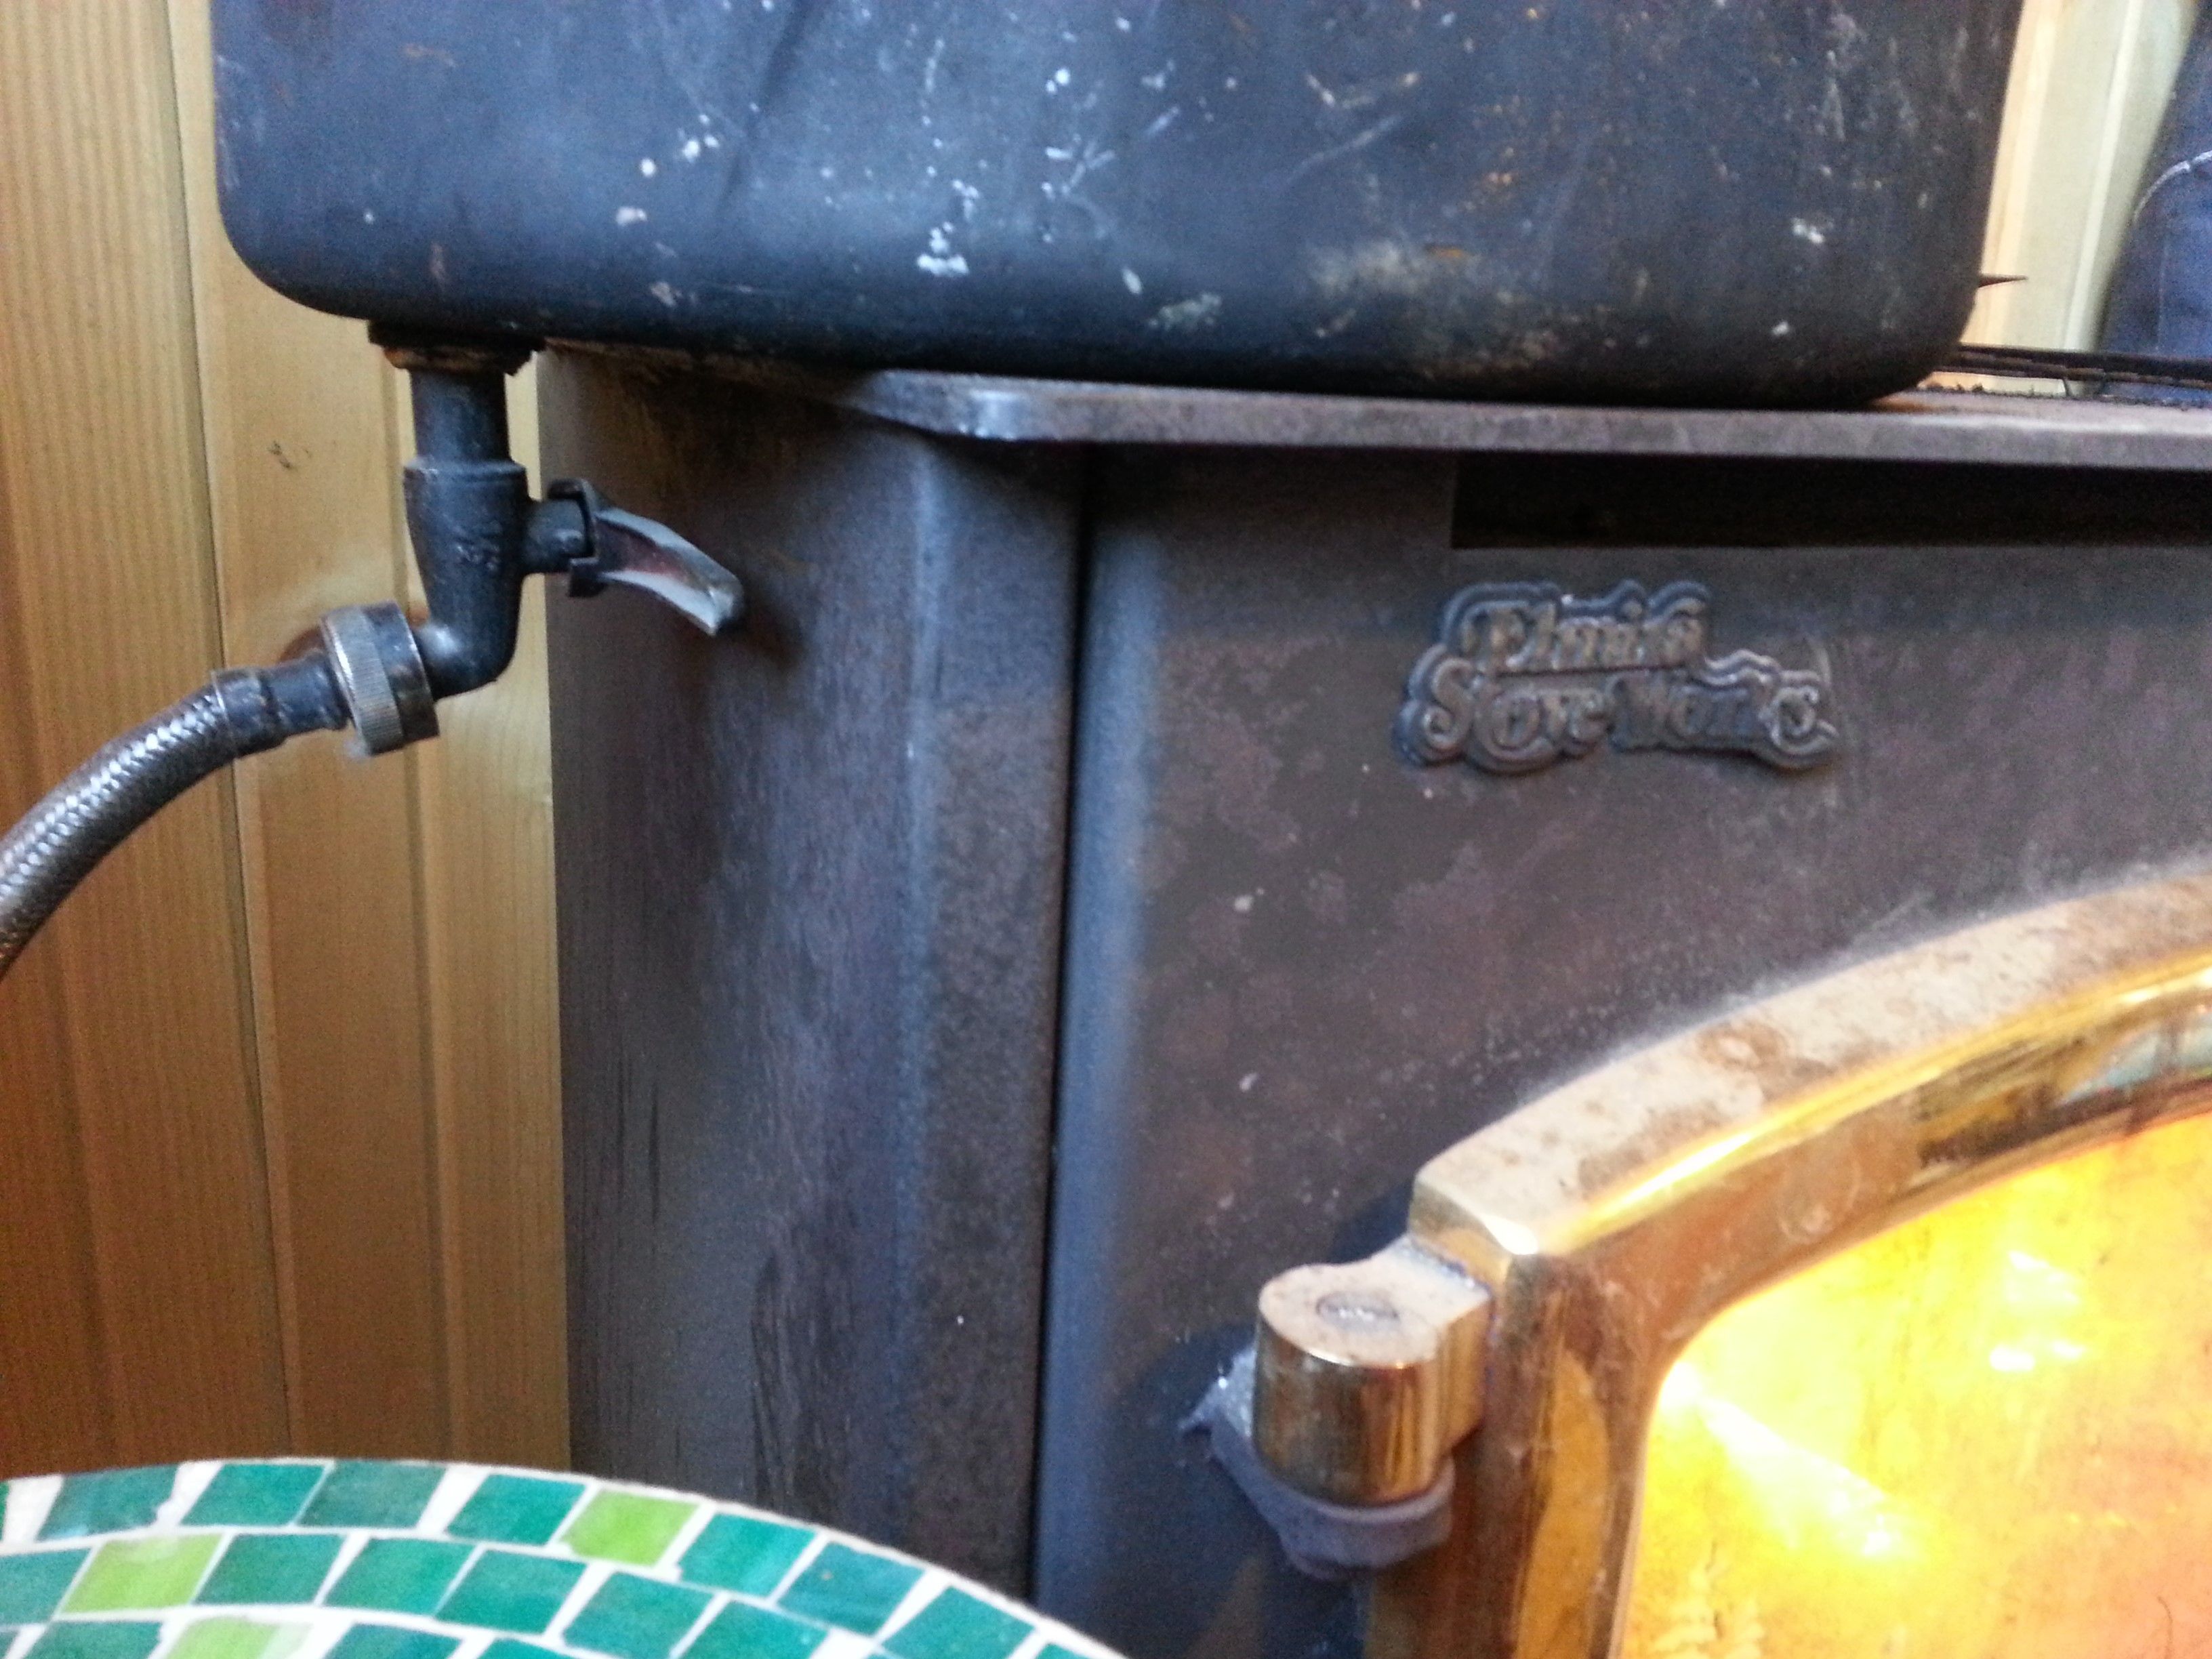
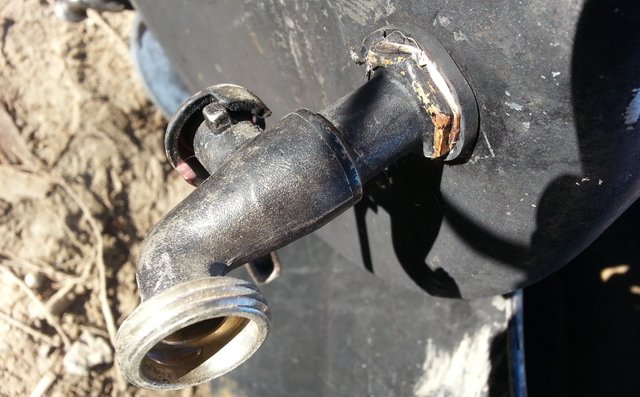
In the picture above you can see the large stainless steel stock pot. I have installed a ball valve on the flat bottom. A metal braided dishwasher hose is attached to the 3/4 inch ball valve outflow threading.
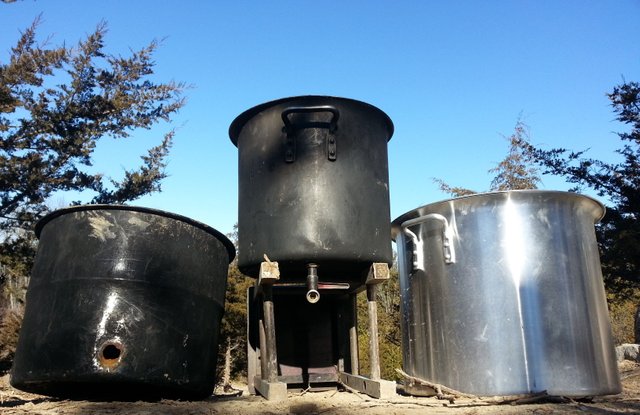
Three Stock Pots - One Failure
Above you can see three stock pots. The one on the left we brought from our old basement, black with white speckles - a thin metal. The stainless steel stock pot upgrade in the middle has the ball valve installed on the bottom. Both stock pots were used with the outdoor rocket stove boiler. The larger stainless steel stock pot is still shiny and unused, we realized it was to large for the wood stove top, we will be using it this spring and summer for the outdoor rocket stove boiler.
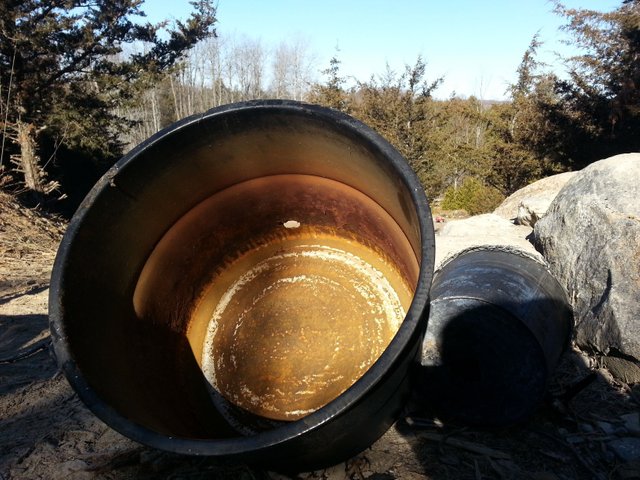
In the picture below you can see how the constant water, heat, and hot drying rusted the inferior metal of non stainless steel stock pot.
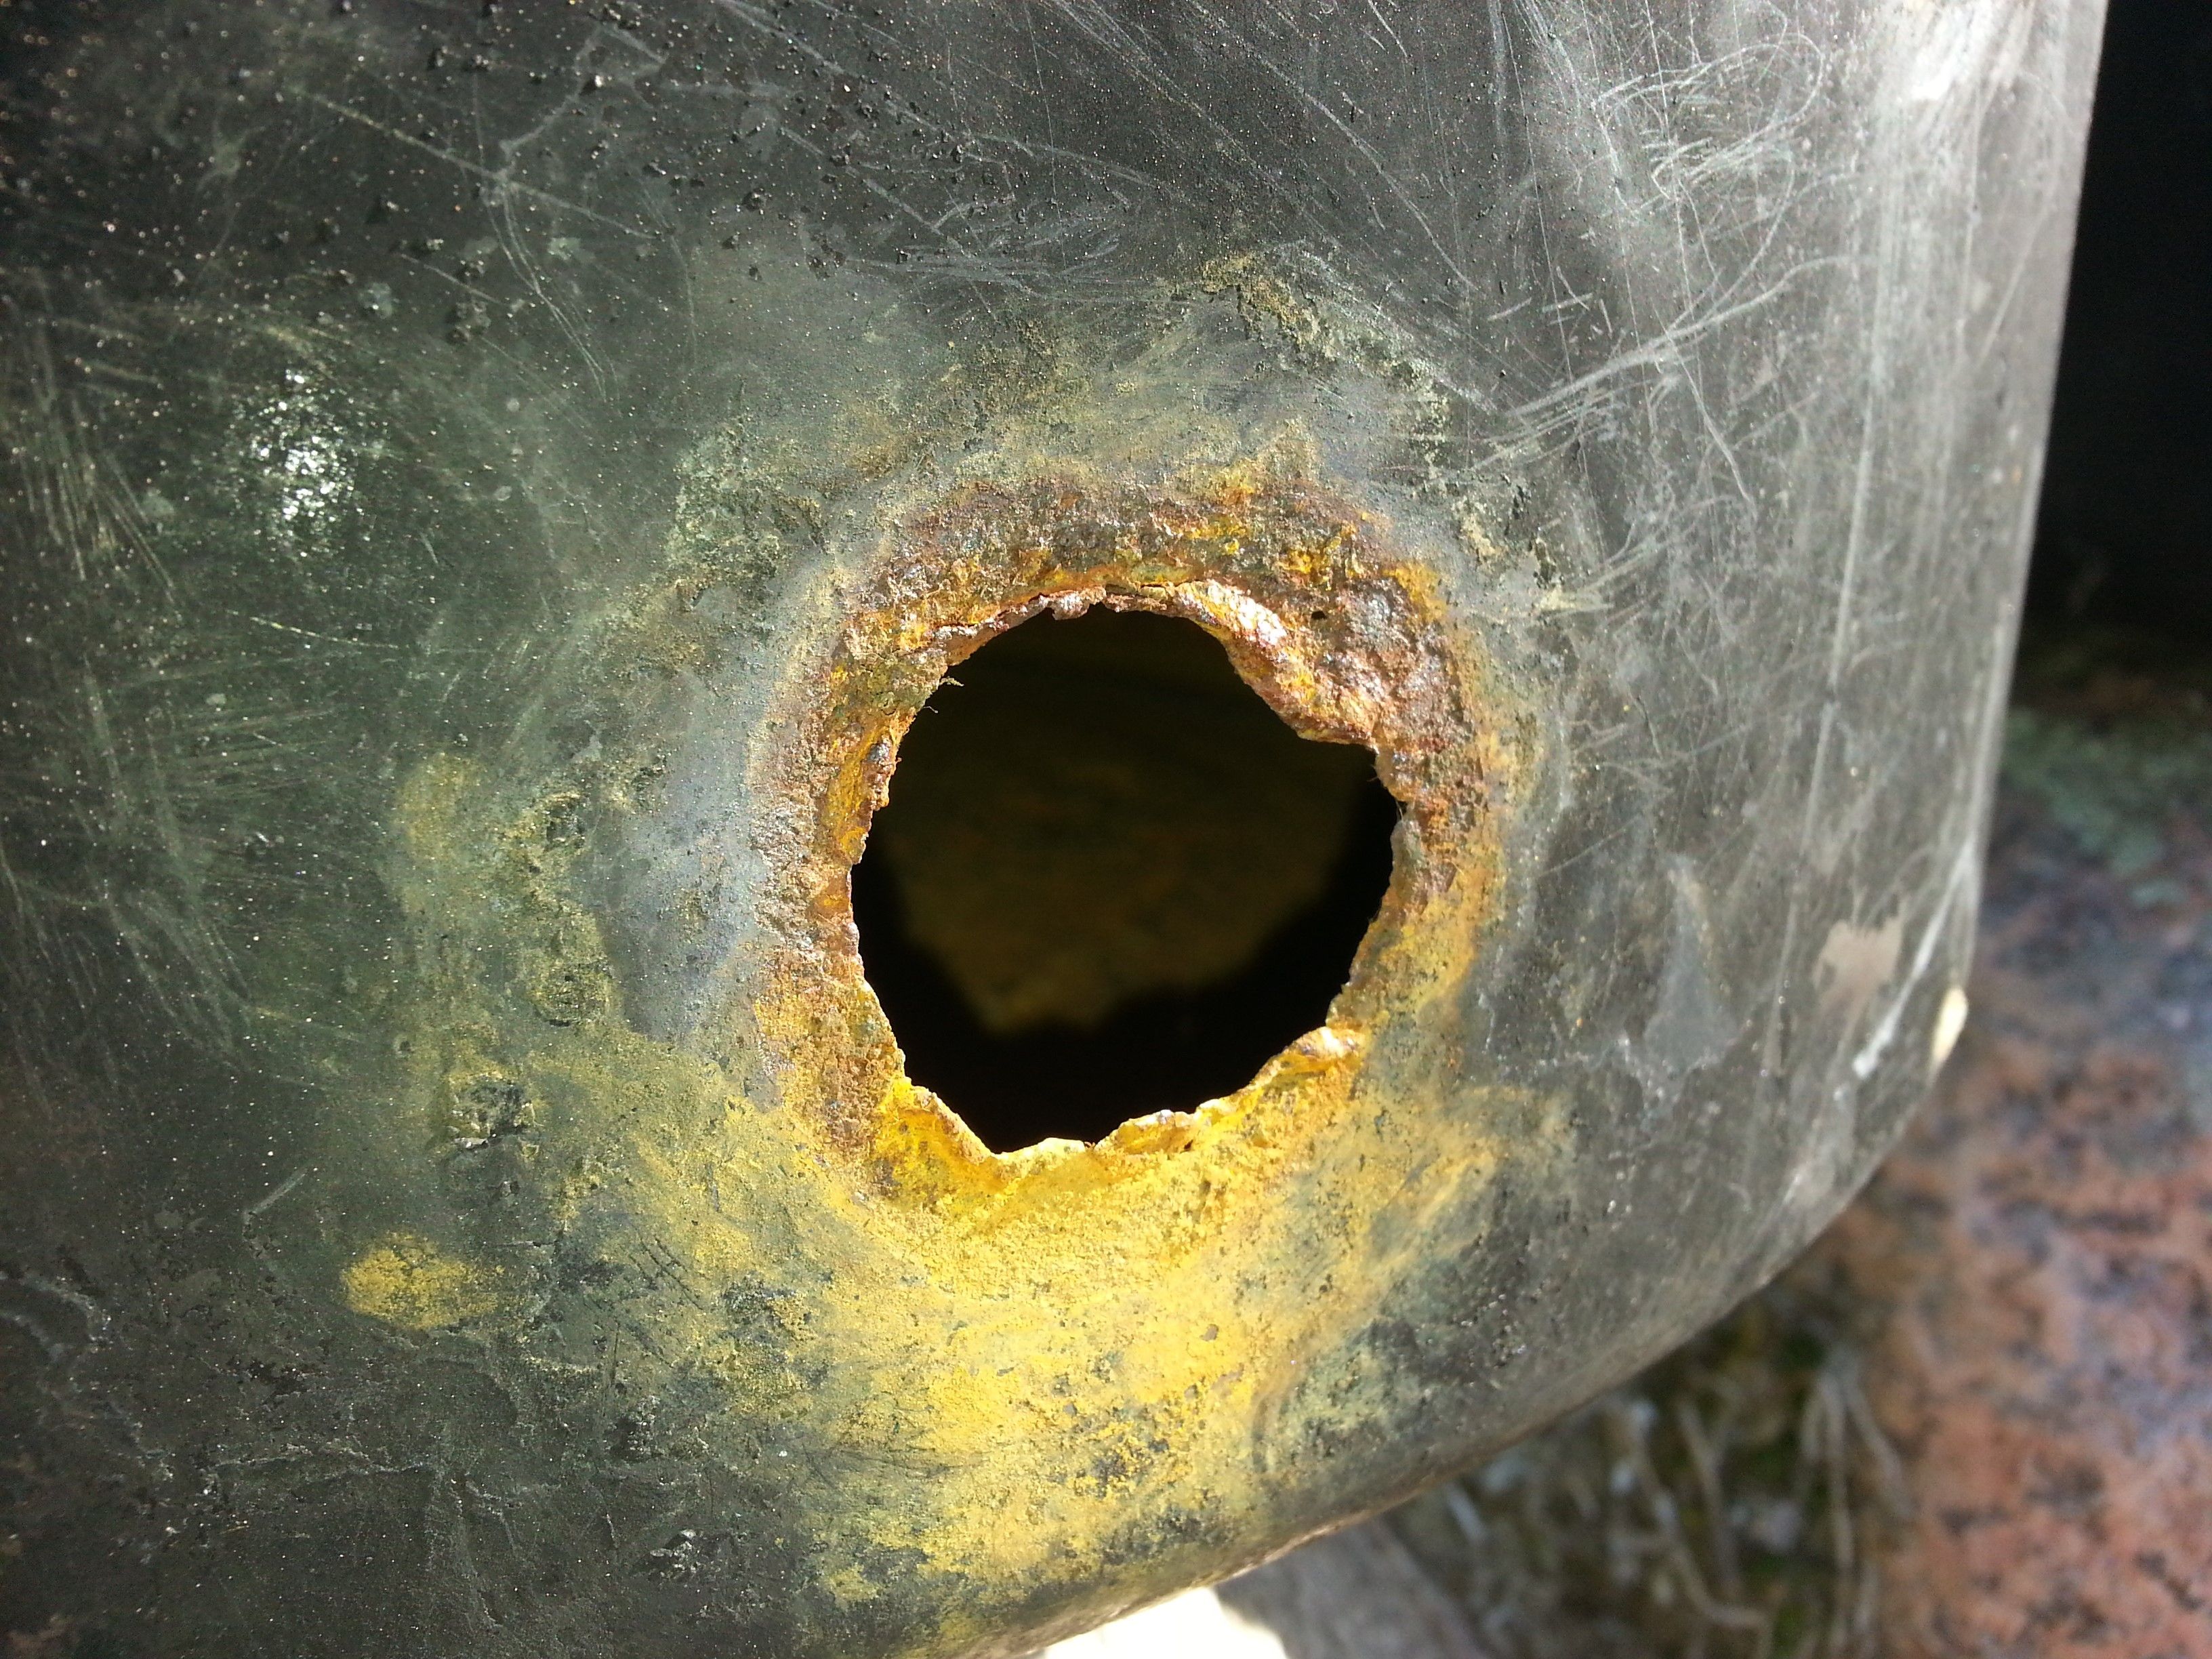
It probably didn't help that the ball valve was installed on a curved space, but you can see in the picture below - the rusted inside of the non stainless steel stock pot.
That rust was a real hassle. Not only was it quickly eating away at the metal, but if I didn't wash out the stock pot every time before boiling water - the water would look and smell rusty.
Boiler Flat Bottom Ball Valve Installation
In the picture below you can see the inside of the stainless steel stock pot, notice the ball valve installation.
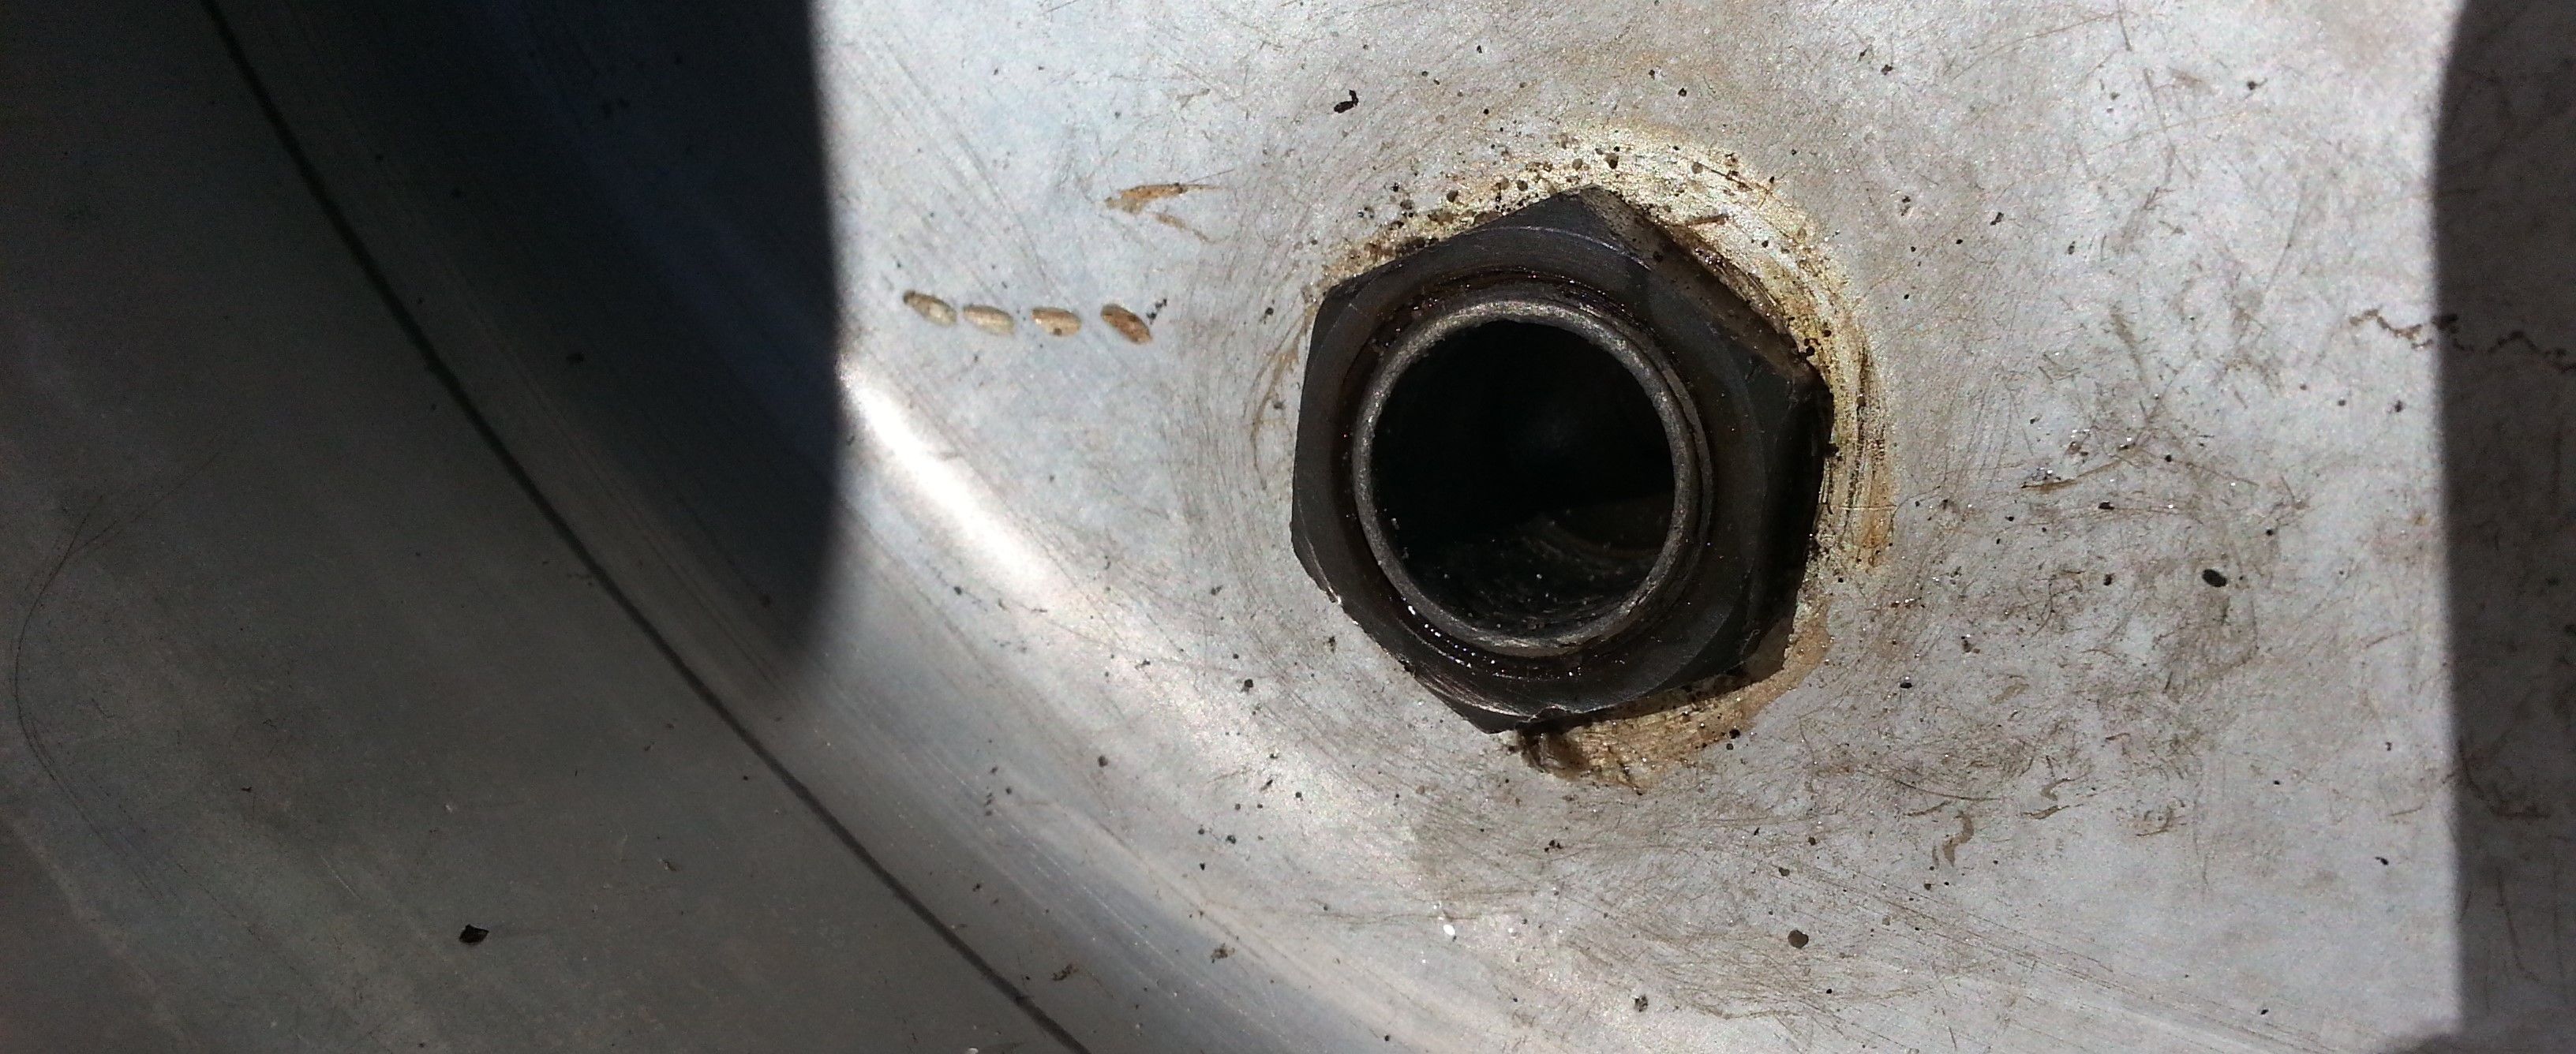
First I drilled a small hole, then gradually filed a larger hole until I could just barely slide the ball valve inlet threading through. A thick rubber washer on both sides of the metal, the nut tightened onto the ball valve inlet threading. I was sure not to tighten it so much that the rubber washer squeezes out from under it.
In the picture above you can see the outside of the stock pot with the ball valve installed. The ball valve handle is currently turned to the off position. The ball valve would be open if the handle is turned to be in-line with the water input and output.
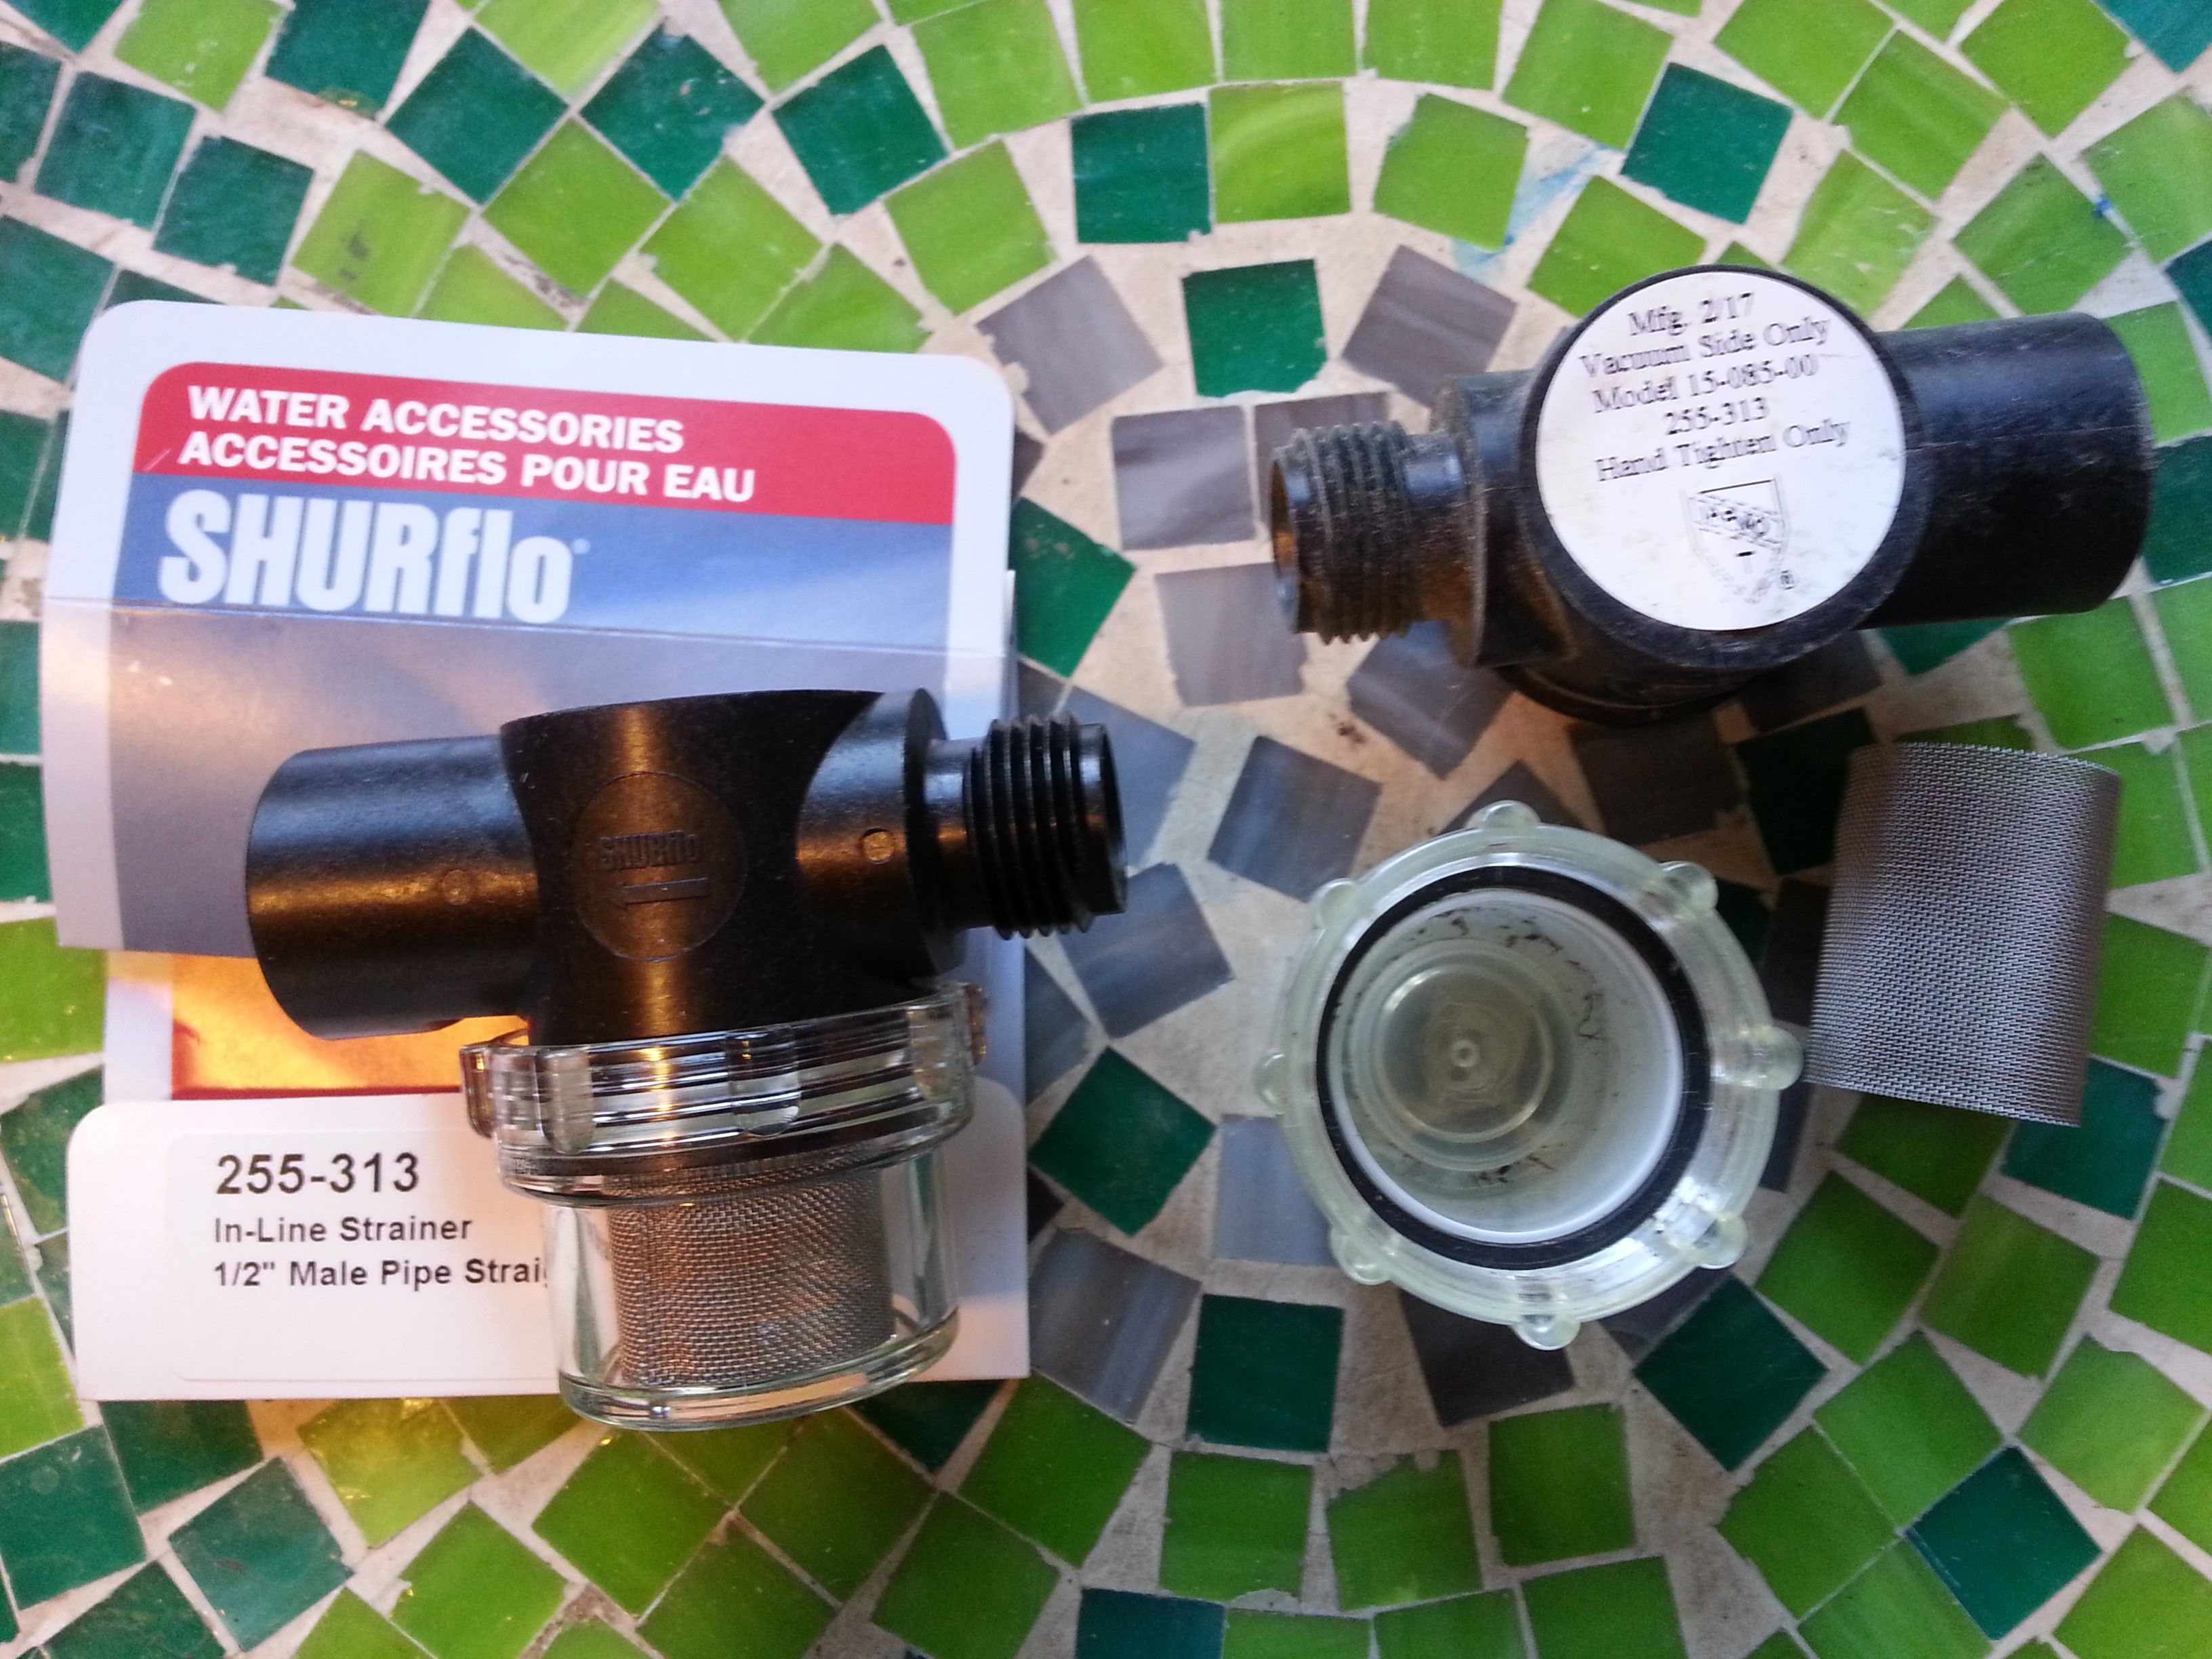
A Simple In-Line Strainer
Especially with snow boiling down 10 snow parts to 1 water, the in-line strainer helps catch the random juniper evergreens, berries, or any other larger than screen size particle that gets in there.
In the picture below you can see the screen housing is removable for easy rinsing.
Strainer Garden Hose Setup
In the picture below you can see the parts to make the strainer - garden hose ready.
Parts for the Project:
- In-line Strainer with 1/2" threaded male inlet, 1/2" threaded female outlet
- Elbow Connector with 1/2" threaded male to 1/2" garden hose push-on connector
- In-line Connector with 1/2" threaded female to 1/2" garden hose push-on connector
- Plumbers tape for the above connections - hand tightened
- 1/2" Garden Hose with 3/4" threaded male connector
- 3/4" threaded female connection for both ends of the 1/2" metal braided dishwasher hose that connects to the ball valve of the boiler
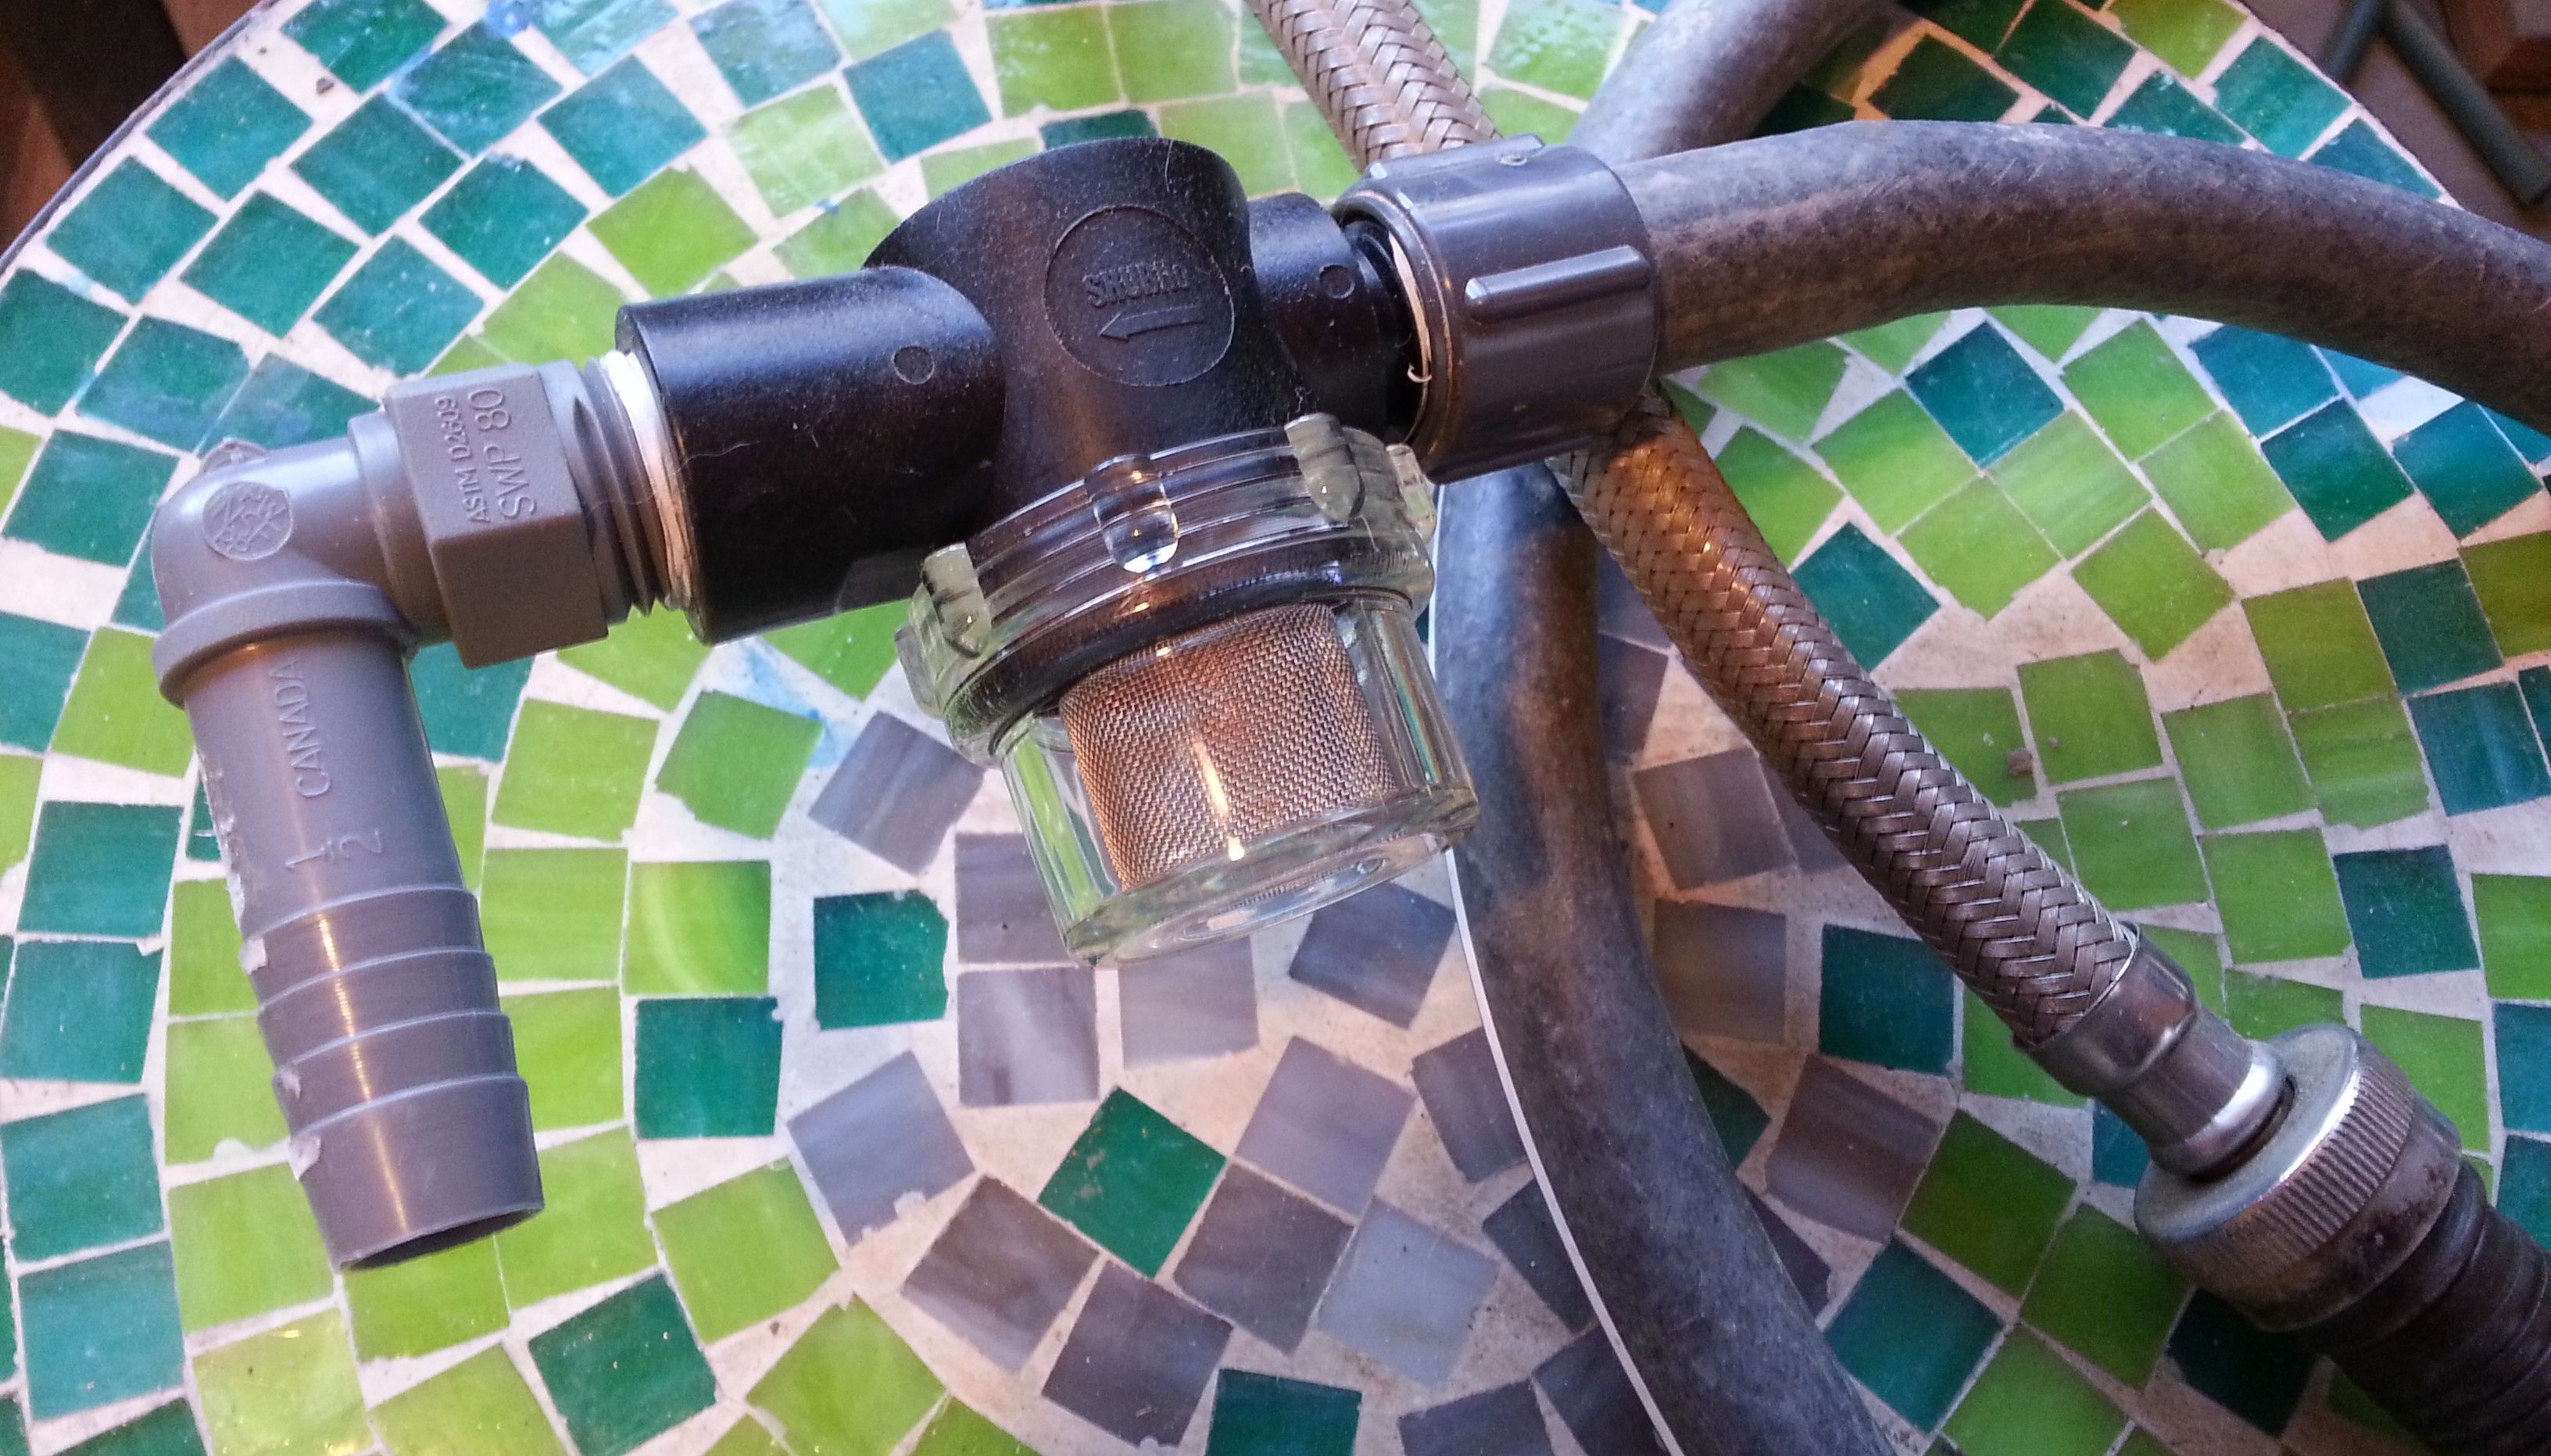
Above you can see the fully assembled strainer to wood stove top boiler project.
Below is a video of the stainless steel boiler ball valve, drain hose, and strainer in action - filling a tub with water for dishes.
You can see in the video above that the tub is almost at the same height level as the bottom of the boiler. The water flow would be much faster if the tub was on the ground.
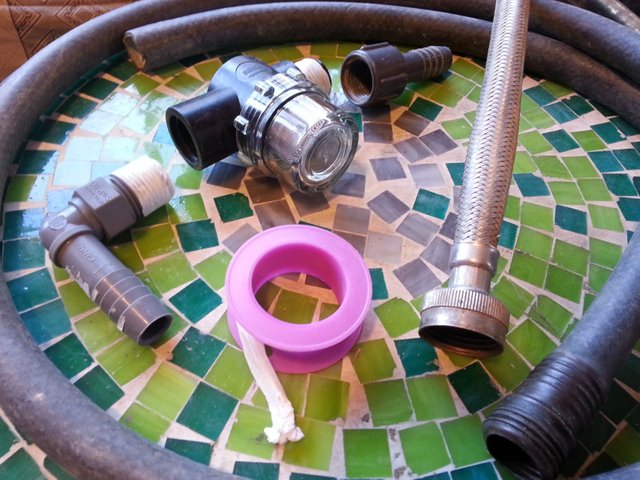
Additional Garden Hose Plug & Play Plumbing
In the picture below you can see some of the basic attachments for our outdoor and stock pot plug & play plumbing. Everything is hand tightened for easy disassembly and re-purposing. With gravity fed water pressure the connections don't have to be quite as tight as with household water pressure.
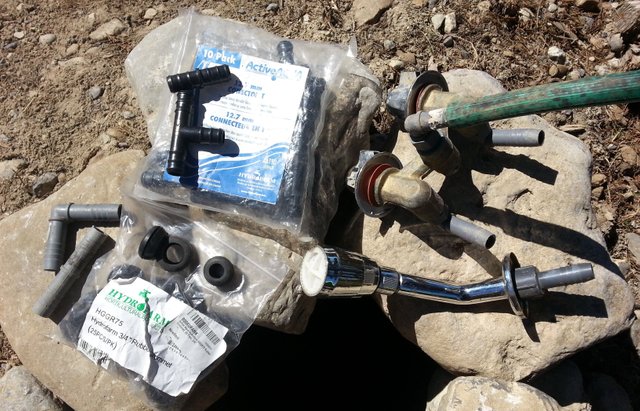
The rubber grommets in the picture above I'll be using for the large stainless steel stock pot ball valve installation. I've found ball valves to have a better water flow as compared to the more basic garden hose spigot which seems designed to work with a stronger household water pressure. In-line, T, and elbow - 1/2" to 1/2" standard garden hose connectors. Note that standard garden hoses are 1/2" while the screw on connectors they usually come with are 3/4" threaded. Also in the picture above - cheap shower head with hot and cold water controls came in handy.
You may find these previous posts useful:
- Water Containment for Emergency, Conservation, and Off-Grid Living
- Compact Clothes Washer and Spinner. Great for off-grid and small living spaces.
- My Solar Powered Cabin Setup
Have a great day!
That's a great setup. We functioned the same way when living in the barn but I never did think to add some plumbing like that to the boiler. We did add a propane hot water heater for the rain water shower which was like moving into the Hilton!
We had the plumbing for the outdoor gravity water pressure boiler, so admittedly the garden hose plumbing for the inside boiler just fell into place. I cant wait for hot outdoor showers this summer, I'll have a better solution than squeezing into a storage tote for a bath next winter :D
Ha. I used a 12v water pump from and RV powered by tractor batteries with solar panels. It worked like a champ for very cheap. Just plumbed it to the rain barrels. Sounds like yours is even less trouble, gravity never breaks 😊
For the inside of the cabin it came down to not enough floor space. I had a temporary one I would setup by the door, but that became too much of a hassle, so we figured we'd rough it for one winter. I was going to heat the camper with a wood stove, so i was thinking the shower in there would come in handy, but the cheap little wood stove I installed in there was a little too smokey lol, next year :)
You're right, especially in the winter it was a lot of hassle. Every night I'd have to unhook everything and hook it back up after the sun warmed things up the next day. It was a lot of work to keep everything from freezing and busing. I still had two different toilets freeze and bust on us!
I really love the brilliant inspiring posts you are putting out, you are such a great attribute, not only to the environment, but also to the Steemit community!! LOVE IT!
Thanks @breezin - Life really slows down nicely off-grid. A lot of people I know and know of have their eyes set on it. I'm hoping my experiences can give them a few new ideas to get them started :)
You know what even if this post only inspires one person, then you have already made a greater difference than you could ever imagine, the ripples spreads!
Yeah, I am not quite there yet, (not sure if we have had this conversation) my farm is currently standing at about 80% self sustainability - getting there slowly...
Excellent stuff my dude. I would like to recommend turning these awesome posts into a book. I WOULD BUY! RESPECT
Thanks man, I definitely keep an offline copy of these for future uses, I have thought of that possibility. After a full year there should be a good amount of material. About the howtos, the joys, and pitfall avoidances of going off-grid :)
Thats great... i haven't seen this before.... It's almost like a backboiler, but on top and easily removeable and manageable.
Is this a back-up or your main hot water system supply?
How often do you have to clean out the mesh metal filter?
This is the main winter cabin hot water system, outdoor rocket stove boiler for spring fall and summer. Propane burners and pots and pans are the backup. I clean the mesh out once a week at the most, but when it's already screened rain water going in there, then maybe once a month. Putting snow in the boiler has the most bits of trees in it. That's the main cleaning-water boiler for the cabin. A bath uses the most, about 3/4 of the water in it, and it has to cool first. Next year i'll have a separate containment for cooled off, pre boiled rain water, so i'll have hot and cold taps. It's pretty handy on top of the stove, other than for baths, we'll just dip a big bowl in the top for quick cleaning hot water. There is an added bonus that overnight the full hot boiler slowly radiates the retained heat :)
Congratulations! This post has been added to our growing directory of Steemit "how to" posts for the Homesteading/Survival/Foraging/Prepper communities. If you haven't done so already, you can claim your badge along with the code to add to your posts to let the world know you have chosen to help others Survive, Thrive and be Prepared! Click here to get the code
Nice, many thanks :)
Thank you for sharing your knowledge & ingenuity!
Very nice! I learned a lot reading this post. I am curious to see how the rocket stove and solar distiller were setup or to see the whole system.. do you have any posts about those?
I didn't join steemit until after the new year, so I don't have very many pictures from the past summer and fall :) In a week or two, if the warm weather keeps up, I'll be posting a full rebuild of the hillside rocket boiler with the larger stock pot. Here's a pic of the setup from this past fall..

Basically a garden hose came down from the boiler to the patio where it splits. One split of the hose would go down the hill to the outdoor shower tap. The other split stayed on the patio with a nozzle for filling the dish tub or clothes washer :) Below is a video of me thawing out the rocket boiler a week ago - the boiler stock pot that was installed in it before winter is currently in the cabin...
I would fill and boil the boiler twice per day, once in the morning for laundry and dishes, once in the evening for remaining dishes and showers :)
I'm not sure what you mean about the solar distiller, did i refer to one in this or another post? I will be experimenting with solar water heating, storing heat in earth foundations, and heating water in hoses with a hot compost pile :)
Wow this is great! Thank you for the photos, video and explanation :) How cool that you built your rocket stove out of stones! I didn't know that was possible.
Where i feed the sticks into the fire is a chiminea chimney pipe, the chamber and inner chimney are made with cinder blocks, then all of the outside of it packed with clay dirt to keep it air tight .. the stones on the outside are for heat retention and to complete the upper chimney so that the heat is focused on the boiler - all the way up it's sides, the upper chimney rocks prevent the heat from shooting out the sides as soon as it hits the bottom of the boiler .. after boiling, the water stays very hot for many hours .. lots of rocks and clay here - not so great for gardening (i'll fix that) but great for building materials :)
Nice design! Thanks for that explanation.. your description made it very easy to visualize :) What a smart use of thermal mass to retain heat.