Instruction Manual on The Steem Venue - Make sure you are your channels owner!
Recently I wrote a post to announce the move of The Steemit Bar at steemit.chat to The Steem Pub on Discord and the addition of The Steem Venue.

The Steem Venue is a server on Discord where you can find members of the steemit community and chat to them not just by text but also by voice! Having some cheap headphones and a microphone (even the one on your phone/laptop) allows you to speak directly to a group or just listen to a group of other users chatting and you can even make a private call just between two.
My recent post explains exactly how to control who can contact you and who can add you as a friend. So now we can connect with our steemit comrades by phone, on the go, without ever giving out our phone number and having total control of who contacts us through the app.
The Steem Venue allows steemit members to create, manage and moderate their own channels, invite their friends, choose who can access them and give moderating permissions to their friends. Since the launch we have 50 new members and they have created channels such as @richhersey’s “libertarian” channel, @joewantsfreedom’s “alt-coins" channel, @mikkolyytinen’s “the-black-hole” and “art” channels, @jessamynorchard’s “original-music” and “vape-lounge” as well as a “post-promotion” and "introduce-yourself" channel.
Instantly on arrival I have been adding membership to each new user I see on the server. But what I would like is for YOU to hand out the free hugs (membership), so that this server can take on a life of its own. And so I’m writing this post as a sort of instruction manual on how to give membership to your friends, how to make channels and manage them, and how to prevent anybody else from taking ownership of your channel as well as making the channel completely private to select members.
So first off… what’s with the tiers?
When you become a member you can create Roles and add them to Members by going to the Server Settings Menu. In order to make it easy to pass on all the permissions you have as a member, I created a Role that was already customised with all the necessary permissions. All of the tiers have the exact same permissions. These permissions include creating and managing channels, roles, and even emoji’s. If you have the role Member-Tier1, you can make your friend a Member-Tier2 and as a Member-Tier2 he or she can pass on the free hug and make somebody else a Member-Tier3.
Becoming a Member
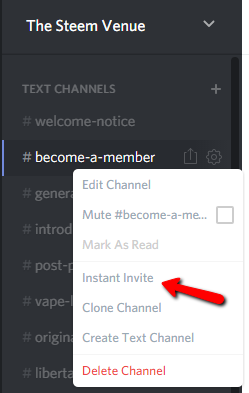
This is the easy part. Membership at The Steem Venue is just like a free hug! All you have to do is ask. You can message me (beanz) personally or anybody else you know whose name is green. The green name means that they are a member. As a member they can make you a member. There is also a channel where you can simply comment to “become-a-member” and wait for somebody to add you.
Adding Members
Everybody should know how to add their friends as members. This gives them the same permissions you have. By right-clicking on your channel you can send out an “instant invite”.
Once your friends arrive you can simply click on their name then click on the + symbol to add a ROLE and click the Member-Tier at the top of the list.
eg. Member-Tier1 should add the role Member-Tier2 to their friends

Creating Channels
Once you have membership you can create a new channels by clicking on + symbol next to "TEXT CHANNELS” & "VOICE CHANNELS" on the panel on the left.
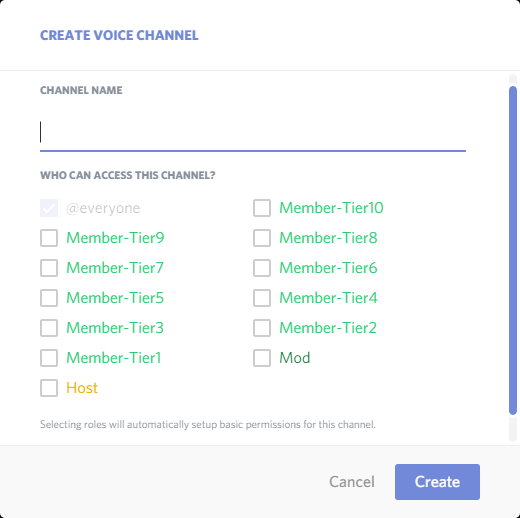
You’ll be given the option to allow specific roles to access your channel but there are 2 things to note here.
- if you don’t include your own role to access then POOF where did it go….
- allowing access by certain roles will not make your channel private because when you create a role you don’t own that role completely. Certain users can just add that role to themselves or other users which would give them access to your channel.
(You can still create private channels though! Keep reading)
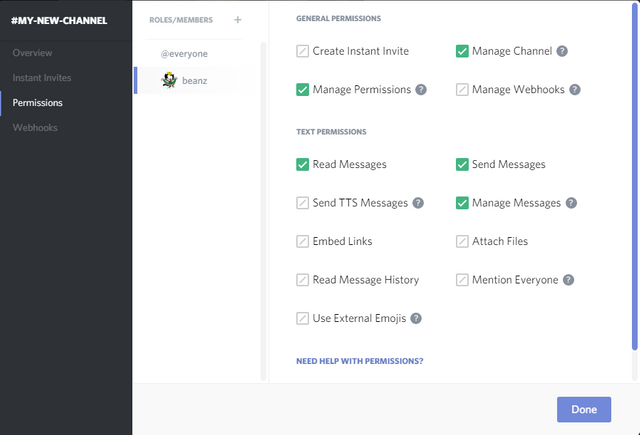
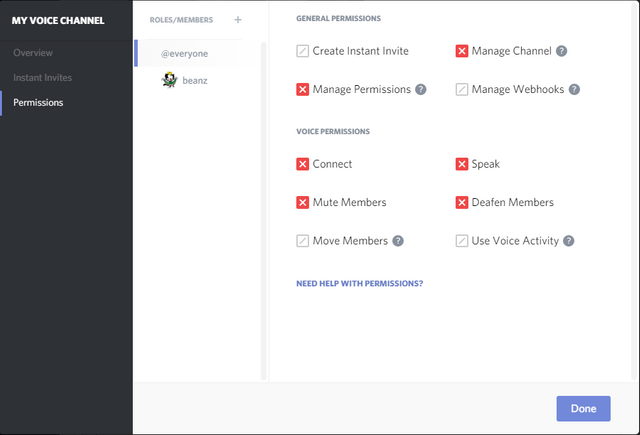
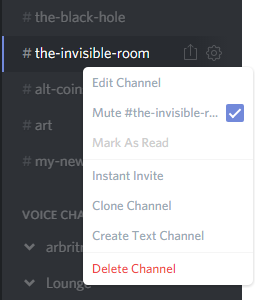
Very important step after creating your channel!
After you create a channel you’re not the only person who can edit the name, description, permissions or delete that channel. Remember that everybody has the same permissions so as soon as you have created your channel you need to follow these steps to make it yours!
- Go to Edit Channel

- Go to the Permission tab
- Press the + symbol next to “ROLES/MEMBERS” and search for your username.
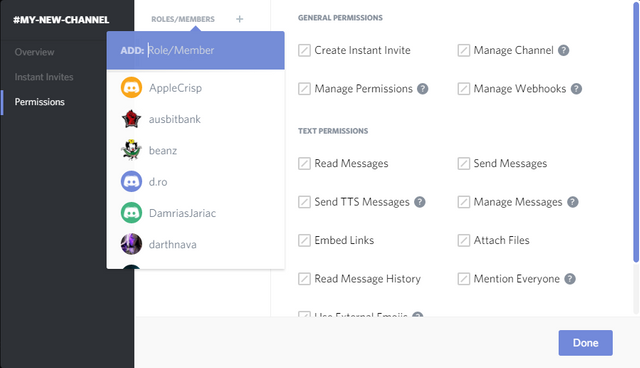
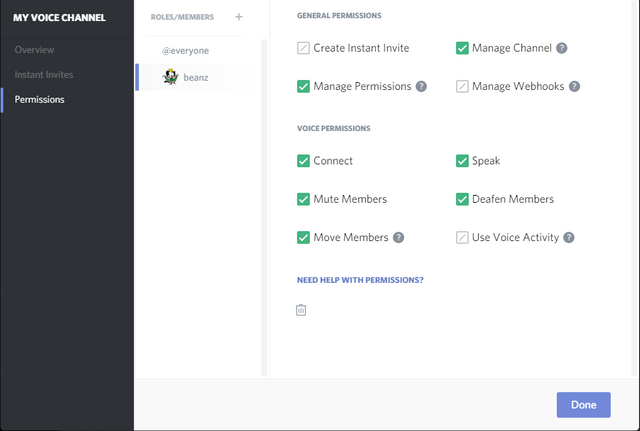
- Add these permissions to yourself before you remove them from “@everyone”.
(Manage Channel, Manage Permissions, Manage Messages, Mute Members, Deafen Members, Move Members)
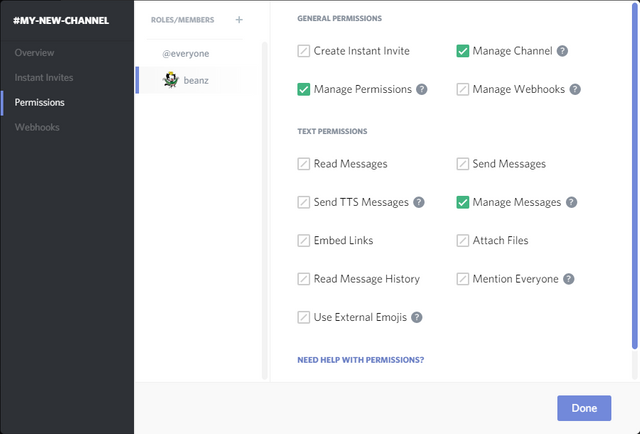

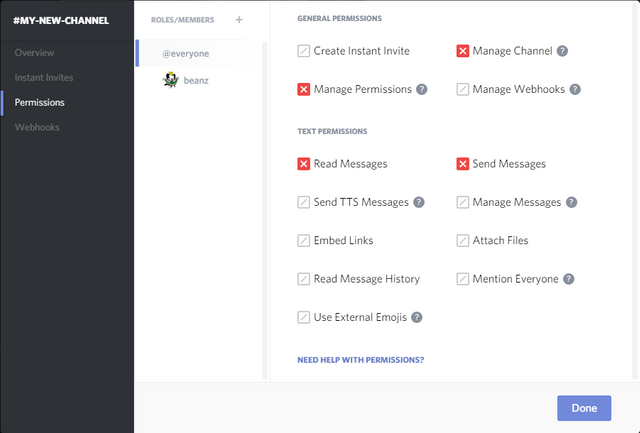
- Switch to everyone and remove these permissions
(Manage Channel, Manage Permissions, Mute Members, Deafen Members)
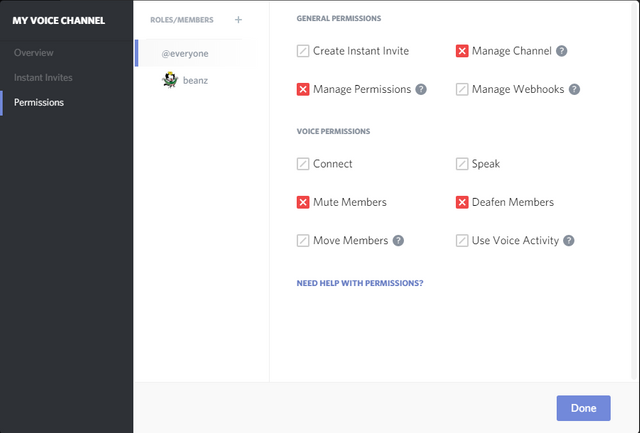
- Click done to save
Making a Private Channel
To make your channel private you need to first add some extra permissions to yourself before removing the from “@everyone”.
(Read Messages, Send Messages, Connect, Speak)
Each user can be manually added so that only these users can access the channel.
Warning: This privacy ends before me as the owner of the server. Unfortunately, I would still have accent to your private channel so if there are reasons to keep it more private than that it would be better to create a new server and invite your group there.
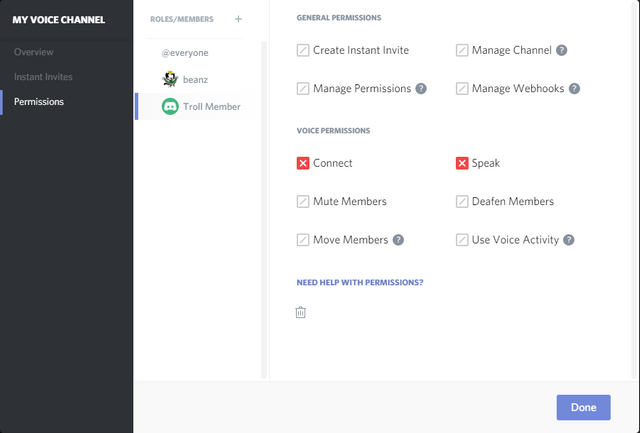
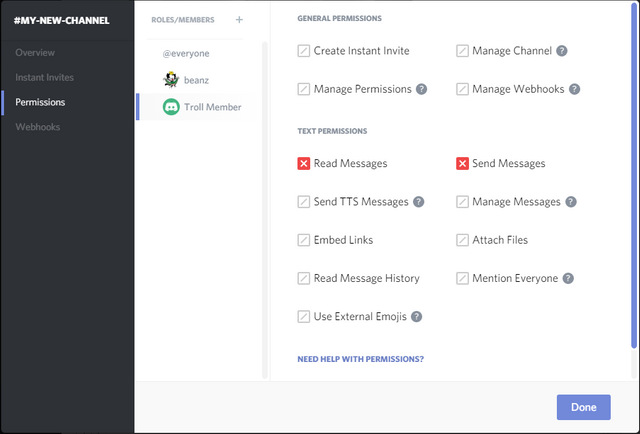
Keeping Out The Trolls
If you have a problem with a member or two in your channel, as the channel admin, having given yourself the control of who manages your channel you can also block certain members from your channel.
- Click on the + symbol next to “ROLES/MEMBERS” and search for the username of the account You want to block.
- Then remove the following permissions.
(Read Messages, Send Messages, Connect, Speak)
Couple more tips
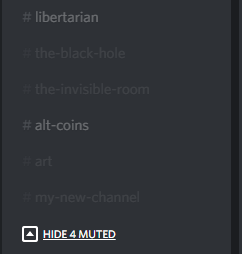
If the list of channels on your left becomes too much as more and more members create new channels you have the option to Mute Channels by clicking the bell on the top right or right clicking and clicking Mute
Then you can Hide muted channels and Show them again whenever you like.
You can also host your own shows through the voice channels, whether you want to show off your music, a comedy act or even host a podcast through this server by giving permission to “speak” to a select number of members and removing this permission from “@everyone” so that most members who connect become a listening audience.
The possibilities are pretty exciting when you think about it! So get over here to collaborate and promote yourselves.
https://discord.gg/zBCQ7Zy
![]()
Native speakers only.
Google translate not permitted.

Pretty cool tutorial @beanz. I'm on Discord for curating on SteemTrail. I'll get set up on Steem Venue once I get all situated. How fun! We'll get to chat soon.
I'm definitely bookmarking this @beanz. Wish I had more time to chat but with WriMo less than a week away, I'll be hosting write-ins and word sprints on their chat servers. Oy! I need another me! LOL I'll pop in when I can! :)
This post has been linked to from another place on Steem.
Learn more about and upvote to support linkback bot v0.5. Flag this comment if you don't want the bot to continue posting linkbacks for your posts.
Built by @ontofractal
Hi beans, may I please ask, if I apply this, does it mean that I wud have created a searchable steemit.chat channel. I want to create a public channel, that people can search on steemit.chat, find it and join on their own. Is that possible using this discord method?
Well steemit.chat is a server on rocket.chat, so it's not connected with discord. There are lots of steemit users on this server so they can find your channel that way, or you can simply tell users the instant invite link (set it to never expire) in a post about the channel you're setting up if you like.
I just have you membership so you should now be able to create a channel and create an instant invite
YES, Thank you. i will have to read that manual again.