Moss, Snow, Dirt or Just Creating Variations in Blender - Node Setup With Normal Map
This is a post about adding moss, snow, dirt or just different variation in blender using node setup with normal map, separate RGB and ColorRamp.

As I have mentioned already I like creating cycle materials and textures that are procedural generated, and with details so I have original textures, and have the ability to adjust them quite a lot.
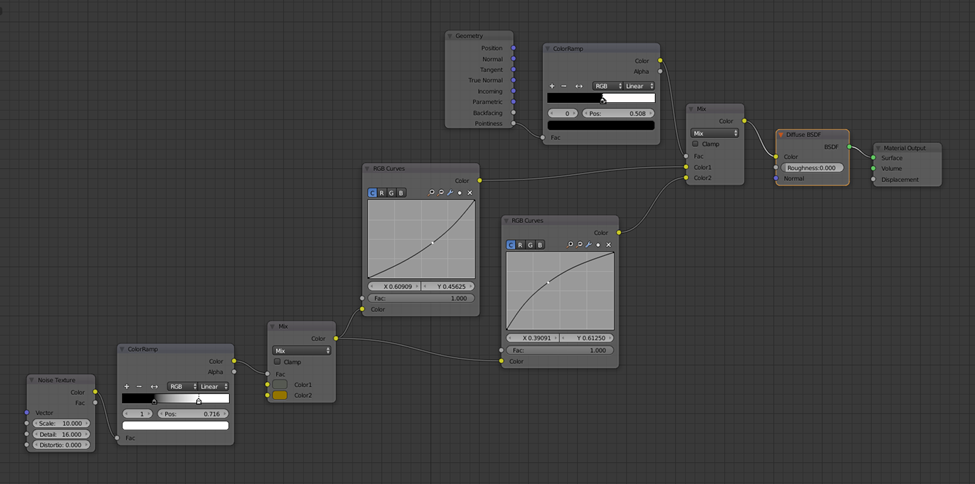
In this post I will be upgrading the node setup for a cycle material that I previously explained in the post Pointiness Future in Blender Node Setup – Give Shape To Your Model. You can check that post for a step by step detailed explanation of creating this basic material, otherwise here is a picture from the final setup of that post, that we will use and start with in this post, and if you are interested only in this future.
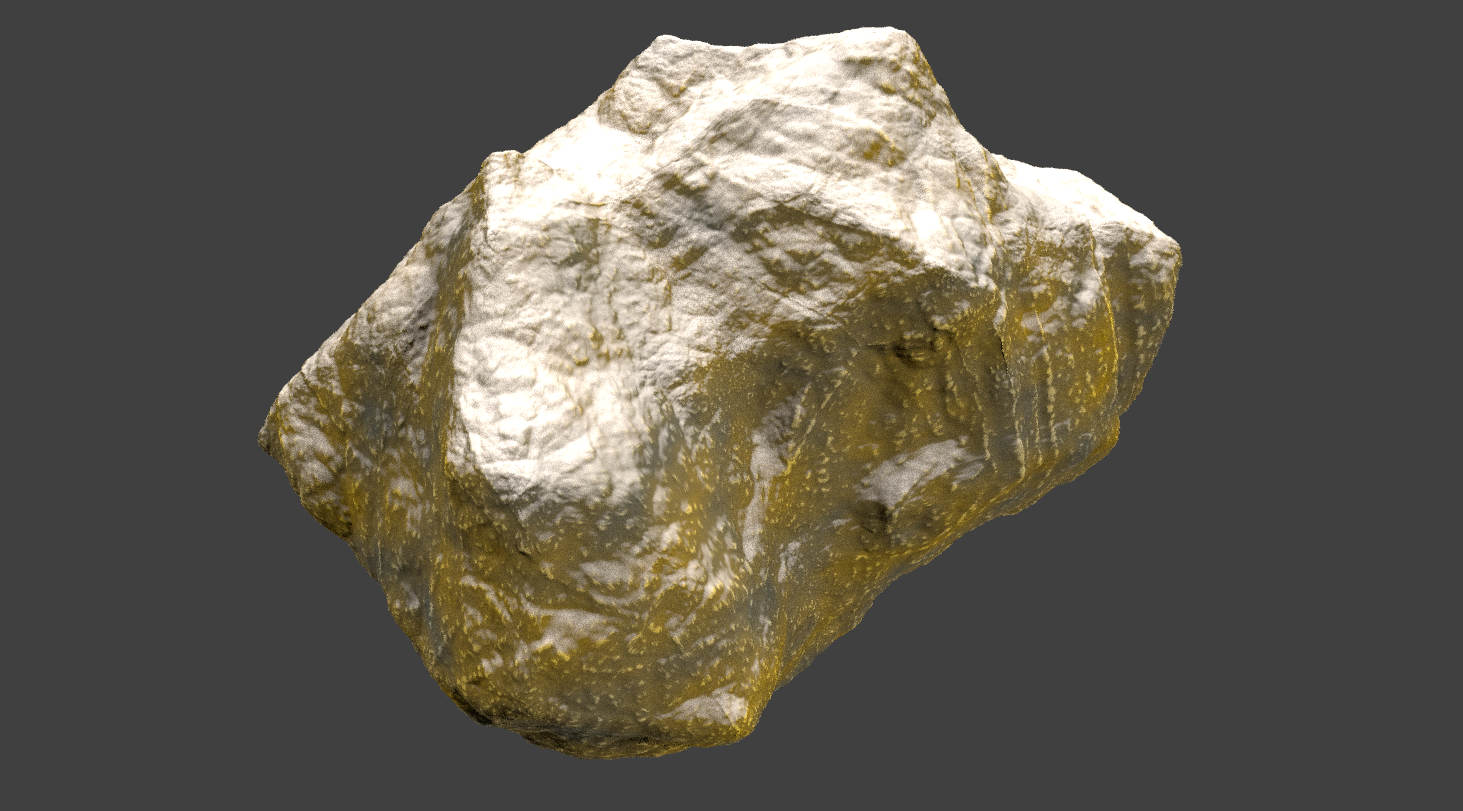
For this post and the need of the presentation I will be using a model of rock.
Here is the model without any material.

And after adding the material with the node setup above.

This is the model that we have, and we upgrade from here to add moss, snow dirt etc.
To add the node setup that allows us this, first we add the normal map node. SHIFT A -> Vector -> Normal Map.

What the normal map node do is projects different colors from the different angles on the object, as you can see from the image below.

Next, we will add separate RGB node. With the separate RGB node we can choose different color channels of the Normal Map node, and in this way choose one angle to project from.
To add the separate RGB node press shortcut SHIFT A, to Converter -> Separate RGB.

Next comes the mandatory ColorRamp 😊, SHIFT A -> Convertor -> ColorRamp, adjust the nobs from the left and right as shown below.

Connect the Normal Map node, the separate RGB, and the ColorRamp. Connect the blue exit from the separate RGB with the ColorRamp.

Here what this is doing to the model.

As you can see it add the white on top, and dark on the bottom. But it add the white like a projection, not as simple gradient, so it has more natural looks. The ColorRamp is used to control the effect.
We will use this now as a mix factor to mix the different colors and make our model look nice 😊.
On the starting node tree above we add mix RGB node, SHIFT A-> Color -> Mix RGB.
The node setup with the normal map is connected with the factor input of the mix RGB node, and the current node tree we connect to the Color 1 input in the Mix node. The Color 2 input of the Mix RGB is what we put on top of the model. For our purpose we adjust it with green color.
The final node setup

The node group with the Normal Map is on top.
The final look of the model.

This material now can be applied to any other model and will give the same result. Also, you can tweak the nodes, the colors etc. to get a lot of different results.
Here is a variation with different color on top, that resembles snow …. sort of😊
Lava maybe???

It is possible to use different channel from the separate RGB, so you can make sided variation.

Here I’m using the red channel from the RGB separator node.
Also this can be used for mixing different textures.
Thanks for reading, and if you have any questions left them in the comment.
All the best
@dalz
very nice :)
Thanks :)
Congratulations @dalz! You have completed the following achievement on Steemit and have been rewarded with new badge(s) :
Click on the badge to view your Board of Honor.
If you no longer want to receive notifications, reply to this comment with the word
STOPDo not miss the last post from @steemitboard:
SteemitBoard World Cup Contest - The results, the winners and the prizes