Make Money With Your Art: Festivals and Fairs - Part 4 of 5
Welcome to the third in a five-part series about making money from your art at fairs and festivals.
I've sold my work at nearly 100 events across the United States over the past 12 years. It has been a rewarding and lucrative experience. Participating in festivals can help you meet new fans of your work, get feedback directly from buyers, and make money at the same time! I have learned so much from selling my work at events, and am sharing everything here in this big five-part series. If you've ever considered applying for a show, I encourage you to go for it! A five-part series may seem overwhelming, but I'm breaking down EVERYTHING you need to know.
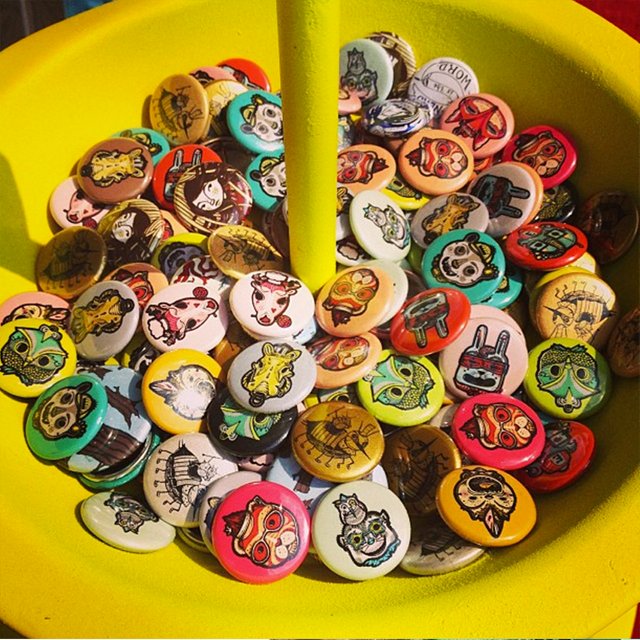
Closeup of my display and buttons from Baltimore's Artscape
Part One: Finding Shows and Getting In (link to previous post)
Part Two: Preparing Your Work (link to previous post)
Part Three: Preparing Your Display (link to previous post)
Part Four: Getting Sales
Part Five: After the Show
Part Four: Getting Sales
In parts one, two, and three of this series, we applied to an art festival, prepared our work for sale, and designed our display. Now that most of the hard work is over, we need to see this thing through.
It’s showtime!
First, let’s make sure we have everything we need.
Merchandise. You’ll want to bring all of your merchandise, and any multiples you have (within reason) If you ordered 500 posters, you obviously won’t need them all - but bring more than you think you’ll sell. I like to keep my merchandise in plastic bins to protect them from humidity and rain in transport.
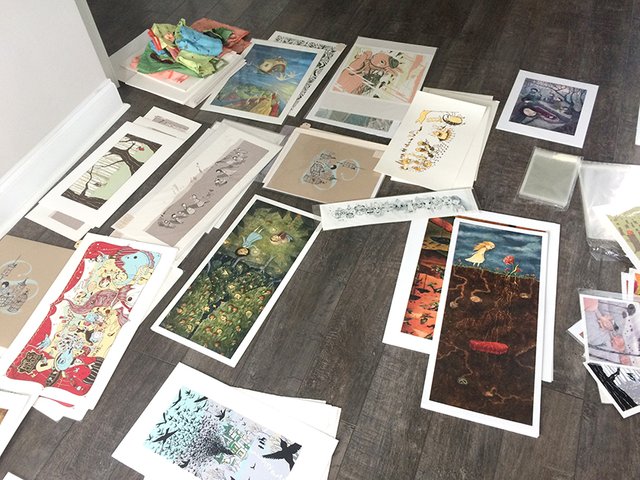
Display Items. Bring anything you need for your display, including your tent, tables and chairs if they are not supplied. Pack all boxes, bins, tablecloths, print stands, print racks, and anything else you’ve bought or created for display. When in doubt, bring it if you have room!
Packaging Items. Make sure to pack your bags, tissue paper, mailing tubes, envelopes, or other chosen packaging supplies. If you have large prints or posters, you may want to bring a roll of postal or butcher paper and some ribbon. You can roll your prints inside the paper, fold the ends inside the roll and tie it up for a nice (and protected) packaging solution on the cheap.
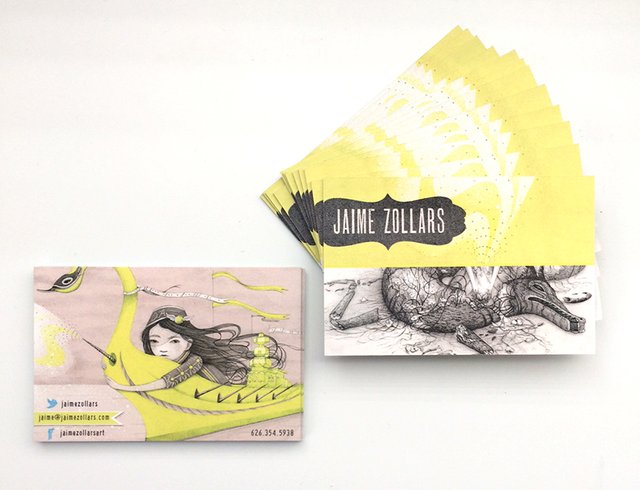
Promotional Items. Make sure you bring all of your promotional items, including business cards and signage. You may also want to print a sign that shows which types of payment you accept. You can get these online from your payment company’s site (see "Money Management" below). You may also want to print a sign that shows your social media names and sites so that fans can start following you! Printing out price tags ahead of time could save you time when you arrive, but you can also choose to bring blank ones to fill in there.
Items That Show Your Process. If you use an intriguing or lesser known process to create your work, or can make something onsite, bringing a tool of your trade or demonstrating it at the show can encourage buyers to ask questions and eventually buy work. This does not work for all types of art, but it is something to consider.
Money Management. You will (hopefully!) be managing money during the event. You’ll need to get change from the bank for those who buy with cash. I usually break $100 into 16 5-dollar bills and 20 1-dollar bills, and it’s usually enough. I also wear a fanny pack at events (yes, a fanny pack) but mine is (arguably) awesome and I’ve even worn it to the grocery store while toting a toddler once and it was super practical. Here’s a picture of mine:
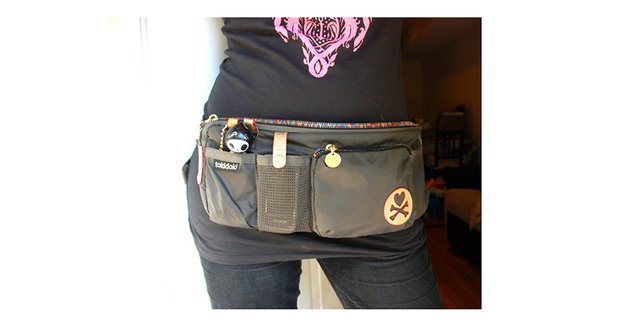
You can also choose to have a cash box or alternative space for money. I just like to have cash on me because I tend to move around a lot during shows and don't want to have to keep tabs on it.
If you accept credit cards you will definitely sell more merchandise. Buyers often ask if I take cards, and when I say that I do, they’ll sometimes throw in extra items! Accepting credit cards will cost you a small percentage of sales, (from 1.5 - 3 %) but you will sell much more than that percentage. To accept credit cards, I use Square - but Paypal and Intuit have options as well. Most companies will allow you to set up everything online. Their card readers work with your smart phone or tablet and can calculate sales tax for you as well. Make sure you bring your reader with you! I usually take two in case one is lost.
Paperwork. If you are selling goods to the public at an event in the United States, you’ll need to have a sales tax license, which is easy to get through your state. Most can be obtained online and many are free. Some require a nominal administrative fee. If you are selling at an event without one, you could be fined if a representative asks for one at the event. This is a rare occurrence (especially at small events), but does happen from time to time. Once a show is through, you are required to pay the sales tax you collected to the state. Even if you did not collect tax, you still need to pay taxes on your sales. I include tax in my prices because I don’t want to deal with lots of calculations and exact change at busy events! Some vendors encourage cash by only charging customers the additional tax on credit card purchases.
You may also want to bring a hard copy of your vendor packet for the event. It is nice to have this to refer to if you have questions.
Lights! Some shows go into the night and are outside, and others may be inside but in a dark space. Lighting you booth can really make an impact if you want to go the extra mile. This will only work if your event has electricity, but many do. If you are interested in bringing lights (anything from little twinkly atmospheric ones to large spotlights) do check to make sure the venue can accommodate you first. Be sure to bring an extension cord just in case.
A Dolly. I always forget one of these and I always regret it! Moving all of your stuff without one takes much longer and eats into your limited setup time.
Basic Show Supply Kit
Setting up your booth will often take more tools than you imagined. It is nice to have a box of supplies with you in case unexpected needs or ideas pop up. Here is a list of things that go in my little kit:
Scissors
Clear tape
Duct tape
Trash bag
Sharpie marker
Pen/Pencil
Safety pins
Clothespins
Rope/Twine
Glue Dots
Clipboard with paper (for notes)
Bottled water
Snacks
SHOWTIME TIPS
-Be sure to introduce yourself to your neighbors! These communities are quite small and you can easily grow your network and knowledge by making sure to engage with those selling around you.
-There is always that question of how aggressive you should be about “selling” your work. Hopefully, your work is interesting enough to sell itself, but do be sure to make eye contact and smile with those who engage with your space. You can say hello and offer to answer any questions - but then I’ve found it best to have an activity to do (like tagging items or working on a piece onsite) so that you don’t put too much pressure on those who are browsing.
-While you want to allow visitors to look on their own, if a good opportunity arises to share the story behind a piece, take it! When I see people talking about a piece of my work and I see an easy in, I will tell them the story behind the piece. People aren’t compelled to buy products as much as they are compelled to buy stories. If you are able to share the story behind a work it is more likely to sell. Though my stories are most often related to the image, your story doesn’t have to be about a narrative in the work. It can be about what prompted you to create it - a snowstorm outside, a trip to Europe, or a book that you read.
-If you have a particularly enchanting biography, make a postcard that tells that story that folks can take along with your business card. Whether you left the big city to find yourself and connect with your art in a tiny cabin studio, or you lost someone important and made a life change to follow your dreams, or you started making art each night at midnight when the kids were asleep, someone is going to want to buy a piece of that story! We all have our own dreams and buyers want to support yours! Working your story into conversation or a small promotional piece can be good for sales and adds personal authenticity to the work.
-Stay positive and accept compliments graciously! Not everyone is good at this, but do practice. If someone tells you that it must be so great to get away from it all and work in a tiny cabin in the woods, validate their vision. It is our habit to downplay the good and bring up the negative, but buyers would much rather hear you explain that your cabin is really a peaceful place to think and work than hear you tell them that the heating is broken and the roof leaks. We all have good days and bad. Be honest, but reflect on your best days, not your worst!
-Consider running show specials. If you give visitors a small discount at the show (that they won’t get should they buy later) you’ll find more people opting to buy at the event. There is a habit of folks coming to shows, collecting business cards, and deciding what to buy when they get home. If you can offer an incentive to buy at the event you’ll increase your sales overall. And if that doesn’t work…
-Give out discount codes for undecided buyers. One thing I do at shows is offer an online code for free shipping that is active for two weeks after a show. I find that the probability of a person buying something after the show (even if they say they will) is small. You might want to print up a coupon code that incentivizes those unsure to be proactive in their choices when they get home.
-Display a mailing list sign-up sheet. Some people will want to keep up with your news and new items for sale. Ask for a name and e-mail address and consider sending out a newsletter every few months. You can sell your work directly from links in the mailing list, or just advertise upcoming shows. A wonderful tool for collecting a mailing list and creating HTML newsletters is Mailchimp.
-Make a list of each item that you sell. This will help you to understand what people respond to, whether it be a specific image, color, size, or price point. This information is helpful in planning new products and lines.
-Take notes. Keep a clipboard for yourself and write down suggestions you get, as well as any observations that might be important in the future. Whether or not you agree with the suggestion at the time, writing it down will show respect to the person who offered it. Once the show is through, you can go back to those notes and respond to what you find valuable.
-Consider creating order forms for custom work. If you sell items that you are willing to customize, having order forms on hand will allow customers to place a custom order at the event. This means that you can be commissioned (and paid upfront) to make the work later. The form should include all information for the buyer and include a receipt and your contact information, as well as a guaranteed date of delivery. This will help the buyer feel secure about pre-ordering.
-Give something away. You may want to collect customer information in exchange for the chance to win a piece of work. This might be the tipping point for folks who are interested in what you make, but weren't quite motivated enough to sign up for your mailing list without incentive. And if there are any event-wide raffles or giveaways, donating a small item to the cause is a good way to thank the organizers of the event as well as be featured in a giveaway.
-Use social media leading up to, during, and after the event. Use your Twitter, Facebook, Instagram, (and Steemit!) accounts to show pictures and information about the event as you prepare, set-up, sell, and thank everyone who participated. You may get some visitors for sending the info out into the world, and there is always the chance of being retweeted to many more.
-And last, but not least, don’t take anything that happens at a show too seriously. You will have good shows and bad ones, and neither will indicate your imminent failure or success. You’ll see people looking at your work for an hour who will then simply walk away without even buying a postcard. You’ll hear people openly criticizing your work while you are standing within mere feet. You will also hear people talking about how amazing your work is and that you can do no wrong. All voices, criticisms, suggestions, purchases (and non-purchases) are not meant to be taken singularly and personally, but considered altogether and objectively. This is difficult to do, but is a rule to success in any creative field! You must stay true to your vision but be willing to consider and understand the thoughts of other people as well.
Hopefully your first show is a smashing success!
Thanks for reading Part Four: Preparing Your Display. If your missed Part One: Finding Shows and Getting In, you can read it here. If you missed Part Two: Preparing Your Work, you can read it here. If you missed Part Three: Designing Your Display, you can read it here. Now you should have a basic understanding of show applications, preparing your work to sell, creating a display, and selling your wares. In Part Five: After The Show you will learn to assess the event and plan for future ones, as well as learn to grow your business. Expect that post soon. If you have questions to ask or advice to add on this topic, please do reply and comment for the benefit of all!
Images © Jaime Zollars
Very detailed post...good. upvoted. Look at my post on art and art consultant.
Will do, thanks!
I may have to print this out as a check list! I put my name down for a stall at local fete, I'm not planning to make a lot of money as it won't be that type of market but I think it will be good practice for getting the look of my stall right before I pay more for a stall at an arts and craft show. Thank you for inspiring me to do this!
That's so great! Yes, a small event with low expectations is the best place to start. There are lots of things to iron out before you commit to spending lots of money of bigger shows. Are you selling originals or prints? You could make a handmade sign with your name on it - I could totally see your booth being really fun and colorful! Post pictures!
I'm selling originals. I'm making my sign ( I think) from cyanotype letters on fabric bunting, at least that's my plan.
This post has been linked to from another place on Steem.
Learn more about and upvote to support linkback bot v0.5. Flag this comment if you don't want the bot to continue posting linkbacks for your posts.
Built by @ontofractal