The second best film fight of all time on my list is Jackie vs. Benny in WHEELS ON MEALS! Right after Bruce Lee and Chuck Norris' fight of the century in THE WAY OF THE DRAGON. What makes this fight so unforgettable is Jackie's character, Thomas overcoming the fearsome newcomer, undefeated World Kickboxing Champion, Benny 'The Jet' Urquidez as Mondale's henchman. It all started out to be fun and games for Thomas and friends, but soon, Mondale's henchman would wipe the smiles off everyone's faces. When Jackie ran out of tricks--he was sleeveless remember? He buckled down and reminded himself it was just a training session. Just like he and David played by Yuen Biao, practices every morning. Jackie's trademark antics and well timed music gives a jolt of energy in the second round right to the final KO knee!
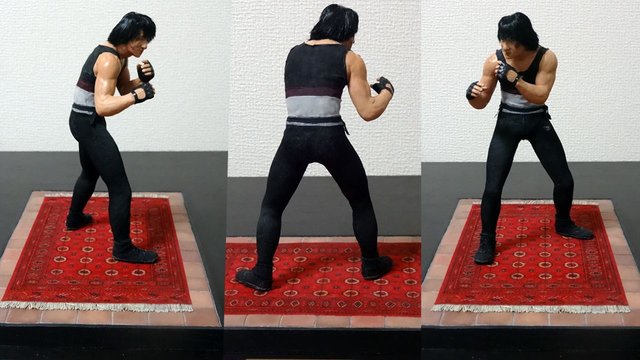
Exhibit I. Thomas completed with base. One thing to mention is always practice the art of persistence. Never sell yourself short on your vision.
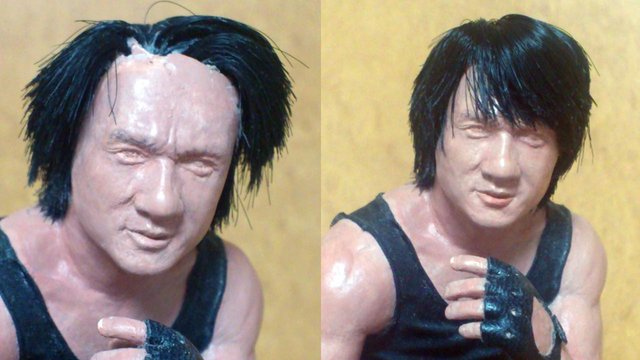
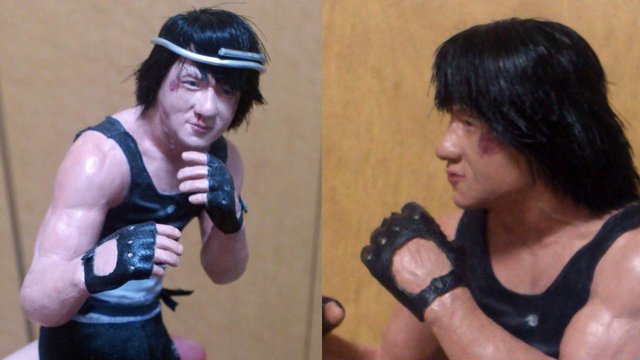
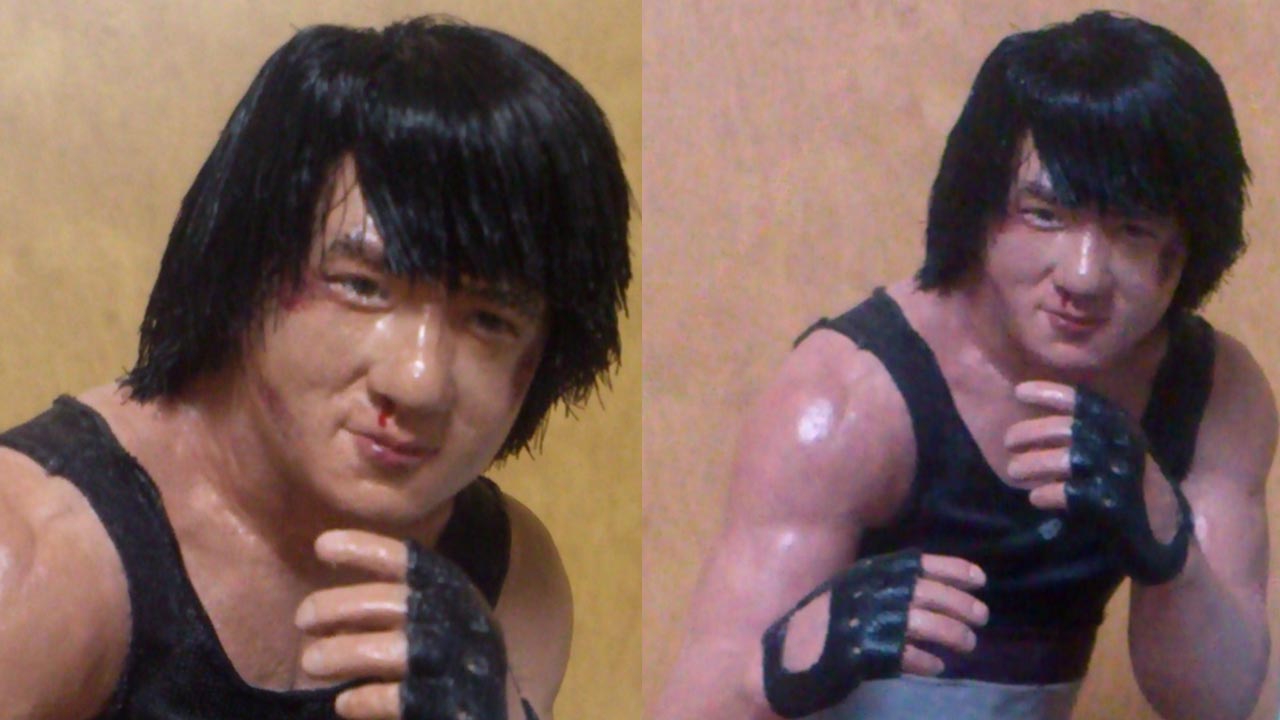
 Exhibit II.
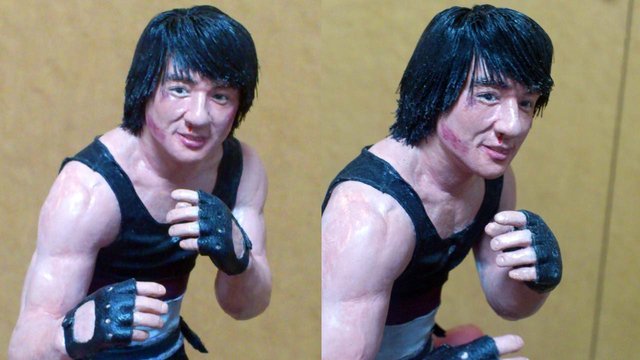
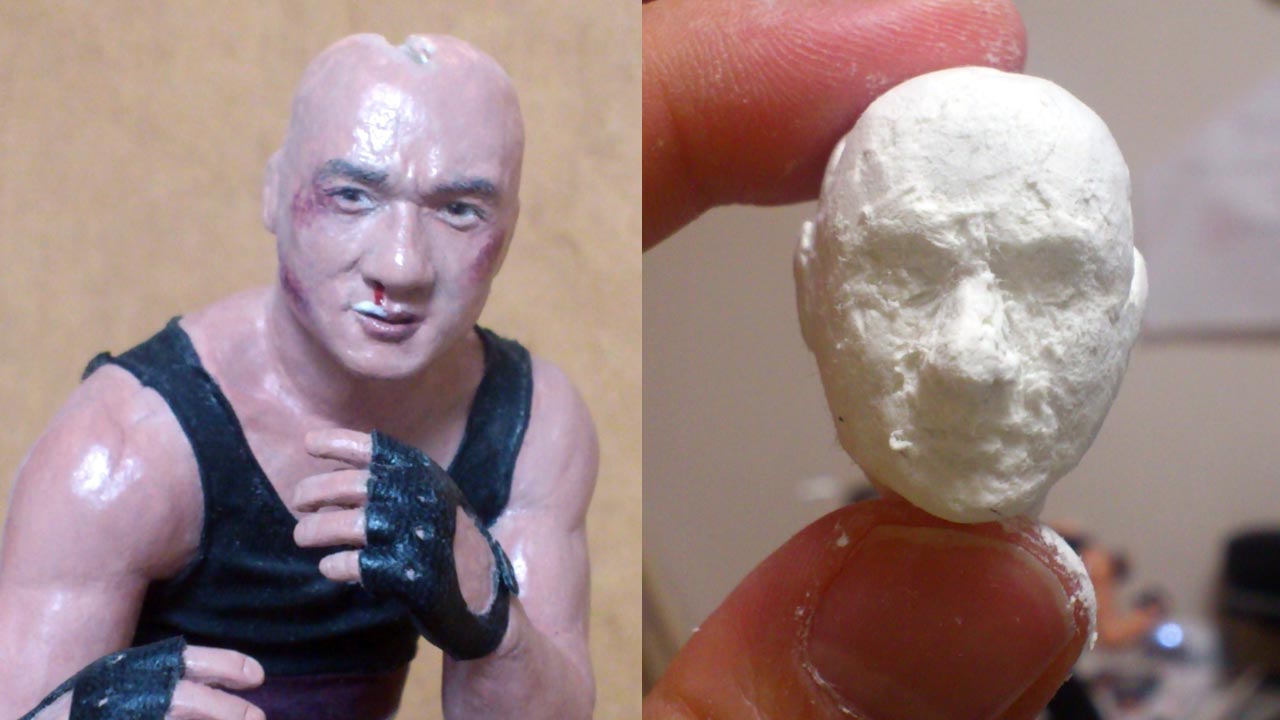
 Exhibit III. The title of this piece is called TREAT IT LIKE TRAINING.
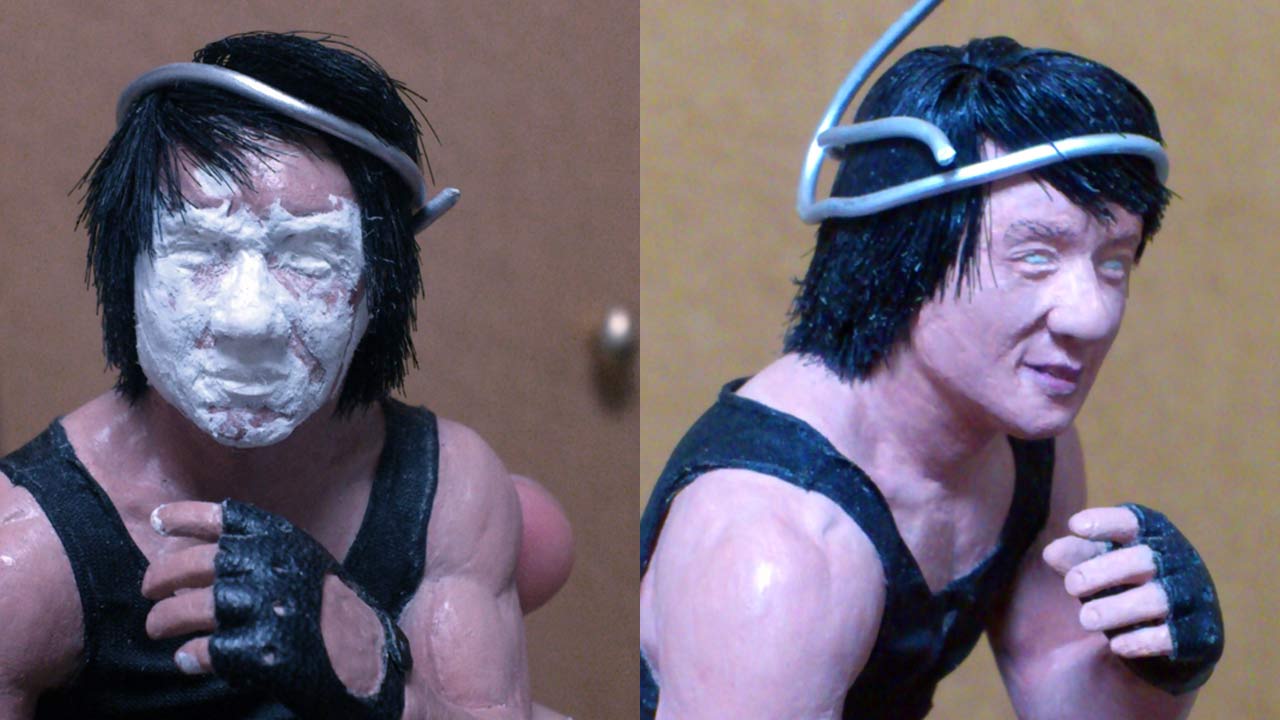
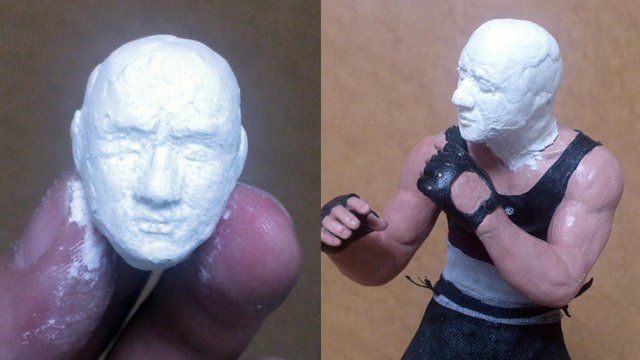
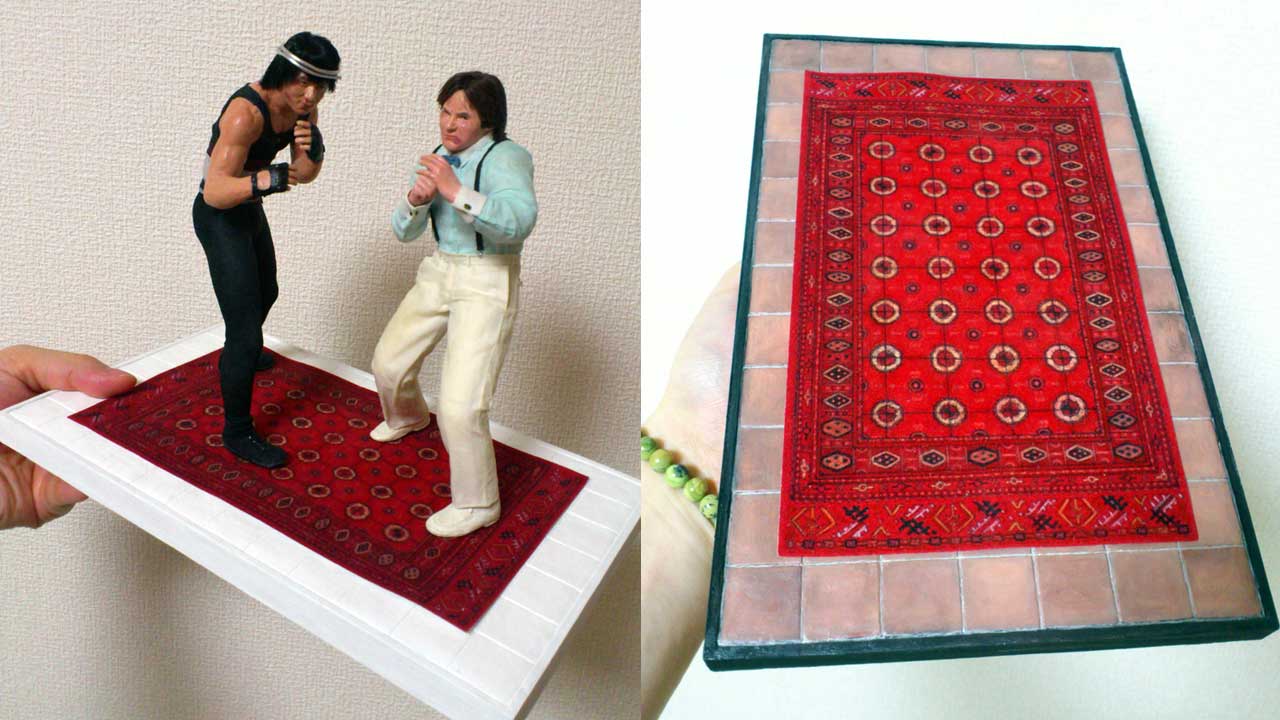
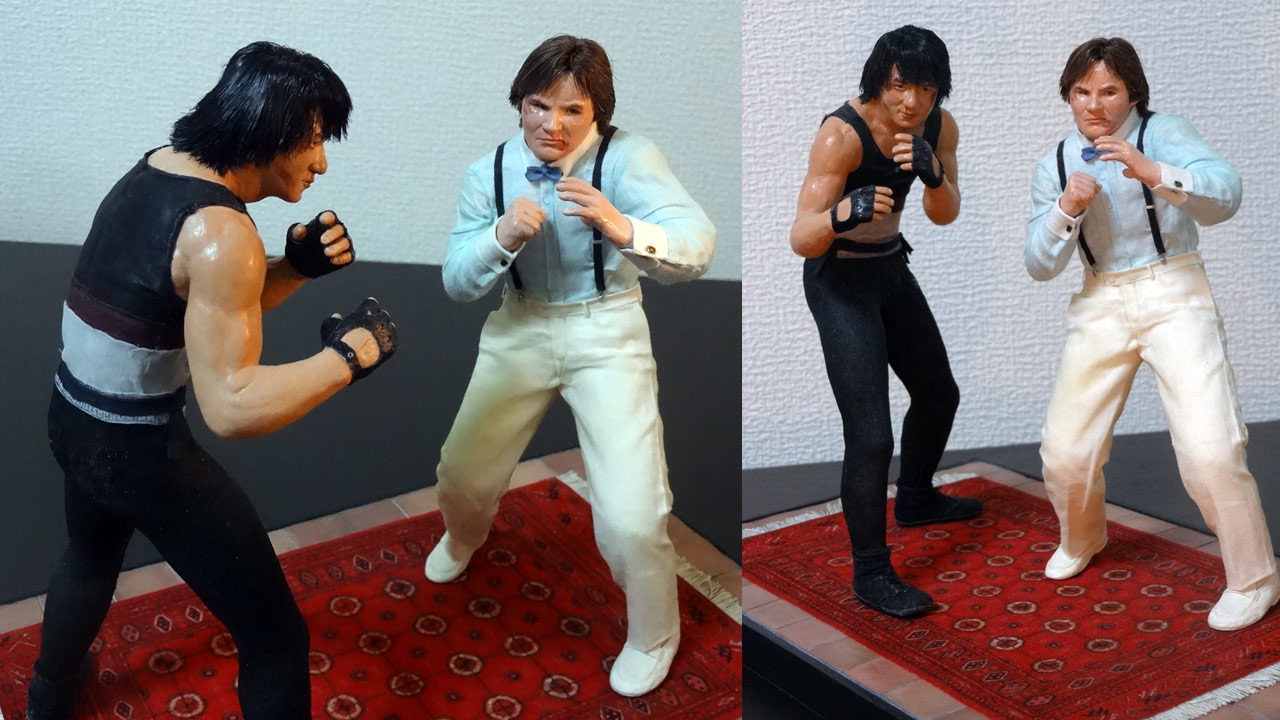 Exhibit IV.
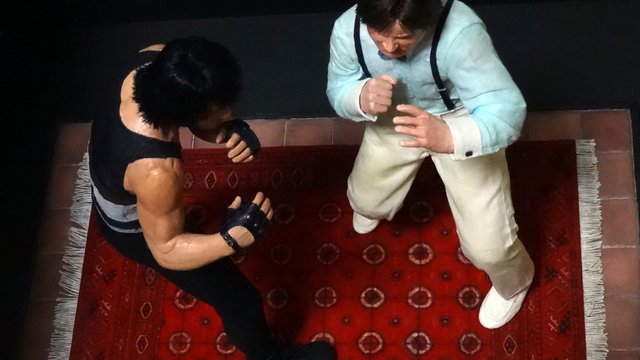
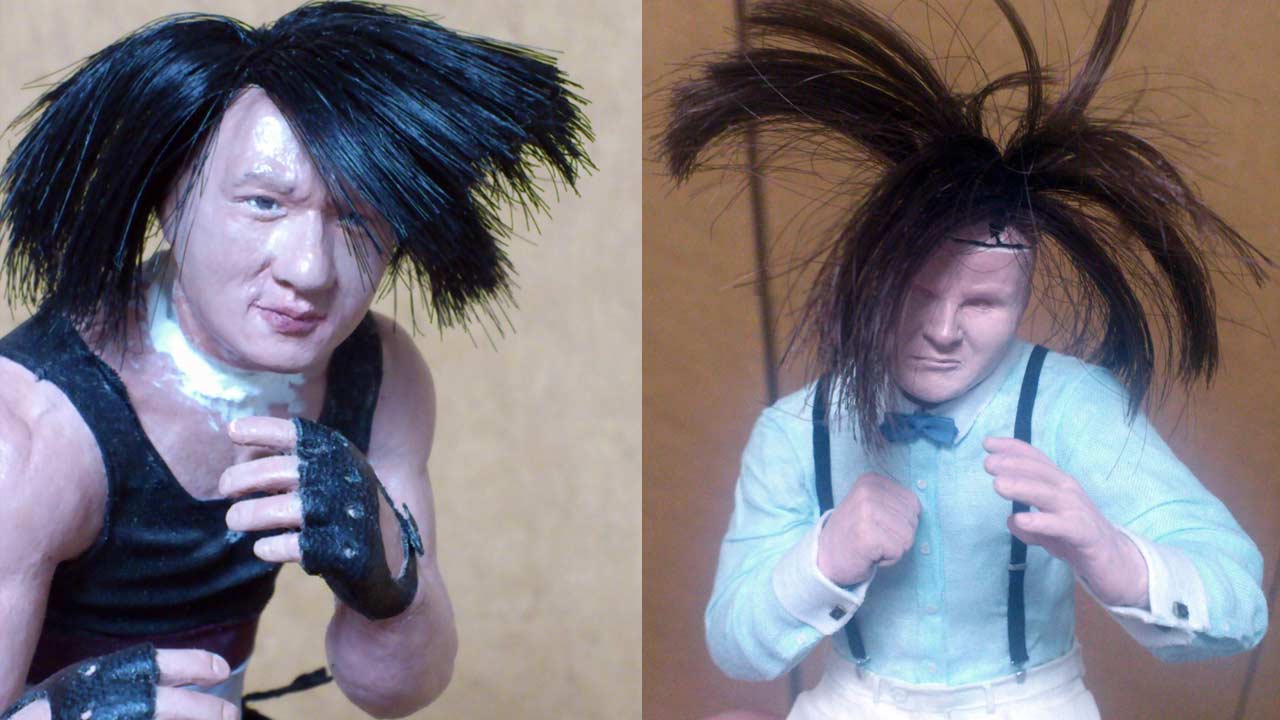
Exhibit V.
END OF GALLERY
●▬▬▬▬▬๑۩۩๑▬▬▬▬▬●
THE MAKING OF JACKIE CHAN'S CHARACTER, THOMAS
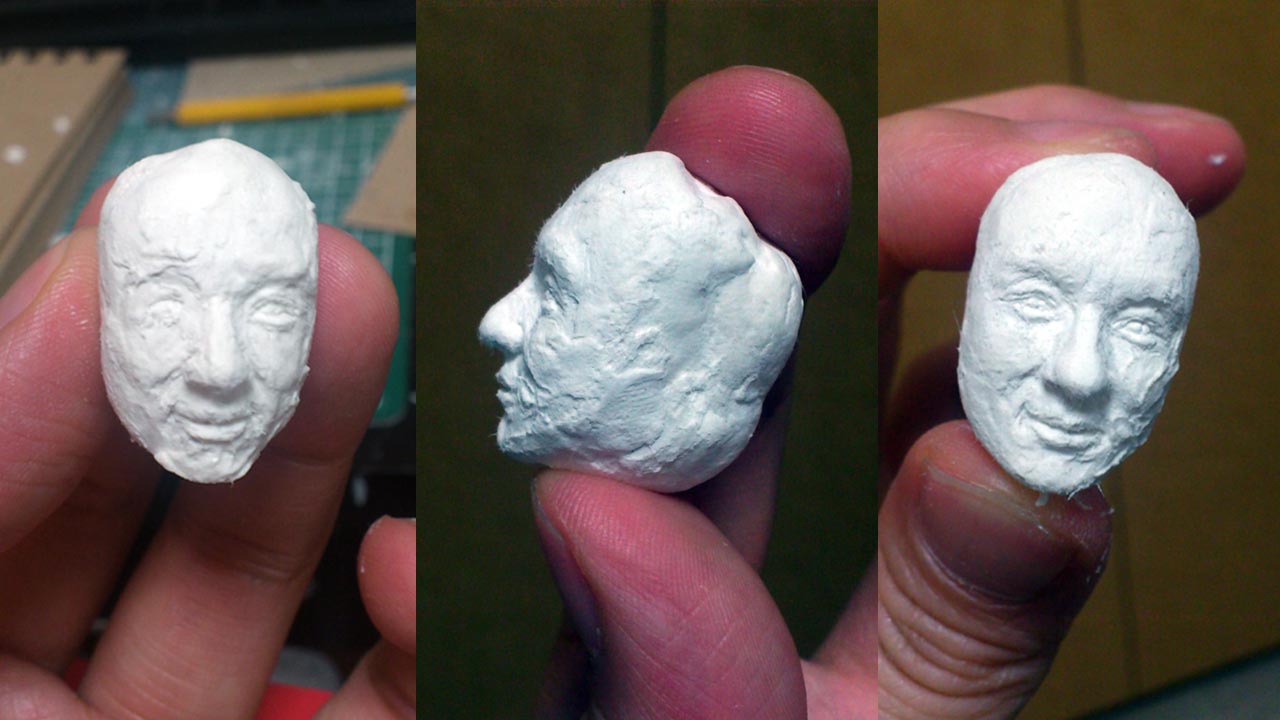
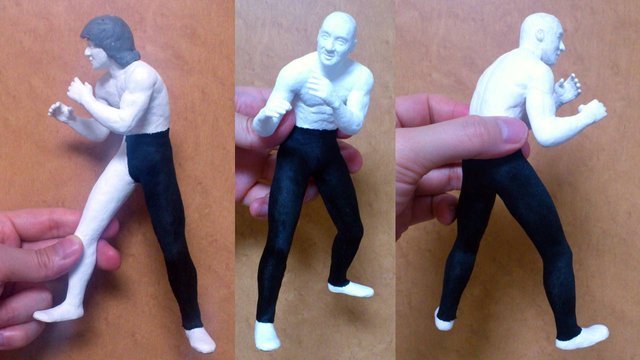
Using Padico's LaDoll series Premier stone clay, the basic head and features are sculpted. As it dried, the rest of the head was filled out and the expression is good to go.
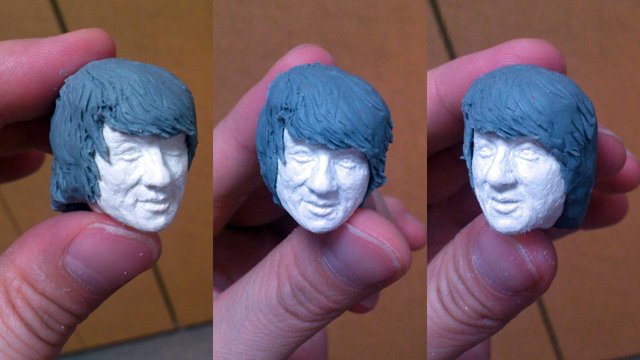
I used oil based modeling clay for temporary hair to check facial proportions and balance. What seemed to be good at the time would come to haunt me later... you'll see lol.
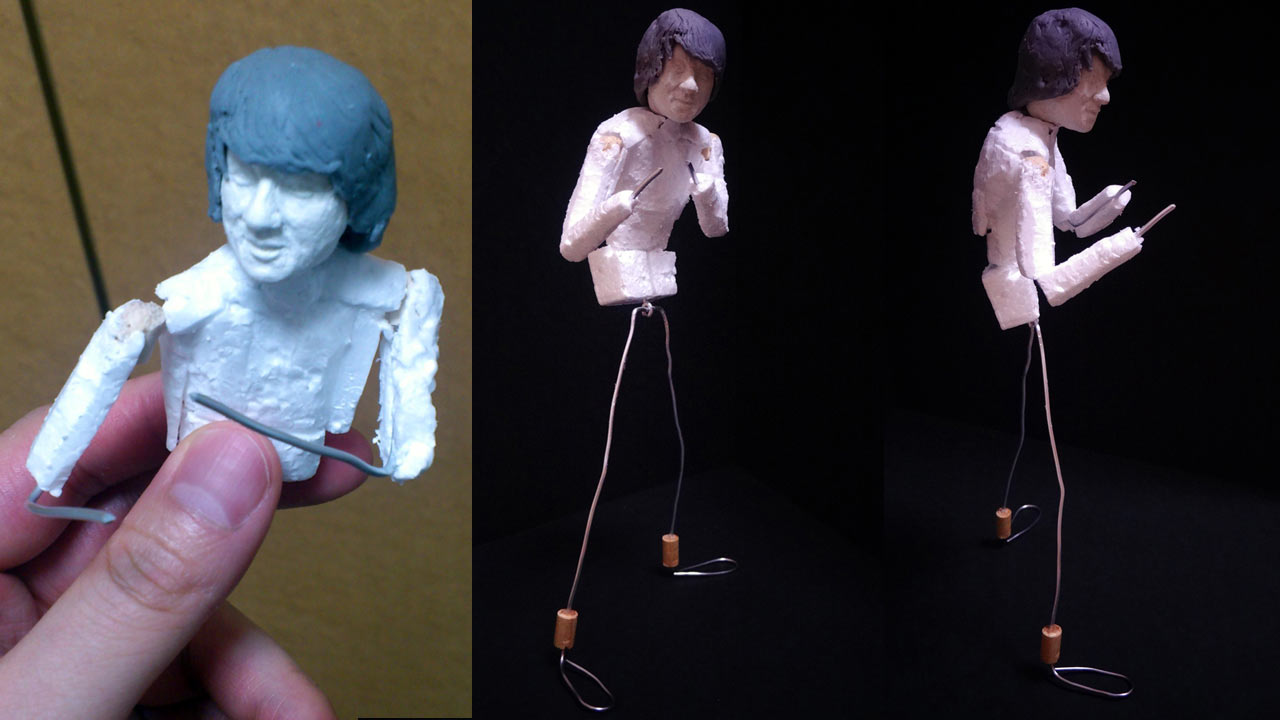
Styrofoam blocks were fitted over the aluminum armature and shaved down to give a general form. Wooden joints used at the shoulders and ankles as connectors.
The entire body was coated in styrofoam ready for the stone clay coating. The concept behind the styrofoam is making super lightweight statues. Thomas can stand well balanced on his own. Believe me?
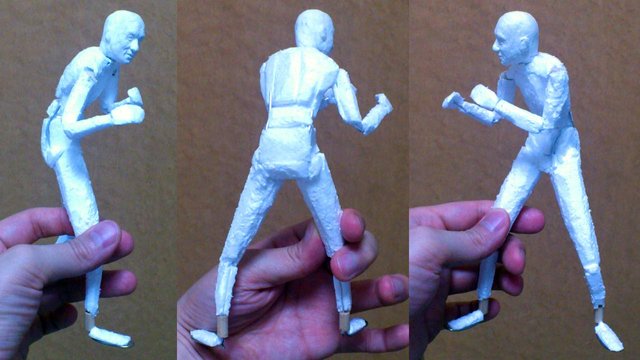
The stone clay dried after 6 hours. Then it can be carved, sanded and polished. Applying water to an area will moisten and soften the stone clay again to be re-worked as much as you like. Fabrics for the New Balance tanktop were set.
Still much refining work on the overall muscles and facial expression. Nothing was set in stone yet. With constant updates to specific areas, it is vital to update to the rest of the statue to keep balance and consistency. Golden rule.

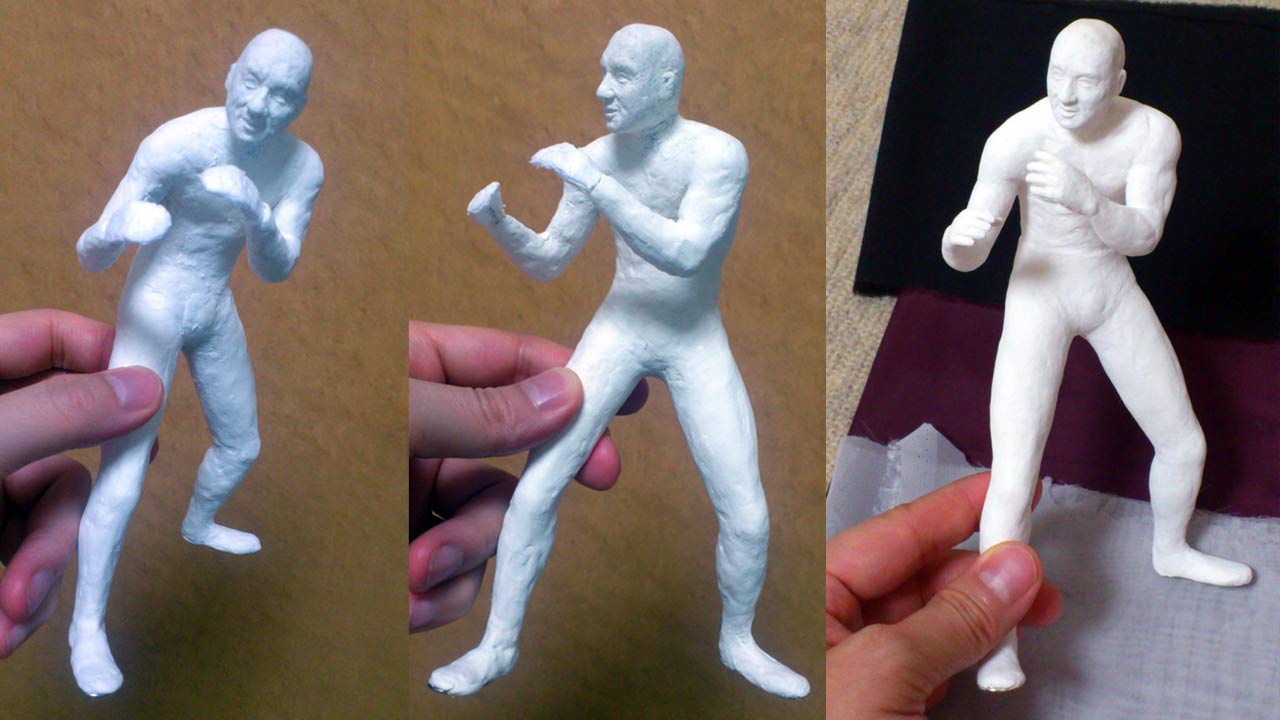
Before I got started on the tanktop, the fabrics took a good week to find, store after store... :( the leather bicycle gloves would go on first. I penciled on the hands for size reference.
Still tweaking and refining areas. The skin got more coats of paint. I added the pattern work on the wrap around his hips under the sash and painted the Olympic Rings logo on his tights. Channeling Hannibal Lechter at this point.
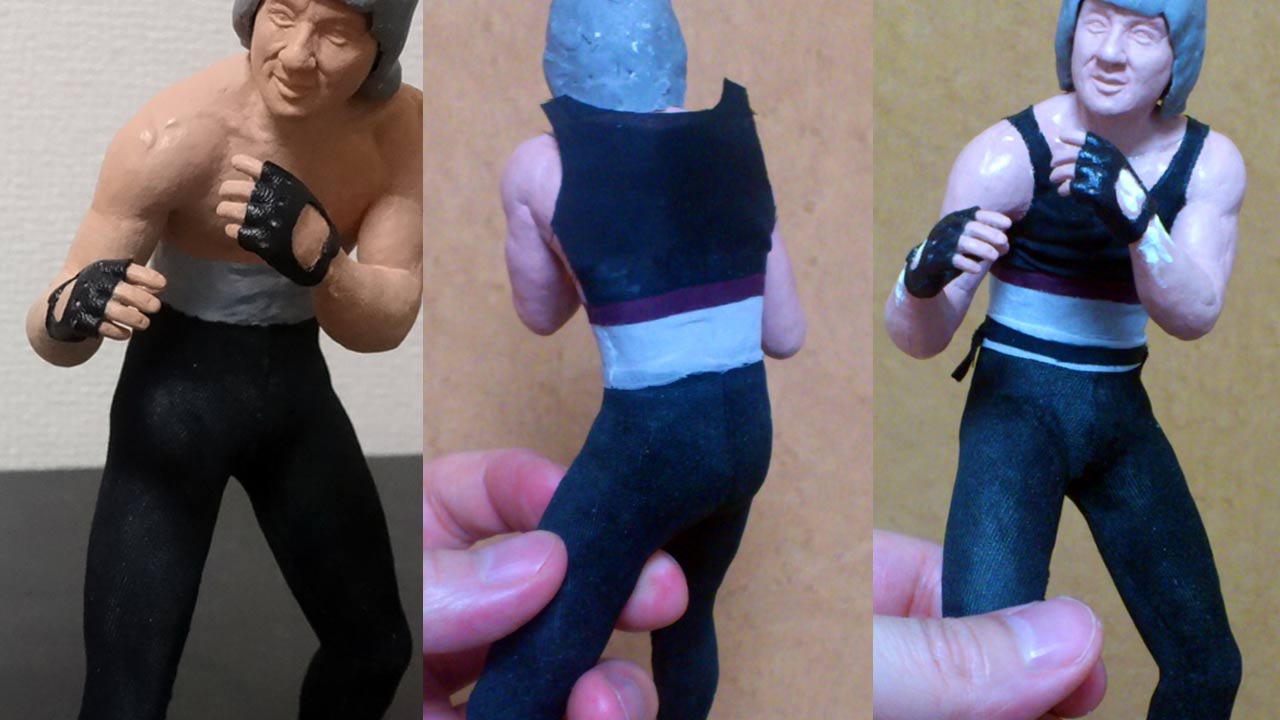
The little snap-on buttons on the gloves would be added later on. Tank top completed. Painted the New Balance logo. Since the gray fabric was fine mesh and see through, the waist needed to be painted gray. A neat little trick.
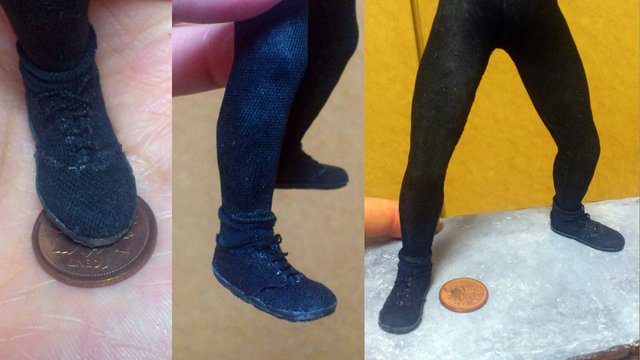
The shoes were made with black canvas and rubber for the soles. The socks were little leg-warmers... not actually over his foot because that would be insane, right? Yeah, I'm not quite there yet. Oh, wait! Magnets were embedded in the soles for the metal base I have planned.
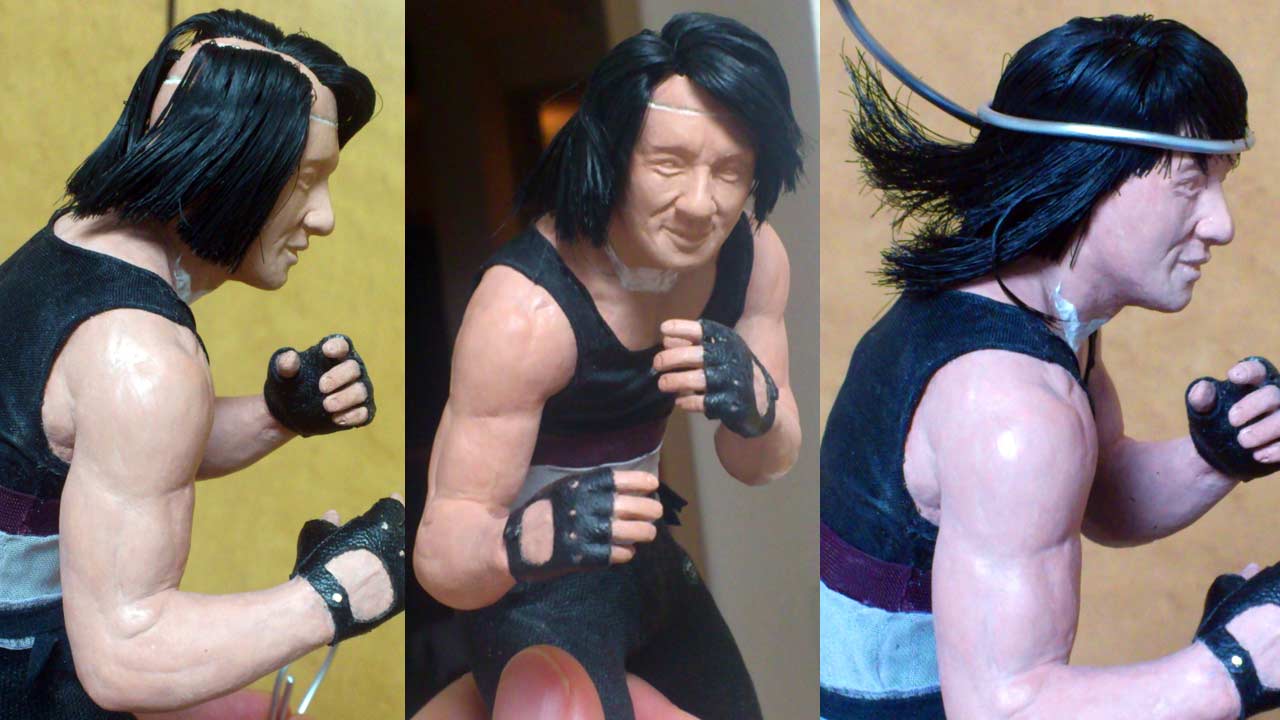
My technique for hair was adapted from Ryo Yoshida, a master ball-jointed doll maker. The removed scalp was hollowed out and slit from back to front for five separate openings. Long doll hair was fed through each line.
After some quality time on the hair styling with mousse and the help of my trusty aluminum wire sidekick, the results were passable. After a series of photographs, I knew it wasn't going to work out...
Back to the drawing board as they say. I would be stuck on this stage for about a month because I just didn't feel it. This would be Round One and I was getting knocked around!

I'm giving it my all and it just seemed that playful grin of Jackie's kept eluding me, as if it were The Mona Lisa's. If I had thick hair like Jackie, it would have been all torn out!
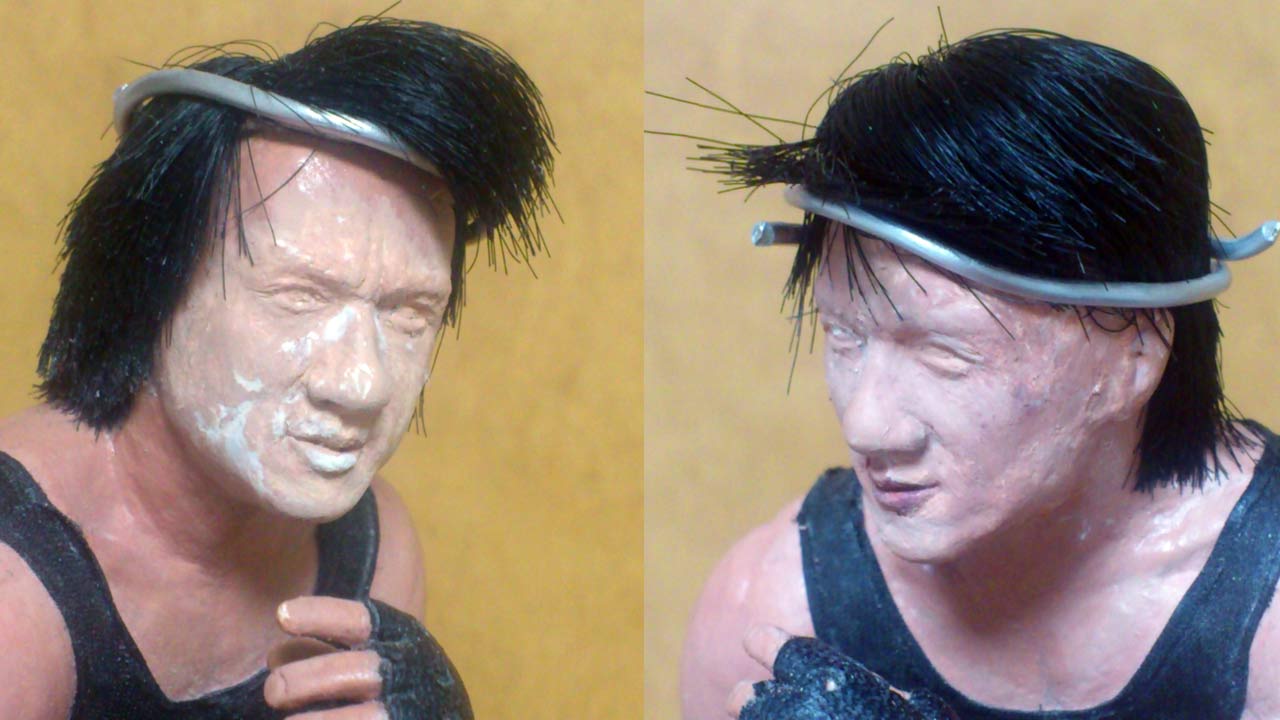
Round Two: I'm hitting back hard and getting some momentum but something kept knocking me back down. There must have been at least 9 or 10 versions of his face made.
If I remember correctly, here I was feeling pretty good about it. Once the front layer of hair went on, it felt like an uppercut to my nose. I was seeing stars. Now, I was angry. Beyond angry!
Ripped out Jackie's hair instead because I don't have any. Rounds One and Two were nightmares, but the worst was yet to come. I caught a second wind while telling myself: relax and just... treat it like training.
Starting over is never a bad thing. It's better than trying to fix something that is already beyond repairing. Save your precious time and just reset. It's Round Three! I came out re-energized--hitting hard!
Even though the expression wasn't quite there yet, I just knew... momentum began to swing my way. Yep, epic bad hair day! LOL.
Not giving up on this version. The grin began to shine through... there was light! Remember what Thomas / Jackie said in the movie when he got punched in the nose? "Mom was right! Due dilligence reaps rewards, laziness gains you nothing!"
Welcome to the PD family, Thomas. One important lesson I learned throughout this episode of "Jackie's face hell" was making an ensemble piece required more patience to find balance between two statues.
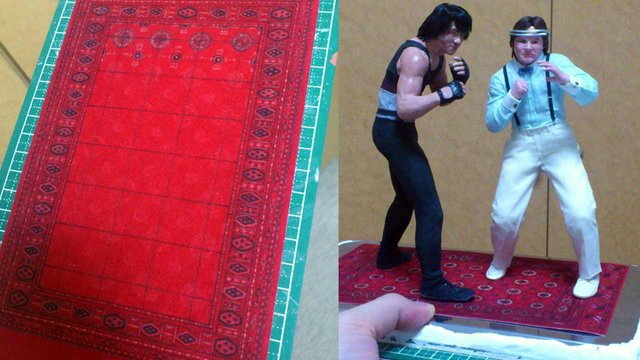
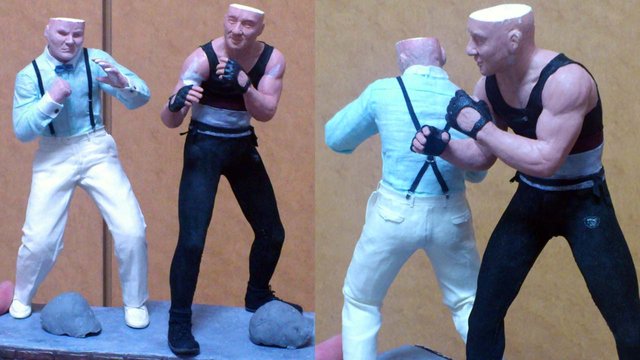
There will be more shots on the making of the Afghani rug and base in the next post along with the 'MAKING OF MONDALE'S HENCHMAN'. The embedded magnets in their shoes kept them standing securely on the metal tray. Stone clay was coated along the sides before the wooden panels were in put place.
The base was given a few coats of gesso and sanded down before starting on tile painting and panel finishings. The only things missing are the tassles on the rug ends.
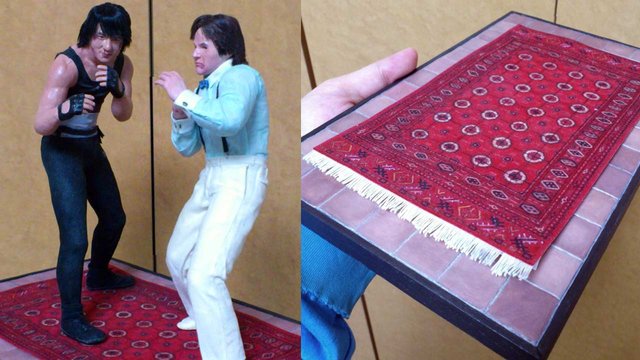
Testing the balance of the ensemble piece. Luckily nothing needed to be scrapped or revised. Tassles were aligned in place one at a time. Tweezers are a hand-crafter's best friend.
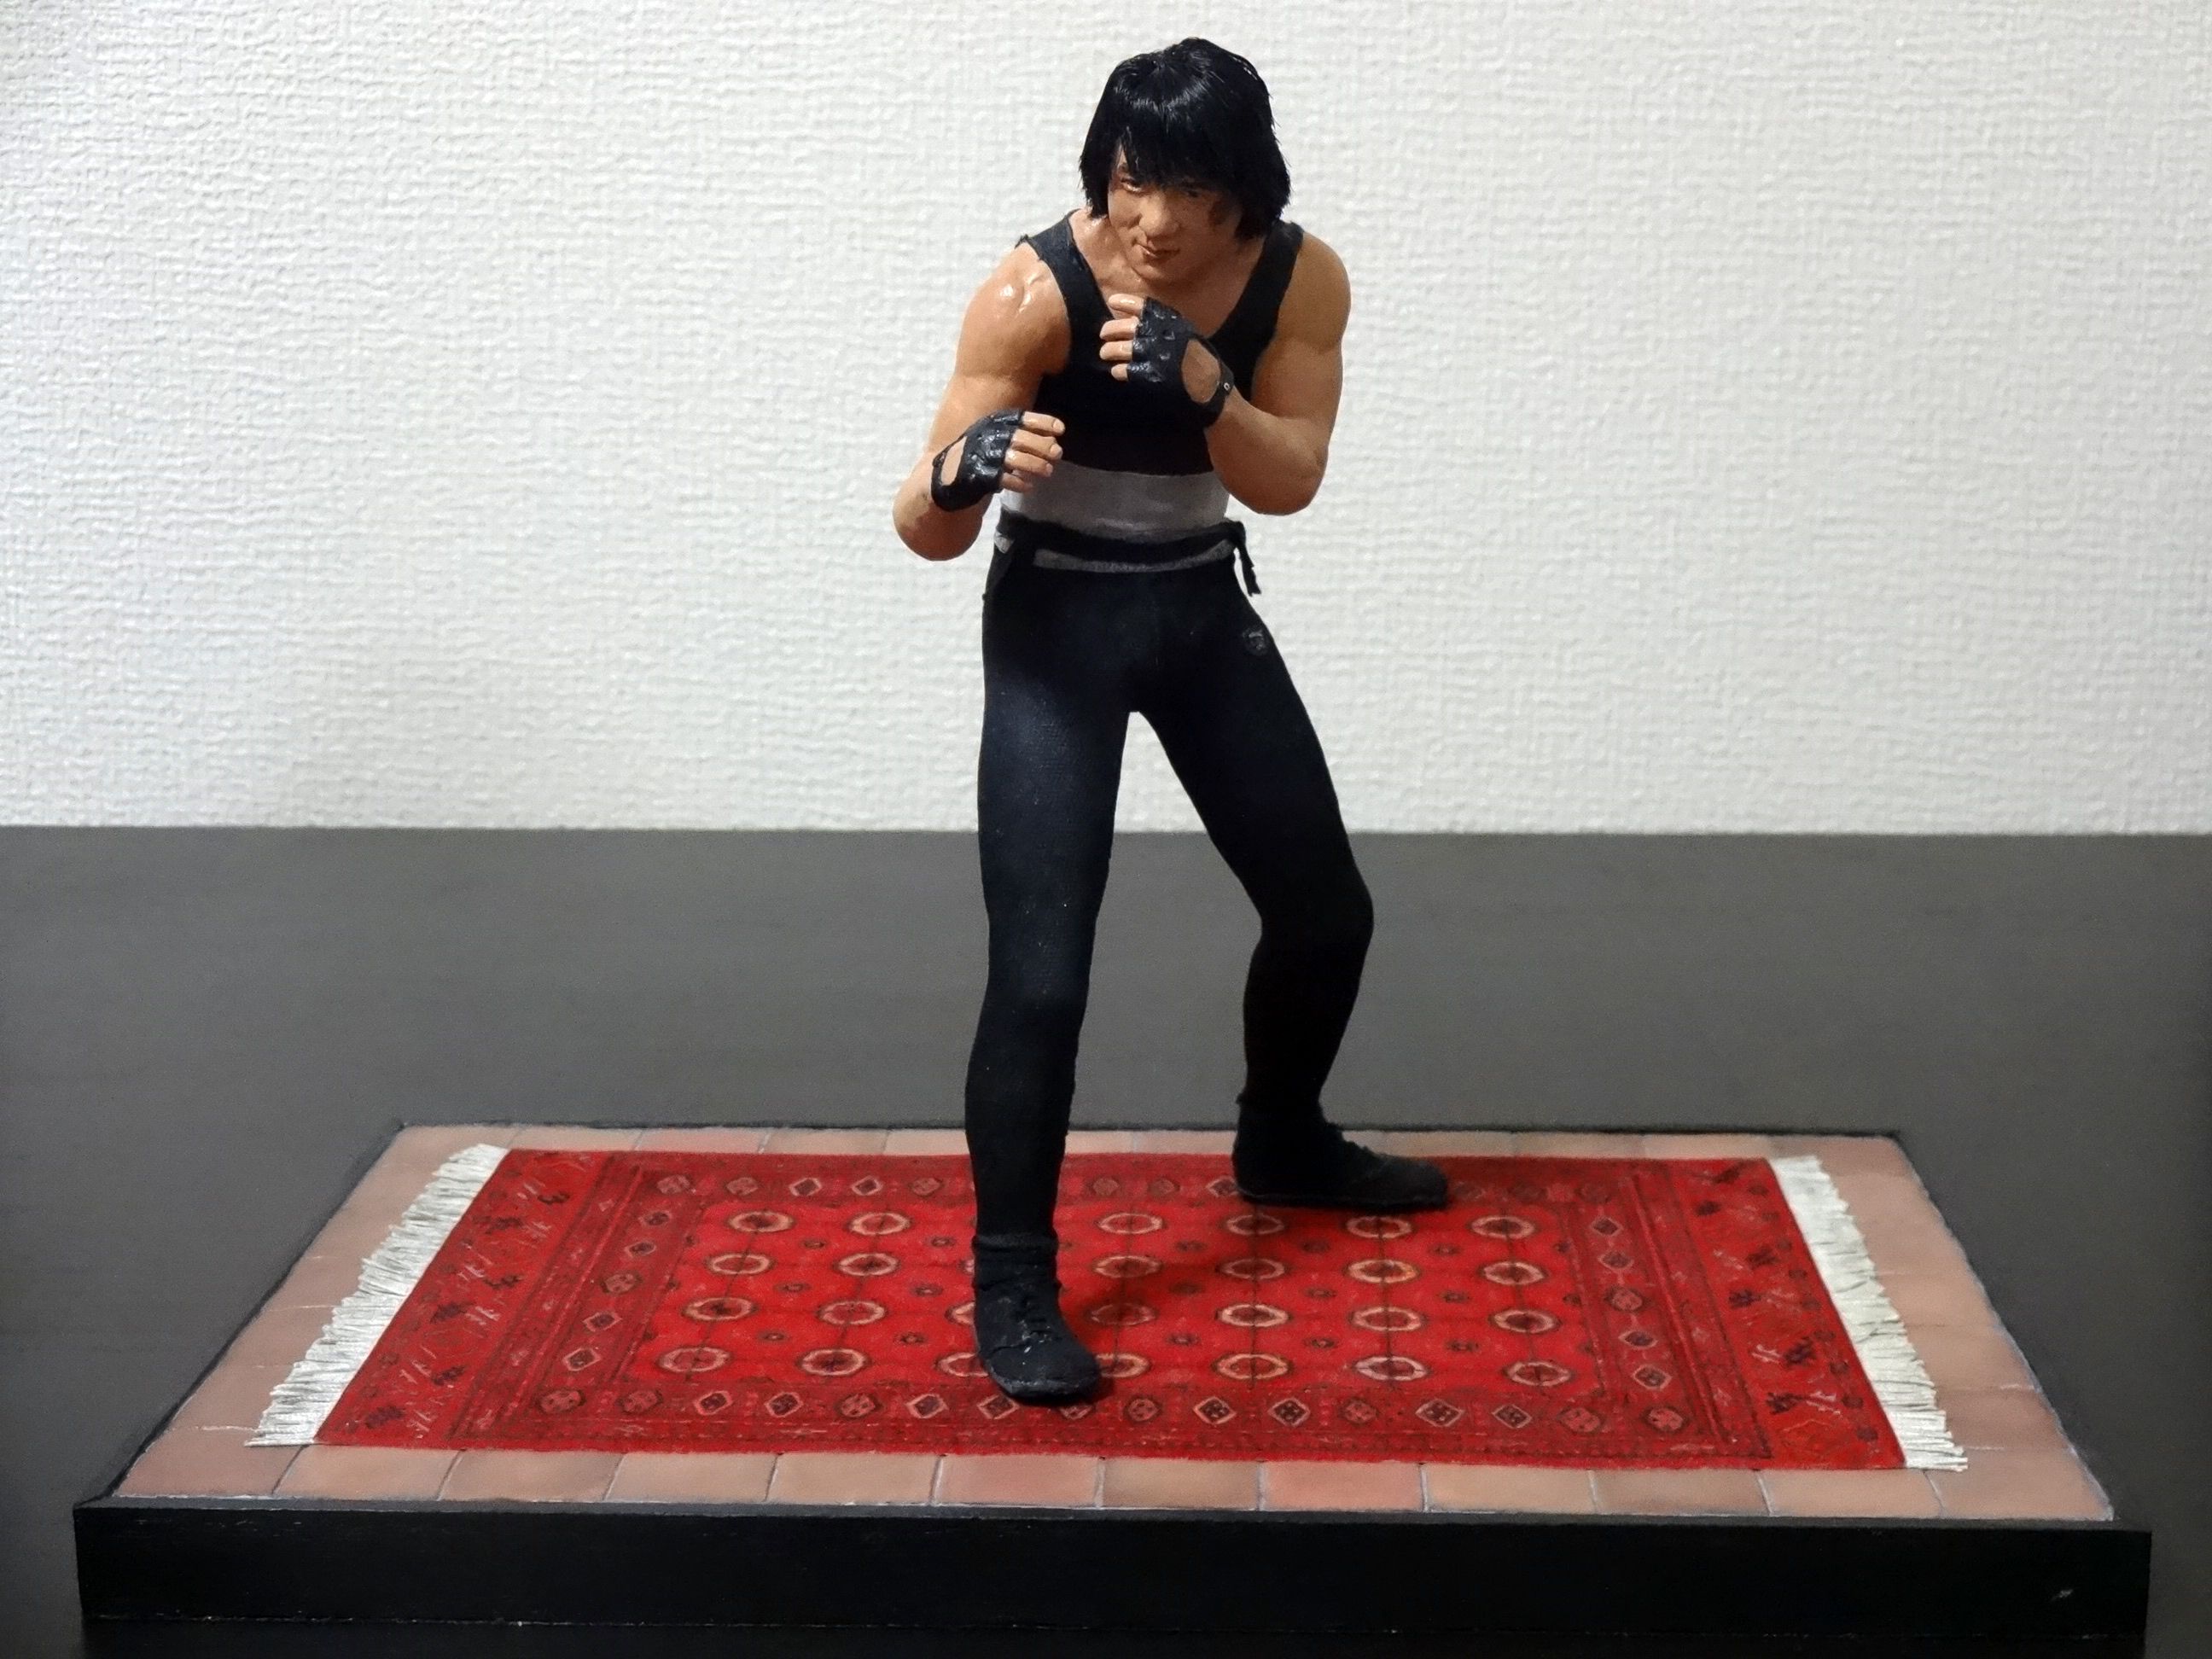
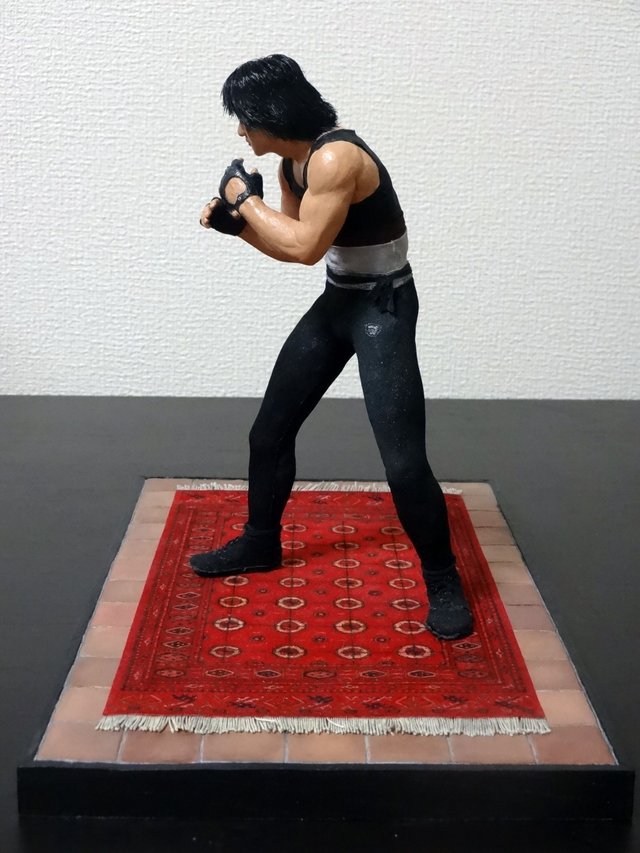
And here he is. Thomas aka Jackie Chan and base.
Thank you for watching and reading. Stay tuned for my next long-ass post on the making of Mondale's Henchman aka Benny 'The Jet' Urquidez.


If I were a whale I would voted you at 100%. Sadly I am not. All I could do is upvote and resteem your work. Good luck to you and I hope the bigger fishes would sooner appreciate your work.
Thank you for the great comment. I appreciate it a lot and it means a lot to me 🙇😊
No problem dude. I spend most of my time here to learn something new. And I found your post really of great value. So thanks for sharing, keep it up and god bless :)
you did this? this guy is legit!
Yes I did. Thank you for dropping by 🙇
this is absolutely epic, you have done justice to a true legend :)
This gem of a post was discovered by the OCD Team!
Reply to this comment if you accept, and are willing to let us promote your gem of a post! By accepting this, you have a chance to receive extra rewards and one of your photos in this article will be used on our compilation post!
You can follow @ocd – learn more about the project and see other Gems! We strive for transparency.
Thank you so much. The blood, sweat and tears literally was all worth it to honor Jackie Chan the living legend.
WOW!!!! Again...love it! You captured even that little smile Jackie always has on his face hihi. What do you do when it's all finished?? Do you keep them or sell them?? But really extraordinary!
Thank you very much. I always appreciate your comments :)
I keep all the statues. They're actually prototypes, so maybe in the future I'll get them digitally scanned and 3D printed for a limited amount to sell. If not, it's OK too. I need to build a room to display them properly.
per•se•ver•ance (ˌpɜr səˈvɪər əns)
n.
[1300–50; Middle English perseveraunce < Middle French perseverance < Latin persevērantia]
per`se•ver′ant, adj.
syn: perseverance, persistence, tenacity imply determined continuance in a state or in a course of action. perseverance suggests effort maintained in spite of difficulties or long-continued application; it is used in a favorable sense: It was apparent only after PD sat back and regarded the combined frown and grin on the remarkable likeness of Jackie that perseverance had finally paid off.
These are so wonderful, so much detail, blemishes, bruises, dynamic posturing, material folds; Benny looks as if, at any moment, he would duck and uppercut in a flash, and Jackie would unexpectedly split kick the viewer in the face.
You never do a half job on the plinth either, that would detract from the overall value, and once again you've made a piece worthy to display the figures.
Hey, the second iteration of Jackie's facial rework - it reminds me of him in Half a Loaf of Kung Fu, which I'm fond of, a superficially silly film with a Zen Koan sub text about authenticity and experience.
Also, in your Exhibit V photo above, you've localised the lighting to great effect. This is easy to do if you want to repeat it;
It sounds harder than it is.
If I can find set photographs from this scene I'll post them here, in case you want to make a 3-walled backdrop to stand behind them.
Thank you man. You're comments are second to none. I appreciate the lighting tips a lot. It is an area I lack knowledge in and need to learn. The info you provided makes it very easy to comprehend (b~_^)b
My pleasure, glad it helps. I only wish I could find images of the Jackie vs Benny fight scene set.
Just remember it's the difference in illumination level that makes the rest of the room 'dark' in your exposure, the bigger the difference, the darker the room. Some lighting and exposure tips for scale models and general macro, and some examples
With macro photography, the closer you get the more localised the exposure metering is, and the shorter your Depth of Field tends to be too, even with a fixed aperture device. DoF is your friend. https://en.wikipedia.org/wiki/Depth_of_field
Diagram of aperture controlled DoF, by Xiuchai Xu
Here's a cheat sheet, and here's some examples (I'm sure you're familiar with this, but hey why not they're great).
Love your work.
I just got around to look at some of the links you provided and they're pure gold. I'm looking forward to sculpting... 12 unfinished pieces waiting on me and then try out some of these awesome lighting and dof tips. Thanks again.
Can't wait to see them!
Great Work ! Compliments...
Thank you!
This is so impressive! Wow my mind is blown. I tried doing sculpture myself so I know how hard it is. May I ask if you would do commission work? Maybe for a simpler project...
I appreciate your kind comment. I'm afraid I don't do sculpting commissions. Only 2D characters drawings and custom t-shirts if you'd like. The reason I don't is because I'm taking a long break away from clay until my studio is back up and running. May I ask what project you have in mind?
Ah ok I got it. It's nice that you still have a creative activity going. AsI said I tried sculpting myself. https://steemit.com/art/@jrej/mini-lev-sculpting-a-figurine Wasn't a succes. I was hoping to find someone for a sculpture of my character or at least 3d model I could print. We shall see...
I think it just needs some more time spent refining and shaping the features. Polymer clay could be intimidating for beginners, if so, try an air dry clay instead. Once you have the pose sculpted as you did with yours, let it dry for a few hours or so and then you can begin carving, sanding and polishing it. I find this method of sculpting more like the traditional master sculptors working with granite, stone and marble.
Good luck. Keep me updated on your project.
Congratulations @preserveddragons! You have completed some achievement on Steemit and have been rewarded with new badge(s) :
Click on any badge to view your own Board of Honor on SteemitBoard.
For more information about SteemitBoard, click here
If you no longer want to receive notifications, reply to this comment with the word
STOP