Artventure | How to make Rubik's Cube Souvenir
Thinking of some unique and personalized party giveaways that any age can enjoy?
I am an Event Planner and Coordinator and shared some of my projects months ago for #steemgigs.
It is hard and exhausting but I just love doing it! 😍 Ohh, by the way it's just a passion and I have full time job in an insurance industry.
Recently a friend of mine asked me to organize her daughter's 7th birthday. Theme is My Little Pony and she requested 'especially' for personalized giveaways and Pinata.
'twas a challenge...
- Because I don't know how to do Pinata... that's where @prinsepong came to the rescue
- Keeping in mind the theme... I can't think of any personalized souvenir 😵 It has to be colorful!!
To cut the story short, I have thought of Rubik's Cube but I was still searching for alternative 'coz I know it's not easy to do and I need 50 pieces!! And guess what, I ended doing it aloneeee!! Hahaha,,, well got help from my mom in cutting the tags, ribbon and net textiles. 😍 Thank You Mamsy!!

Here's what we need:

Note Worthy:
Size of Rubik's Cube is on your choice but would suggest a bigger size (I used 9x9 cm) so that it'll be easier to stick the picture. I used 3x3 squares so the size of each square is bigger and one side has only 9 squares.
Use A4 size sticker paper to print the picture so that it'll be easier to stick. If you can't find then you can use normal paper but need to have glue so that you can stick the paper on the Rubik's Cube.
Optional: Net Textile is optional, it is also presentable if you'll just tie Rubik's Cube with a ribbon but use an inch size ribbon.
Optional: If the paper you used is not glossy, you can use transparent scotch tape on the picture and tag. It can also preserve the picture for longer time and protects it from water or dust.

Let's get started...
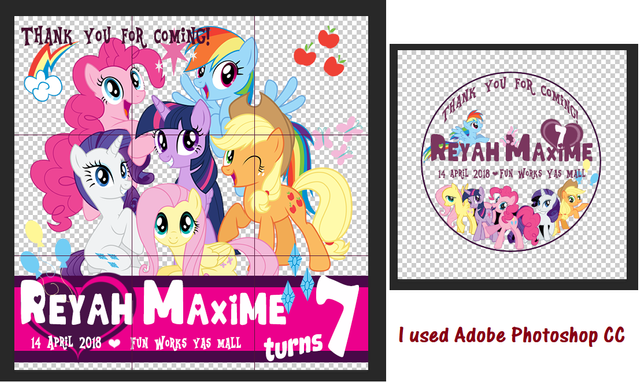
My cube is 9x9 cm so I used 8.5x8.5 cm size so that there will be enough border once I stick the picture on the cube.
Since I used Adobe Photoshop, I was able to put lines as guide for cutting.

Put transparent scotch tape on the picture to make it glossy. It will also make the paper thicker and stronger.
You just have to put it carefully as it may have bubbles/air after sticking the tape. You will need thin sharp blade to cut the tape and let the air out then slowly stick the tape.

To avoid confusion, arrange the picture like a jigsaw puzzle after cutting so it will be easy for you to stick each square.
I've read your mind!! Yes you can stick the full picture without cutting and just use blade/cutter to cut the squares as per the middle of each squares of Rubik's cube.
It is easier, I agree... but it'll be messy edges and border of each square won't be visible. I know cutting each square and sticking it one by one is a hard work but it will look neater. 😊

I chose to remove green as there is no green pony in My Little Pony.
We're halfway through...

Make sure to stick the pictures in order otherwise the puzzle will never be solved. 😅😅😅

Stick all the cut pictures until the last square of the cube and...
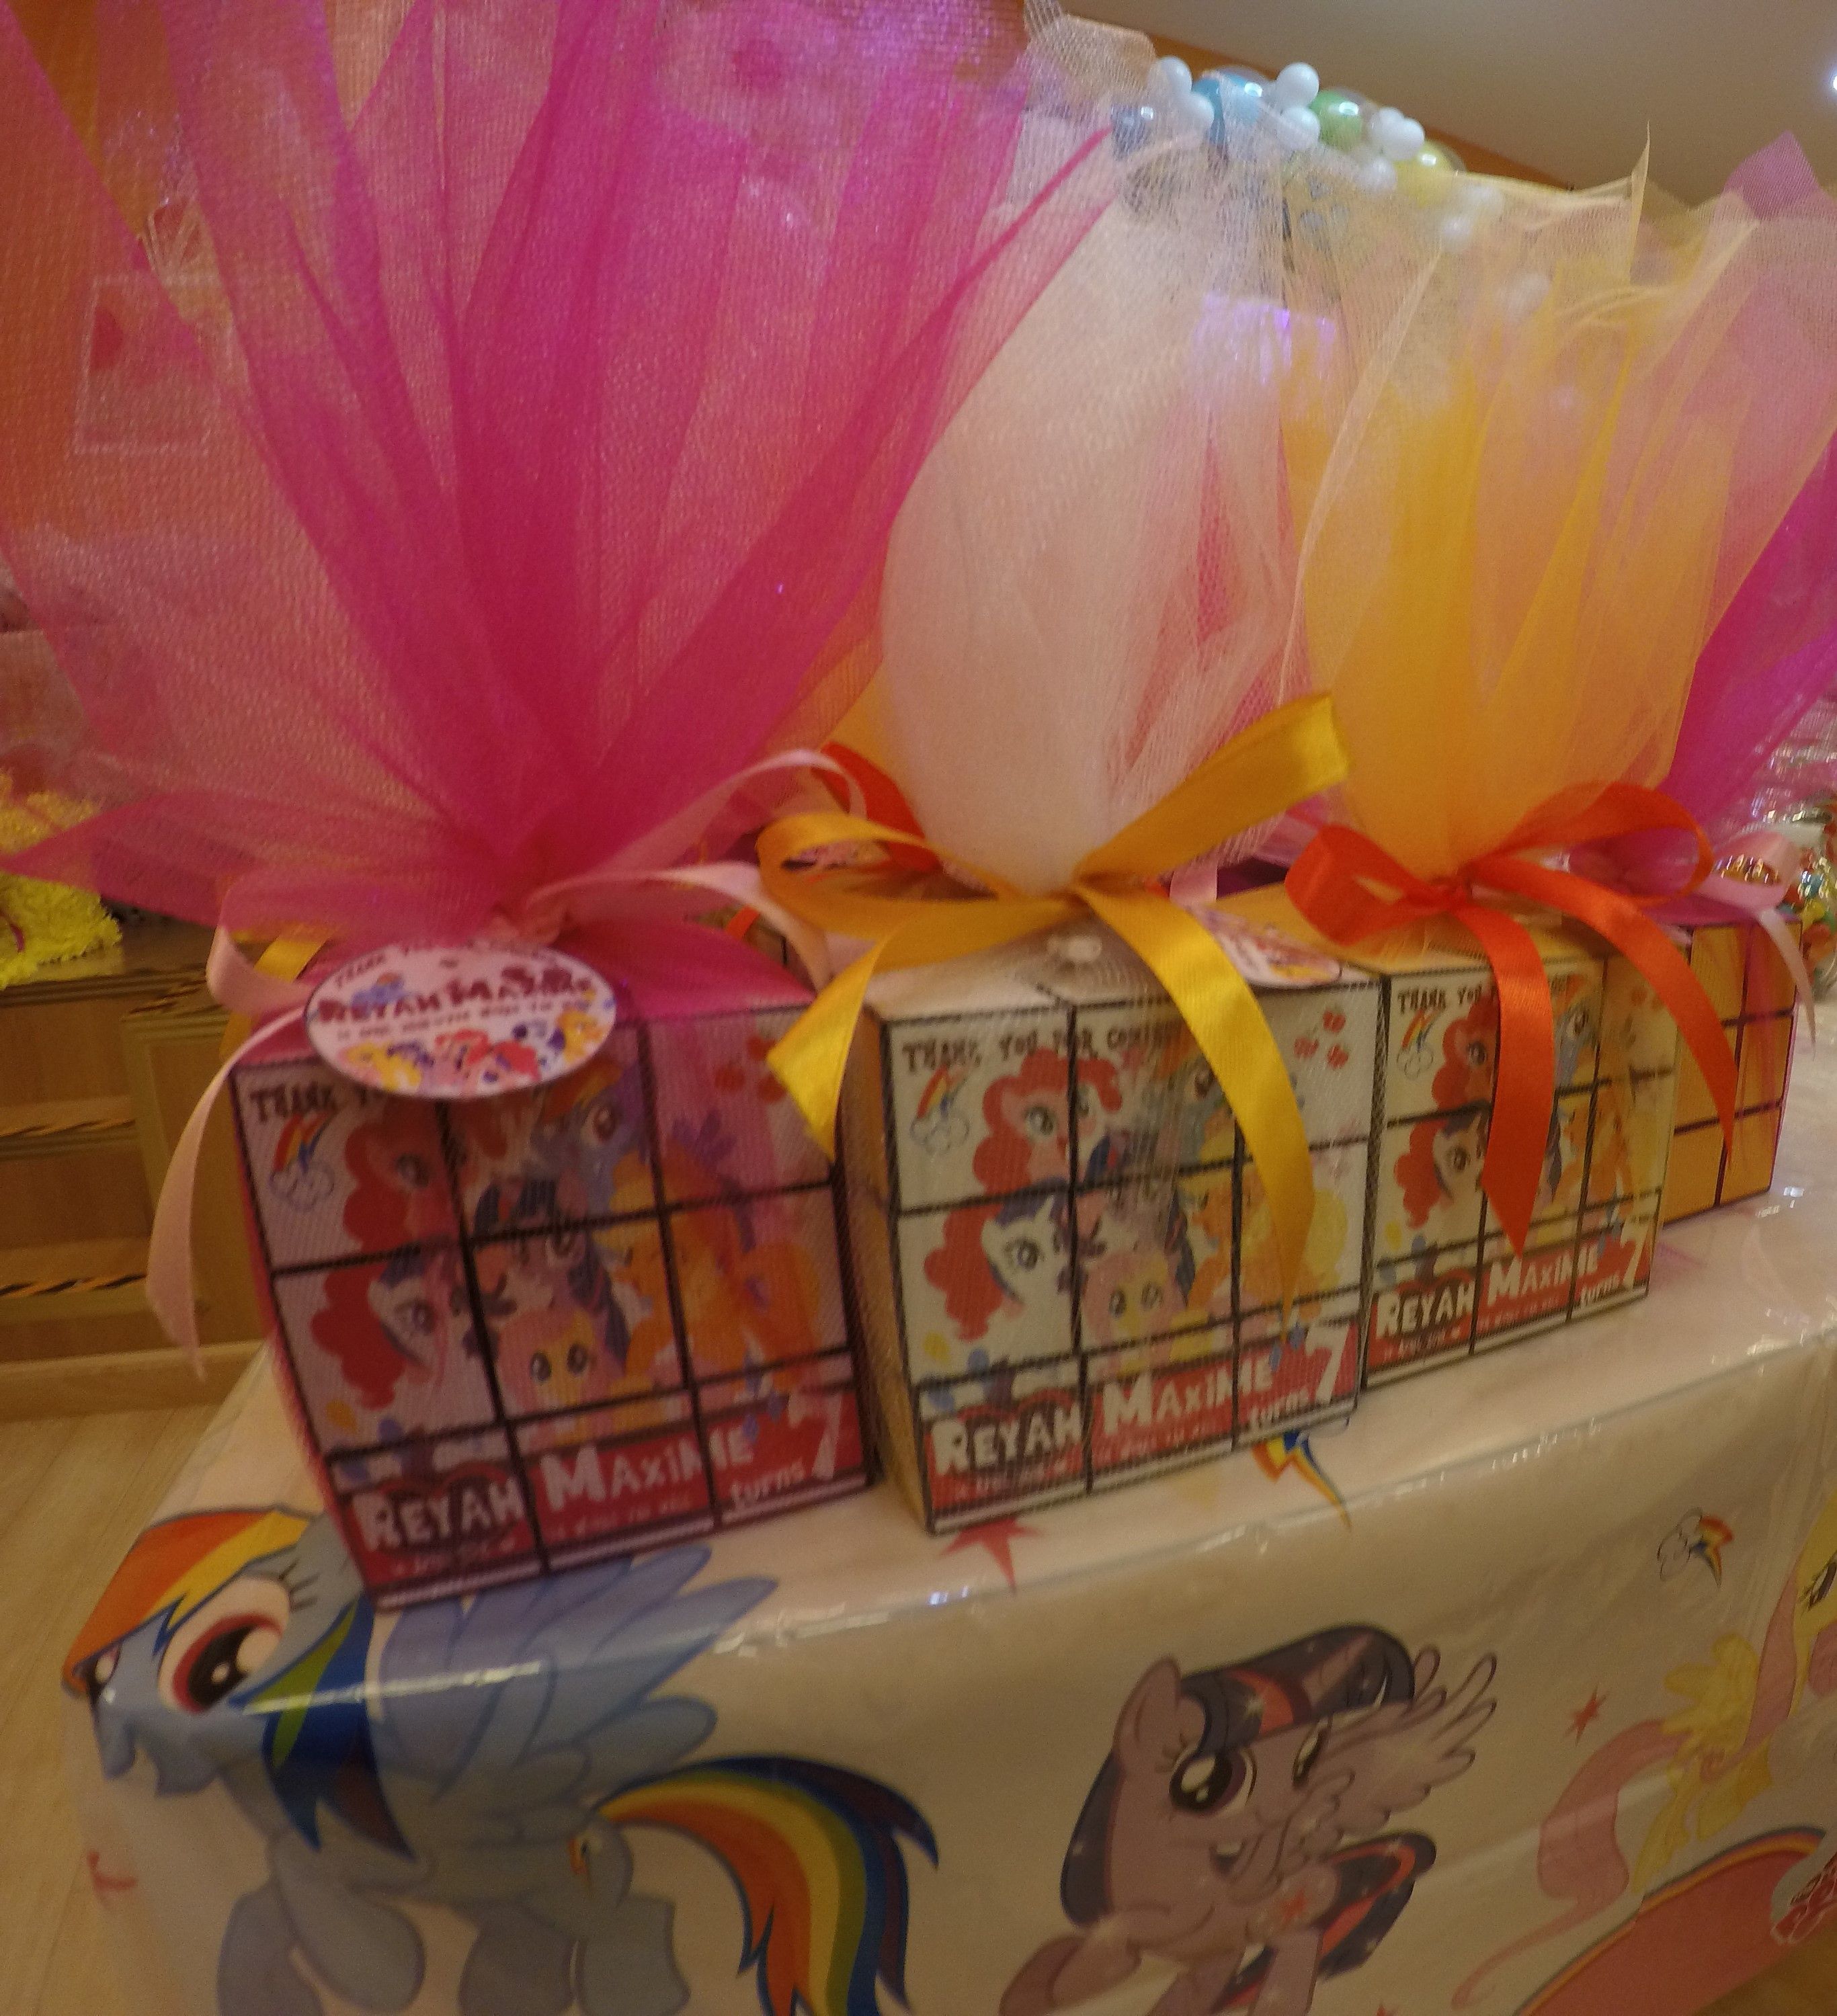
tadaaaa..... you've your personalized party souvenir! 😍

You can now tie an inch size ribbon of your choice and it's ready to give that personalized Rubik's cube away!
But to make it elegant, will wrap it with net textile, color of your choice that will match your ribbon and here's how...
OPTIONAL: Wrapped with net textile

Arrange the edges and put them together in one hand like doing a ponytail hair.

It is easy as tying your hair.
It's time to put the souvenir tag and ribbon

Try to find an empty space to put a hole so that you don't have to cut any of the picture.

You can also use a colored string where you can easily twirl on the tied rubber band.

You can wrap the ribbon twice to hide the rubber band so that it will be neater.

If you know a special knot that you think will look good, you may try so. Don't forget to cut the end of the ribbon to put a style.
Just a little trim on the tip of the net textile, design it as diamond shape to look better. 😊😊😊
And here's the finished masterpiece... 😊😊😊

Yeheyyy... we made it!! It may looks so hard but it's not... though you need a lot of patience,,, buy tons of it!! ~LOL~ It will help!! 😅😅😅
We're glad we made it and the event was successful... well, Pinata was another struggle story!! hahaha
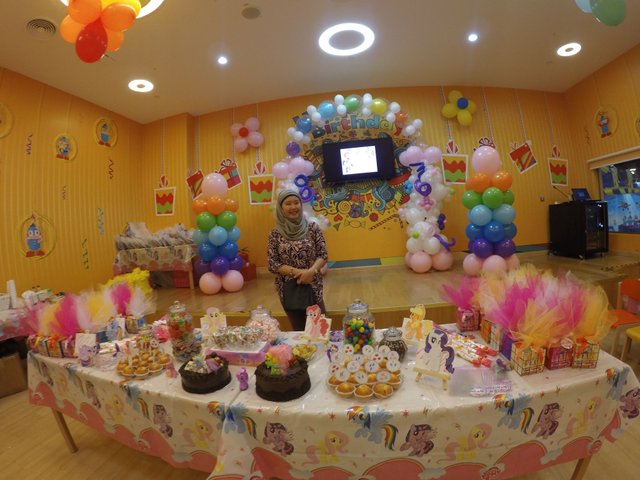
Glimpse of the event, 📸 by @pinsepong
Click below 2 minutes video and check how the Personalized Rubik's Cube was done! 😊 ENJOY!
Would love to hear your suggestions too in making unique and personalized party giveaways/souvenirs. If you have made some posts, please comment your link and will check it too...
Thank you for your time and I hope you enjoyed it! Until my next Artventure!
As suggested by @progressivechef to Implement a clickable link on all blogs directing to the introduceyourself post or any other post to be selected by the user! so the person who wants to know more about you can easily check your #IntroduceYourself post... and here is mine! 😊
Have you voted your witness? Consider casting your witness votes for @steemgigs (@surpassinggoogle), @precise, @cloh76.witness, @ausbitbank, @qurator, @jerrybanfield, @blocktrades and @curie who have been adding invaluable contribution to the community.
To cast your votes, just go to
https://steemit.com/~witnesses

That really required a lot of patience! You should have called the @divinekids for help 😆 .
Oh, i may have a solution for you instead of using tape to make the paper glossy- use the transparent adhesive we use to cover notebooks. You know that?
Oahh yeahh!! That would be easier!! Thanks for that! 😍
Congratulations! Your post has been chosen for the SteemPH UAE : Daily Featured Posts | 26 April 2018.
Thank you for your support @steemph.uae 💕
Wow! Cutie cutie! ❤❤❤
Thank you atengg 💕
Wow! That's so cute. Ang galing po. Xx
Thanks sis... tsaga lang talaga hahaha 😂😂😂
Yehay!!! We have an awesome witty event planner! I should get bookings for you!
Yeheyy... at your service madamm!! ☺️☺️
this is awesommmmeeeee!
Thanks nantz! Dami ko naipong puyat jan😂😂
Creative, Keep it up
Thanks vince! ☺️☺️☺️ Pag may need kang giveaways, alam mo na sino kokontak mo huh!! ☺️☺️
Pabile po ng patience ate.
Naku, ubos na po! Dahil jan 😂😂
Hello @pingcess, thank you for sharing this creative work! We just stopped by to say that you've been upvoted by the @creativecrypto magazine. The Creative Crypto is all about art on the blockchain and learning from creatives like you. Looking forward to crossing paths again soon. Steem on!
Thank you @creativecrypto! I am glad my work is appreciated 😍 Hope to see you again very soon!! ☺️☺️