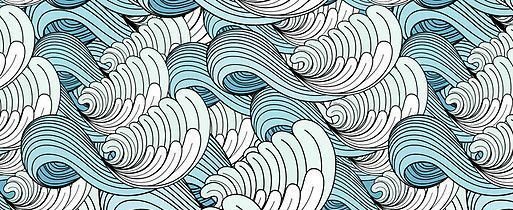
How To Design a Repetitive Pattern + Tiny Celtic Pattern Tutorial #jnarttutorial
Turtorial in Two Parts
..:: * ::..Original art by @jnart
..:: :: :: * :: :: ::..
Part One - Design Repetitive Patterns
Have you ever wondered how to make a repetitive pattern like this:
I'll teach you how!
..:: :: :: * :: :: ::..
1 - Draw something on a square paper and mark the middle (One way to see the middle is to fold it).
2 - Divide the paper into two parts and change sides.
3 - Draw something that connects the two parts of the paper.
4 - Tape them together in the original order.
5 - For a horizontally repetitive pattern use the template and copy or trace the pattern.
6 - For a repetitive pattern in all directions cut the paper in half horizontally.
7 - Change sides.
8 - Draw something cool ! 😛
9 - Copy the pattern in all directions of the paper.
10 - And I almost forgot. There is another way to think about the second pattern, see below.
11 - And do this if you want the pattern to repeat itself in a triangular way.
Of course it's easier to make it digitally, but this is made for the tiny art challenge. And then you can apply the theory in any setting.
Part Two - How To Make a Tiny Celtic Pattern
1 - I started by playing with some shapes.
2 - Then I started to make the shapes more symmetrical by drawing them in a grid.
3 - I kept on working on the symmetry - at this stage only with single lines.
4 - When I thought the design looked okay I started to add thickness to the lines. But be careful not to have too many lines running underneath each other.
5 - Then the thicker lines was applied, I started to erase some lines and add thickness to others to make an overlapping effect.
6 - I cleaned the drawing.
7 - Cut in half.
8 - Swapped sides and liked the pictures together.
9 - And to make it a bit harder I translated the picture to a smaller size when the design was completed.
10 - I used my Pigma Micron 005 ink pencil to fill in the lines.
11 - I was a bit tired of the process at this stage and made some small error, it's human ;)
12 - To add some depth I drew black close to every overlap. And I wasn't planning to continue the patterns so I made a top and bottom.
13 - And finally finished with some color.
I figured out that Celtic patterns are more beautiful in bigger scale - this was the first serious try to make one. I will defeatedly try to make a bigger one at another time. They are super fun to make!


I had to read it through a couple times before I realized my device had not loaded the pictures - as soon as they loaded
Do you think they where to big?
Hmmm, I think it was more my device and a third party app I stubbornly have been trying to use, to be honest. Now on browser it loads fine for me!
Good input anyway. I am resizing pictures in bigger posts now - https://steemit.com/art/@jnart/must-have-program-for-all-digital-artist-and-human-beings-how-to-rename-or-resize-lots-of-pictures
awesome design, and thank you for the great tips !
You're welcome!
@jnart,
This gem of a post was discovered by the @OCD Curation Team!
Reply to this comment if you accept, and are willing to let us share your gem of a post! By accepting this, you have a chance to receive extra rewards and one of your photos in this article may be used on our compilation post!
You can follow @ocd – learn more about the project and see other Gems! We strive for transparency.
Love the artwork, and I really love when artists take the time to show HOW they do what they do best!
Please Reply and I will nominate your post to the @OCD Curators for possible extra votes and Steemit Exposure!
Do it! :D
Interesting technique, it's not one I have tried but it is a pretty foolproof one.
Could be an interesting thing to try with the kids, get one to draw the centre and the other to connect it up then see what you get.
I think you will get amazing results. Maybe the new pattern for the curtain ;)
Simply amazing!
Thank you! :)
love the tutorial
sadly i have the handwriting of a 2nd grader
Thank you!
@originalworks
@OriginalWorks Mention Bot activated by @reko. The @OriginalWorks bot has determined this post by @jnart to be original material and upvoted it!
To call @OriginalWorks, simply reply to any post with @originalworks or !originalworks in your message!
For more information, Click Here!
Cool methods, I haven't tried using folding or cutting to move patterns around when I draw ideas like this... you've inspired me with a new tactic for next time I have some artwork to make.
cheers
Cheers!
Aaaa dude! Well done! Still can't figure out how you did it so tiny...I'll post about it tomorrow!
Huge THANK YOU for this!
You're welcome. I'm looking forward to see the entries. Patience and ruler and a thin pencil. But this was much easier than the GoT portrait.
Yeah, me too!
The was a good post! Great for people who'd like to design a tattoo ;)
Hope someone can benefit!