the birth of a blade 7: the Axling
Even though I like to make swords, I make a lot of other stuff in my forge. Some of it are bladed implements like knifes or chisels, some are not.
Today I will tell you about my first experiment with making an axe. It started with my son who wanted to buy a very expensive duffelbag but couldn't afford all of it it himself.
I offered him ,that he could work in the smithy with me, to earn the money he needed.
Thus he became my striker for a day. For those of you that may not know what a striker is, it is a helper (usually the apprentice) who is wielding the big sledgehammer.
The other guy (usually the master) will be holding the metal-bar (and sometimes also a smaller hammer) and he directs where the striker strikes the metal. In this way much more force can be transferred into the strike (using 2 hands)
and the tempo can also be faster because you can have 2 people striking.
Making an axe is a fairly simple but at the same time fairly hard task. It requires a lot of hammering and you have to use a rather big lump of metal that needs to be heated, thus for this little project we decided to do a mini axe, an axling. I am at the same time working on a "real" axe but that will be covered in another post.
first I chose a bar of waterhardening steel 10 mm by 30 mm and together we forged out a tang as shown below

Since this is a "pocketaxe" we decided to make it slightly different from a normal axe where the handle goes through a hole in the head. Instead we gave it a tang, like on a knife.
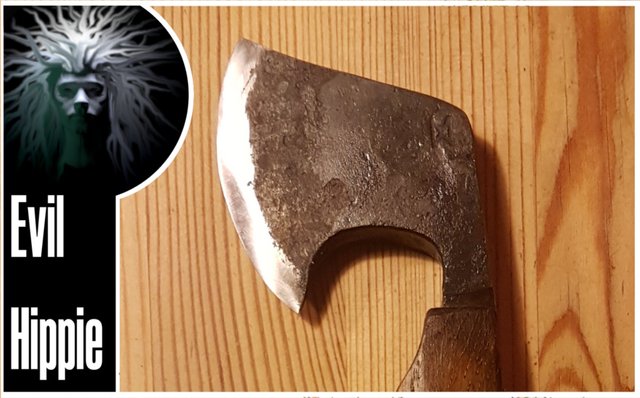
we then bent the tang downwards at a 90 degree angle and forged out the edge. The rounded axelike shape , with the pointed tips, comes naturally from this process. Then we put my makers mark on it.

finally we quenched it in lukewarm water, tested the hardness (using a file. if the file skates off the metal it is hardened, if it bites into the metal try again)
Then I took over since most of the remaining work was on the beltgrinder, and my son has not yet been taught how to use that one safely. I shaped the edge and also the handle (made out of a piece of oak)
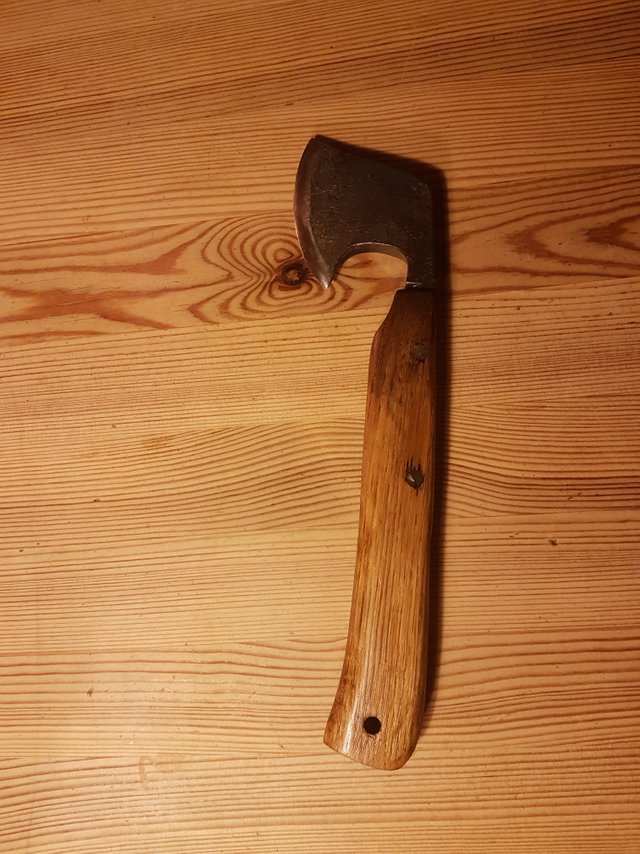
I glued and riveted the head in place and oiled the handle. this technique for mounting is not as durable as the handle through the head, but for such a small axe it should be more than adequate.
Thats it. This project took perhaps a few hours, and all in all, my son put 3 hours of work into helping me (on this and some other projects). His arms were really sore the day after, which meant mine wasnt.
It was really nice having a helper in the forge and I hope he will be willing to help me again, the next time he needs some money :-)

Im EvilHippie, a compulsive creative and jack o' trades. If you want to know more about me, check out my introduction post here
If you like what you see, feel free to upvote, follow and resteem
or you can check out these recent posts
Looks great! This axling appears like it would be a handy kindling splitter. Have you tried it out for this job? What did you envision it's best purpose might be when designing this fine blade?
thank you for your interest. Its definitely too small for log splitting. i had thought it would be good for kindling as you mention or maybe for sharpening wooden sticks when setting up an improvised shelter. I have tried it on kindling and its great for that but haven't brought it outside yet. in Denmark January is cold and wet and not well suited for outdoor work.
Get Paid For Your Comments 💰 🤑
Go here: https://steemit.com/steemit/@a-a-a/4zmd4s-get-paid-for-your-comments
well made well made!
wow you write a great post.... i impressed to see it... best of luck brother...