Merry Christmas! (and 2017 Holiday Card PhotoShop Process)
We are putting our holiday cards in the mail today and I thought I would take the opportunity to share the card and the process I used to make it in PhotoShop.
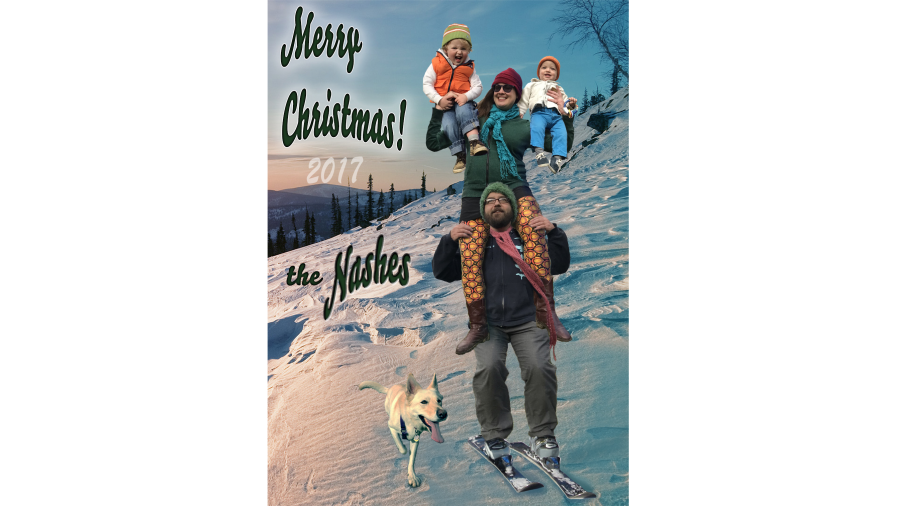
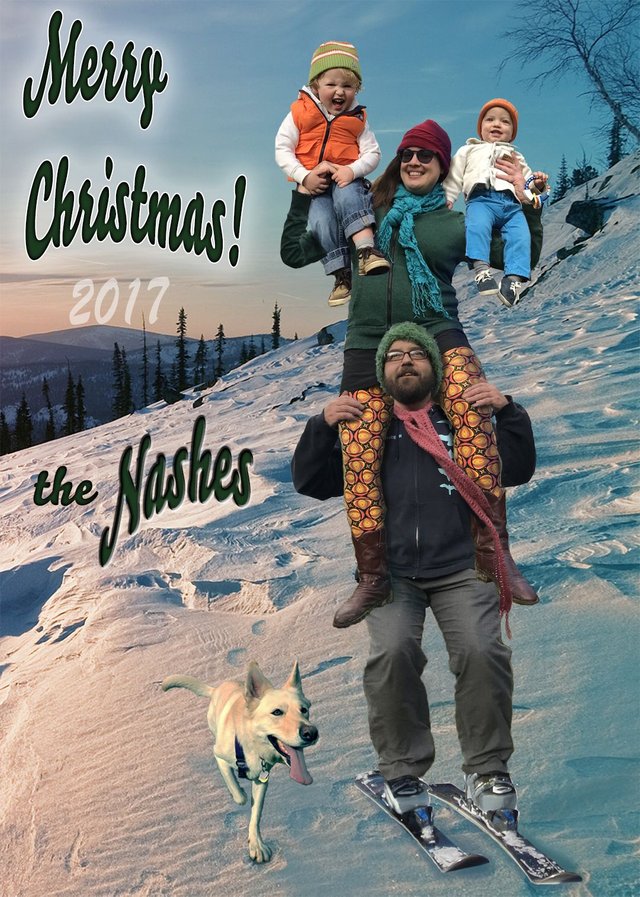
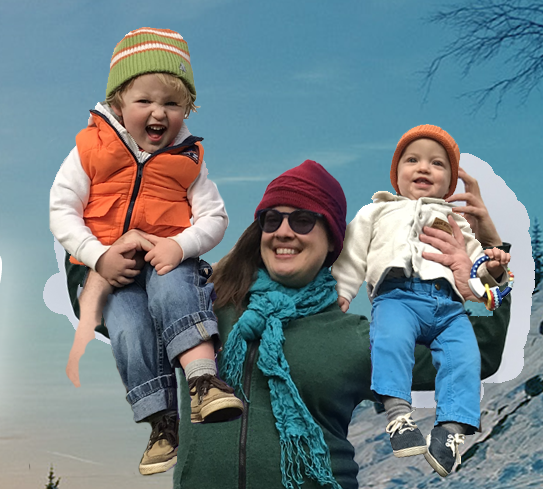
This is probably pretty obvious, but we did not, in fact, descend a mountain in a human pyramid balancing on a single pair of skis. We have a bit of a reputation for fun PhotoShopped holiday cards and we don't want to disappoint, so we began plotting this year's card some months ago. We came up with an amazing idea, one that was truly genius, and @dillemma and I both agreed it would be the best card yet. Fast forward a month or two and neither of us could remember the dang idea! No clue what it was. We both remember it was going to be a REALLY epic card. Oh well - we went back to the drawing board and this is what we ended up with :)
Before I get into the process used in creating this year's card, here are a few choice selections from previous years:
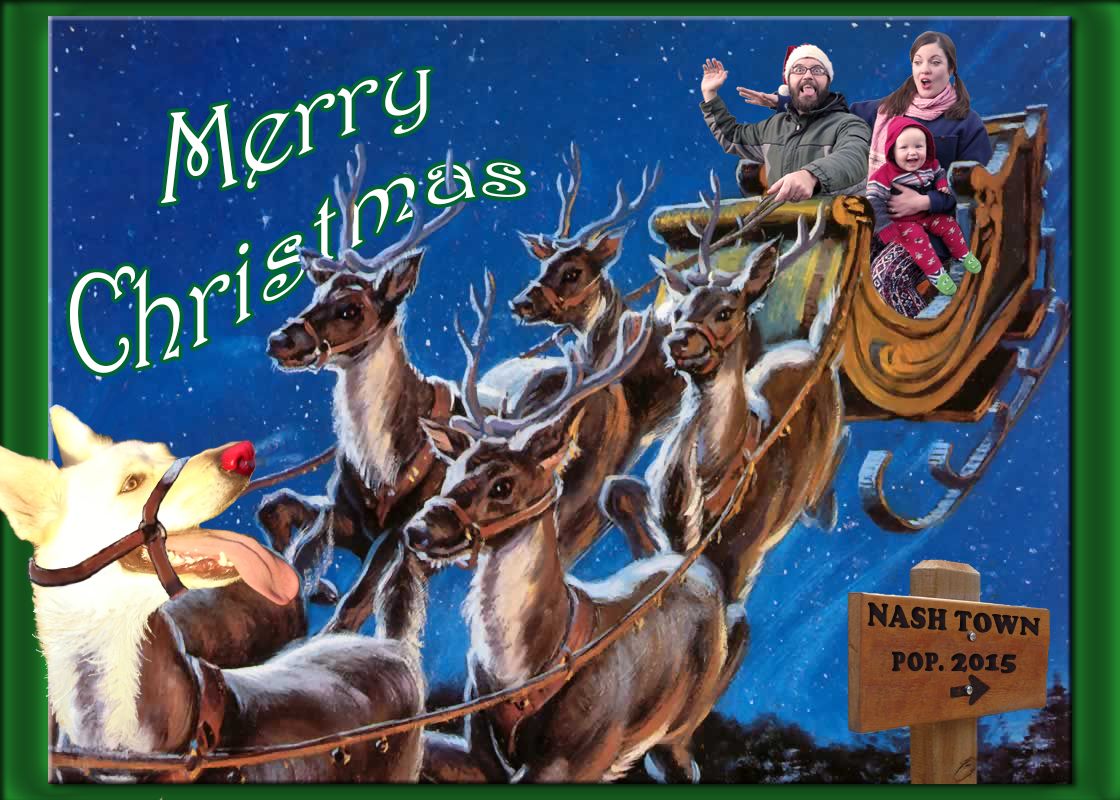
2015 Holiday Card
2013 Holiday Card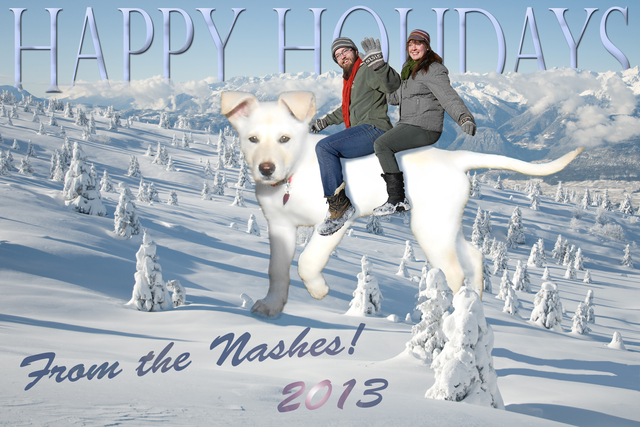
|
2012 Holiday Card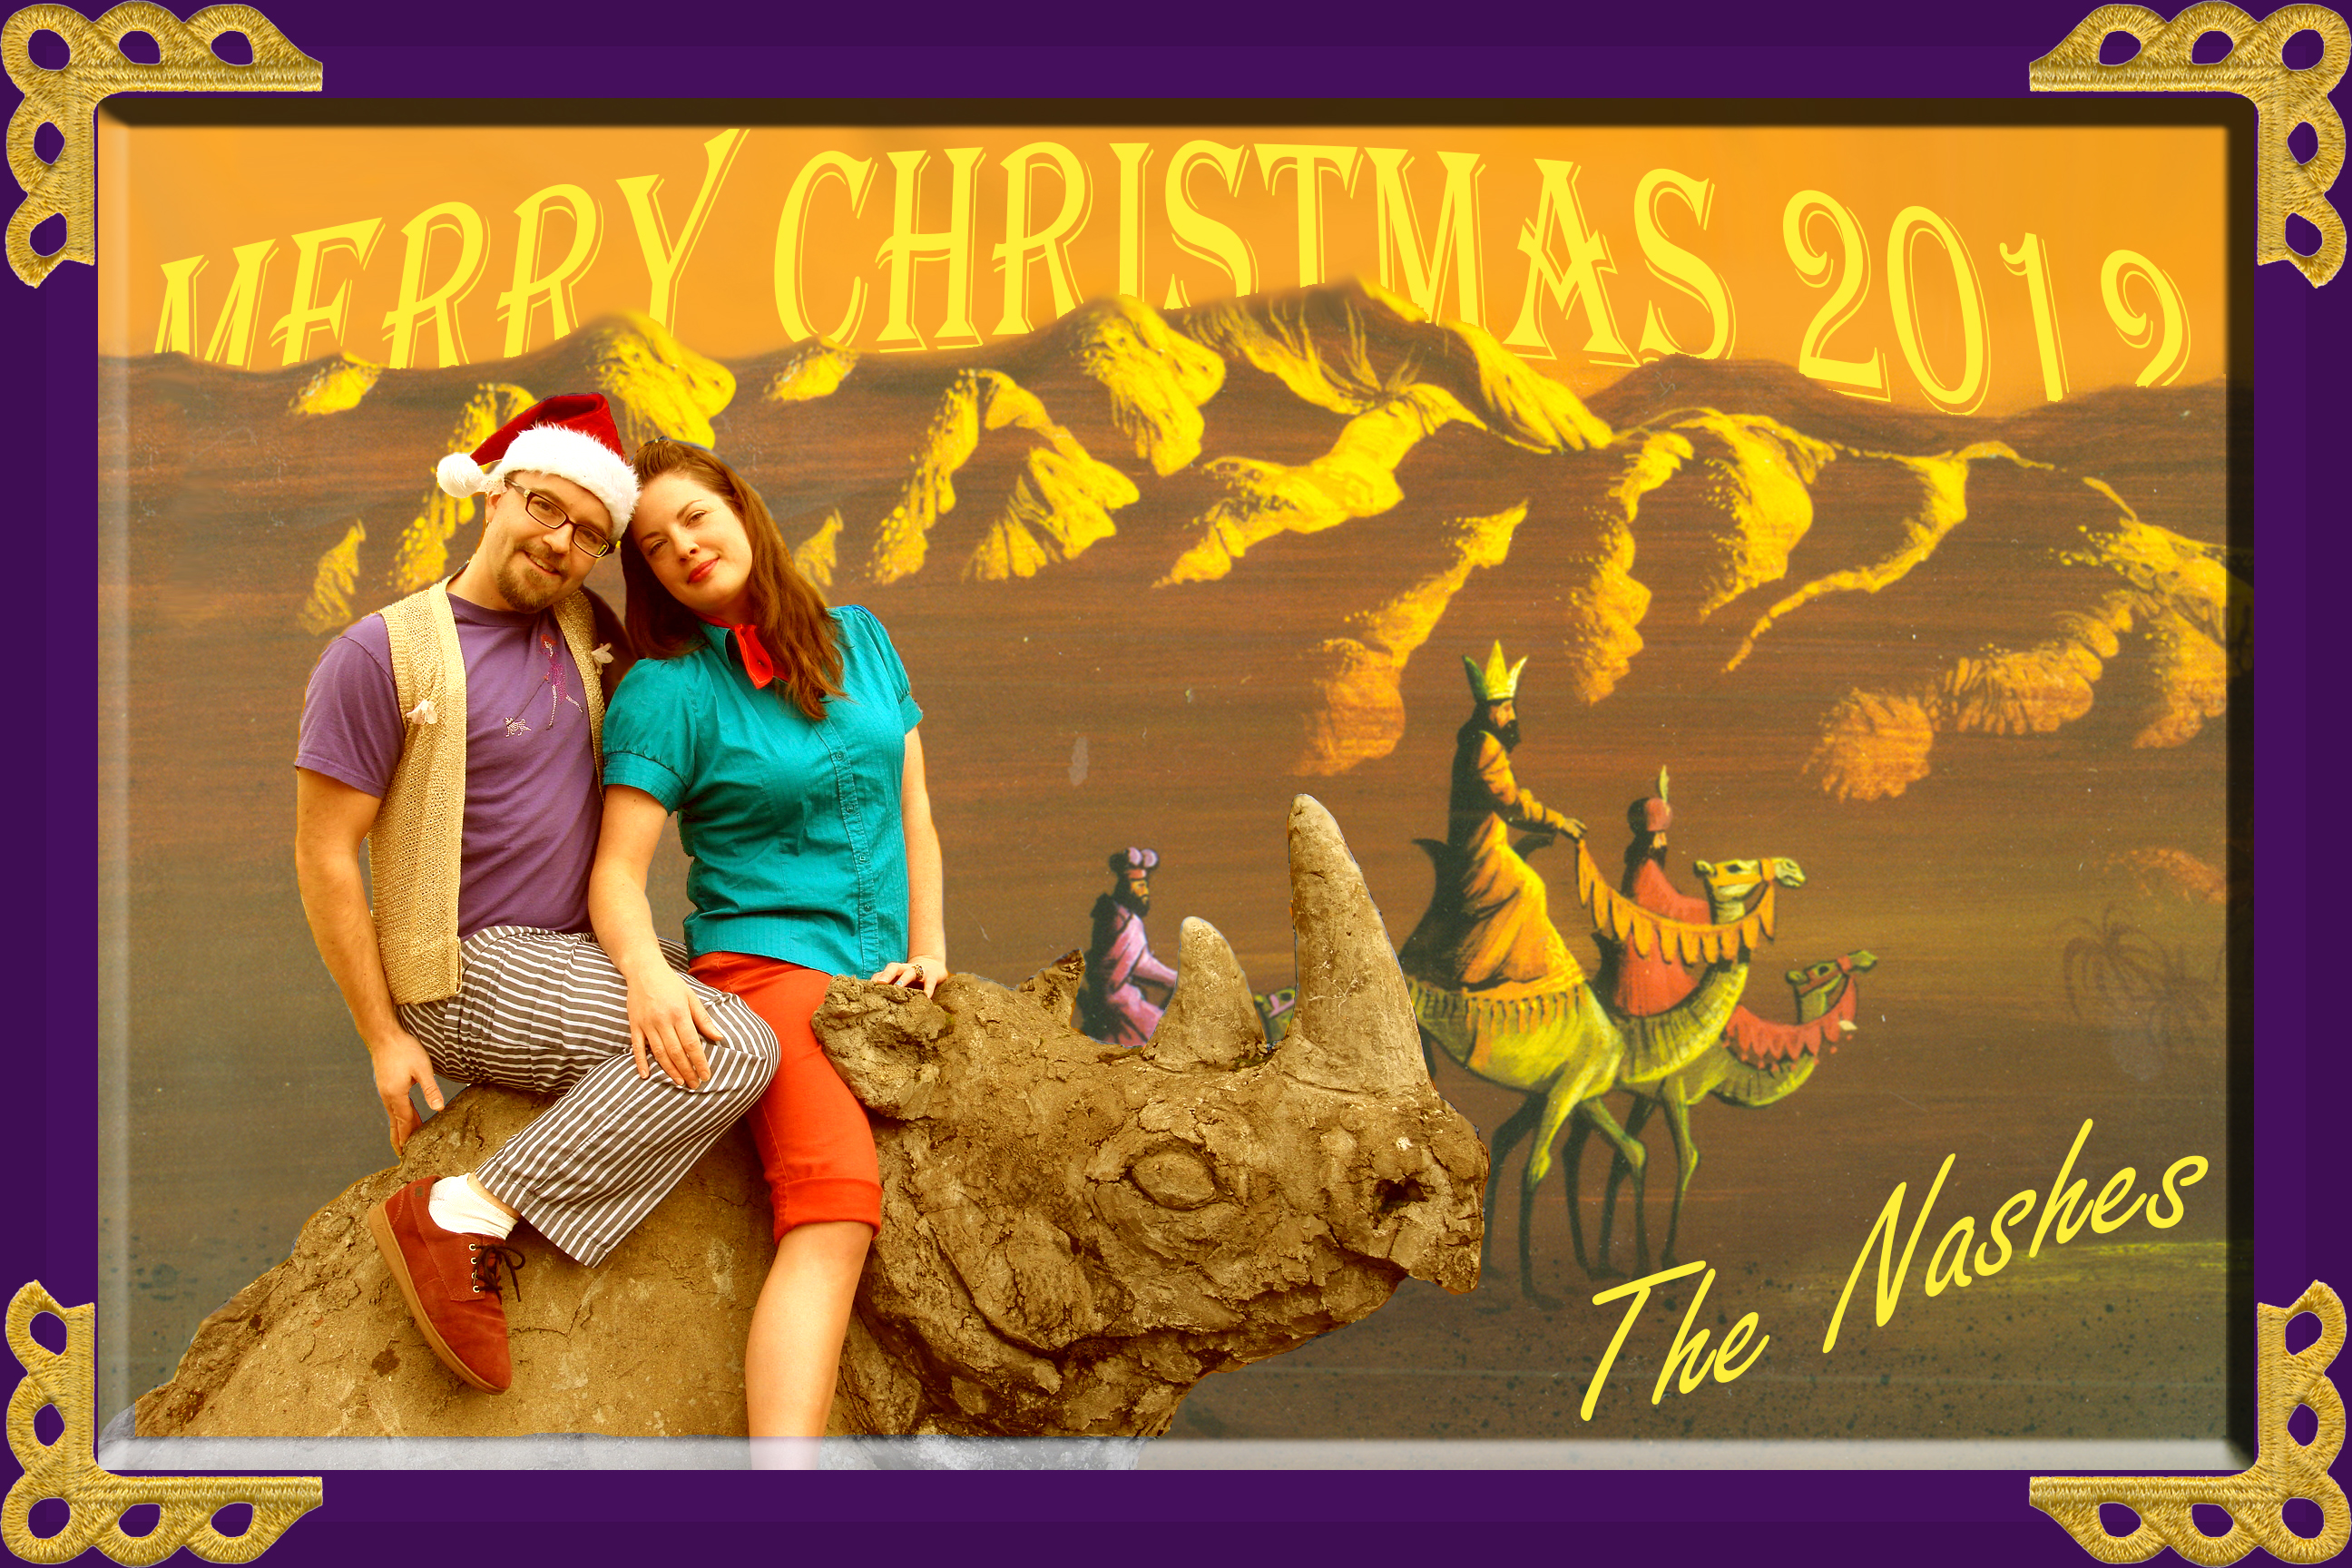
|
2017 Holiday Card - PhotoShop Process
When my sister was in town a few weeks back (check out the song I recorded with her during this visit if you haven't already! My sister has a beautiful voice) we enlisted her services as photographer for our grand holiday card scheme. We knew we wanted to pose such that I could later combine the pictures in PhotoShop to make it look like we were skiing down the mountain in a human pyramid formation on a single set of skis.
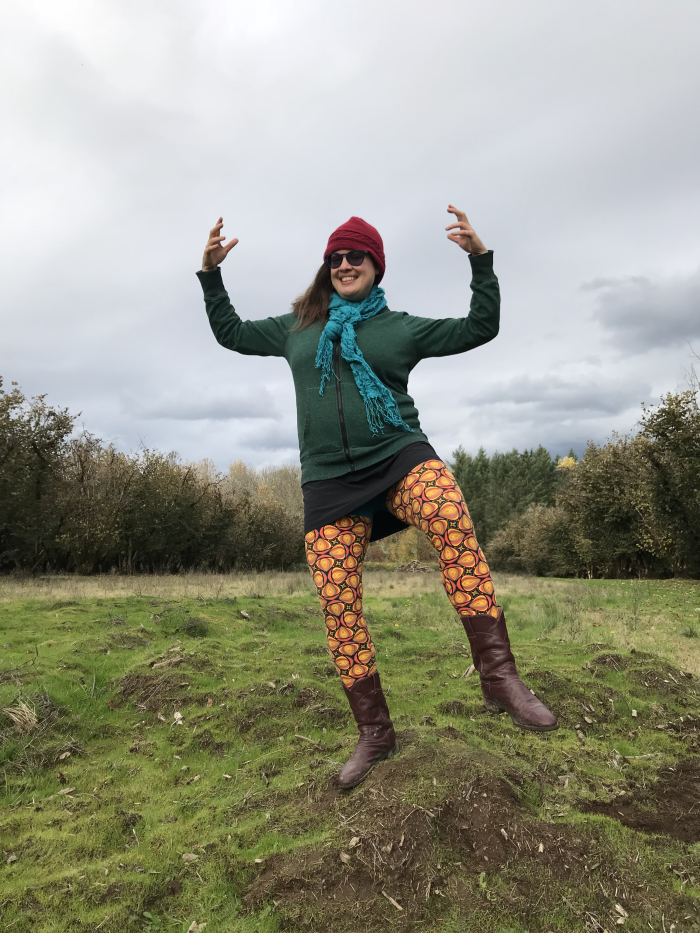
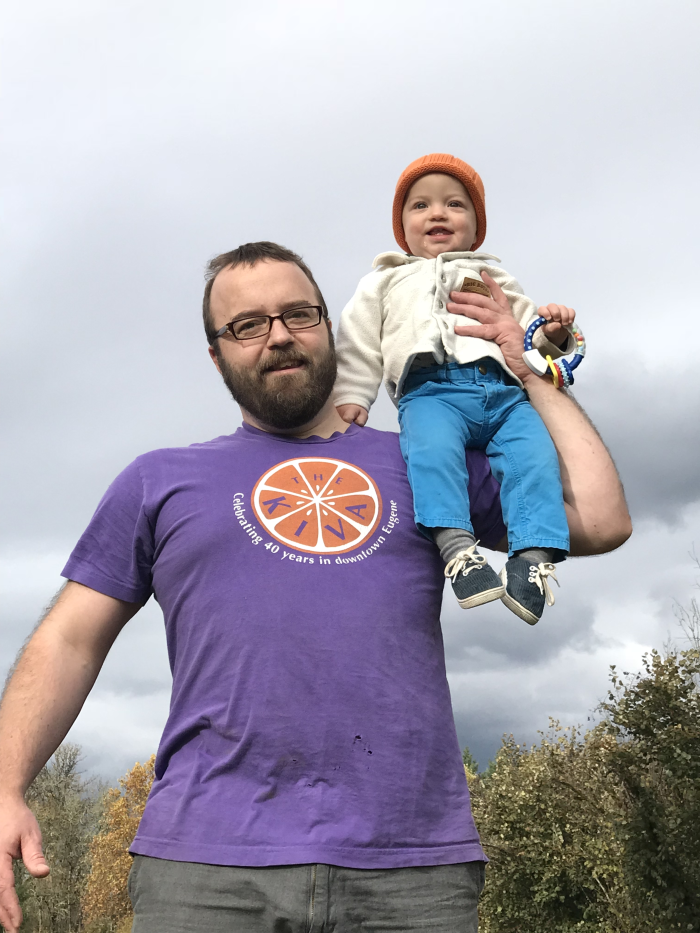
Original Photos Used
Here are the original photos I ended up using for this project:

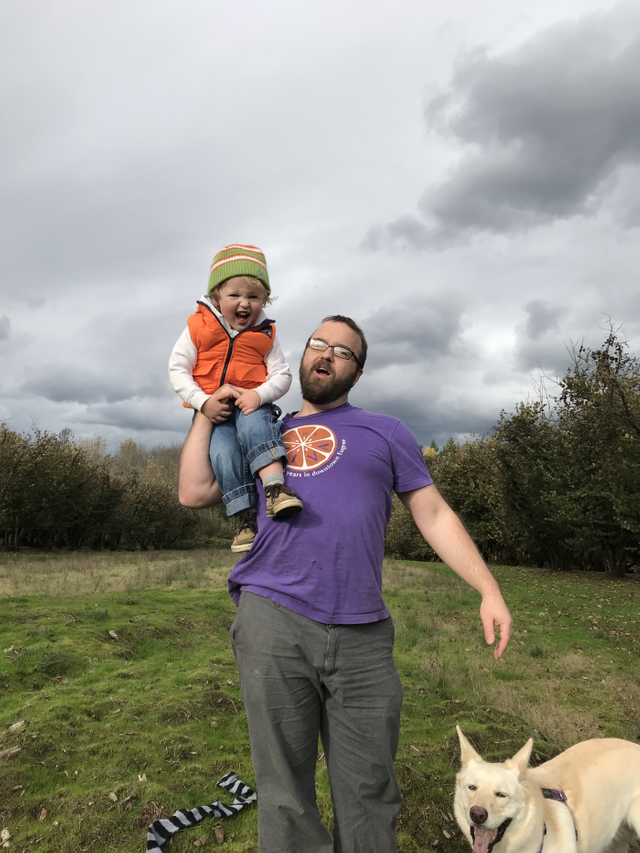
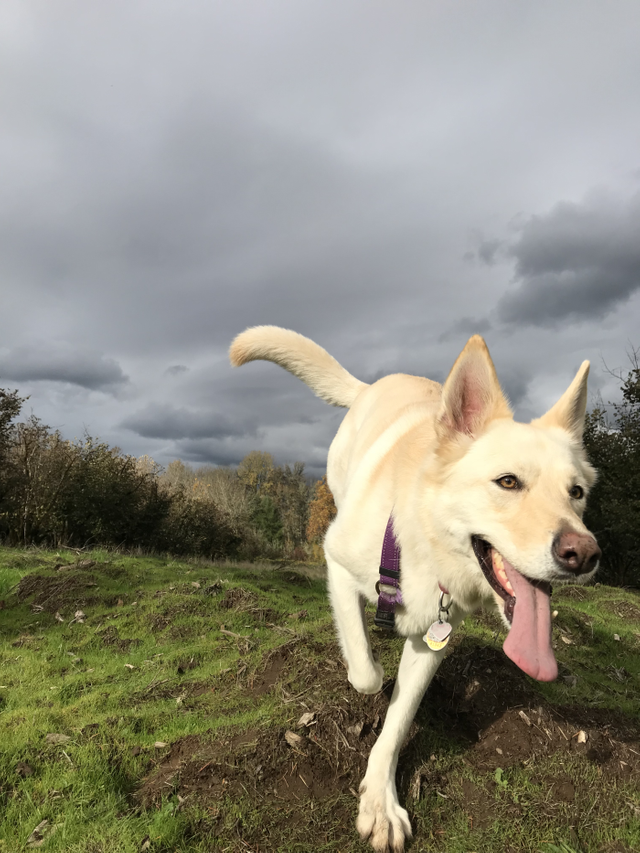
And of course we can't forget about Yeti the Dingus:
Next we needed a good background image. For this I just used Google Image search and tried a bunch of different combinations of search terms, e.g. "winter slope", "winter mountain", "snow slope", "snow mountain", etc. I honestly don't remember what the winning combination of terms was that turned up this picture, nor do I have a source link (regrettably):
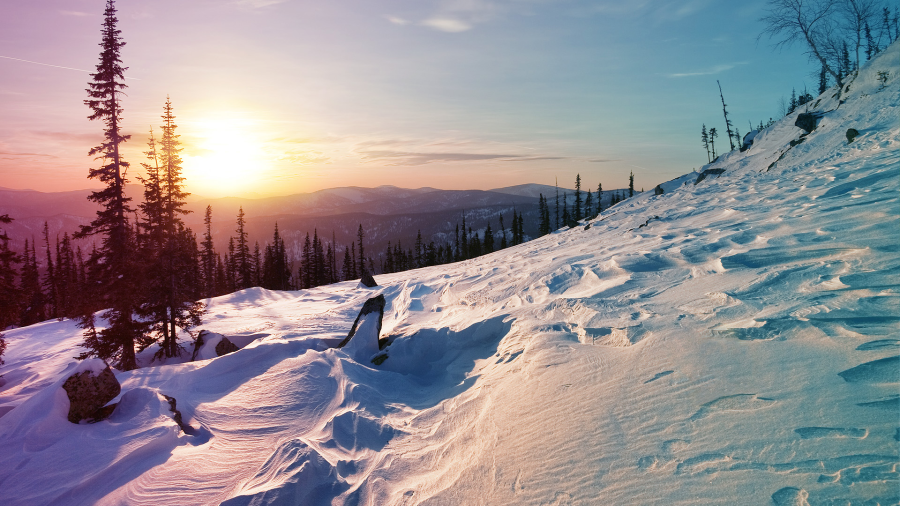
This one fit the bill - we needed a slope that would work to have us skiing at the viewer, and we needed the light to be coming from the left to the right (from the viewer's perspective). I trimmed out a portion of this image to use as the background in PhotoShop, using the rectangular marquee tool set to aspect ratio of 5:7

This is a helpful trick to know about - after selecting the rectangular marquee tool just go up to the top of the screen and select the style dropdown (by default set to "normal") and change it to "fixed ratio" when you know in advance you want your finished product to end up in a certain aspect ratio (in this case I knew we wanted to end up with 5" x 7" prints). I didn't want to lose resolution on the background image so I used the full vertical dimension of the image. Here is the background slice I cut out by itself:

The PhotoShop Magic step 1 - Cutting Out the Family
I opened up the new background image in PhotoShop and started pasting in the other photos I was going to use as new layers on top of it. I did this process one at a time starting with myself. I resized each photo to fit the background size and keep all of us in relative proportion to each other. Once I had all the original images in my working file, I saved it as a .psd (PhotoShop format) document. Over the years I have gotten in the habit of regularly saving my work, and while my computer now is much less prone to crashing than some junkers from years past, this is still a great idea for all computer projects of any stripe.
Tip - use Layer Masks!
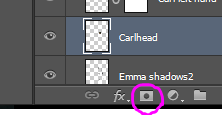
Cleanly cutting out a person from a photo is actually relatively tricky in PhotoShop. The easiest way that I found to do this is to use the "layer mask" feature of PhotoShop. This is an awesome thing and if you don't know about it, pay attention! You can add a "layer mask" to any layer by clicking on the layer mask icon while the layer is selected (there is no keyboard shortcut for this action by default but of course you can add keyboard shortcuts - Edit > Keyboard Shortcuts > “Shortcuts For” Application Menus > toggle on the Layer menu > Scroll down to layer Mask > add your own shortcuts by clicking the blank area):
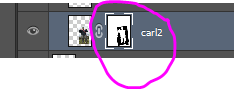
What a layer mask does is allow you to "erase" portions of an image by placing a "mask" over them, without actually erasing the pixels underneath. Once you have created a layer mask on a layer, you can toggle back and forth between the actual layer and the layer mask by clicking the associated thumbnails in the layer sidebar - the thumbnail to the left is the normal layer, the thumbnail to the right is the layer mask (circled below):
When you have the layer mask selected you can add the mask in several different ways. You can make a selection per normal with the lasso, marquee, magic wand or quick selection tool - then use the paint bucket or the gradient tool to add the mask to the selection. You will only have the options of black (a totally opaque mask, this completely "erases" / blocks the underlying layer from view), white (a totally transparent mask, this does not erase/block the underlying layer at all) and shades of gray which result in masks of varying degrees of opacities. In this case I was using solid black to totally erase everything except our bodies from the images. You can also just paint or draw the mask on with the paintbrush or pencil tools. I use the paintbrush tool for the fine detail as it makes a nice soft edge without the hard, pixelated look the pencil can give. It is a little counterintuitive at first because everywhere that you paint with solid black disappears when you have the layer mask selected - it is the exact opposite of painting on the actual layer itself.
Why use the layer mask instead of just the eraser tool to erase the original image? Because even with PhotoShop's decent ability to "go back" and undo recent edits, you will inevitably end up needing some portion of the picture that you previously erased. This is particularly true when you are combining several different images and may need to re-position limbs, make a scarf go over a leg instead of under it, etc.
If you are using the layer mask, you can just remove that section of the mask to reveal the original picture in the layer underneath as needed. If you used the eraser tool on the original layer, you are screwed and have to start over in that case. The layer mask also allows you to work much more rapidly, knowing that you don't have to get everything perfect on the first pass. I use the magic wand tool set to a pretty high tolerance to select the background portions of the image (holding down the "shift" key while using the magic wand to make multiple selections at once) then use the paintbucket to paste in black over those selections in the layer mask ("erasing" / blocking them from view). I do not worry at this point if some of the selections are not perfect - I go back over the layer mask with a paintbrush and paint black (to add to the mask / delete more of the original image) or paint white (to remove the mask / reveal more of the original image) as needed.
It is still a fair amount of work to get four people and a dog cut out down to the pixel, but it is MUCH faster using this method than any other way I know about. The layer mask will prevent you from ever having to duplicate effort to fix a mistake and really lets you rip through this in good time. I think it took me about 2-3 hours to cut us all out to my demanding standards. I could have done a rush job in a fraction of the time but I like to get things pixel perfect.
I didn't take a process picture at this point, unfortunately, but I am sure you can imagine the original photos above with us all cut out of the background and placed over the snowy slope.
PhotoShop Magic Step 2 - Positioning the Pyramid
I moved all the cut-out family members into their rough final position and started the really fun part. I started with getting @dillemma solidly positioned on my shoulders; this had to be nailed down before I could start working on positioning the Things One & Two. Once she was in place I used the layer mask on her layer to hide a section of her lower leg and boot so it looked like my scarf was blowing over her leg, and to hide the portion of her thighs to allow my hands to show through. I could have used the same technique to hide her inner thighs and reveal my head, but I actually wanted to enlarge my head anyway so I just copy/pasted my head as a new layer over the top of @dillemma.
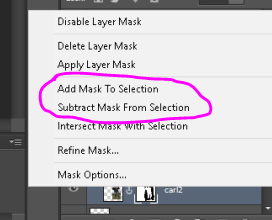
When you have a layer mask on a layer, you can select everything BUT the mask (e.g. the visible portions of the layer) by right clicking the layer mask and choosing "Subtract mask from selection"; or you can selecting ONLY the mask (e.g. the "erased"/hidden portions of the layer) by choosing "Add mask to selection". I selected my layer, subtracted the mask from the selection and copy/pasted the selection over the top of @dillemma's layer. I quickly masked everything except for my head proper and enlarged it slightly.
Why did I make my head bigger? When my sister took the original photos I had her kneel down to make it look like we were looming above the viewer. This perspective worked perfectly for @dillemma and the Things (as they are up high in the pyramid), but I did not think things through properly when it came to taking my own picture. My sister should have been standing and taken the picture at the same level as me, because I am at the bottom of the pyramid and on the same level as the viewer. The perspective made it look like my body was too large for my head, although my body was the correct size in relation to everyone else. It also made it look like my head was too small in relation to @dillemma's legs.
Here is what it looked like before I enlarged my head slightly (left) and after I enlarged my head slightly (right):
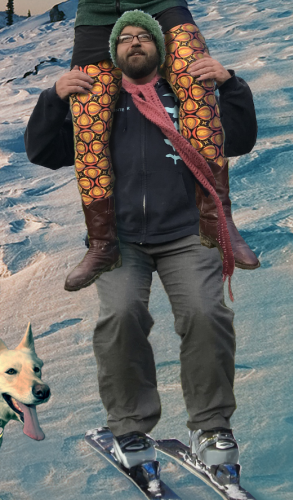
|
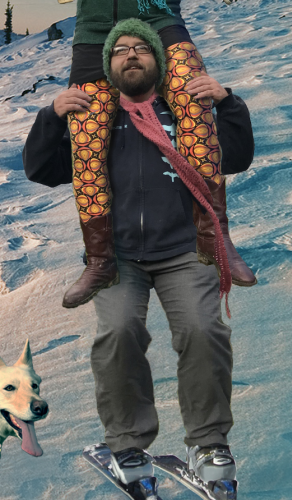
|
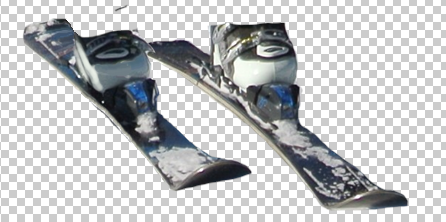
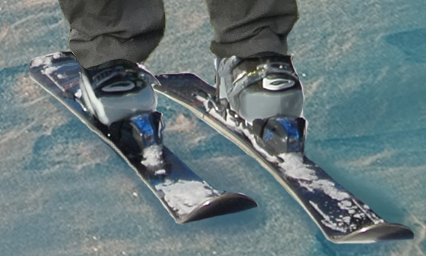
I also had to add skis/boots on to myself - this ended up being really easy as I fortuitously happened to find an image of a skier coming downhill at the viewer that worked perfectly with very little alterations needed. I ended up reversing the left and right boots to fit the angle that my legs were, but actually had to do very little else but cut out the boots/skis (using layer mask as described above) and positioning them on top of my original feet. It just happened to work perfectly, the folds of my pants and the angle of the boots and everything just worked out. Love it when that happens.
Here are JUST the boots/skis for reference:
And in context:
If you really look closely you can see that the boots are reversed, with the right boot on my left leg and vice versa. But again, this is something I don't think you would ever notice right off the bat. Did you notice this before I pointed it out? Tell me in the comments!
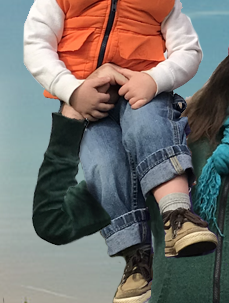
Now that I had @dillemma and I put together it was time to add the Things on top of @dillemma. I left my own hands in the picture, knowing it would be much easier to just connect @dillemma's arms to my wrists than it would be to try to get her hands to match up with how I was holding the Things in the original photos. Leaving my hands in the picture gave this a much greater sense of realism - you can see that Thing One is grabbing on to my hand and you can see that my hand is really scrunching up Thing Two's coat. I would have lost those details and made my job much harder if I tried to remove my hands and add @dillemma's. For reference, here is what the Things plus my hands, along with @dillemma's original arm positioning, looked like:
You can see that @dillemma did not have her arms in the same relative position as mine at all. Her right arm in particular was WAY higher than my arm was, with most of her right arm hidden behind Thing One. I had to cut out her arms into sections, twist them around into new positions, and even fill in some gaps with sections copied from the opposite arm :) This was fun!
@dillemma's right upper arm, rotated down appropriately:

@dillemma's right forearm and upper arm, rotated and positioned appropriately:
A section of elbow copied from her left arm filled in the gap left by cutting her arm into segments and rotating them:

The reconstructed right arm with the rest of the image showing:
I left these sections of her arm as separate layers so I could tweak the positioning as needed, using layer masks on each separate section to reveal/hide portions as needed. Here are the layers that make up @dillemma's reconstructed right arm:
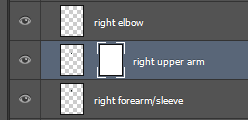
You can see that in the end I only needed to use a layer mask on the upper arm section, to allow more of the elbow and forearm to show through - this actually ended up looking good without further modification so I just left it at that.
I repeated this process for the left arm, cutting her original arm up into sections, rotating and repositioning them to meet up with my wrist/hand holding Thing Two.
I should note that @dillemma is convinced that the first thing anyone will notice when they look at the holiday card is that her hands are "huge man hands" in her words. I am not sure it is noticeable that they are my hands in the final picture - could you tell before I told you this? Let me know in the comments!
PhotoShop Magic part 3 - Grouping / Positioning
Now that I had everyone positioned correctly in the pyramid, I grouped all the layers of the human pyramid into a single group so I could move us around in the picture without changing our position relative to each other. Using the "Group" feature in PhotoShop is another REALLY useful tip. As much as possible I avoid combining layers when I am working on a project like this, preferring instead to group them together so I can still work on each layer separately if I need to change something later on. To group, just select the top layer that you want to group and hit "Ctrl-G". A folder icon will appear denoting a group, and the item you just grouped will indent slightly to denote that it is in the group. Select the other layers you want to add and drag them up just below the first layer in the group - you will see a little horizontal line appear under the layer you are moving when you have dragged it up far enough to join the group. Release the drag at that point and you have added the layer to the group.
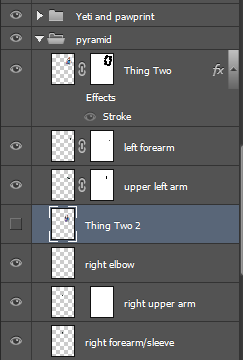
One of the really nice things about a group is you can minimize it to hide the names of the individual layers in the "Layers" panel, which is awesome when you have a ton of layers cluttering up things. In the screencap below you can see that I have the "Pyramid" group expanded to show all the layers in the group (the "Pyramid" group is all the family members minus Yeti the Dog), while I have the "Yeti and pawprint" group minimized to save space. When you select an entire group by clicking on the group folder icon, you can move the entire group as if it was one layer. I used this feature to reposition us where I wanted on the background image.
PhotoShop Magic Part 4 - Shadows / Details
Adding shadows and small details like broken snow under Yeti's paw really adds "realism" to a patently absurd PhotoShop piece like this. For the Yeti pawprints I just copy/pasted sections of broken snow from the background image and repositioned them under her paw, and (resized smaller) behind her as a trail of paw prints. For shadows on the snow (Yeti's shadow, the human pyramid shadow, shadows under the skis) I used the eyedropper tool to select the color of real shadows in the background image, and used the paint brush with opacity and flow both set to 11%. I painted on shadows until I got the desired result.
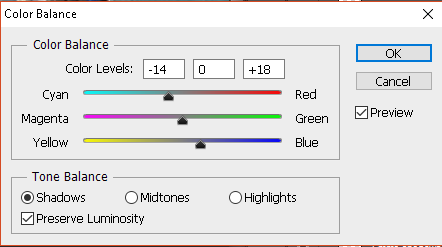
For shadows on our bodies, I created new layers between us where the shadows would be. So for the shadows under @dillema's thighs/legs and on top of my hoodie, I created a layer inbetween myself and @dillemma and painted the shadows (using a very dark blue, painting with brush opacity and flow both set to 11%) on until it felt right. By positioning the layer of shadows inbetween us, I didn't have to be careful to not paint shadows on top of @dillemma - she covered up the shadow layer. I made a bunch of shadow layers to allow the Things to cast shadows on @dillemma as well as @dillemma cast shadows on me. Finally I adjusted the colors on Yeti the dog as she was too bright and golden/yellow for the kind of blue quality of light that the rest of the picture has. The clouds had opened up during our photoshoot when that picture of Yeti was snapped, and she was in more direct sun than the rest of us were when our pictures were taken. I selected Yeti's layer and went to Image > Adustments > Color Balance, and selected "shadows" before changing the color balance to be more on the blue / cyan side of things:
PhotoShop Magic Part 5 - LETTERING
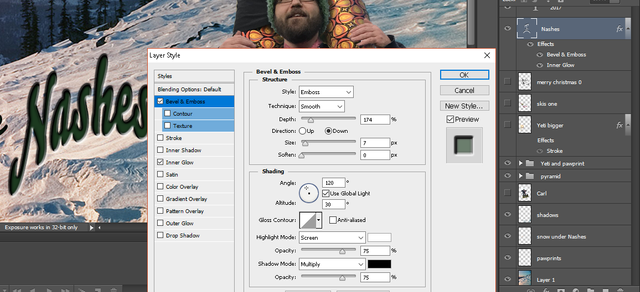
For the card text I used a font called "Bello" that probably came in one pack of fonts or another that I have downloaded over the years. It is a nice flowing script font and it went well with the holiday theme. I used the "Warp text" feature (select the text with the text tool, then right click > Warp text) to make the font have a little bit of curve to it (I used the "wave" warp for the "Merry Christmas" text, and the "arch" warp for the "Nashes" text). Finally I put some effects on the text. The text is actually black, and I used the "inner glow" effect to make it green in the middle fading to black around the edges like so:
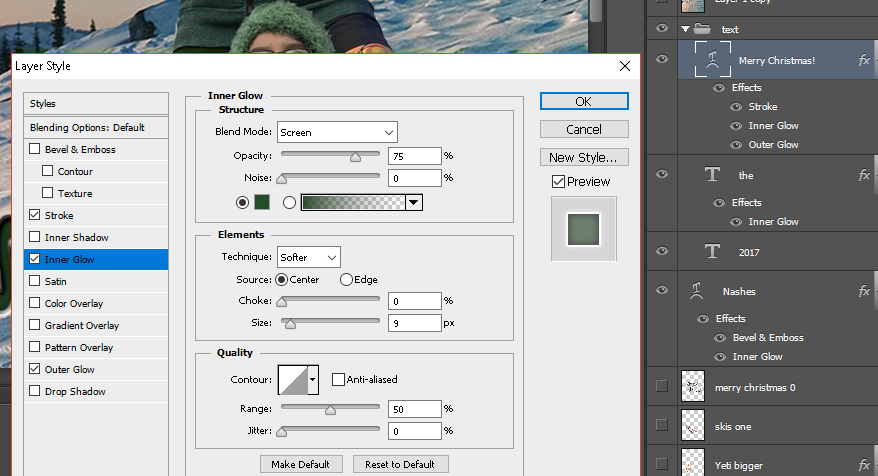
Then for the "Merry Christmas" text I used an "outer glow" effect to set the text off against the sky a little better, and the "stroke" effect to add a thin white outline around the lettering. The "2017" text is a different font, "Brush Script Std", with no effects applied but it is a white font with layer opacity set to 49% to allow some of the sky to shine through. The "the" text only has the inner glow effect to achieve the green to black font transition (no outer glow / stroke). The "Nashes" text has the inner glow for green to black transition as well as an emboss (down) effect to make it pop a little:
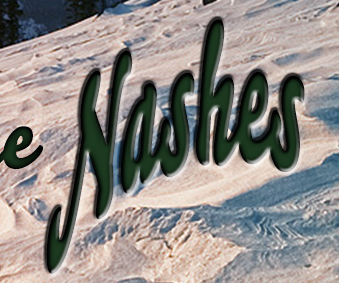
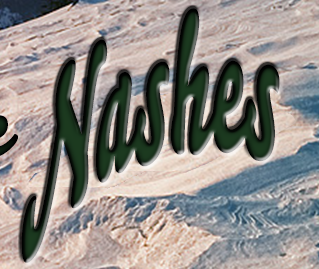
I had to do one last bit of detail work, there was a patch of shadowed snow under the "Nashes" text which muddied up the text a bit, but I liked the position of the words. So I copy/pasted some lighter sections of snow to fill in the shadowy section.
Original shadowy snow under "Nashes" on left; copy/pasted lighter snow under "Nashes" on right:
|
|
Et voila! There you have it folks, a simple tutorial on how to spend WAY TOO MUCH TIME making a holiday card! LOL
Much love from Carl, @dillemma, the Things and Yeti the Dingus
Merry Christmas!
I'm totally impressed! Merry Christmas!
Hahaha, too good! The pawprints really do take it to another level. I have a feeling any holidays cards I give or receive this year will pale in comparison.
I wondered how that was accomplished. Photoshop has come a long way since I used it. Can't remember when that was. Great pictures, by the way. Thank you for sharing.
Much love and light to you and yours this holiday season,
X
Woo hoo! This is great! :) #Masks4e
This is AMAZING <3
Thanks @chelseajo - this post kinda landed with a thud compared to my other recent posting, so glad to hear you saw it and liked it. I personally thought this was AMAZING as well :) Much love - Carl
Its spectcular! You should have a business where you make Christmas cards like this for people! I would hire you 110%! I have a 6 month old 3 dogs, 2 goats, some chickens, and ducks id love to smash into one picture but the odds of everyone looking at the same time.... impossible!! hahaha but not with your magic skills!! Up for a challenge!? haha ill re steem ;)
I don't think you can resteem when a post is out of the payout period unfortunately but I appreciate the sentiment :) Yeah with the magic of photoshop I could get everyone mashed up together. I am not sure with the amount of time I spend doing these that it would be a practical thing to do for other people - I would have to charge a LOT to justify my time. My typical hourly rate for freelance work (I do freelance web design, graphic design and historical research) is $25 USD hourly. I spent ~7-8 hours on this so that would be ~$200 USD for a commissioned Christmas Card or other photoshop project like that. Not sure that is a doable figure for most people, but would be happy to discuss a commission if my rates don't scare ya off :) Much love - Carl
Hey idk, if you could get my zoo of a family all in one photo it would be worth it to me!! hahaha as it would other people I'm sure, especially those that have family from all around. My brother is in Arizona with his wife my dad and step mom in ohio and me in florida, wed pay for something like this to have us all together! :) just saying! you may have a market and youre REALLY REALLLY REALLLLLLLY GOOD!!
you know that is a good idea as far as making a group card for people who are related but far flung physically. That could be really fun. Everyone decides on what they want the card to be (sky diving, bumper car racing, etc.) and then poses appropriately by themselves with as close to a greenscreen type background as possible (in front of a blank wall, curtain, etc.) The biggest challenge is lighting. So we would have to agree on general picture layout and lighting - like everyone has to have lighting coming from the front, or the front-left from high up, or whatever the case is to make it work when all stitched together over the background image.
You are making me think now. This could work... maybe not for this holiday, but next... tell you what, give me a call on your diamond-encrusted Steem phone come next holiday season and I will see if I can pilot my Steem-yacht over your way for a holiday card :)
Much love - Carl
YESSS!! Exactly! NOW were on the same page! It would be genius! You could really have a business in this for real!!! and you could do it for all different occasions (i.e. people who have graduations that out of stators cant attend, births of babies that out of stators cant attend , weddings that out of stators cant attend, etc. etc. you get the idea!!! :) )
YESSS!! Exactly! NOW were on the same page! It would be genius! You could really have a business in this for real!!! and you could do it for all different occasions (i.e. people who have graduations that out of stators cant attend, births of babies that out of stators cant attend , weddings that out of stators cant attend, etc. etc. you get the idea!!! :) )