The Art of the Eye Patch Part 2 -- An Armadilloman Photo Blog -- Making A Tough Looking Eye Patch
Cosplayers, weekend pirates, steampunks, wasteland weekenders, and, more seriously, folks who have lost an eye from accidents, cancer and combat all have one of armadilloman's custom eye patches. I have finished 150 of them in the past 2 years. Made from a cowhide base with exotic leathers such as ostrich, lizard and snakeskin laminated on, I always try to make a comfortable, bold, beautiful, and in some cases, scary patch.
If you missed it, here is a gallery of photos of some of my eye patches that you should check out.
https://steemit.com/art/@armadilloman/the-art-of-the-eye-patch-leather-is-my-art-medium-part-4
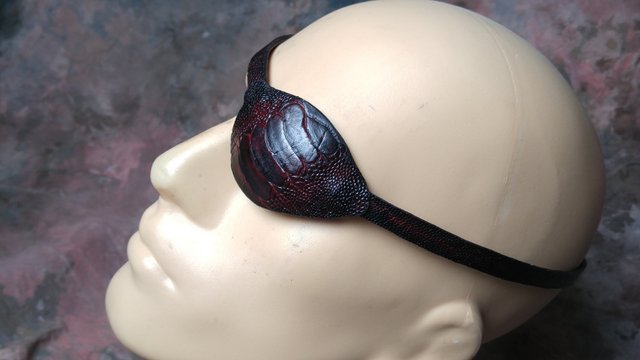
And what follows is a step by step photo blog of how I made this Black Cherry Ostrich leg eye patch.
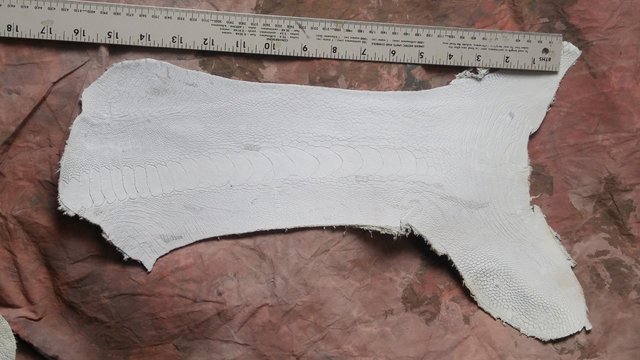
This patch I am illustrating today is made from ostrich leg leather which is tanned leg skin 18-20 inches long, 4-8” wide with a row of scales running down the center. Each leg is about a square foot of leather and generally can be had unfinished and uncolored (called “crust” or “in the crust”) for $20 a skin. The older the bird when it was butchered, the rougher and more gnarly and showy the scales.
Making the cup
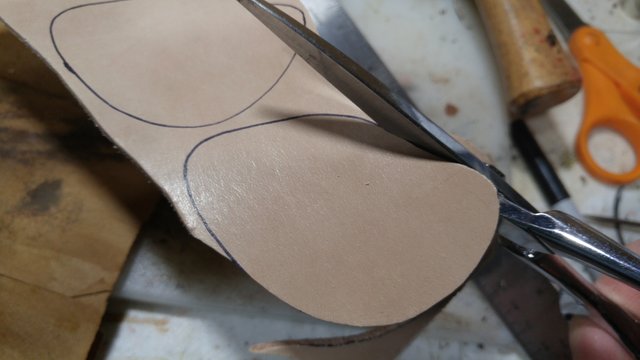
First I start with a hunk of 6-8 oz (2.5-3mm) vegetable tanned cowhide. The vegetable tanning, which uses the tannin from bark or other plant sources, makes a leather that is moldable when wet and retains its shape when dry. I mark out the pattern for whichever, a left or right, eye and carefully cut the pieces out with a pair of leather shears.
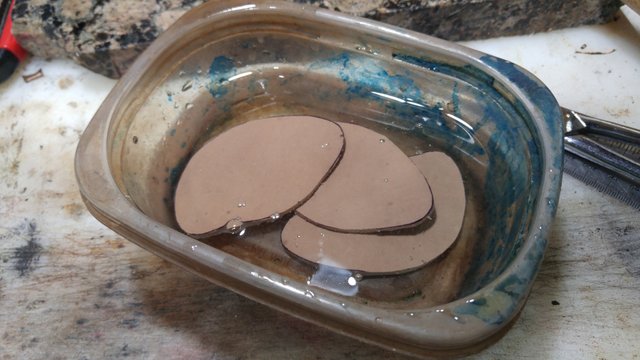
 Once cut, the cowhide pieces go into a tub of water to soak overnight. Water, the universal solvent, will soak some of the tannin out which will make the leather harder, more like rawhide, when it is dry.
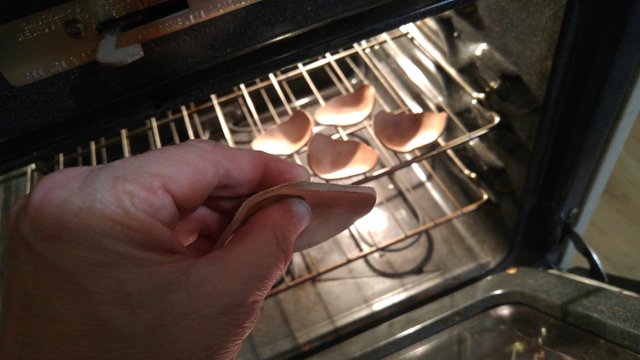
The wet patch cup pieces are then placed on the rack of an oven set to "warm" or at approximately 170 degrees. Sheesh... my oven needs cleaning.
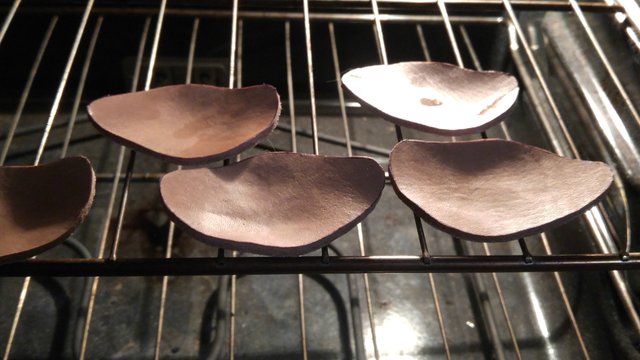
The leather pieces are formed into a round, cup shape mid way through drying, using my thumbs to push and stretch the leather. When they are dry the oven is turned off and the now formed leather cups allowed to cool
Next step is to take a Dremel rotary tool with a sanding bit and cut the edges down as well as shape the patch and remove the ragged spots. This sanding takes off the rough edges and will make the eye patch cup as comfortable as possible to wear. 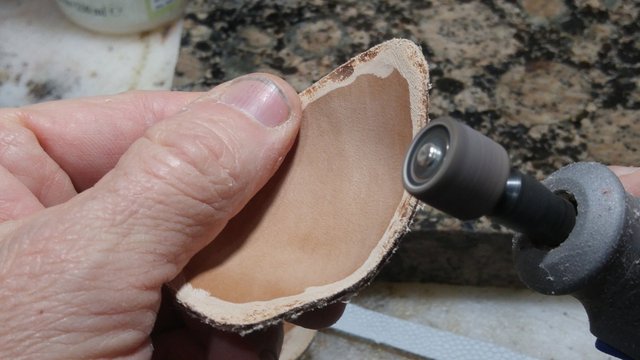
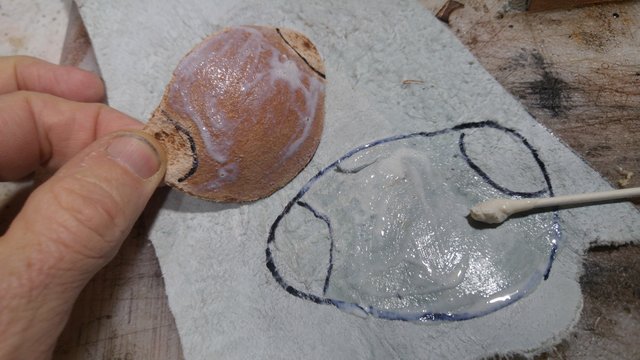
I draw around the patch onto the back of the ostrich leg leather and smear a contact cement on both pieces, avoiding the areas where the straps will be attached. Then I set it aside to dry.
Making The Straps
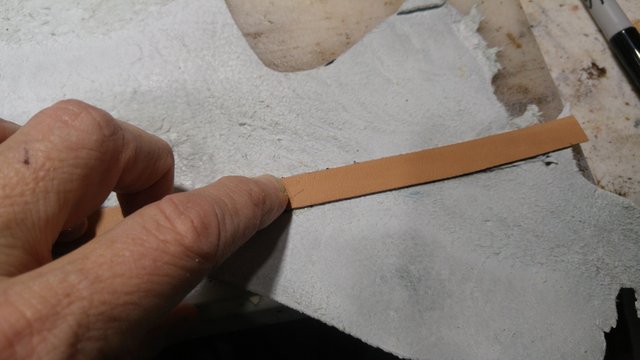
With a strap cutter I then cut out two 7/16" strips of 2/3 oz leather and... 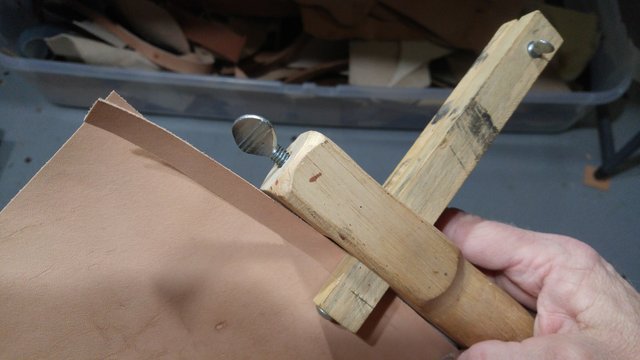
...using the same contact cement, glue each strap to the back of a piece of ostrich leg.
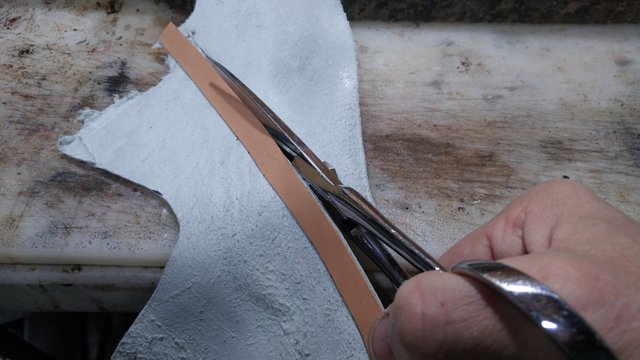
 After the cement on the straps is dry, I take the leather shears and cut them out, being especially careful to cut right up along the edge of the cowhide without nicking it.
Coloring The Leather
Here are the pieces, ready to be colored. 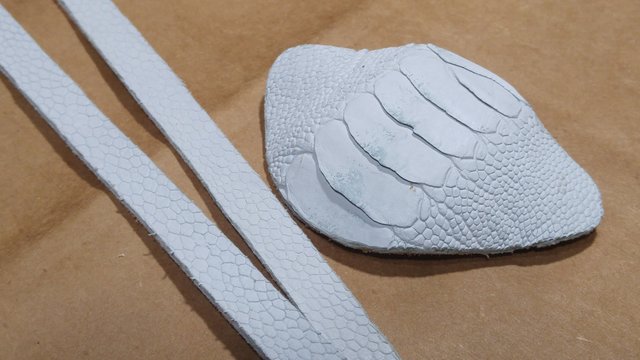
This patch is to be colored Black Cherry, which means first the cherry is daubed on.... 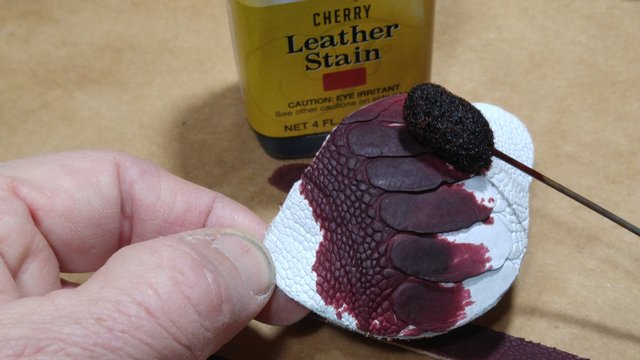
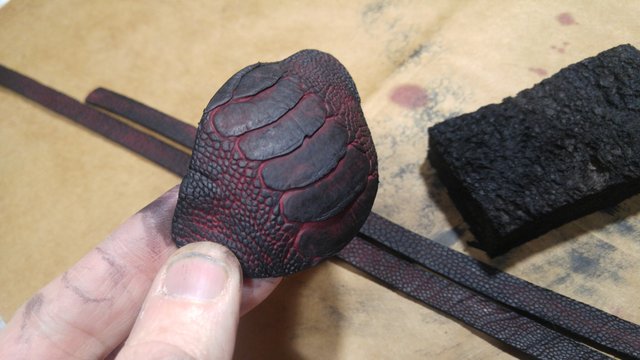
...and then the black is applied with a sponge, only hitting the top surface so that the cherry color in the cracks and valleys of the leather will show through.
Finishing Up
After the straps are riveted on and the ostrich glued down over the strap ends, several coats of clear acrylic are applied to protect the leather. 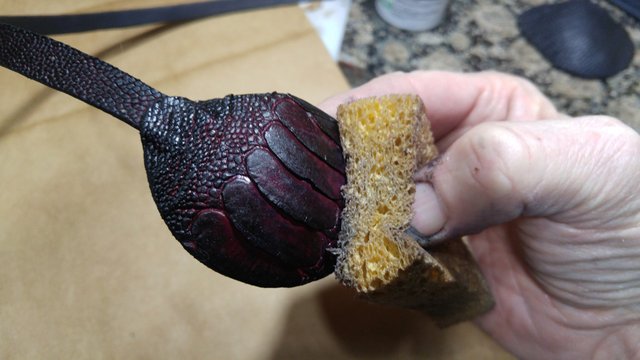
Lastly the holes are punched, a 1/2" watch buckle is attached along with a strap keeper to control the tail of the strap. Then the edges are burnished and waxed and...
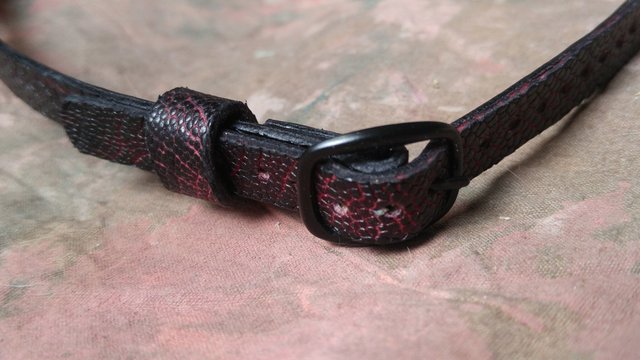
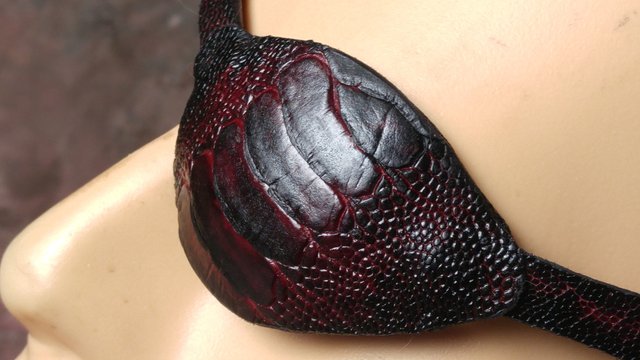
...the Ostrich Leg Eye Patch in Black Cherry is finished.
As always, Wanda Petronski has read, made small editorial changes, and approved this post.
If you find this content entertaining, educational and you would like to see more, please upvote, follow and resteem. --@armadilloman
SteemFollower https://steemfollower.com/?r=14068
Your tutorials are fantastic.
Makes me want to play with some leather.
I already have some of the tools.
All you need is some leather!
Yep
Congratulations, your post was discovered and featured by @OCD in its daily compilation 202!
You can follow @ocd – learn more about the project and see other Gems! We strive for transparency.
If you would like your posts to be resteemed by @ocd to reach a bigger audience, use the tag #ocd-resteem. You can read about it here.
@ocd now has a witness. You can vote for @ocd-witness with SteemConnect or on Steemit Witnesses to help support other undervalued authors!
You got a 33.33% upvote from @spotlight courtesy of @resteemable!
Your Post Has Been Featured on @Resteemable!
Feature any Steemit post using resteemit.com!
How It Works:
1. Take Any Steemit URL
2. Erase
https://3. Type
reGet Featured Instantly � Featured Posts are voted every 2.4hrs
Join the Curation Team Here | Vote Resteemable for Witness
Very creative act.