Step by Step make Android Application using Ionic CLI
Ionic is a framework to help us make hybrid application (Web, Android and IOS). Ionic based on Web Technology such as HTML, Javascript, and CSS. Ionic using Angular Framework in core system, but Ionic get optimized to make us easier to build mobile hybrid application. Like's Angular, Ionic has CLI (Command Line Interface) for make Ionic Developer easier to generate page or Ionic system automatically. So with this CLI we don't need to create file by file and folder by folder. But it's to many command line in Ionic CLI, so we will discuss the useful Ionic CLI for makes Apps from zero to launch in Play Store. As a note, This tutorial just discuss Ionic v3. It is better for us to move to the latest version.
1. Installation
Firstly, we must Install Ionic CLI if we want to use it in our Computer. We can do this script to install Ionic CLI to our Computer. Please make sure you have installed the latest Node 6 LTS and NPM 3. If not you can download in Node.jshere. For a global install of -g ionic, OSX/Linux users need to add prefix command with sudo.
$ npm install -g ionic
or it is better to us to add @latest to get the latest Ionic version to our Computer.
$ npm install -g ionic@latest
After installed Ionic CLI, let's we check it with --version. The --version will show us ionic version installed in our Computer.
ionic --version

2. Start the Project
We can use Ionic CLI to start a new Ionic project. We can use this syntax to create all needed files in Ionic Project. We can use this syntax to start our Ionic Project. This syntax will download all Ionic Framework system.
ionic start ionic-super
With the syntax above, the syntax will show us starter template list which Ionic has. Here the template list:
tabs : A starting project with a simple tabbed interface
blank : A blank starter project
sidemenu : A starting project with a side menu with navigation in the content area
super : A starting project complete with pre-built pages, providers and best practices for Ionic development.
conference : A project that demonstrates a realworld application
tutorial : A tutorial based project that goes along with the Ionic documentation
aws : AWS Mobile Hub Starter
For this tutorial, let's we choose super template. Actually, we can do directly like this:
$ ionic start ionic-super super
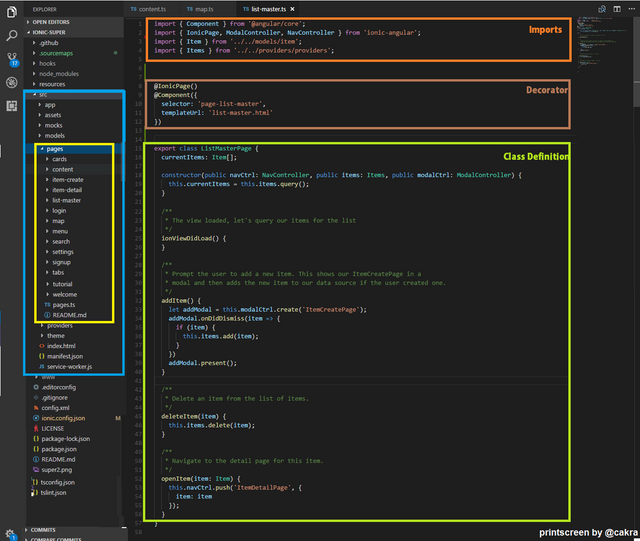
Wait a moment for installation and configuration. After the process finished, Open folder ionic-super. I open my project in Visual Studio Code. The result will be like this:
3. Running Apps
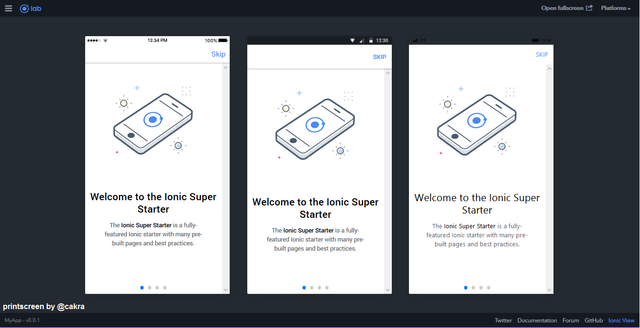
We can use Ionic CLI to running our Ionic Project. This syntax will generate all node module and our script. After that, this syntax will automatically open our default browser and automatically refresh our browser. This really useful to debugging when development.
ionc serve
You can add --lab or -l to active lab mode which show us multiple platform mode in our browser.
ionic serve --lab
or
ionic serve -l
result ionic serve
4. Generate Files to make a new system (optional step)
Ionic has page generator to automatically create page, providers, components and pipes using Ionic CLI. We use this syntax to generate it.
$ ionic generate [type] [name]
[type] is our component types. Available list of type are component, directive, page, pipe, provider, and tabs. [name] is our component names. As example :
$ ionic generate page login
This CLI will generate login page for us. This will make four files, there are login\login.html, login\login.ts, login\login.module.ts and login\login.scss. The all of files will be in app folder. With Ionic CLI we doesn't need to create and configure our file one by one, the CLI creates us the structure of the files we needed. Here the next example :
Generate pipes
$ ionic g pipes upercase
Example : Generate Components
$ ionic g components upercase
Example : Generate providers
$ ionic g providers httpAPI
notes : we can just use g not generate.
5. Install Cordova
After we run our Application in browser, let's check it in real device. We need install Cordova in our system. Cordova will wraps our HTML/JavaScript app into a native container which can access the device functions of several platforms likes camera, GPS, etc. So with Cordova we will can run our Ionic to Android or IOS. Likes Ionic CLI, cordova is split-ed system, so we must install our Cordova to use Cordova CLI.
$ npm install -g cordova
6. Adding Device
We must add platform (Android or IOS) if we want run Ionic in our Device. Let's add android platform to our system.
$ ionic cordova platform add android
example if add platform ios
$ ionic cordova platform add ios
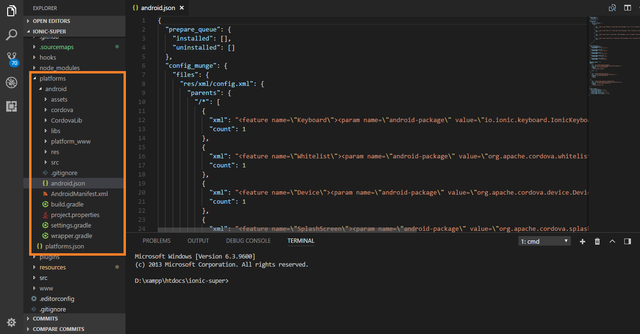
This syntax will make a folder we needed to run our ionic to our device. This the result folder after do ionic cordova platform add android.
7. Running in Device (Development)
CLI has syntax to run our Ionic to our device. This syntax will generate ionic platform and make android-debug.apk after that automatically install this apk to our device. We need USB cable to do this and enable Developer Mode in Android device.
$ ionic cordova run android
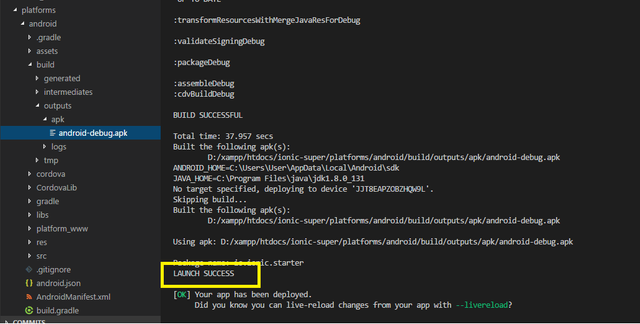
Actually, we can directly use ionic cordova run. The system will automatically check the platform is available or not. If it isn't, first the system will automatically do **cordova platform add ** and then will automatically do cordova run. After you get LAUNCH SUCCESS, let's we see our android device. We can get the the android-debug.apk in folder platforms/android/build/outputs/apk. The result will be like this :
8. Build APK (Production)
The cordova run will make .apk to us, but the apk result just for development mode. If we want to create it for production, we must use cordova build and add --prod. The complete syntax will like this:
$ ionic cordova build android --prod
The script will make us APK to ready for production. But it isn't over. If we want to upload our apk to Play Store. We need add --release. The complete syntax will like this:
$ ionic cordova build android --release
or we can skip the --prod and combine it to be like this:
$ ionic cordova build android --prod --release
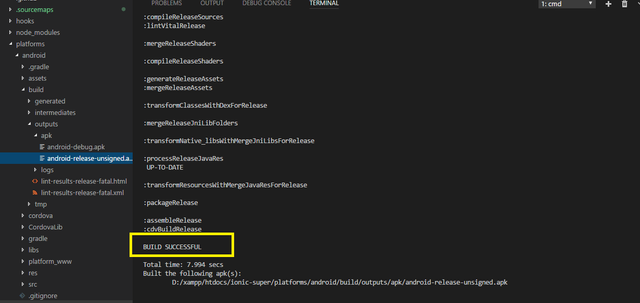
The result of this script will make file APK called android-release-unsigned.apk. We can upload this APK to Google Play Store.
I think that's all what I can share. The little tips to use Ionic CLI is we can use --help or --list to show us what's command available in Ionic CLI. And we can read more in Official Website of Ionic CLI or Official Website of Cordova.
Thank you for reading:)
respectfully,
cakra
Posted on Utopian.io - Rewarding Open Source Contributors
Congratulations @cakra! You have completed some achievement on Steemit and have been rewarded with new badge(s) :
Click on any badge to view your own Board of Honor on SteemitBoard.
For more information about SteemitBoard, click here
If you no longer want to receive notifications, reply to this comment with the word
STOPYour contribution cannot be approved yet because it is not as informative as other contributions. See the Utopian Rules.
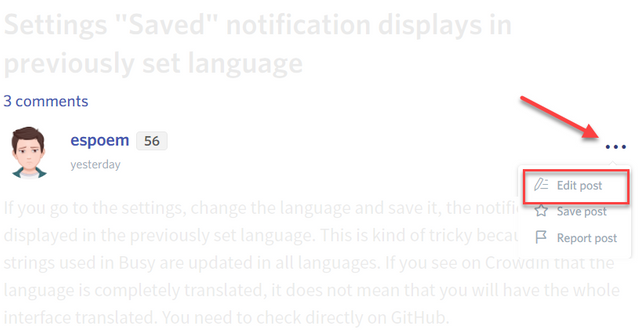
Please edit your contribution and try to improve the length and detail of your contribution (or add more images/mockups/screenshots), to reapply for approval.
You may edit your post here, as shown below:
You can contact us on Discord.
[utopian-moderator]
Hi @damla
I have edited my contribution.
Thank You
Congratulations @cakra! You have completed some achievement on Steemit and have been rewarded with new badge(s) :
Click on any badge to view your own Board of Honor on SteemitBoard.
For more information about SteemitBoard, click here
If you no longer want to receive notifications, reply to this comment with the word
STOPThank you for the contribution. It has been approved.
You can contact us on Discord.
[utopian-moderator]
Hey @cakra I am @utopian-io. I have just upvoted you!
Achievements
Suggestions
Get Noticed!
Community-Driven Witness!
I am the first and only Steem Community-Driven Witness. Participate on Discord. Lets GROW TOGETHER!
Up-vote this comment to grow my power and help Open Source contributions like this one. Want to chat? Join me on Discord https://discord.gg/Pc8HG9x
Congratulations @cakra! You received a personal award!
Click here to view your Board of Honor
Do not miss the last post from @steemitboard:
Congratulations @cakra! You received a personal award!
You can view your badges on your Steem Board and compare to others on the Steem Ranking
Vote for @Steemitboard as a witness to get one more award and increased upvotes!